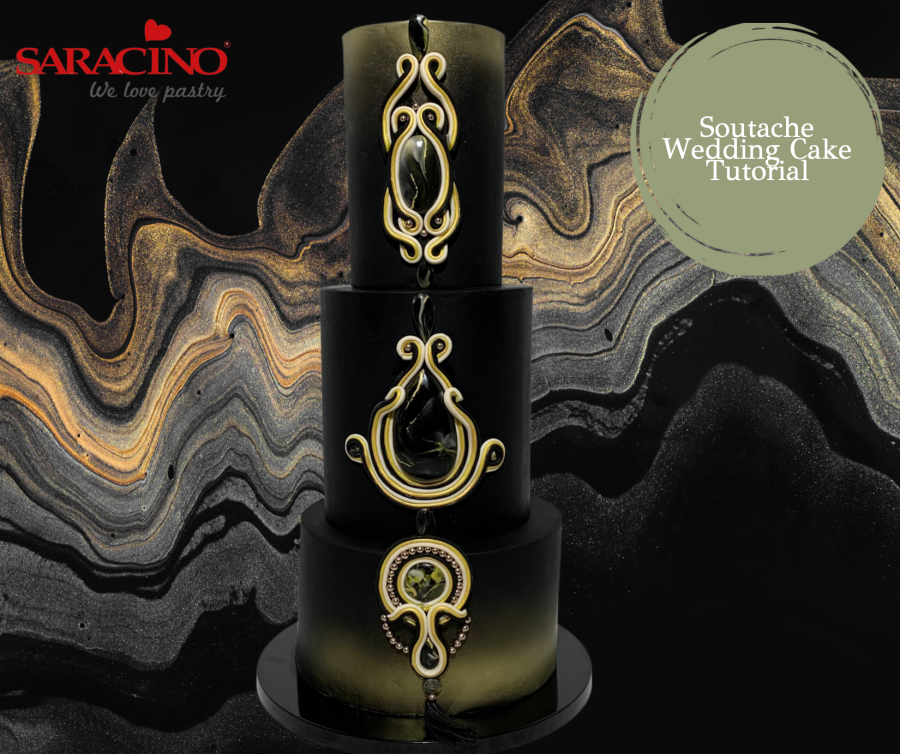
You will need:
Saracino black Pasta Top
Saracino skin tone Pasta Model
Saracino yellow Pasta Model
Saracino black Pasta Model
Saracino gold dust
Gold airbrush colour
Saracino cake gel
Saracino Liquid Shiny
Trex
Rolling pin
Paint brushes
Long blade or knife
Scalpel
Three dummy cakes 5 and 7 inch cakes (8 inch high) 9 inch cake (5 inch high)
Work mat
Rolling mat
Cake smoothers
Cake drum
Extruder
Ball tool
Straws

Step 1
Prepare your cakes or dummies. Brush each one with Trex to help the fondant to stick. Place the Saracino Black Pasta Top on your work surface, kneed until smooth and pliable. Roll out the fondant to your preferred thickness.

Step 2
Trim off the excess fondant with a sharp knife.

Step 3
Use cake smoothers around the side and top of the cake. Smooth it until you achieve a sharp edge. Repeat for the 7 and 5 inch cakes or dummies.

Step 4
Stack your tiers. When using real cake remember to use support between the tiers. Airbrush the top and the bottom of the cake with gold airbrush colour.

Step 5
Take a piece of black pasta model and an equal amount of skin tone and yellow to the proportions shown.

Step 6
Mix colours together. You can use your fingers to move and stretch the modelling paste so the colours will slightly blend.

Step 6
Smooth the modelling paste and create an oval shape. Place the oval shape on the mat and squeeze the bottom to create a tear drop shape. Smooth the edges with your fingers.

Step 7
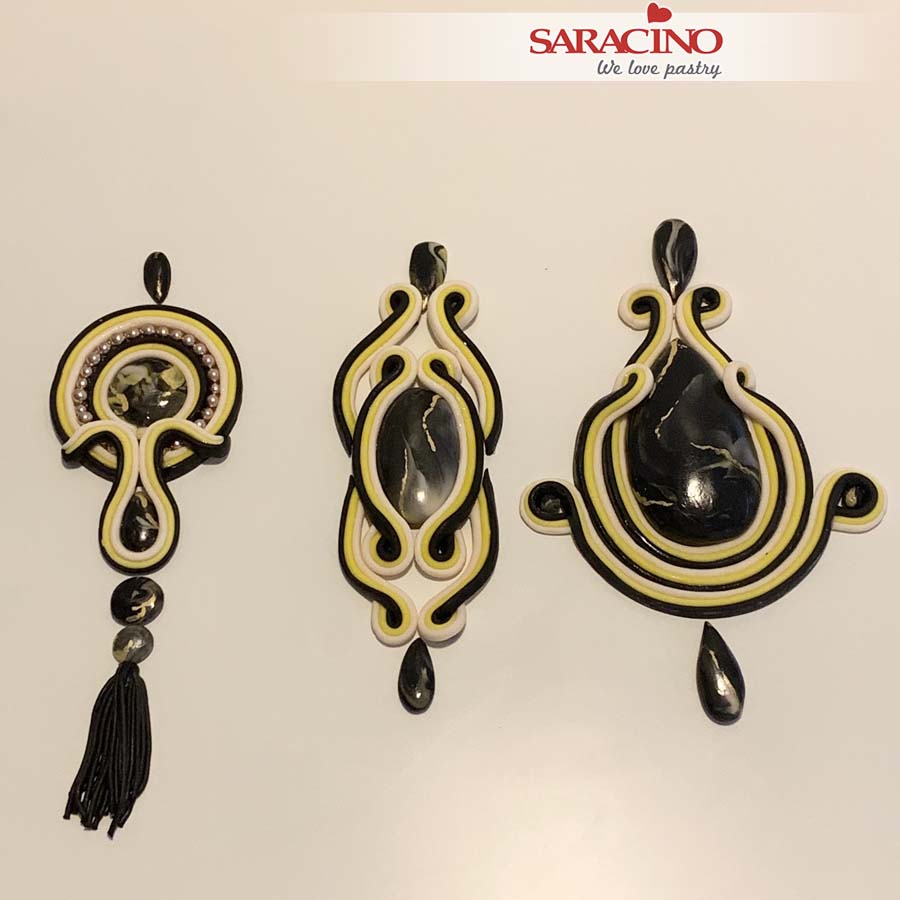
Repeat to create smaller tear drop and circular shapes. You will need one large tear drop. One large oval. One medium circle. Five small tear drop. 2 small circles. Two smaller circles. See the picture at the end of the tutorial to check for sizes.
Step 8
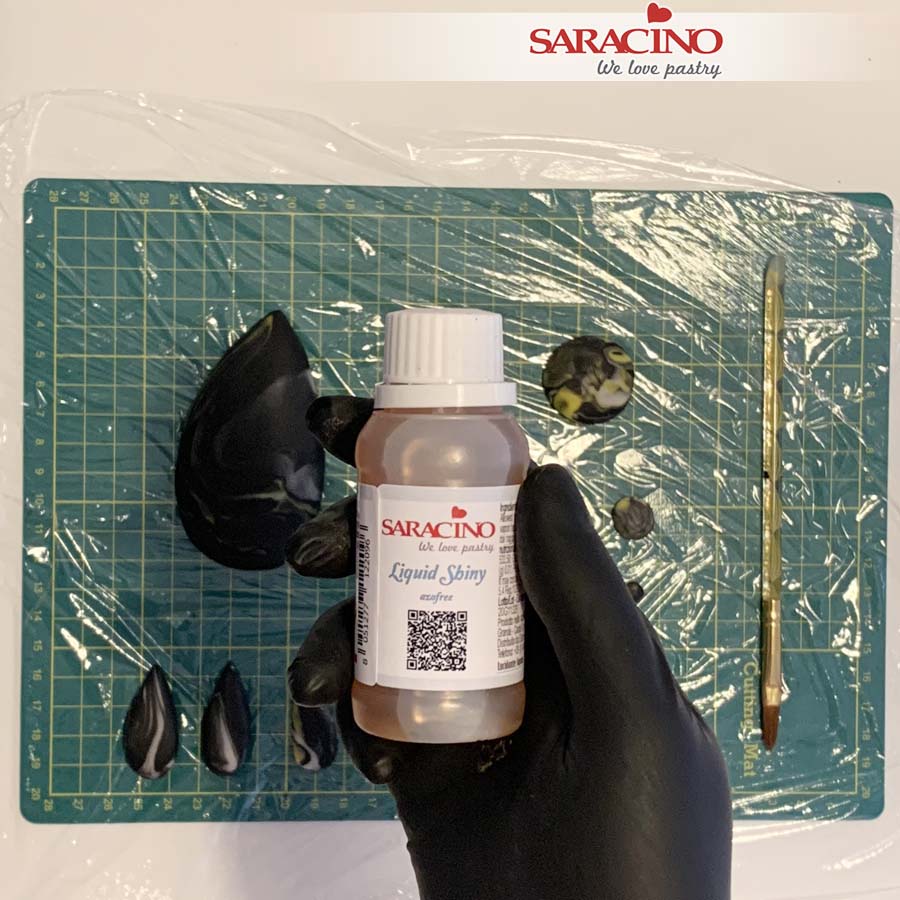
Cover your work surface with cling film. Using Saracino Liquid Shiny Glaze add a shine to the ‘stones’. Paint your stones with glaze (Afterwards use an alcohol to clean your brush).

Step 9
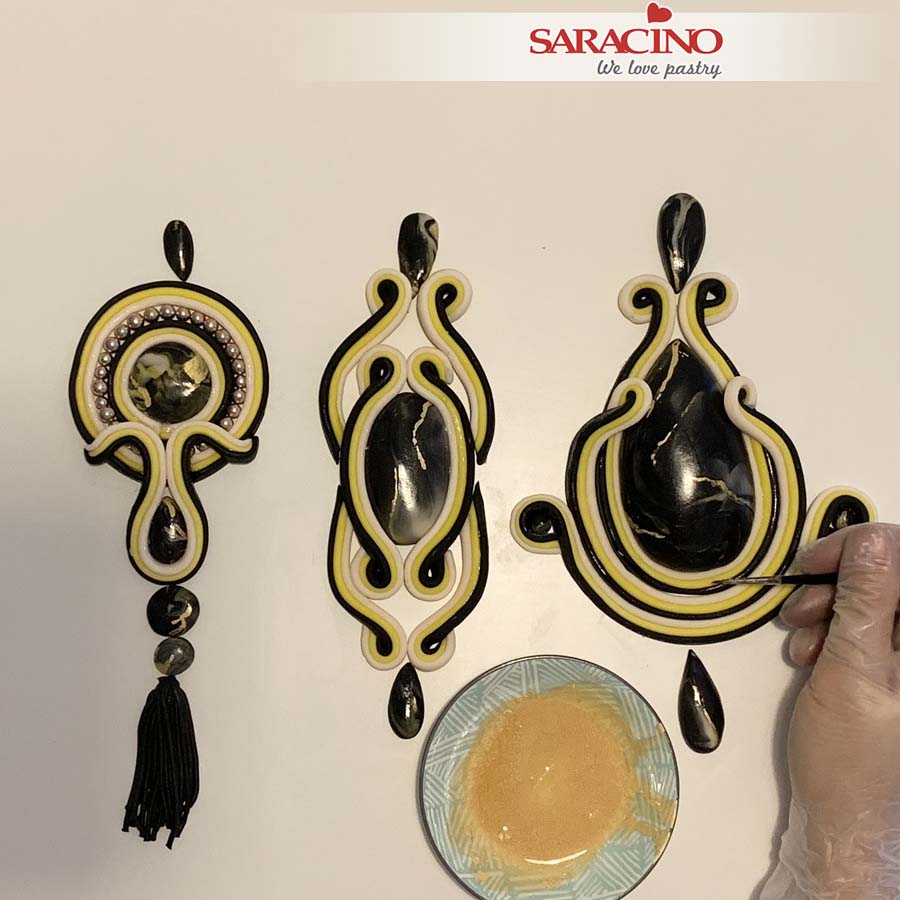
Prepare Saracino gold dust. Mix gold dust with a little glaze.

Step 10
Using fine brush paint irregular lines on the stones.

Step 11
We want to achieve this beautiful stone effect.
Step 12
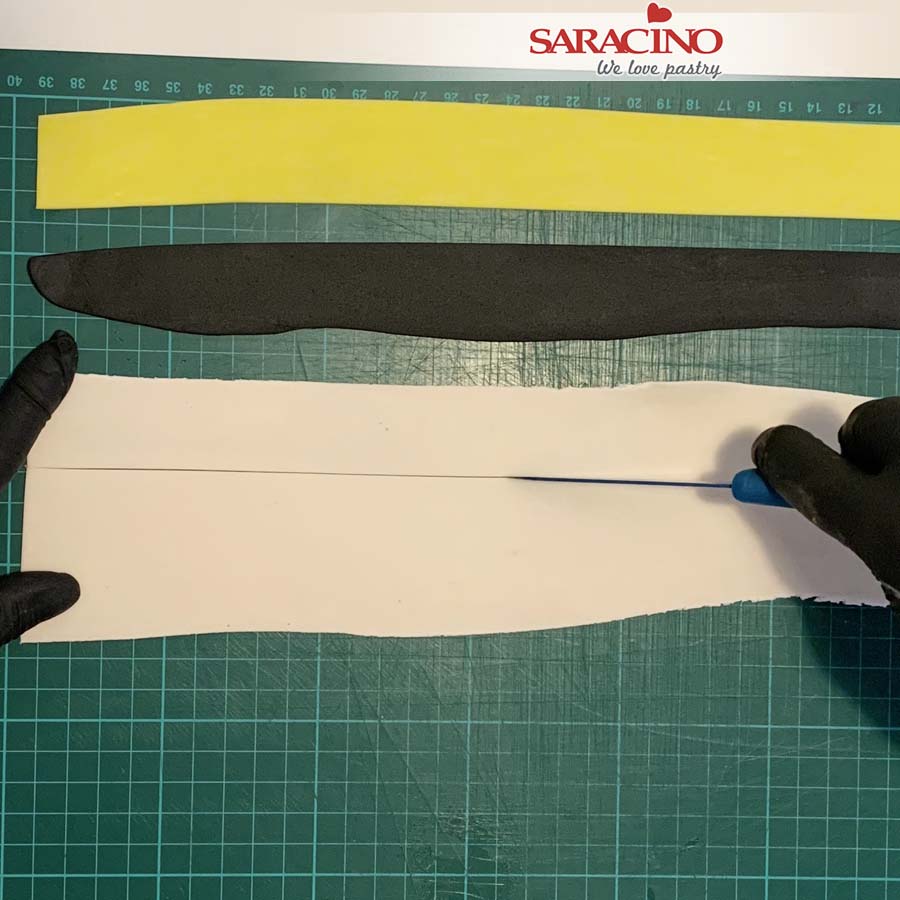
Roll out the skin tone, yellow and black modelling paste, approximately 1mm thickness. Cut the paste into long strips. Cover it with stretch cling film to prevent drying too quick.
Step 13
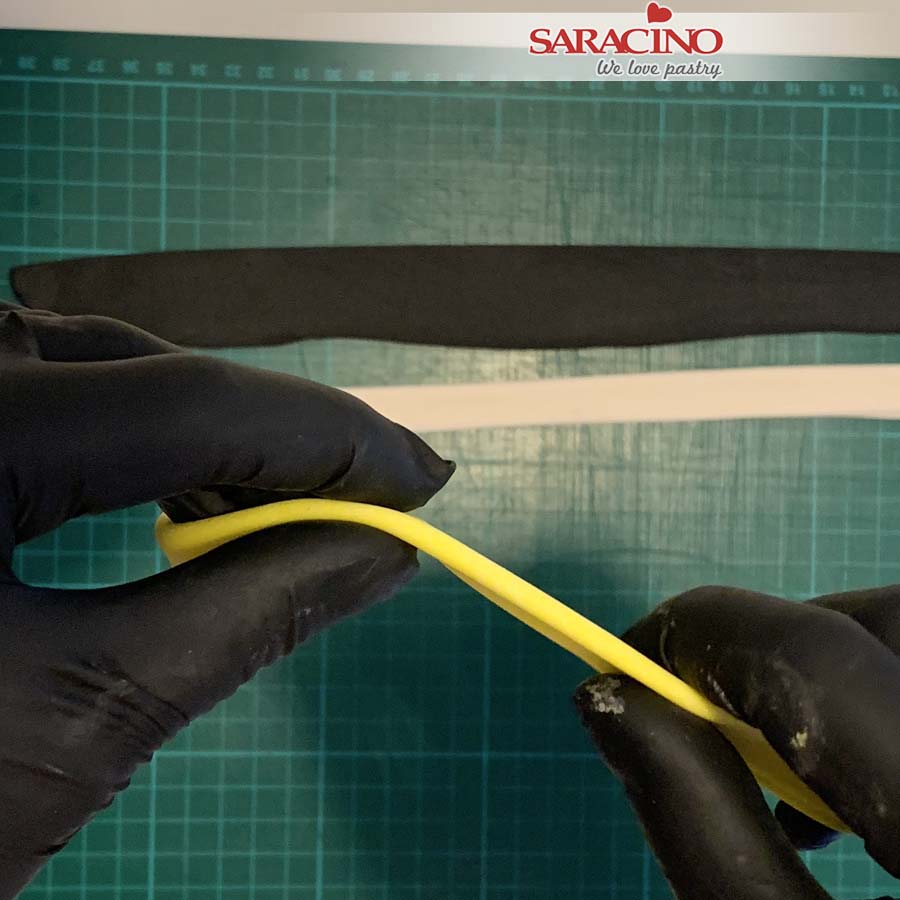
Fold the strips of Saracino modelling paste in half lengthways. Use Saracino cake gel to stick the modelling paste together.
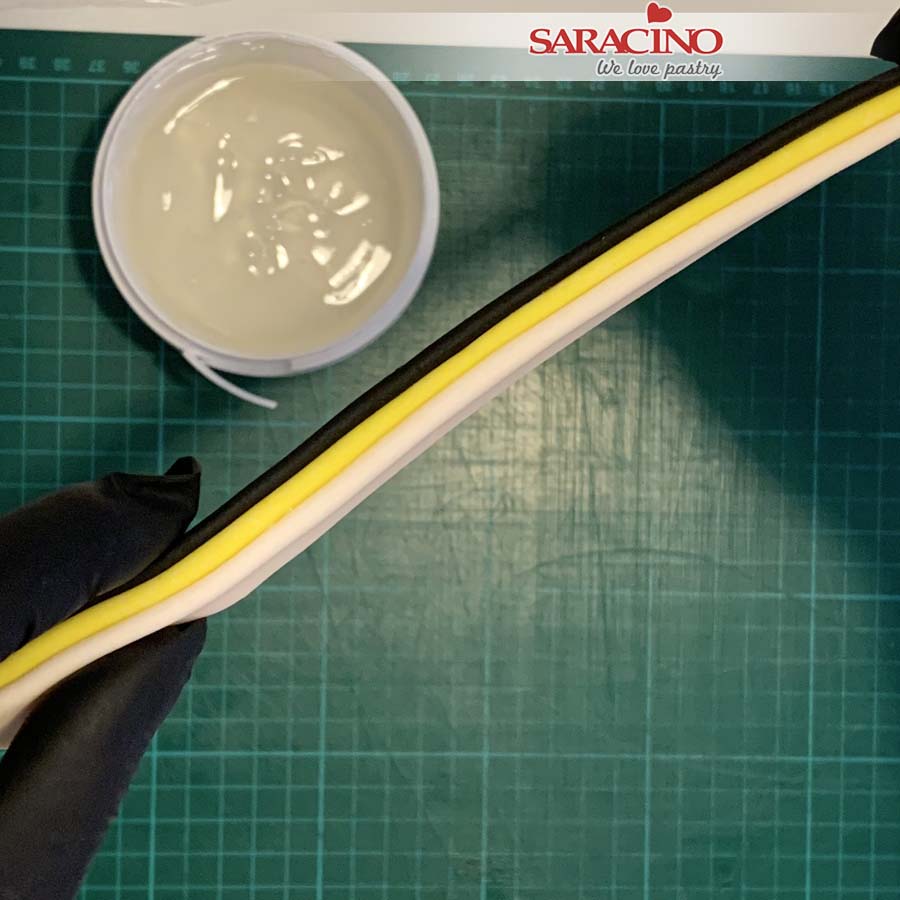
Step 14
Layer the three colours as shown. Apply a little cake gel between each layer to stick together. This way you will achieve the three colour combination.
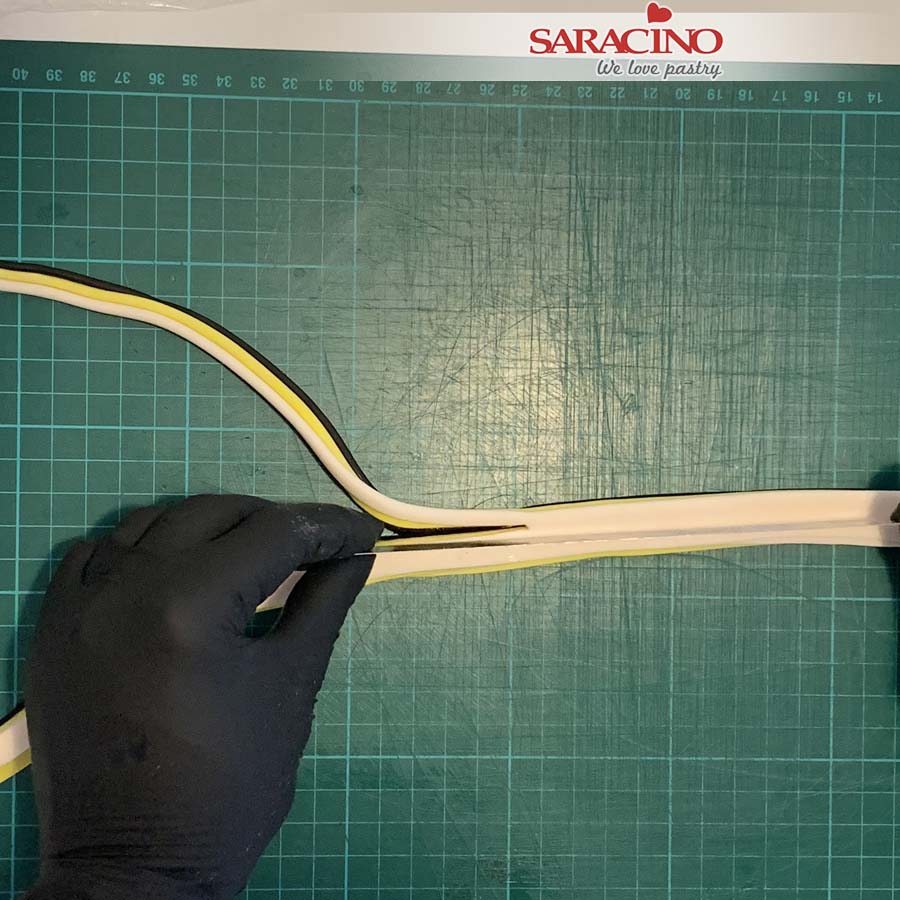
Step 15
Using a sharp knife cut a strip off the top of the three coloured modelling paste.
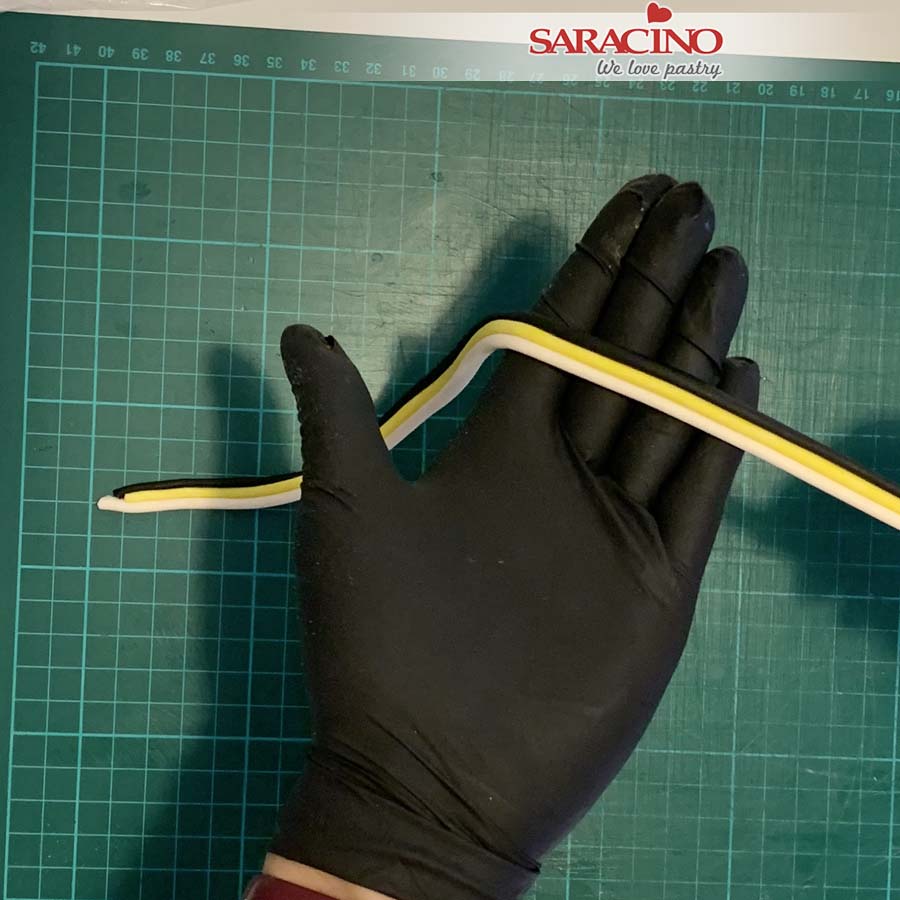
Step 16
You need to achieve coloured strips, round on the top and flat on the bottom.
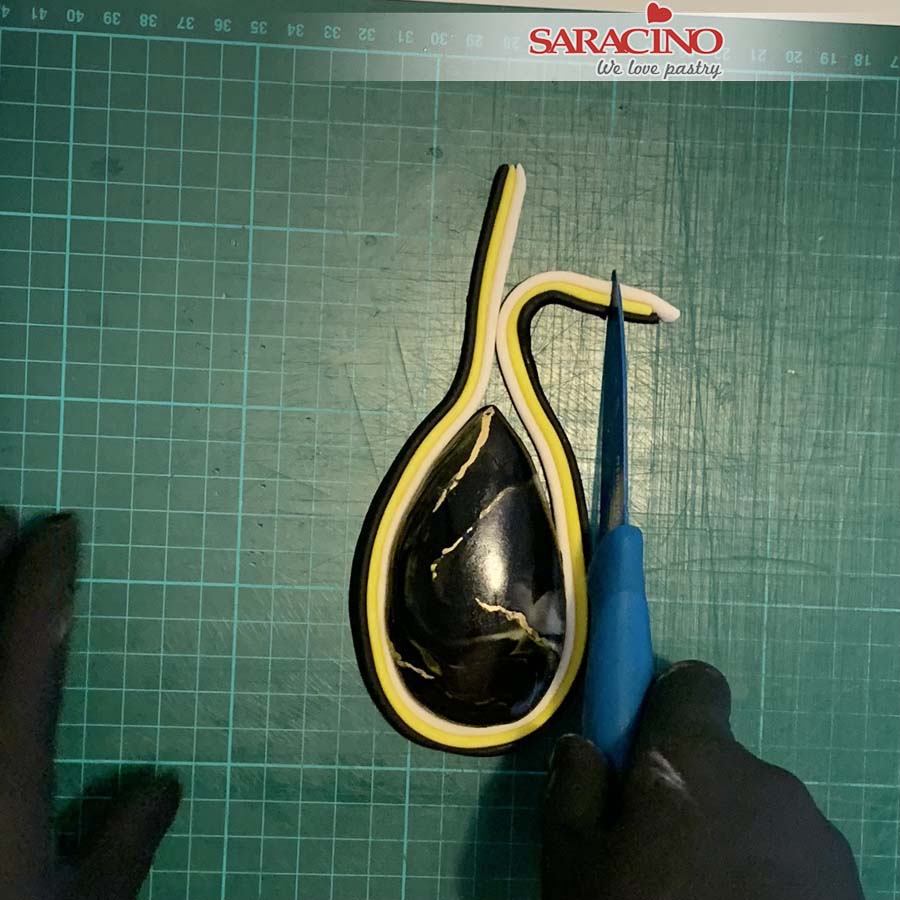
Step 17
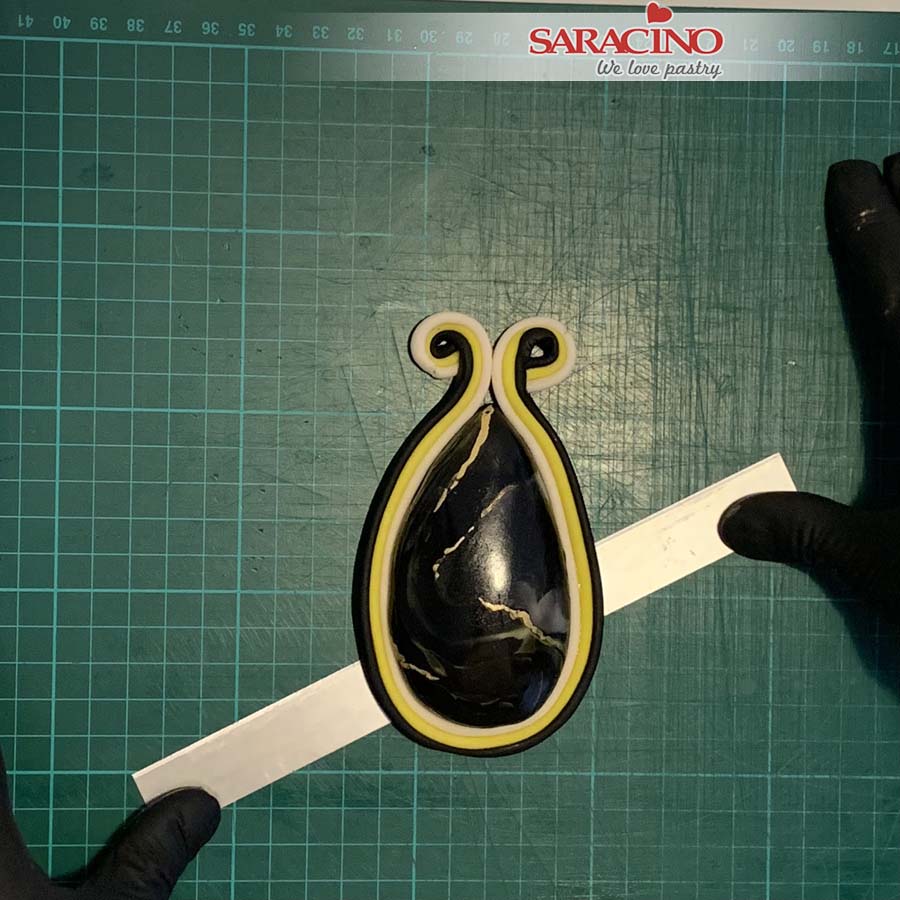
Place the largest tear drop stone and brush the sides with a little cake gel. Place the strip around the outside of the tear drop. Fix it all the way around the outside of the stone. Leave a short length which we will curl. Cut the excess.
Step 18
Curl both ends, you can use the end of a brush and place it in the middle to twist around. Use a long blade to lift it up off the mat.
Step 19
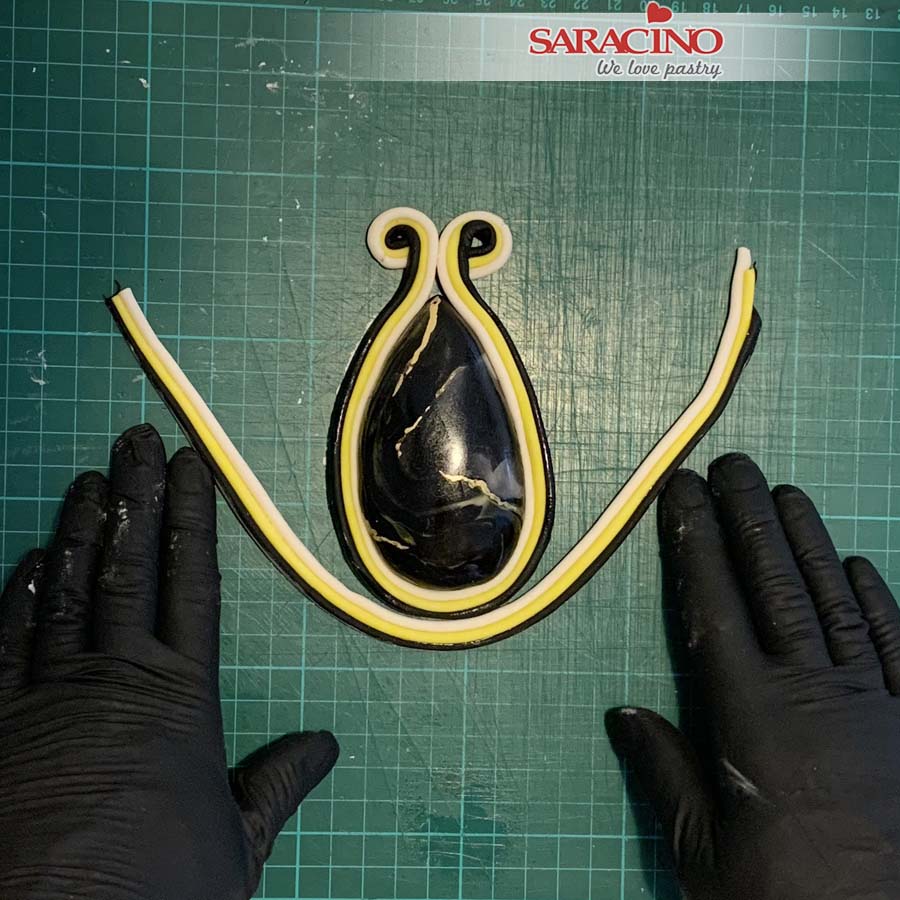
Dust some corn starch on your work surface to prevent sticking. Make more strips of the three colour modelling paste. Fix it around the previous strip as shown.
Step 20
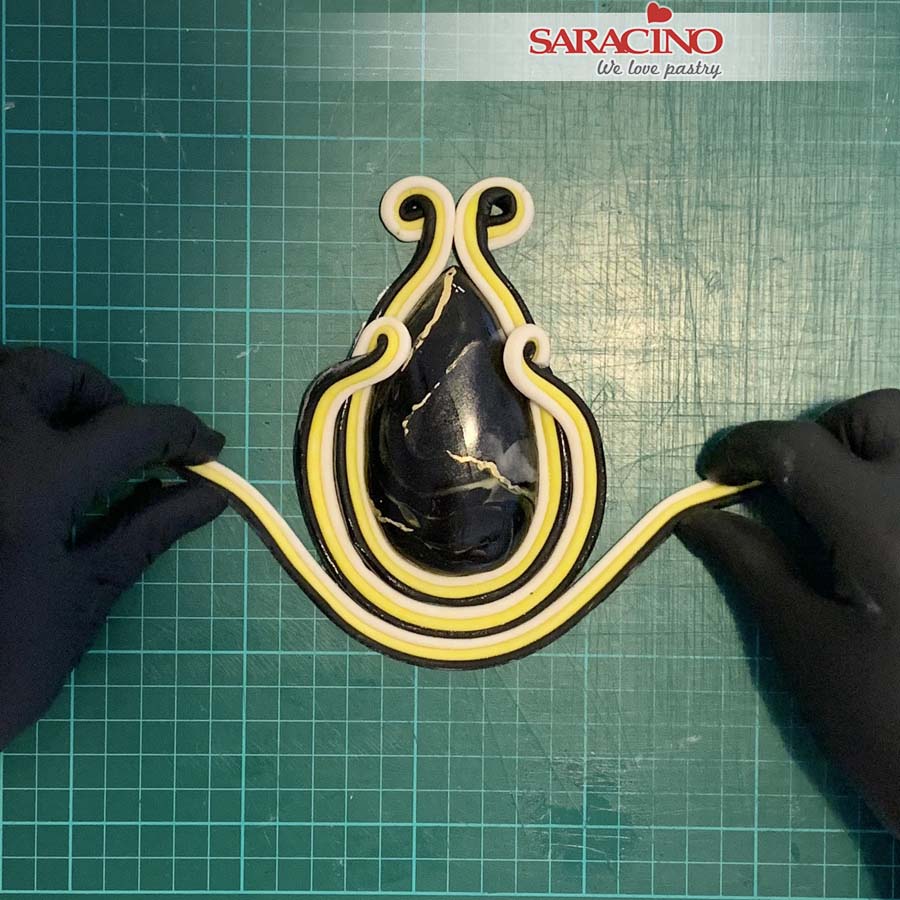
Curl the ends of the second strip on both ends. Place both ends over the first strip and onto the stone. Fix another strip of the modelling paste.
Step 21
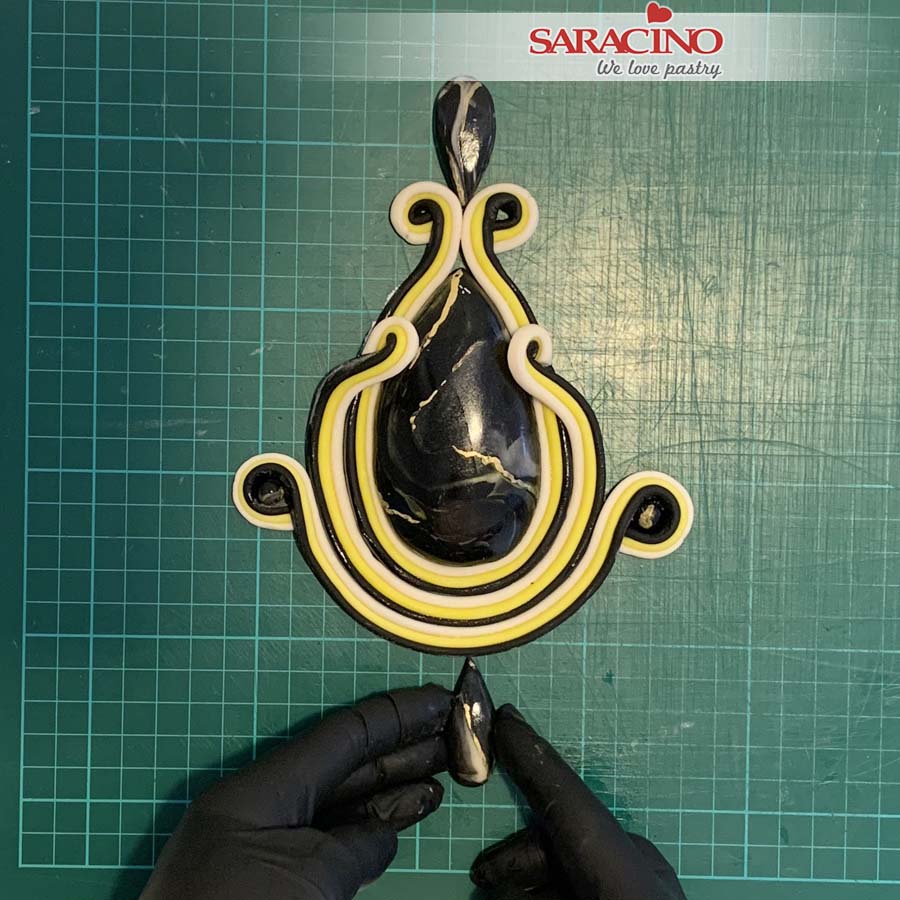
Curl both ends and place two of the previously prepared small circles inside the curl. Fix smaller tear drops on the top and bottom of the design.
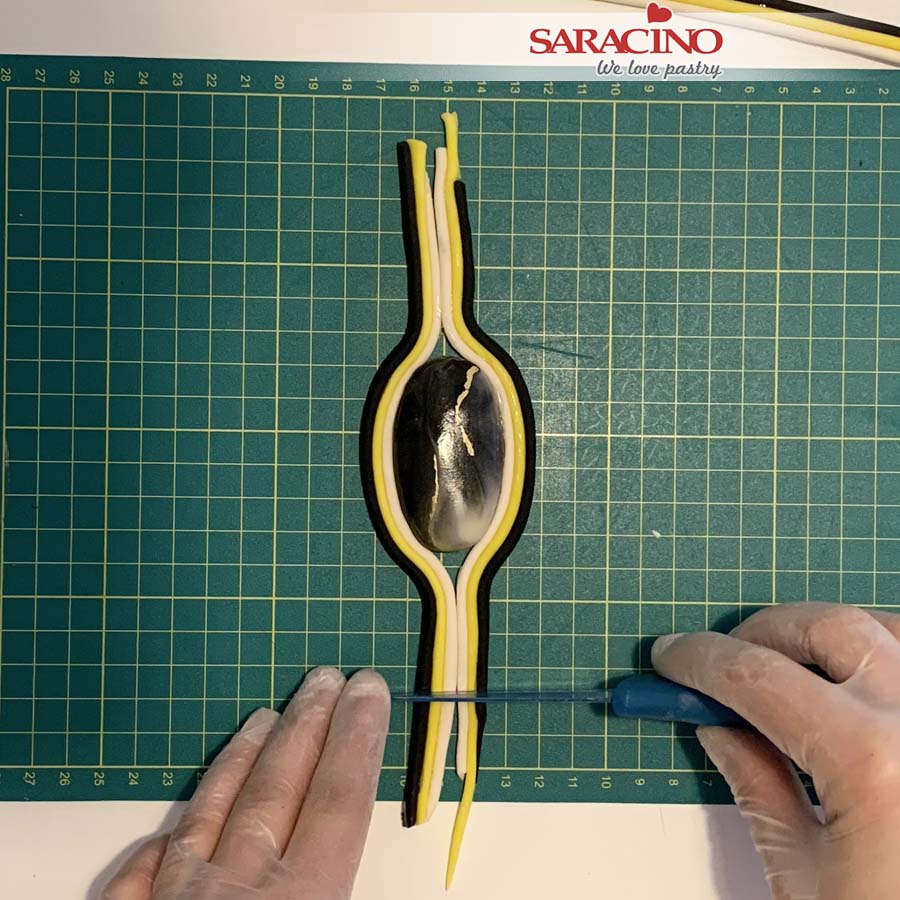
Step 22
Place an oval shaped stone on your mat and fix two of the coloured strips. Trim the excess leaving a length as shown.
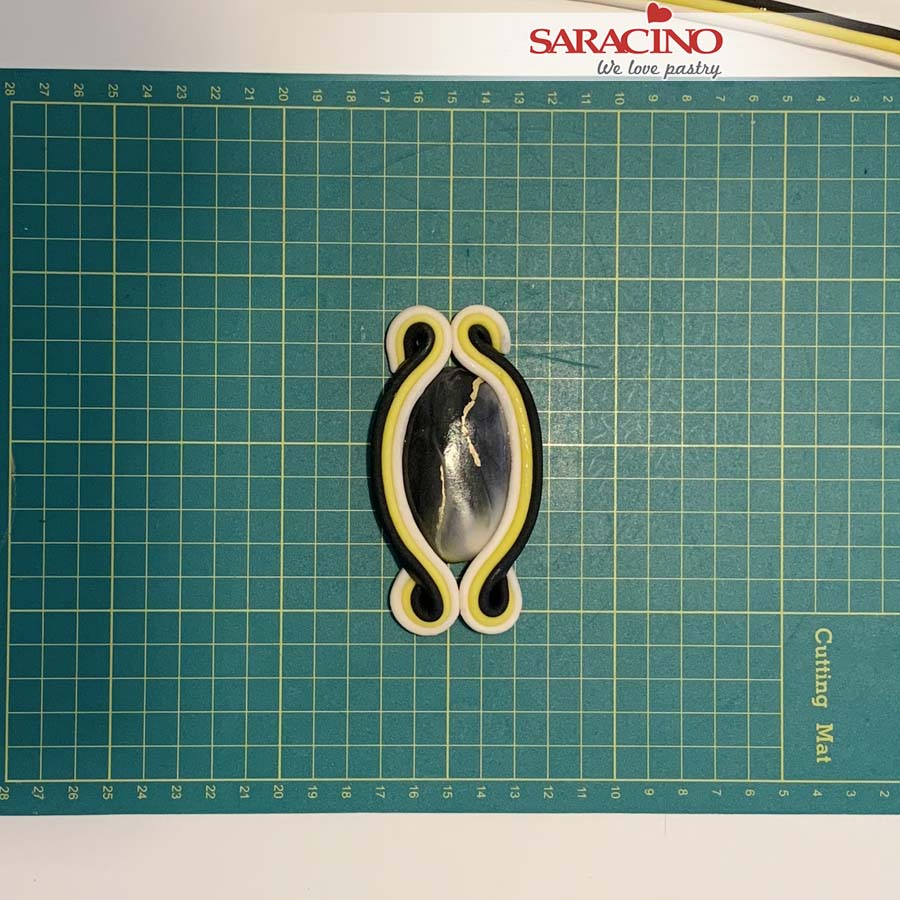
Step 23
Curl the ends at the top and bottom of the stone.
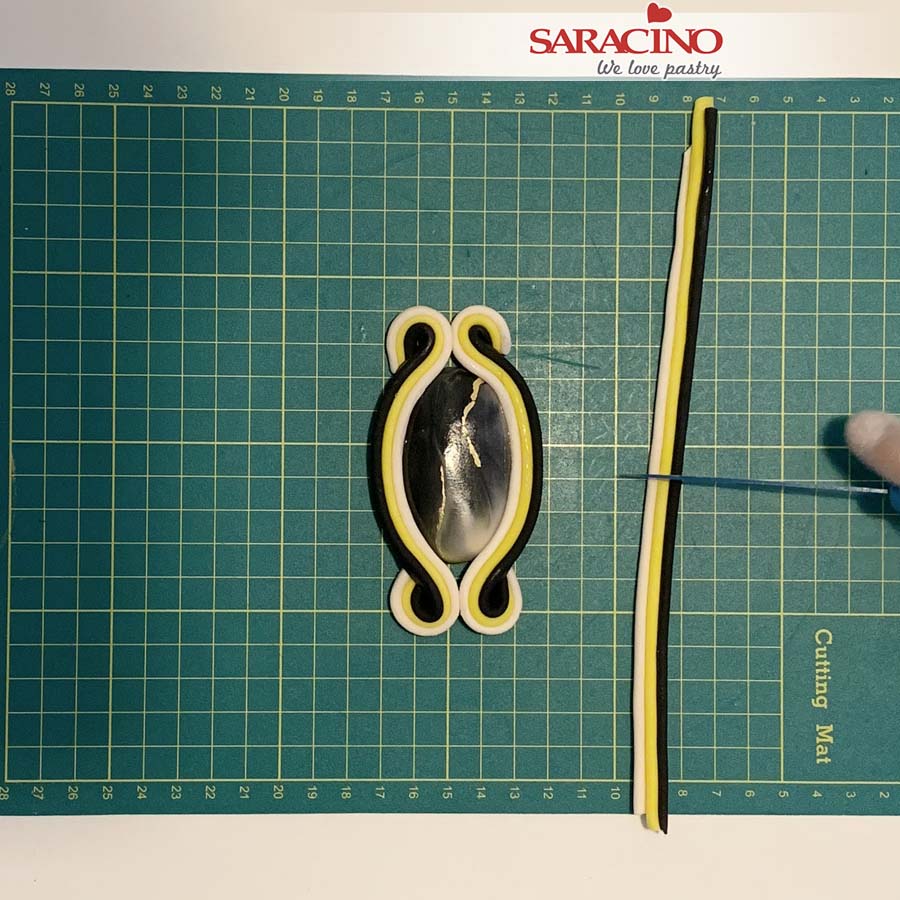
Step 23
Take one of the strips and cut in half.
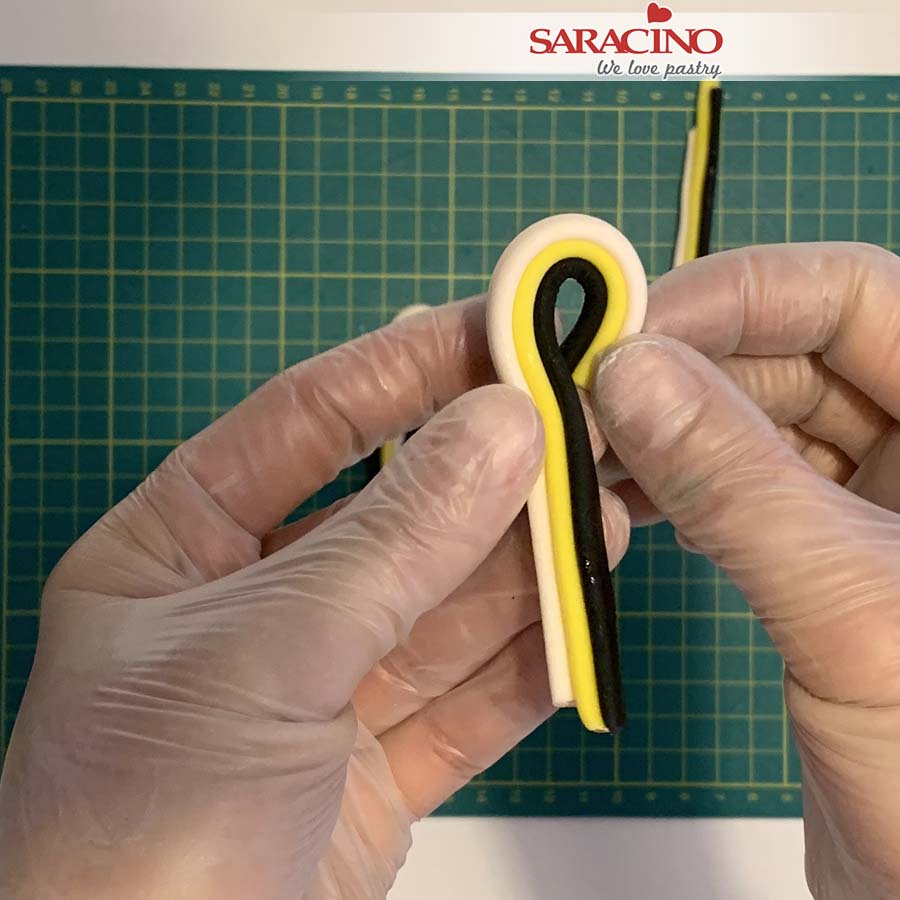
Step 24
Curl to create the round ends.
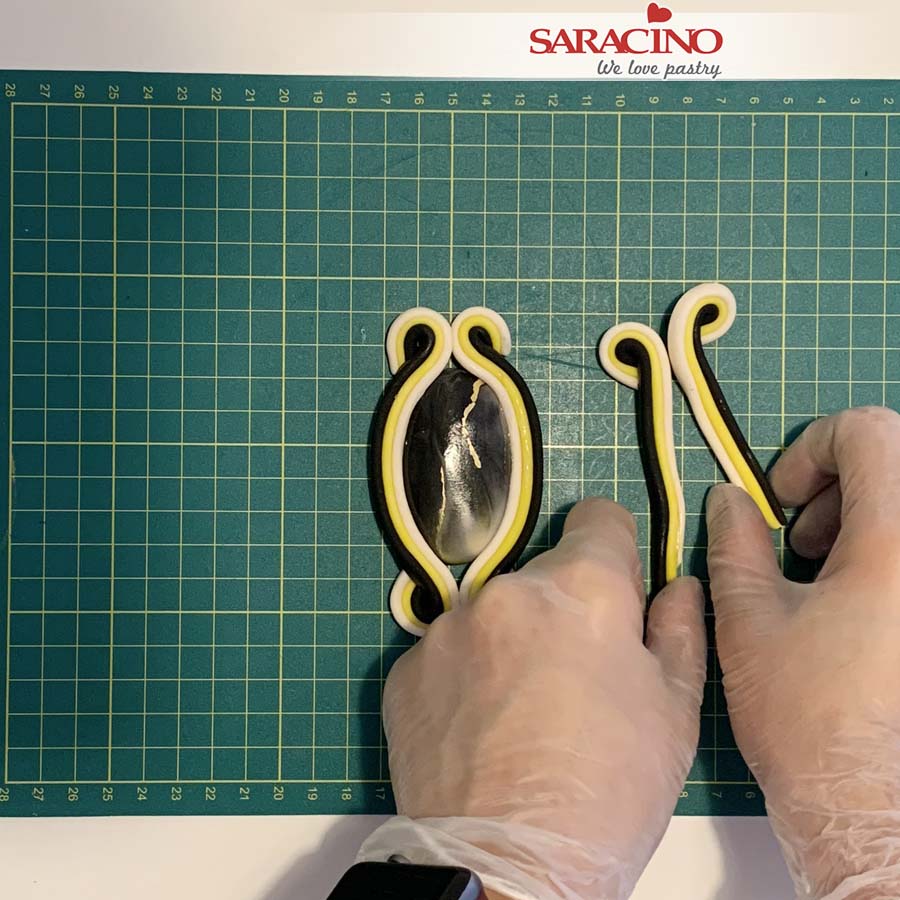
Step 25
Make two identical strips, make sure the skin colour is inside on both sides.
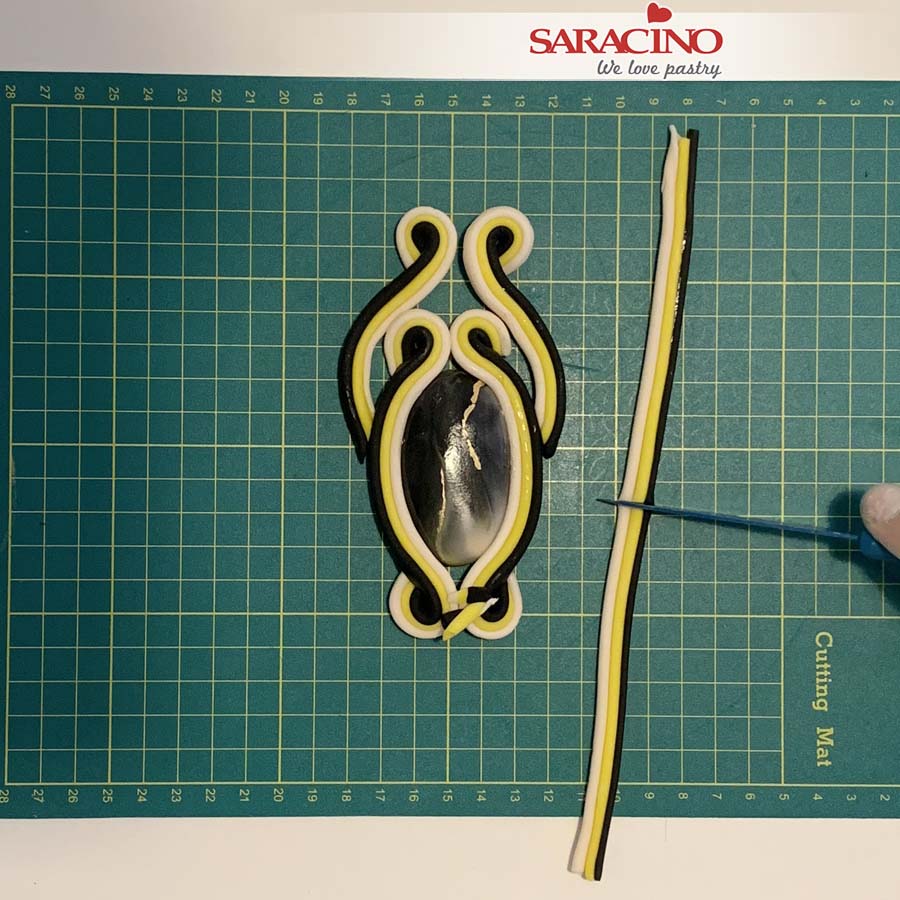
Step 26
Place the two strips on the top of design and prepare another two.
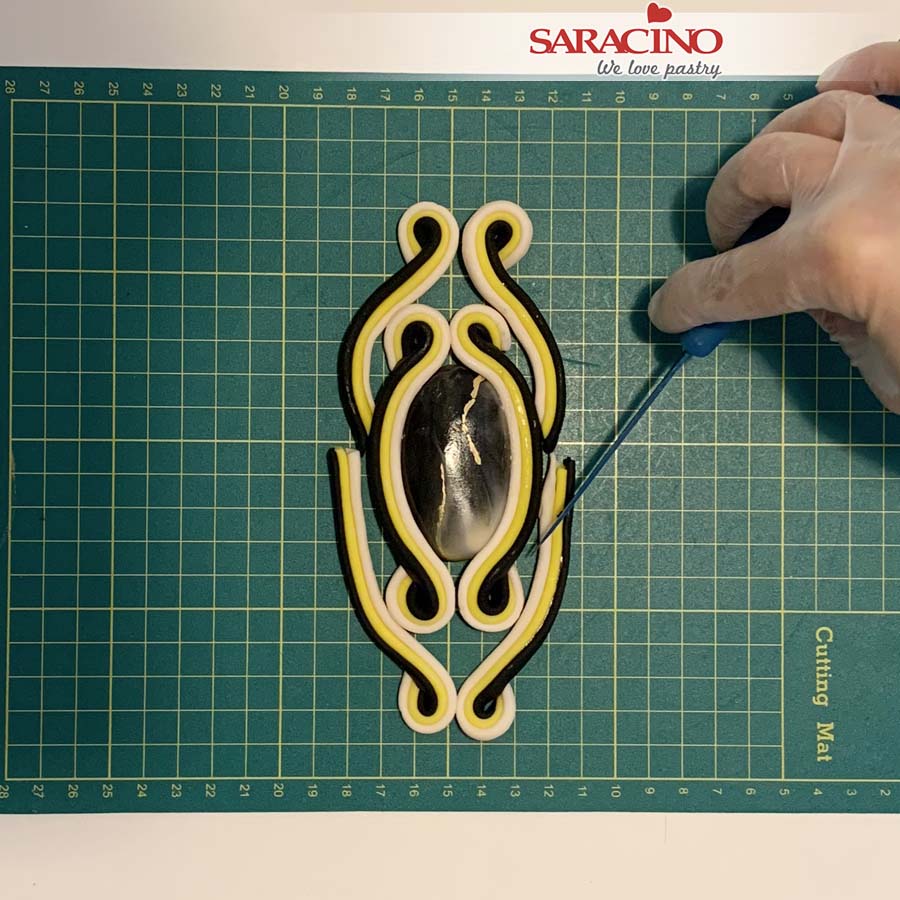
Step 27
Place strips on the bottom and trim the excess to the length required.
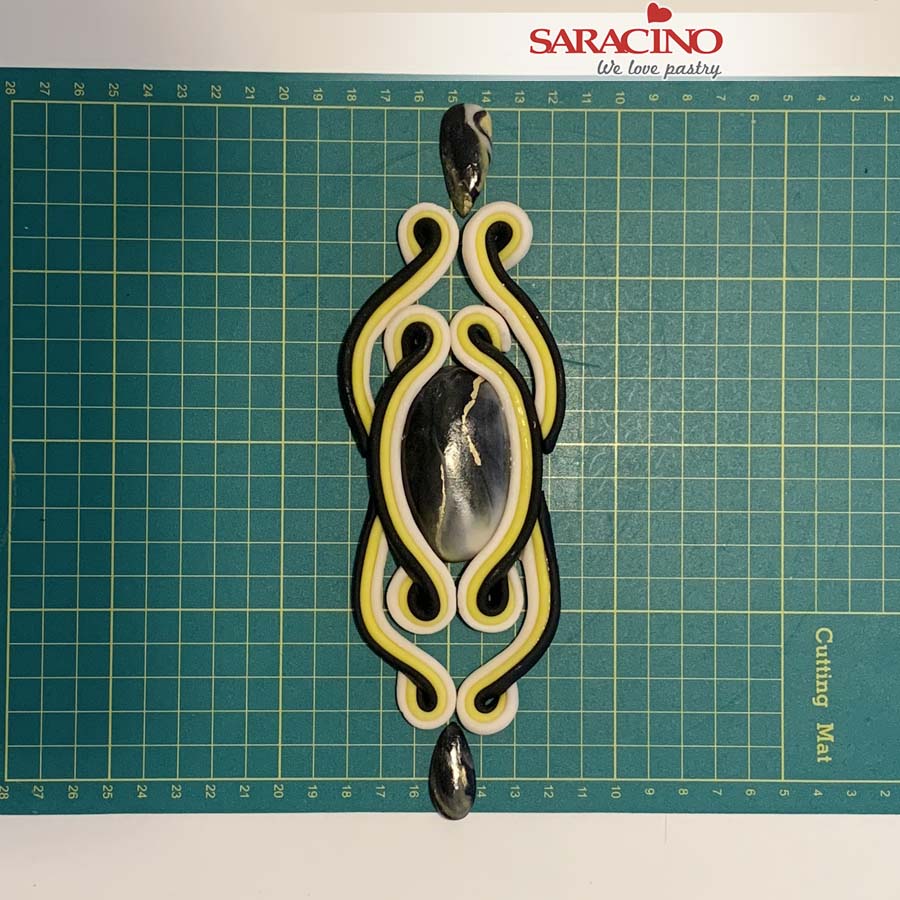
Step 28
Using two small tear drop shapes place them at the top and the bottom. Do not stick them just yet, we will fix them directly onto the cake.
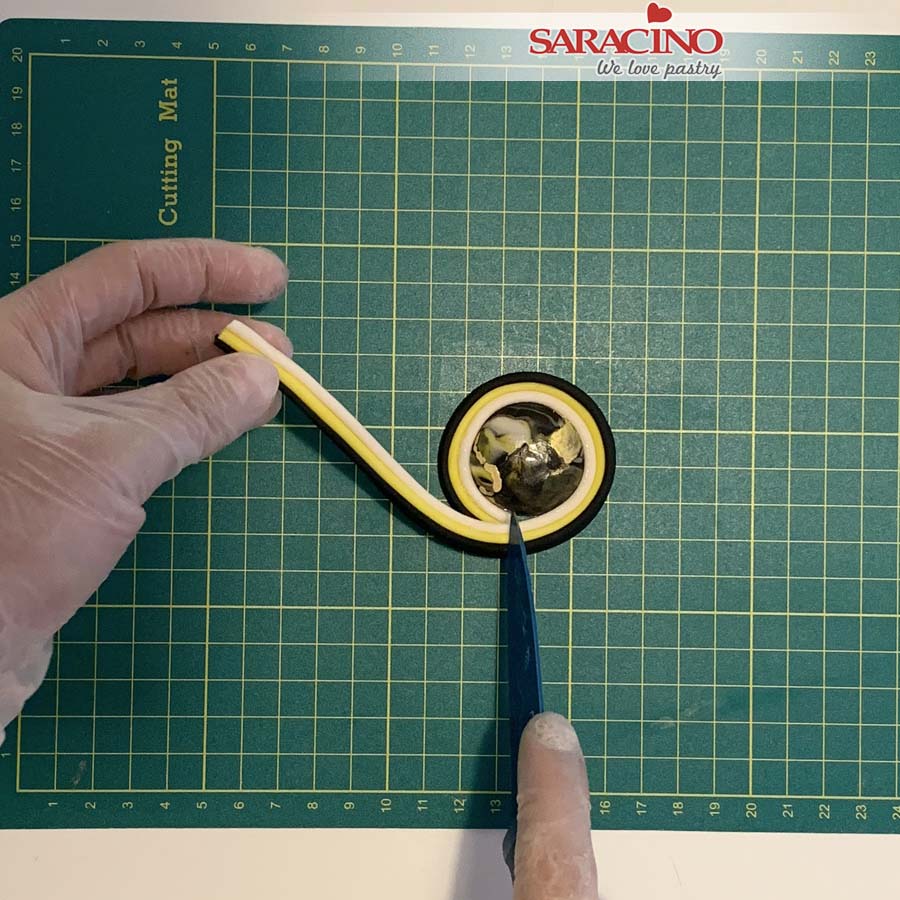
Step 29
Using a round stone wrap a strip of the modelling paste around it. Trim the excess.
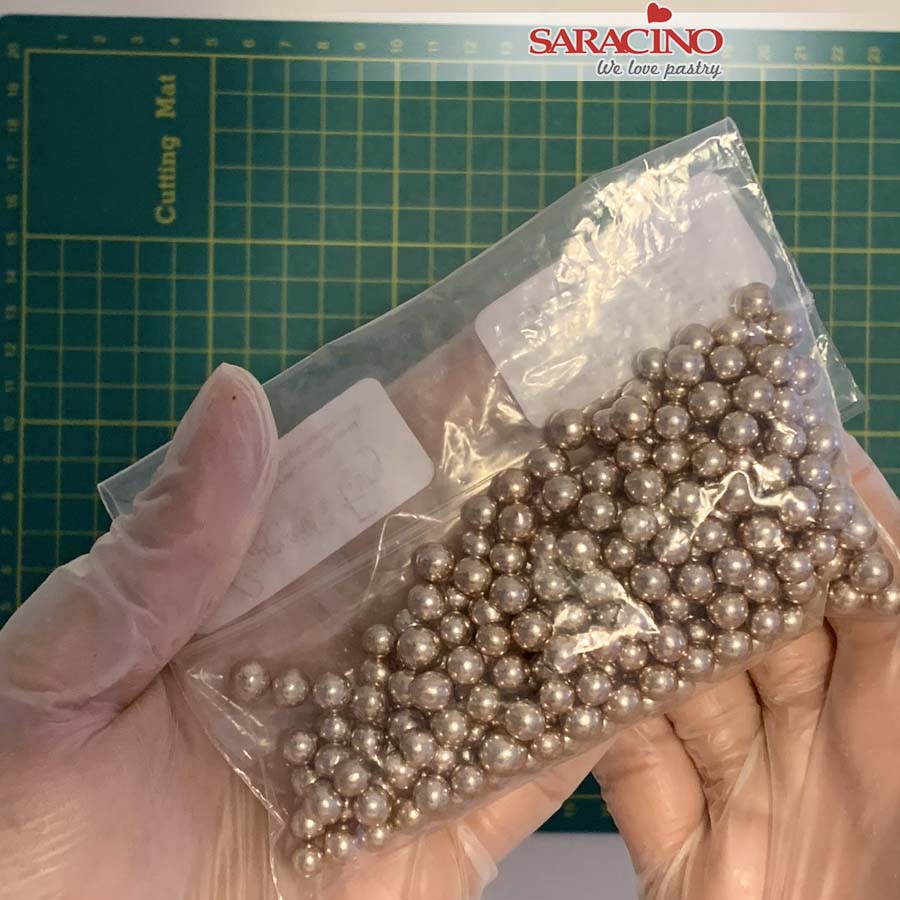
Step 30
You will need 3mm – 4mm sugar pearls.
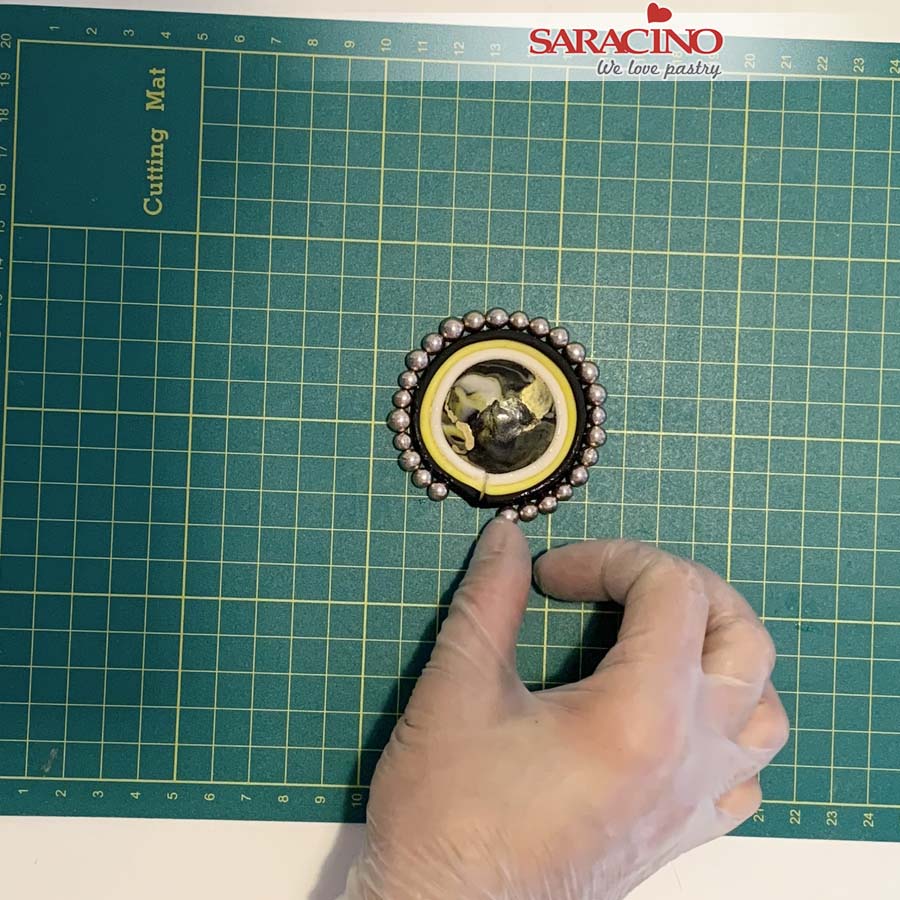
Step 31
Use cake gel to brush the side. Fix sugar pearls around the perimeter.
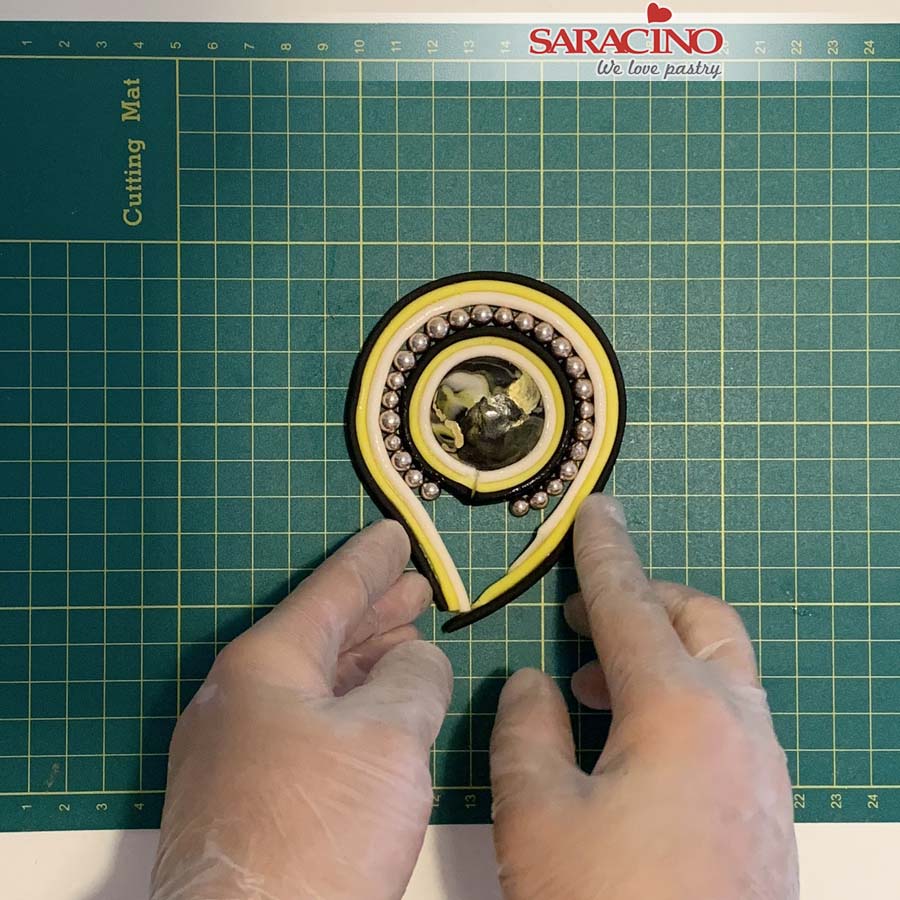
Step 32
Apply a little glue to another strip. Wrap it around the pearls.
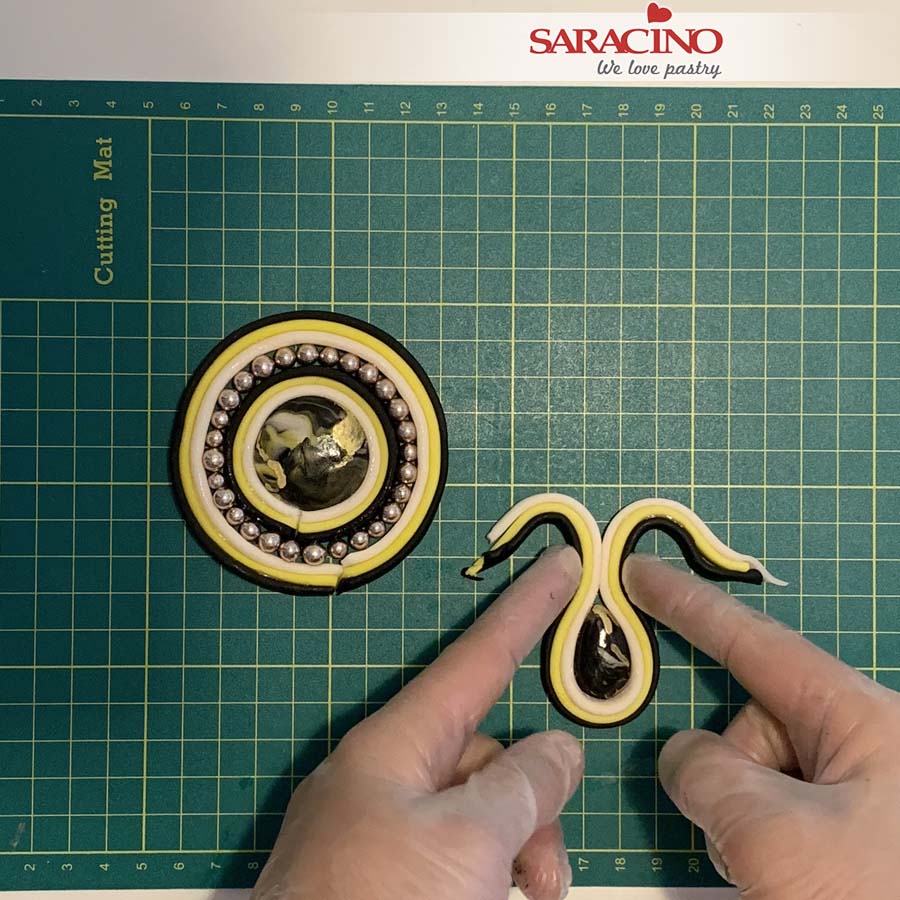
Step 33
Using a small tear drop stone wrap another three coloured strip around the outside. Fix it together at the top. Place it on top of the round stone design already made. Curl the top.
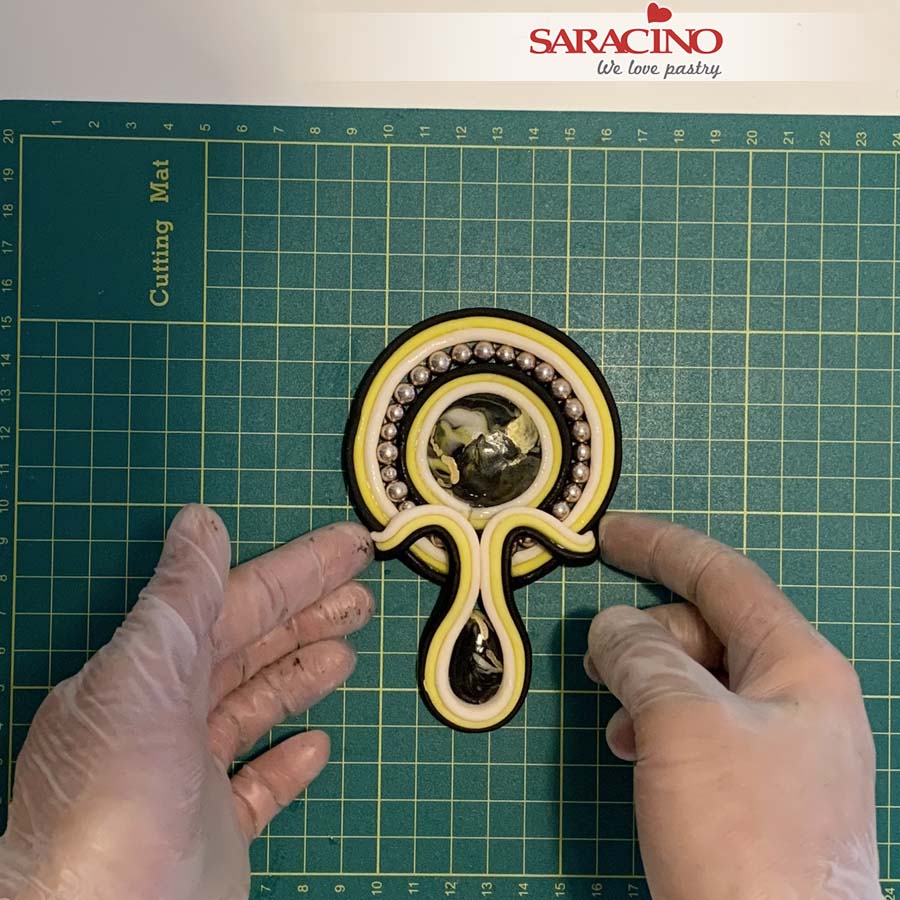
Step 34
Fix the ends underneath the round design.
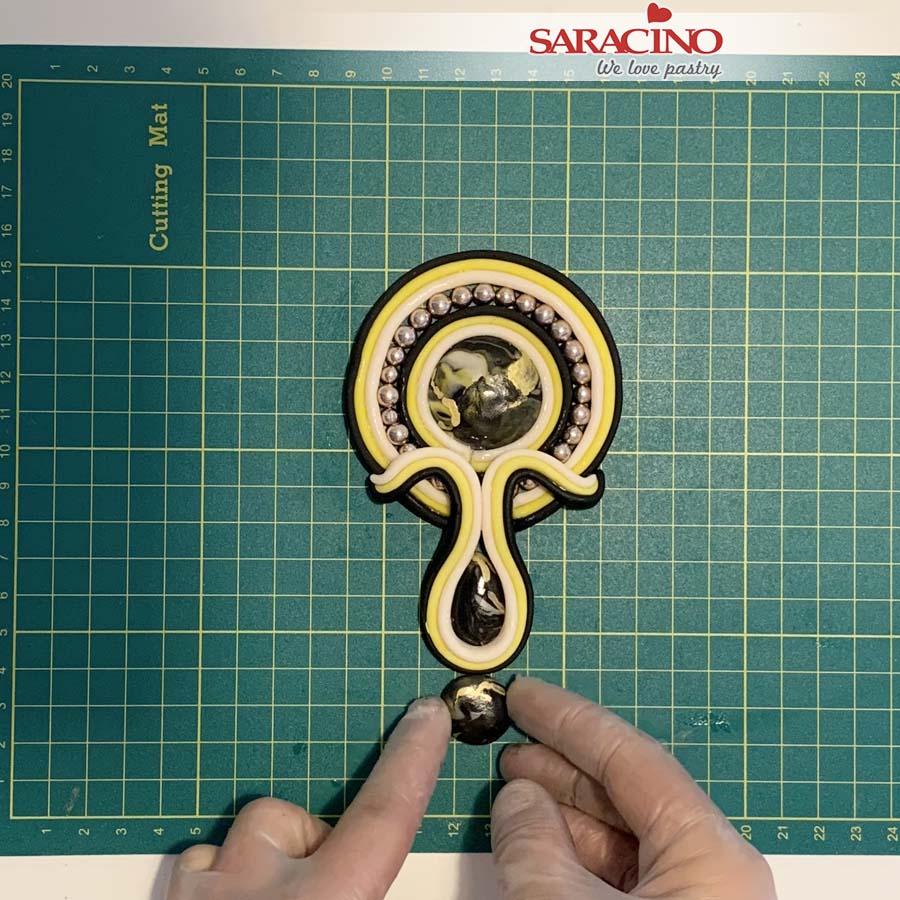
Step 35
Place two small round stones at the bottom of the design.
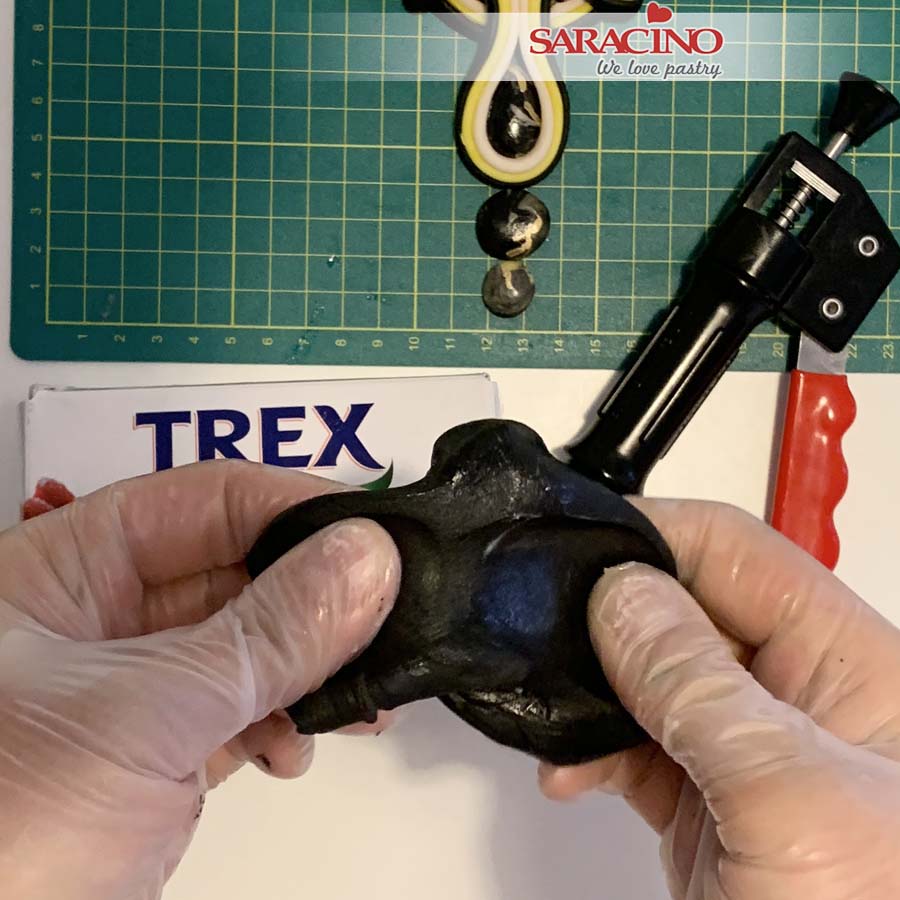
Step 36
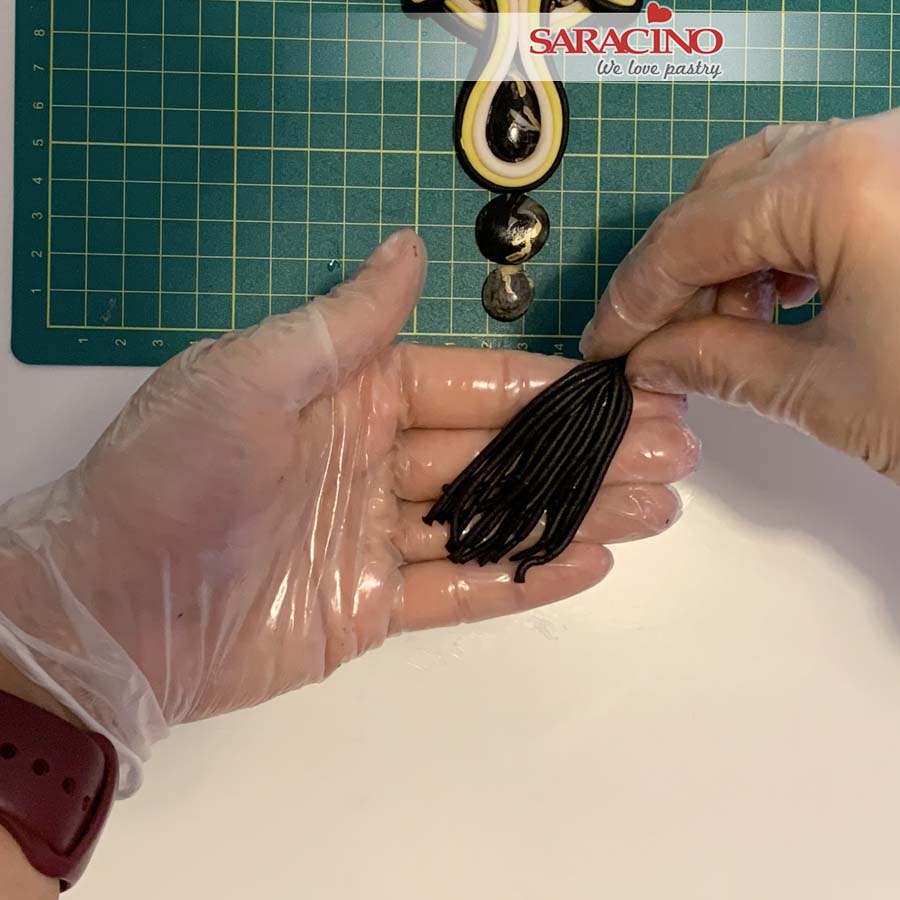
Mix black modelling paste with Trex and knead well. Use an extruder with small holes. Push out the paste. Cut to length and repeat the process.
Step 35
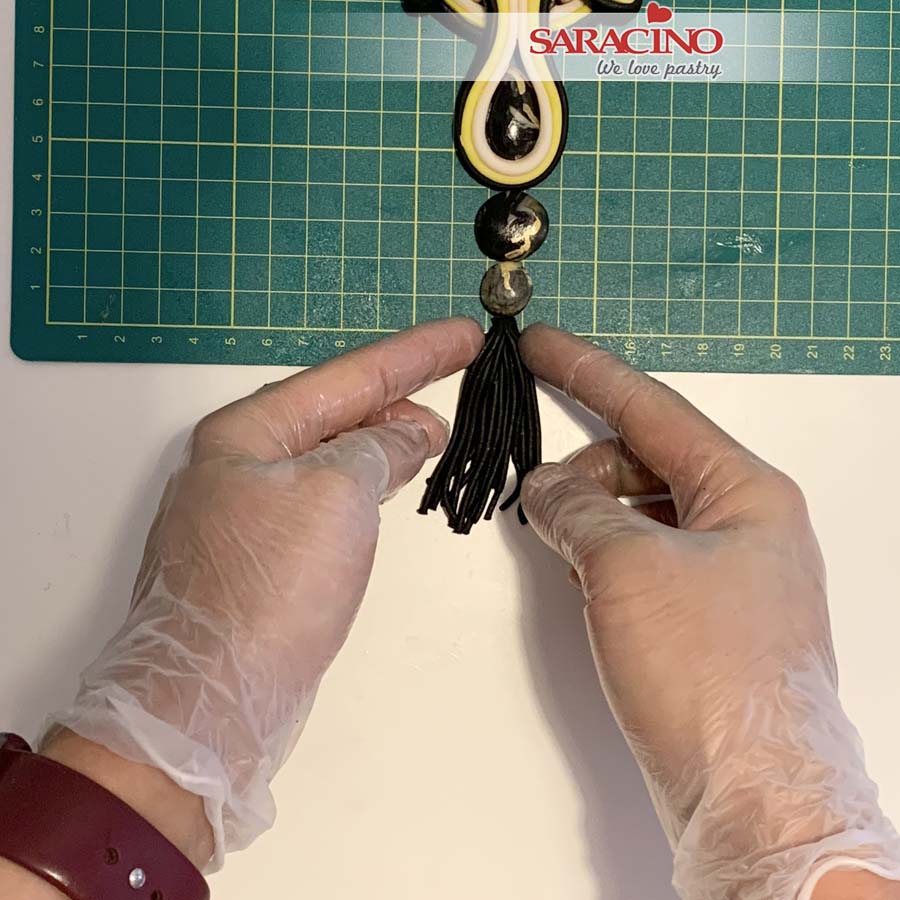
Create the tassel by fixing together at the end.
Step 36
Place it on the bottom of our design. Do not fix yet.
Step 37
Our three edible jewels are ready to fix to the cake.
Step 38
Use Saracino glaze and gold dust, mix them together. Paint the yellow lines on all three designs.
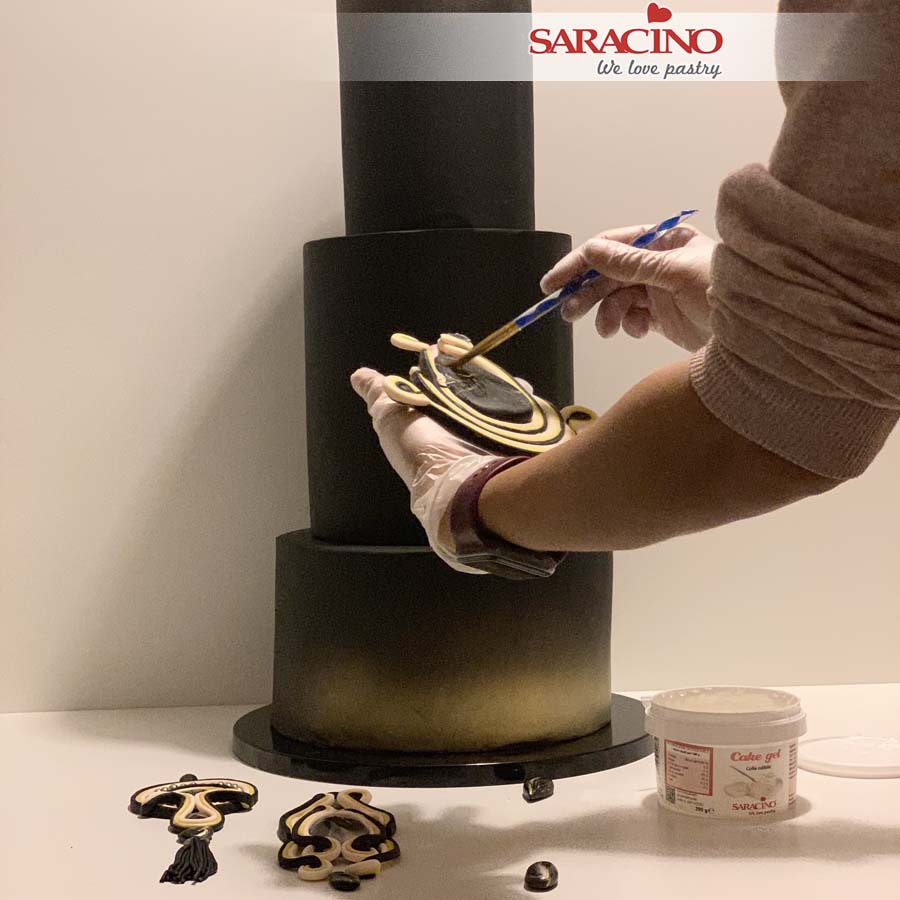
Step 39
Brush the back of your jewels with cake gel.
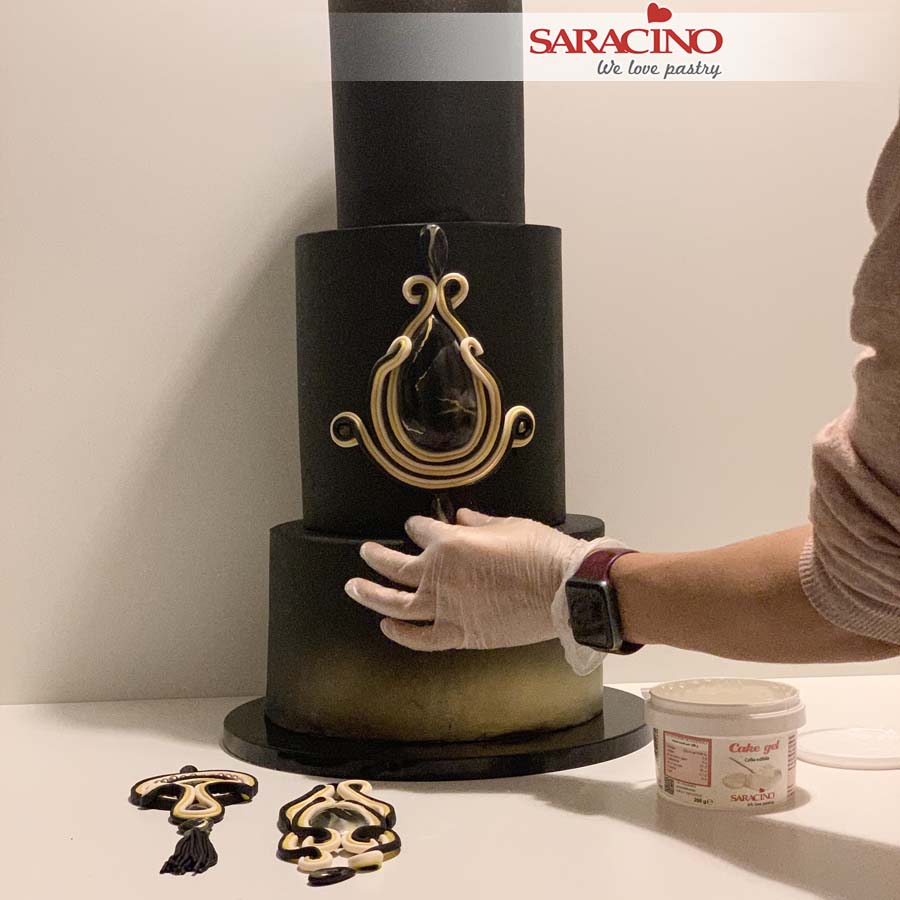
Step 40
For the middle tier fix two tear drop stones. One on the top and one on the bottom.
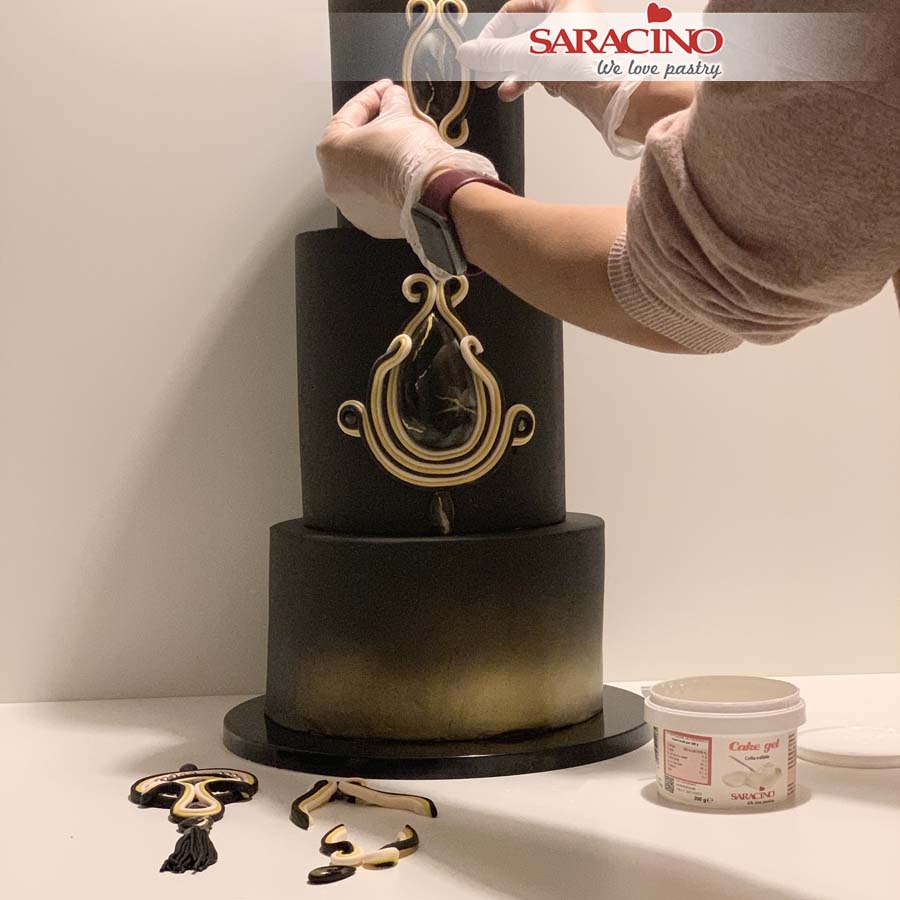
Step 41
Fix the top tier jewel.
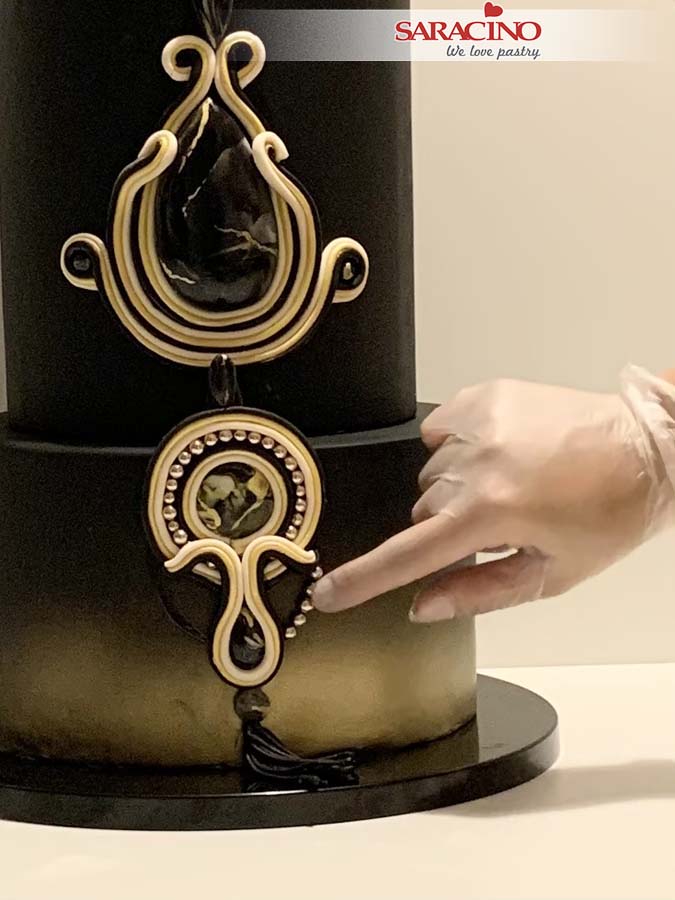
Step 42
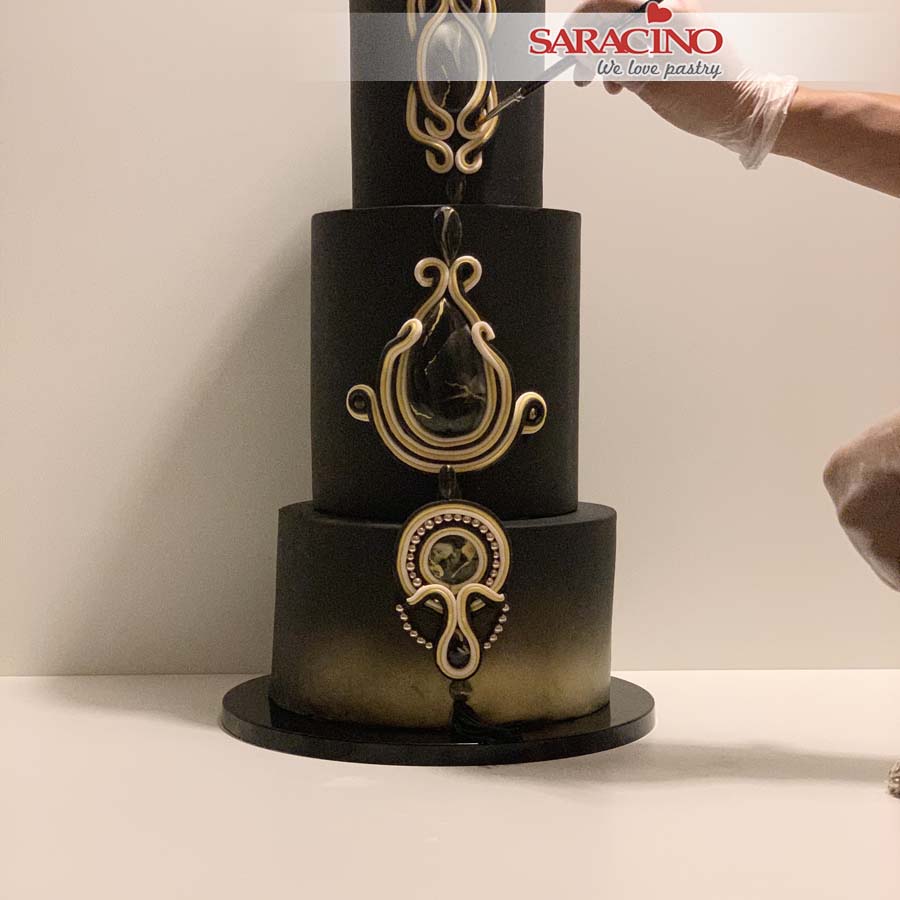
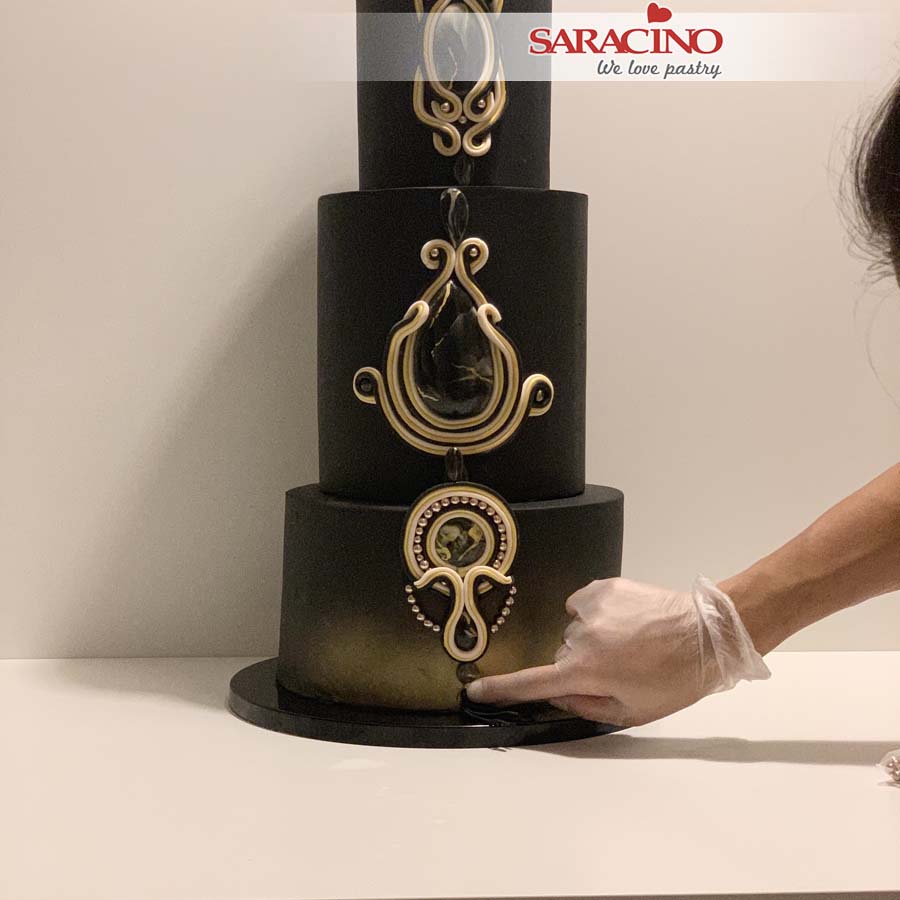
Fix the bottom tier jewel and add some pearls to the design.
Step 43
Add a little glue ready to fix sugar pearls inside the curves on the middle and top tier.
Step 44
Fix the pearls inside the curls. Fix the tassle and ball to the lower jewel. Place the final sugar pearl just above the tassel.


