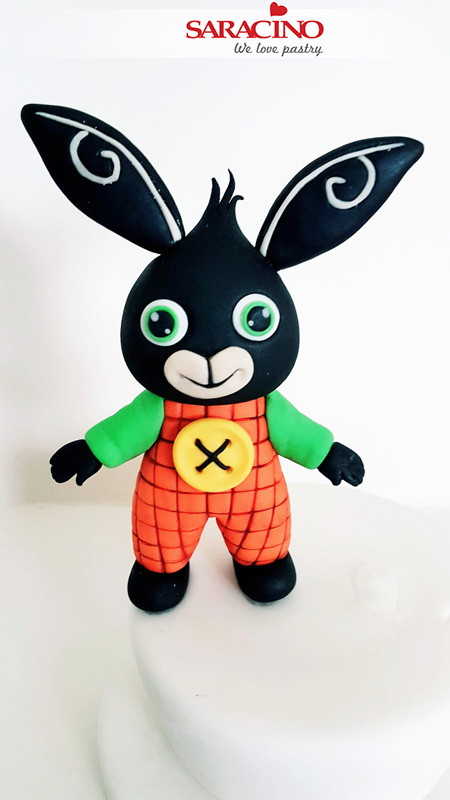

You will need:
- Black,Orange,Green,White,Yellow, Skin Tone Modelling Paste
- Kitchen Knife
- Plastic Craft Knife
- 16 Gauge Florist Wire
- Large Ball Tool
- Small Ball Tool
- Small Circle Cutters
- Scalpel or Metal Craft Knife
- Dusting Brush
- Brush For Water
- Baby Wipes
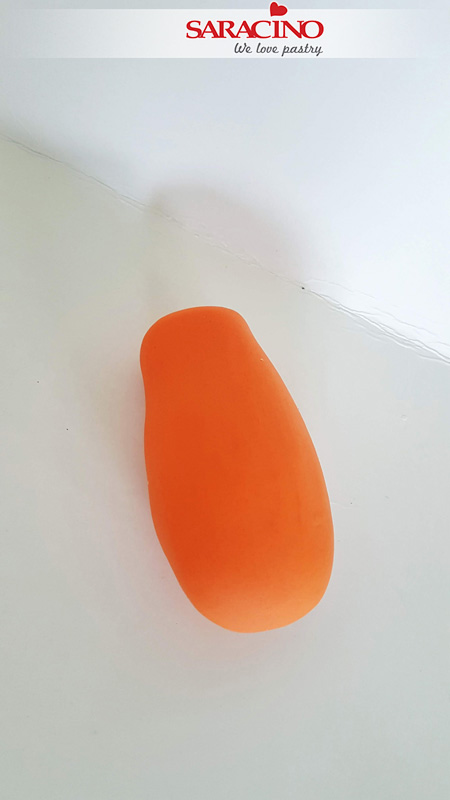
Step 1
Roll a sausage shape out of the orange modelling paste and with your fingers shape the end to form a neck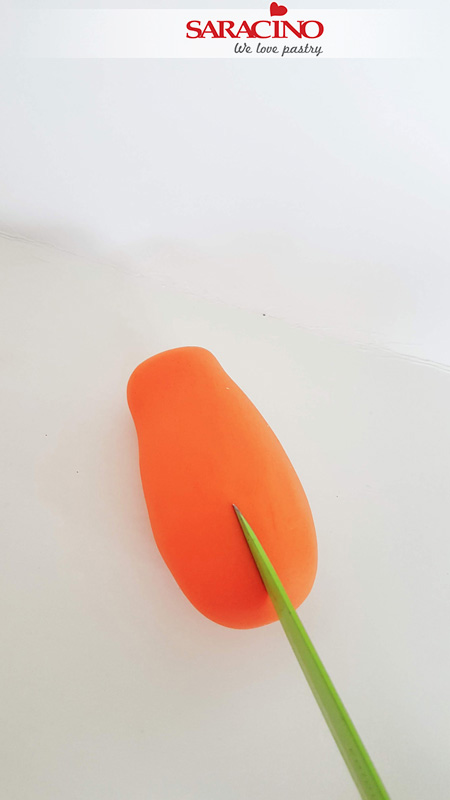
Step 2
For the legs cut the bottom end centrally with a sharp knife as shown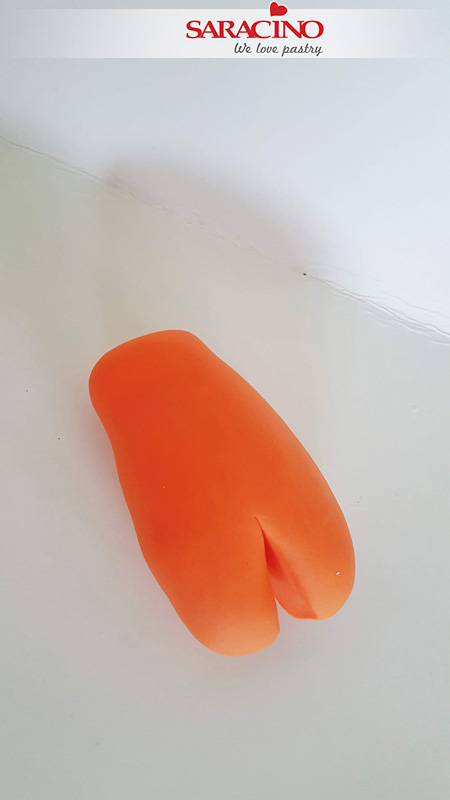
Step 3
Your body should look like this. Now smooth the sharp cut edges with your fingers to model the shorts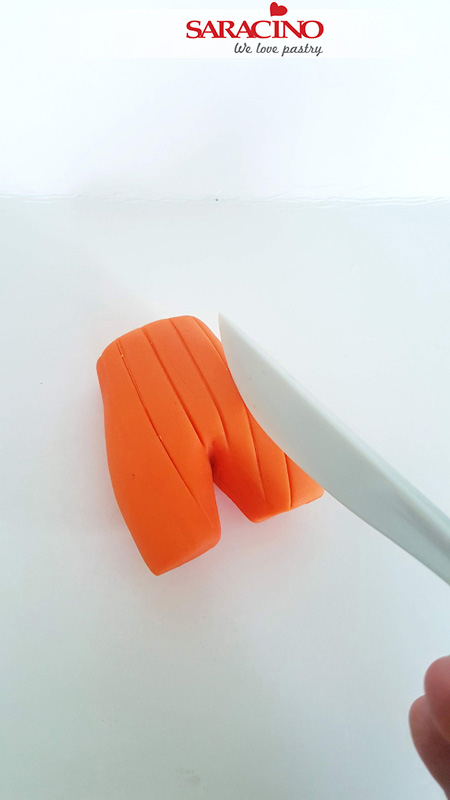
Step 4
For the cheque pattern use your plastic knife and press long vertical lines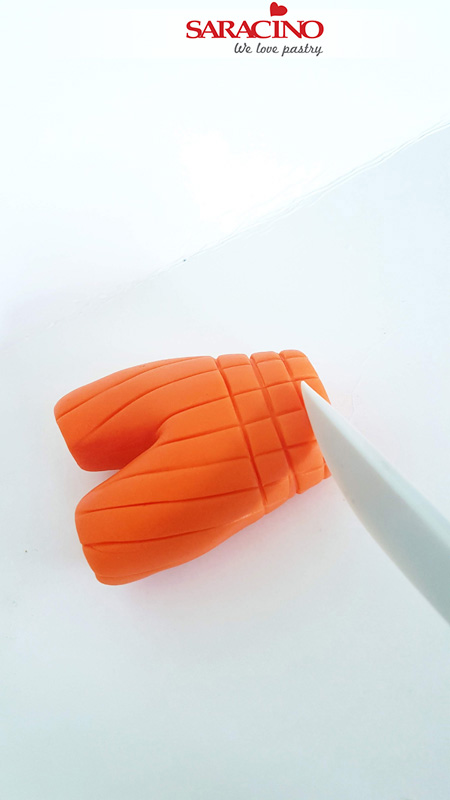
Step 5
Now using the same tool make similar lines in the opposite direction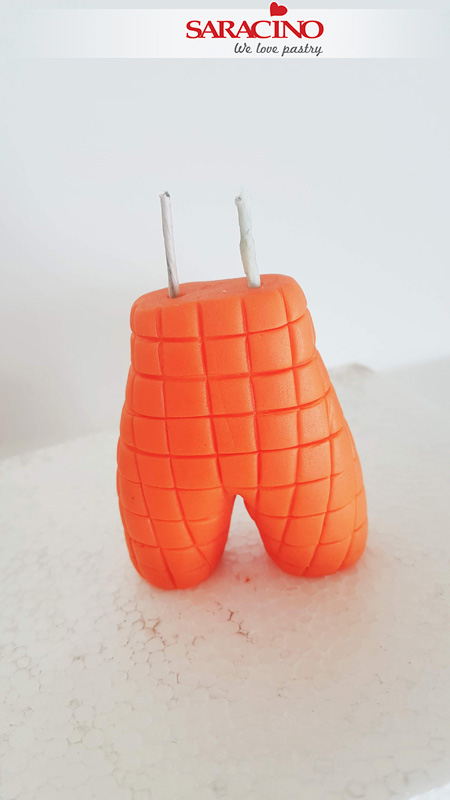
Step 6
Cut two small lengths of your 16g flower wire. Insert one into each leg.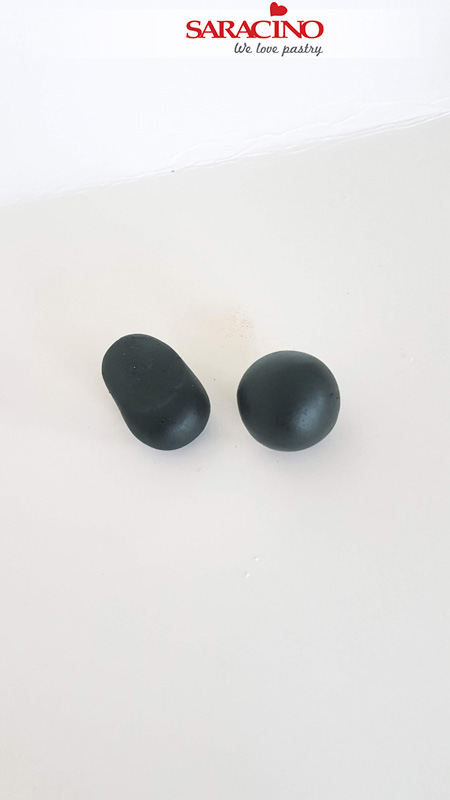
Step 7
For the feet roll 2 small balls of black modelling paste.
Step 8
Using finger pressure form them to feet shape
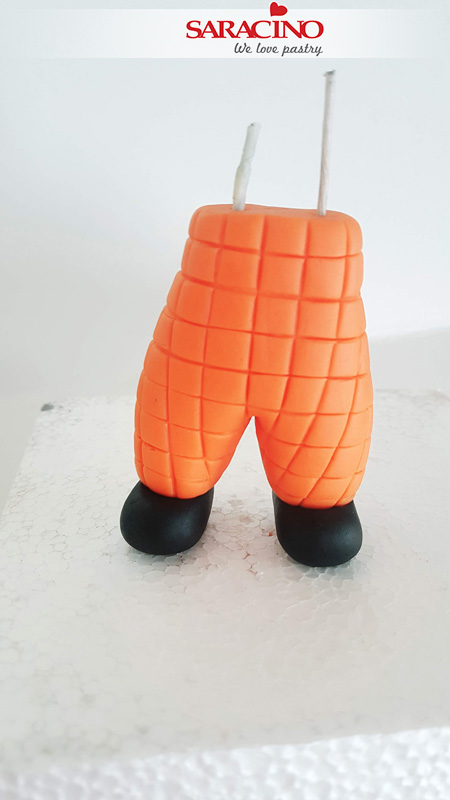
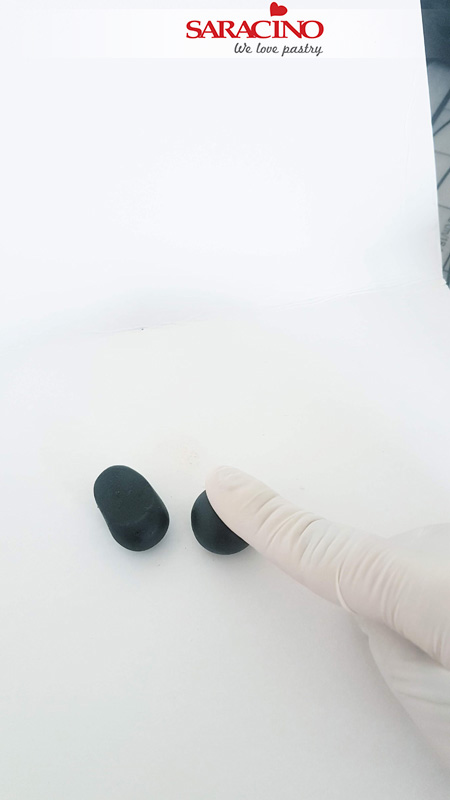
Step 9
Attach them with some water to the bottom part of the legs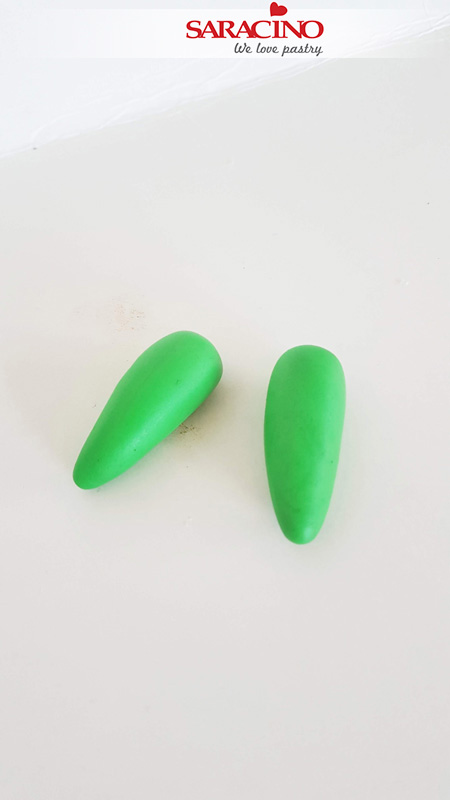
Step 10
Roll 2 cylinder shapes from your green modelling paste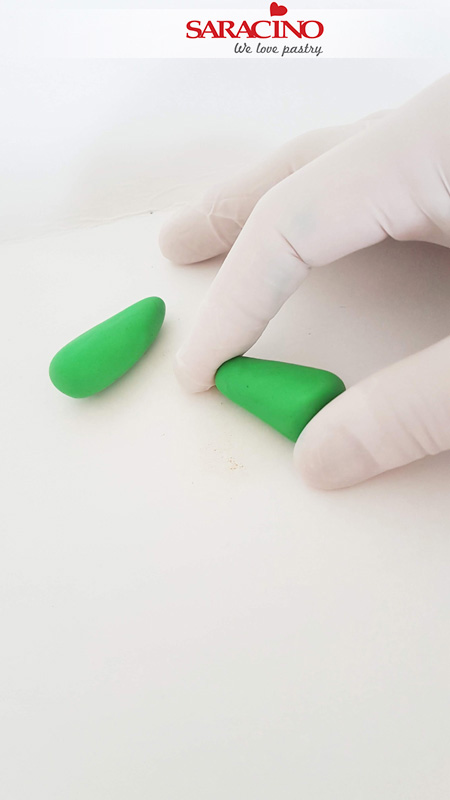
Step 11
Squeeze them gently on both sides with your fingers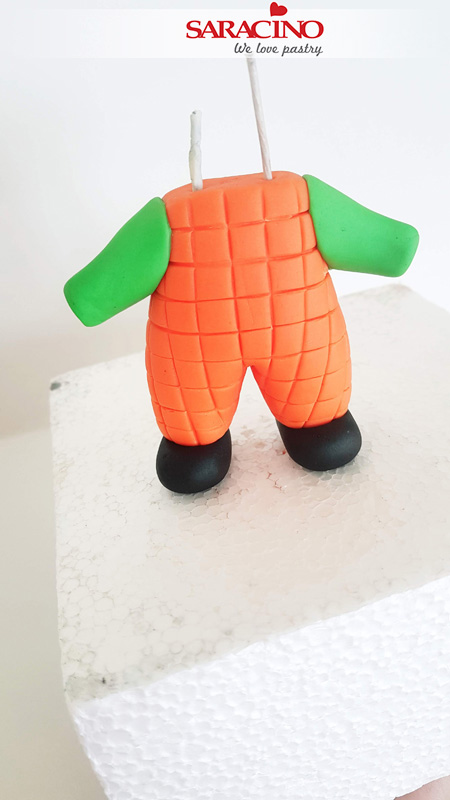
Step 12
Attach the arms onto the shoulders. Use a little water as a glue if required.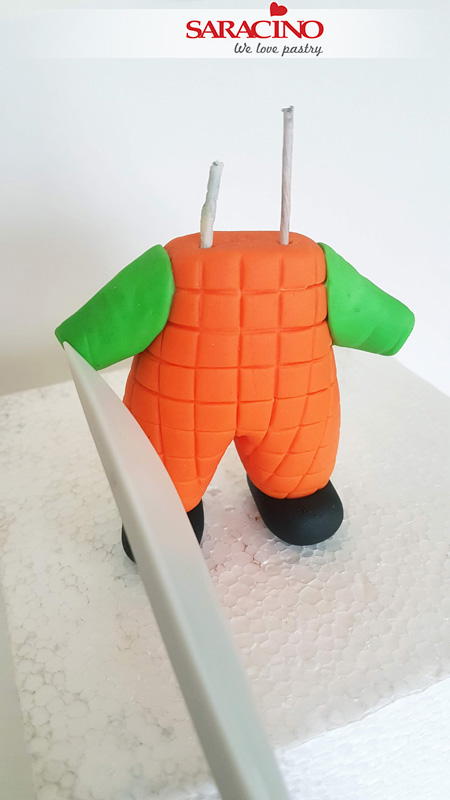
Step 13
Create some creases on the sleeves with a plastic knife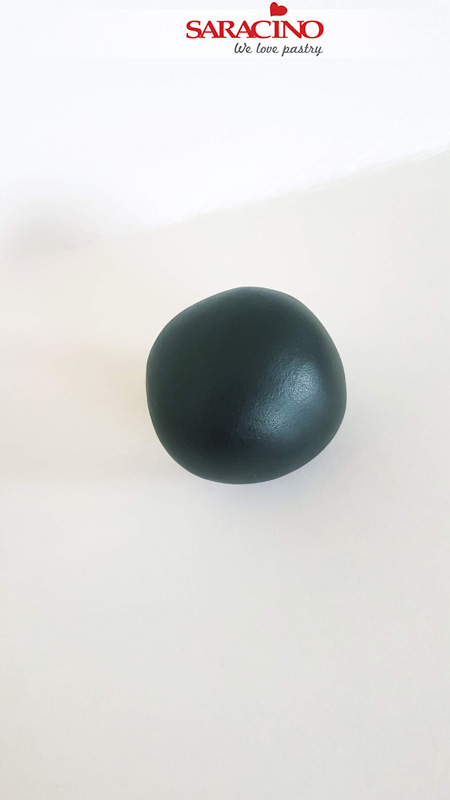
Step 14
For the head make a large ball out of black modelling paste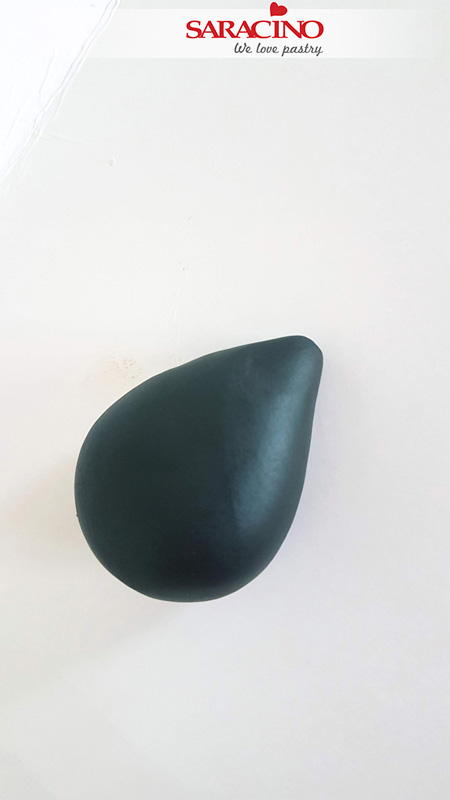
Step 15
Using your fingers roll one end narrower to shape the ball into a teardrop.
Step 16
With your large ball tool press the two eye sockets.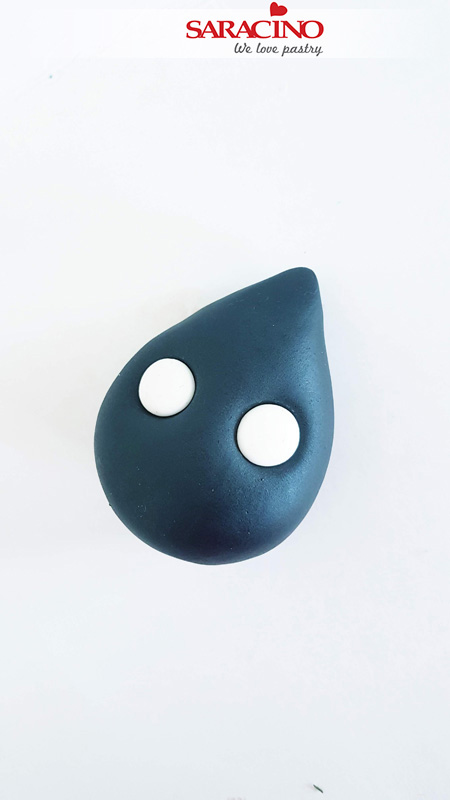
Step 17
Roll out two small balls of your white paste. Place a ball into each eye socket and press down with your ball tool to create a circular white area of the eye.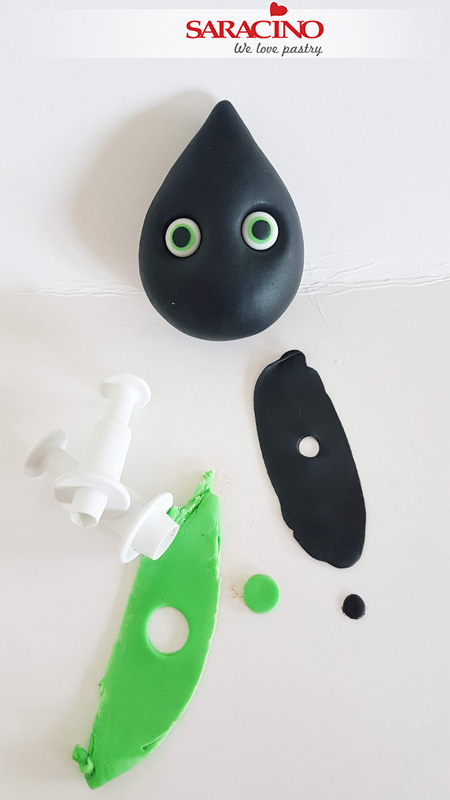
Step 18
Roll out thinly some of your green and black paste. Use small and medium circle cutters to cut out the circles needed for the iris and the pupil. Using a small amount of water fix the circles to create the eyes.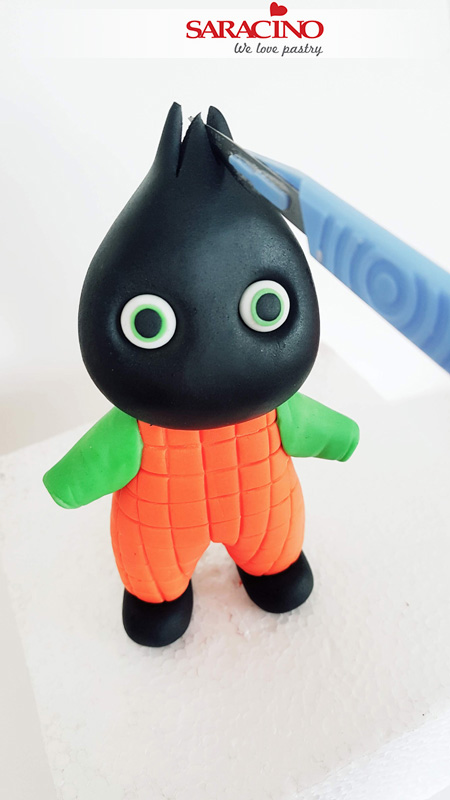
Step 19
Using your scalpel make 2 cuts on the top of the head to create hair.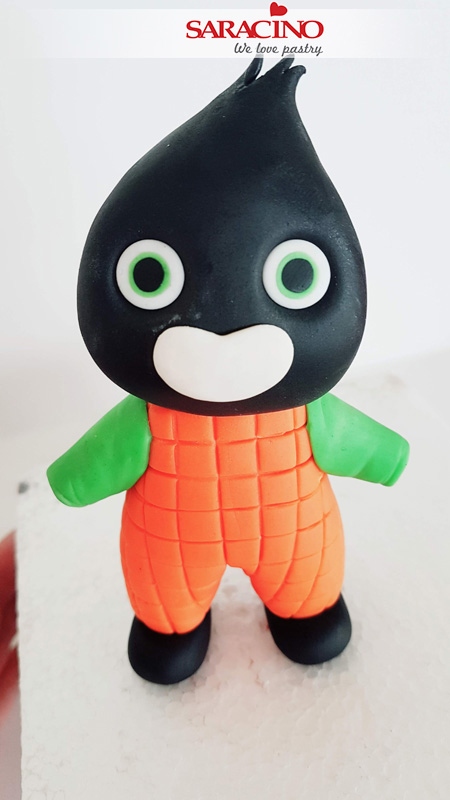
Step 20
For the mouth attach a small round heart shape using the skin tone modelling paste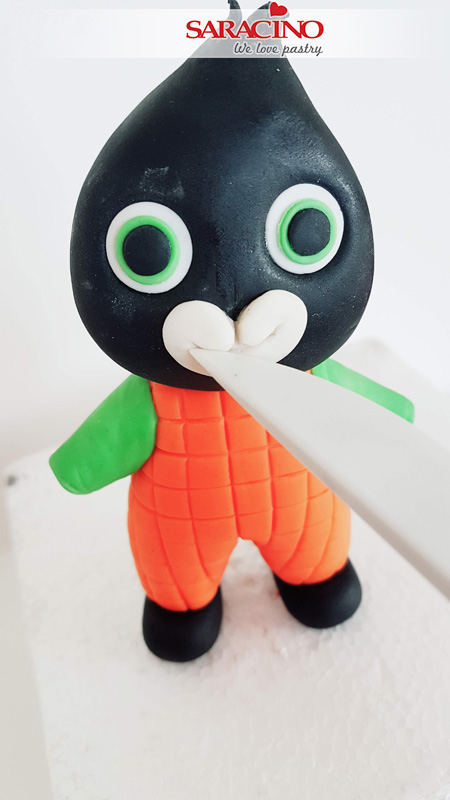
Step 21
Make one small vertical line on the top of the heart shape and one curved in the centre to form a smile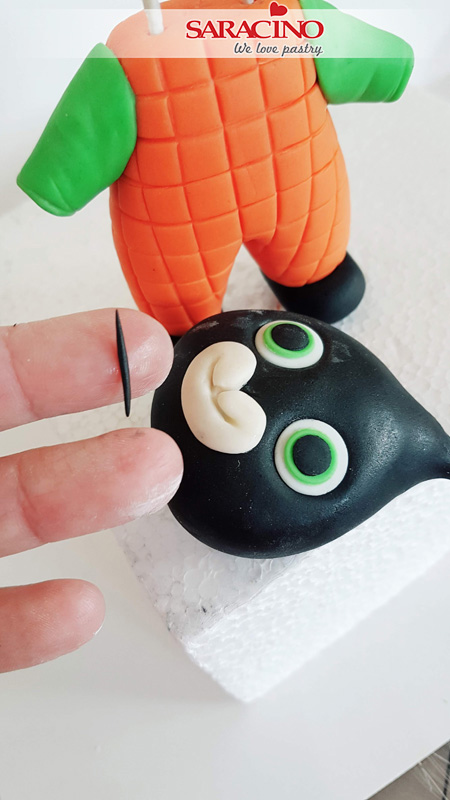
Step 22
Roll a small amount of the black paste very thinly. Place into the lines you have made.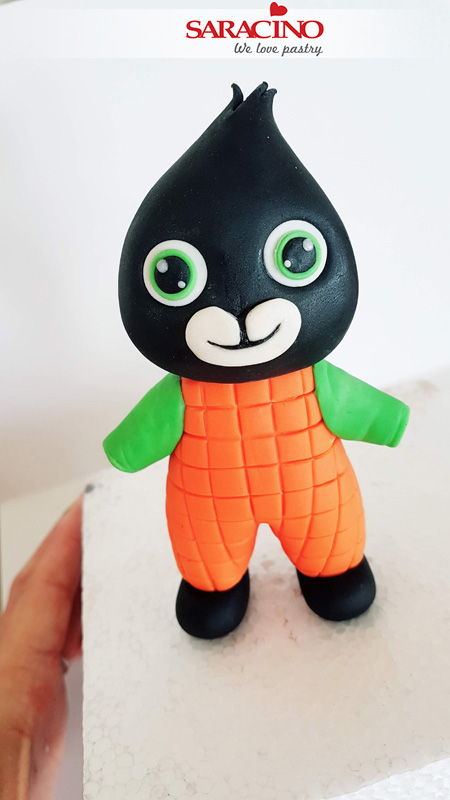
Step 23
Use a sharp modelling tool to blend the black to form the mouth. Add 2 tiny white dots to each eye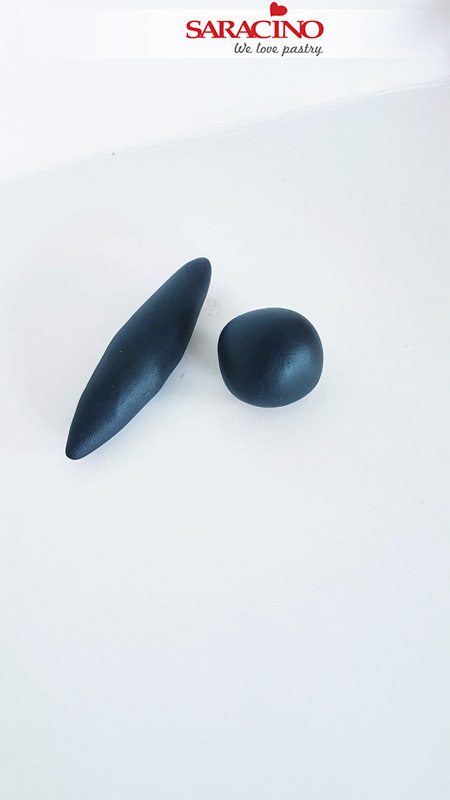
Step 24
For the ears roll two small balls of black paste. Roll each end of them both gently with your fingers into a pointed shape.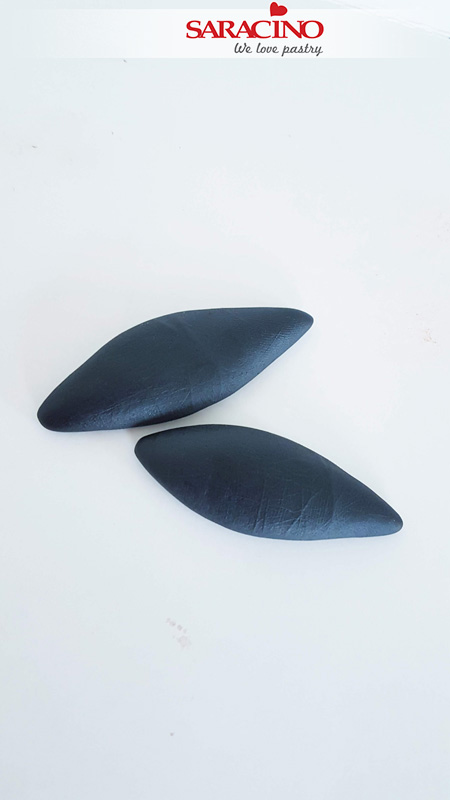
Step 25
Use finger pressure to flatten them.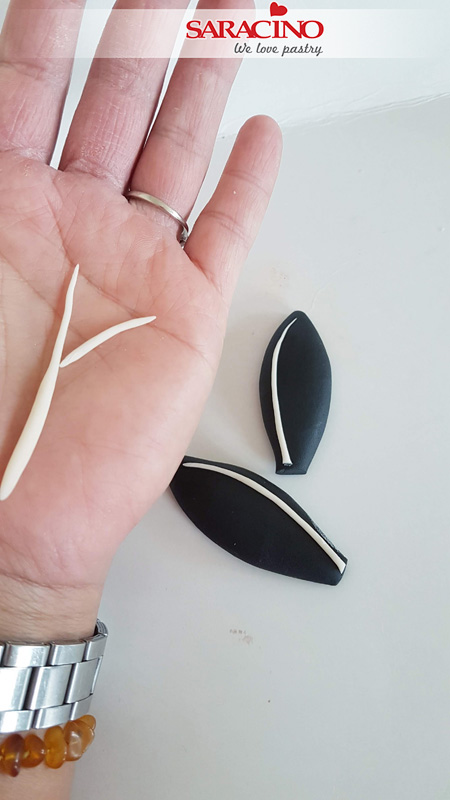
Step 26
Cut a small piece off the end of each ear to form a flat end. Now to create the detail on the ears. Using your white paste roll two long and two small threads and attach them on the ears in the pattern shown. Finger pressure should make them stick to the ear but if required use a tiny amount of water.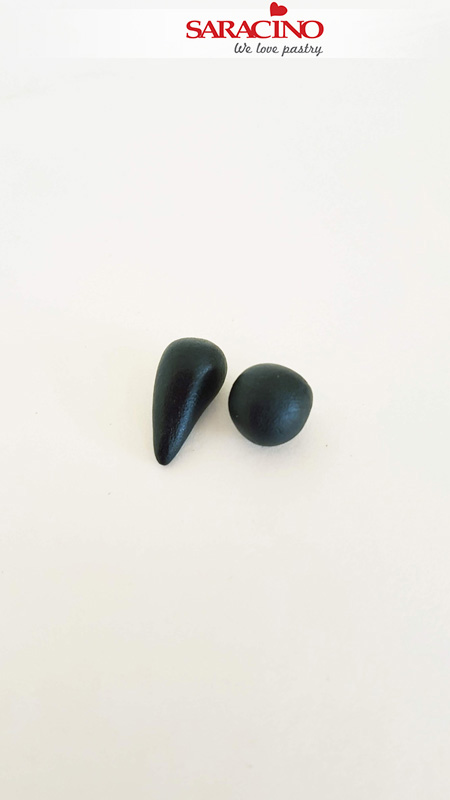
Step 27
Now for the hands roll two small balls from your black paste. Use finger pressure and roll them into teardrop shape.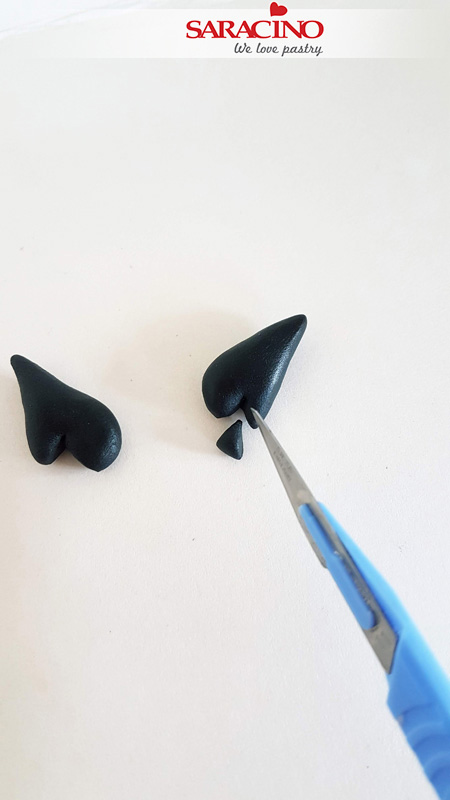
Step 28
Flatten them with your finger and cut out a small triangle on the side for each thumb.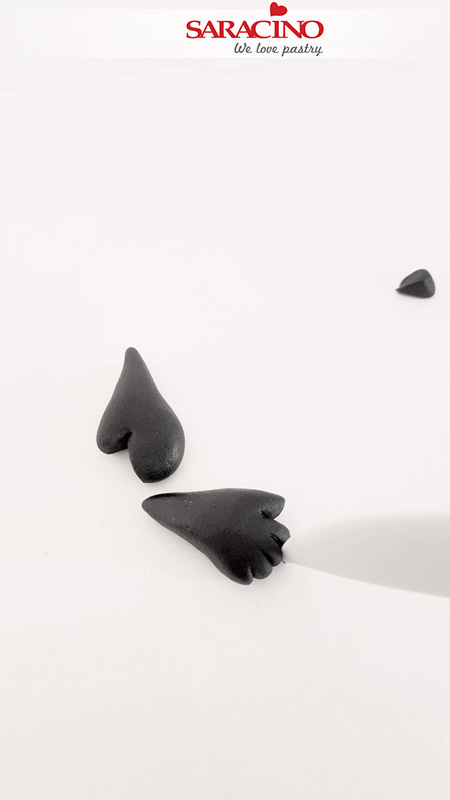
Step 29
Using your modelling tool form fingers into the end of each hand.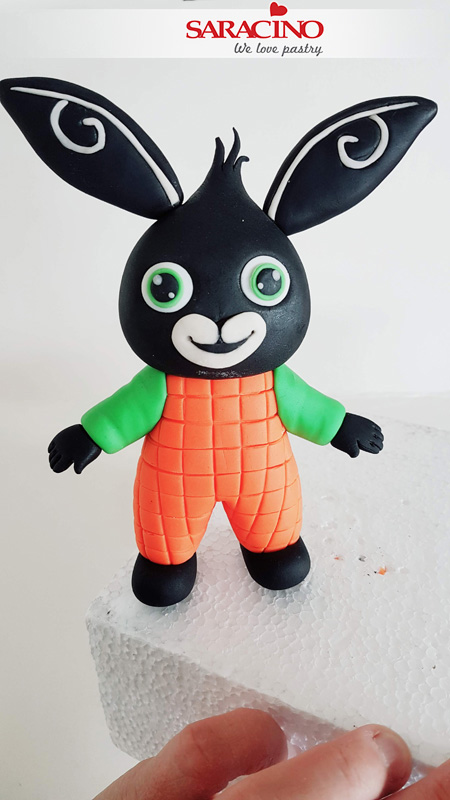
Step 30
Attach the hands to each arm. Use a little water if required.
Step 31
Using a soft brush and you brown powder colour dust the lines of the trousers.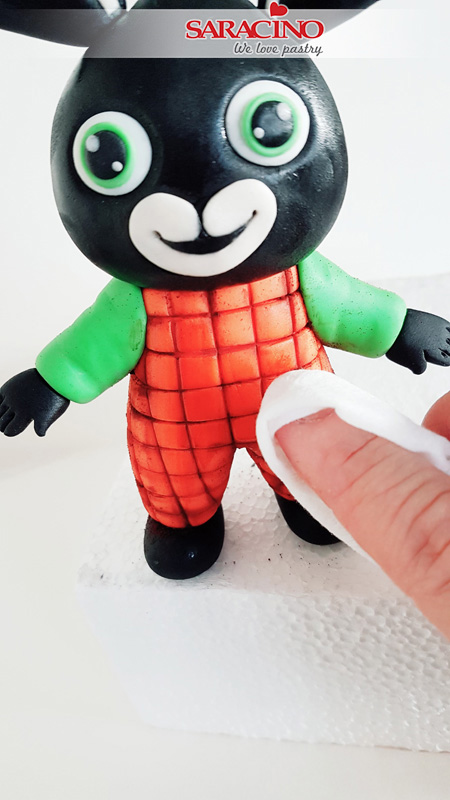
Step 32
Use your baby wipe clean the excess powder.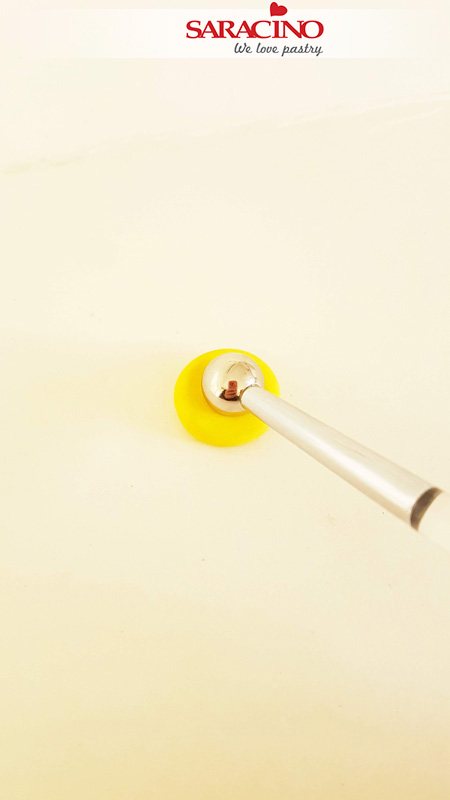
Step 33
Now for the button. Roll a small ball out of the yellow paste. Flatten it in the centre with a large ball tool.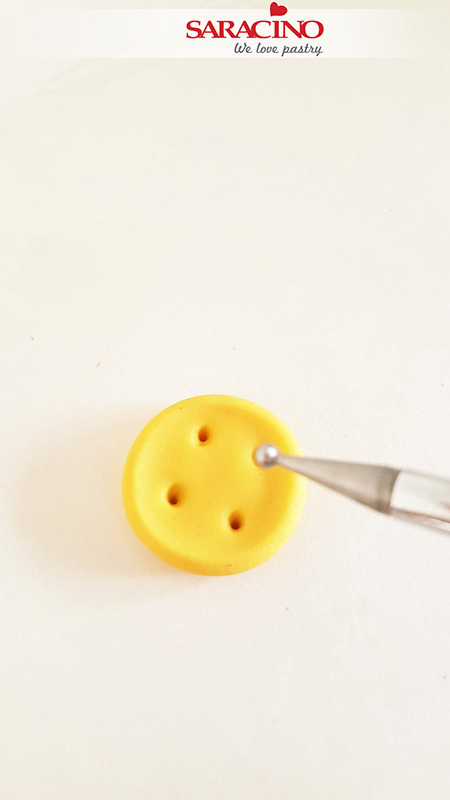
Step 34
With your small ball tool make 4 little indents to create the button look.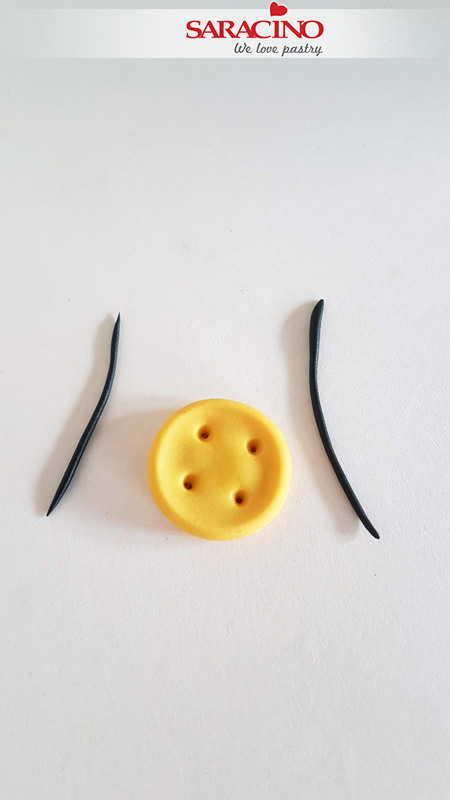
Step 35
Roll your black paste very thinly for the cotton thread. Cut each to length required and insert into the indents made into the button to create the sewing effect.