

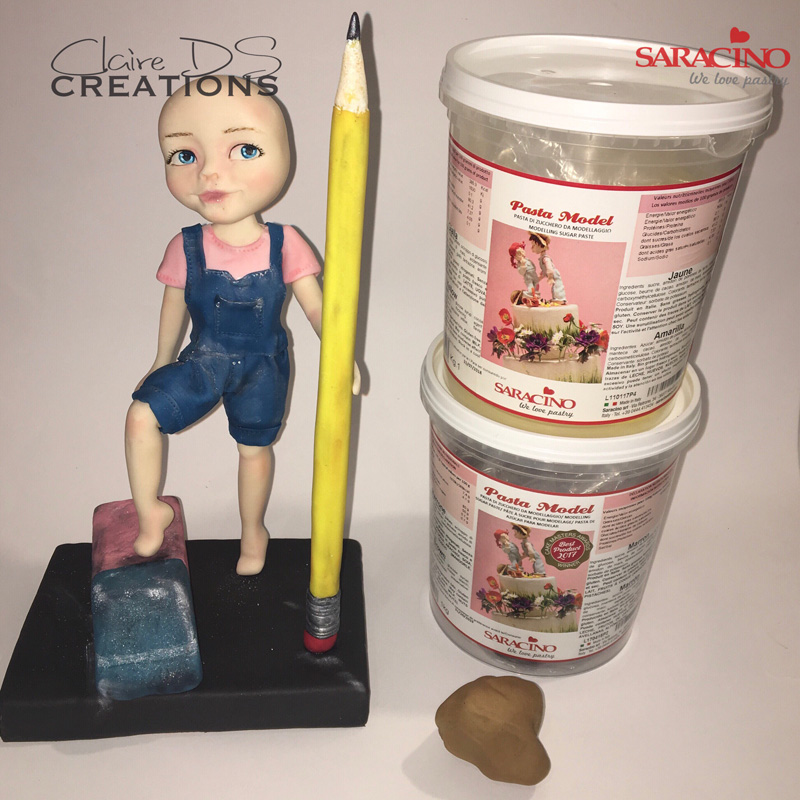
You will need:
-
50g of Light Blue pasta model
-
95g of Pink pasta model
-
90g of Yellow pasta model
-
5g of Red pasta model
-
2g of Black pasta model
-
2g of White pasta model
-
55g of dark blue pasta model
-
15g of brown pasta model
-
Black powder colouring
-
White powder colouring
-
Dark blue powder colouring
-
Pink powder colouring
-
Skin powder colouring
-
Brown powder colouring
-
Silver powder dust
-
White colouring gel
-
Cake gel
-
Liquid shiny
-
2 skewers
- 1 flower wire 20 gauge
- 1 flower wire 18 gauge
- 1 polystyrene ball 4cm in diameter
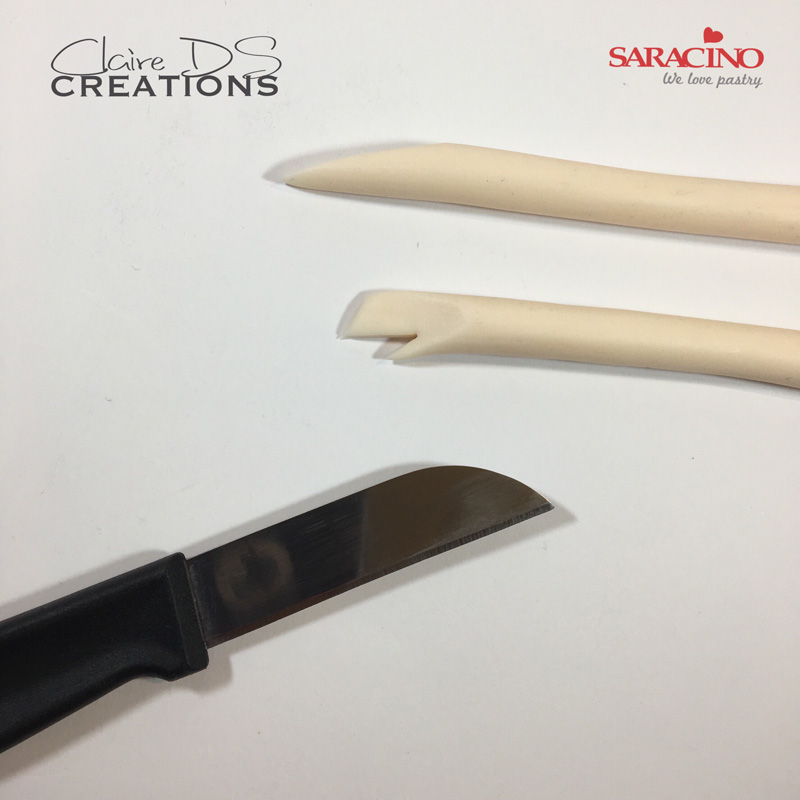
- 1 Dresden tool
- 1 toothbrush
- Paint brushes
- Ball tools
- Knife
- Smoother
- Clear alcohol
- Rolling pin
- Stitching tool
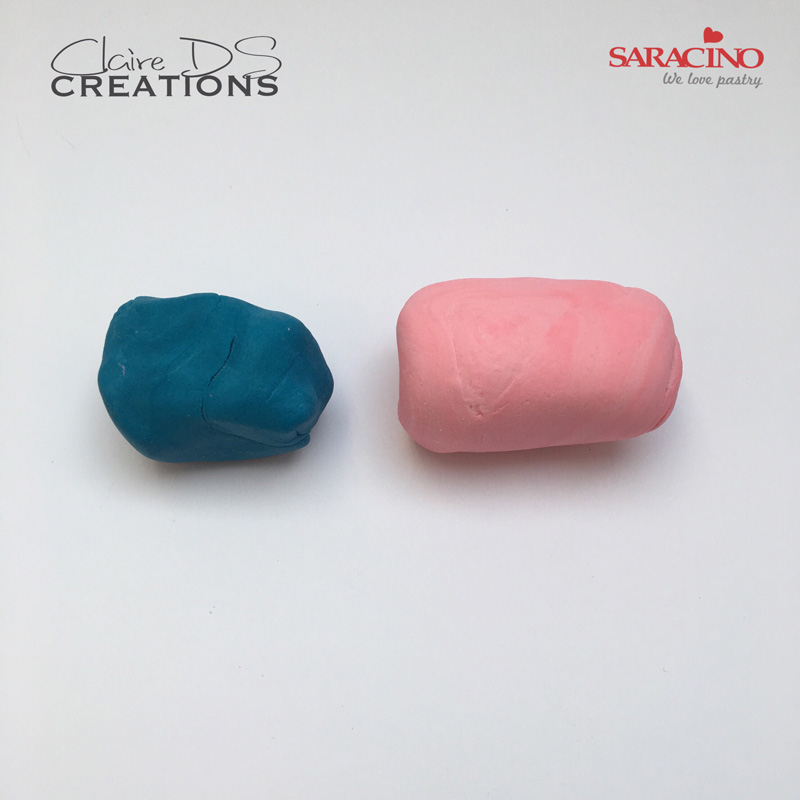
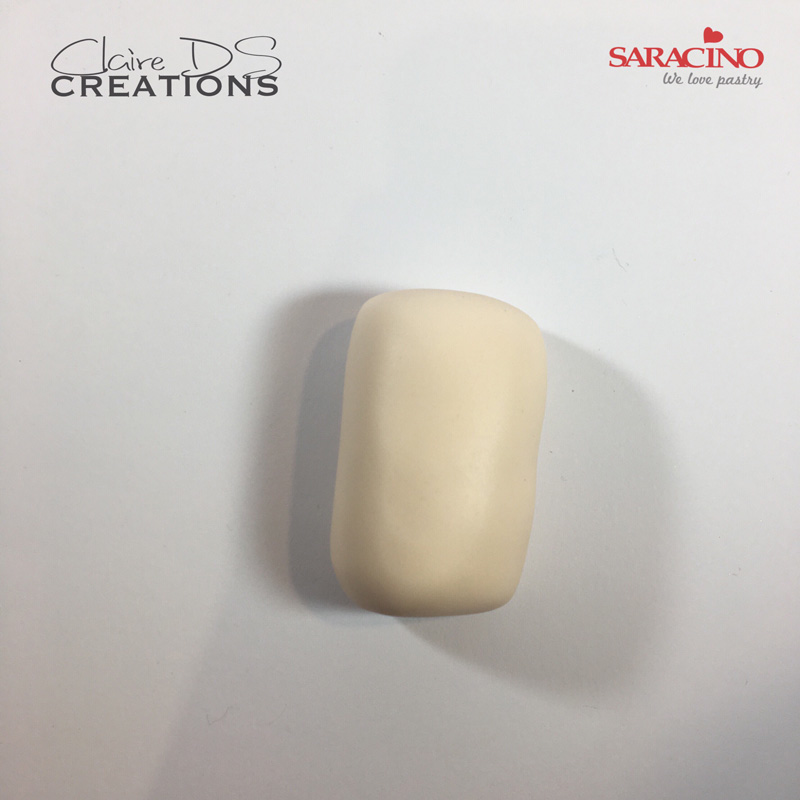
Step 1
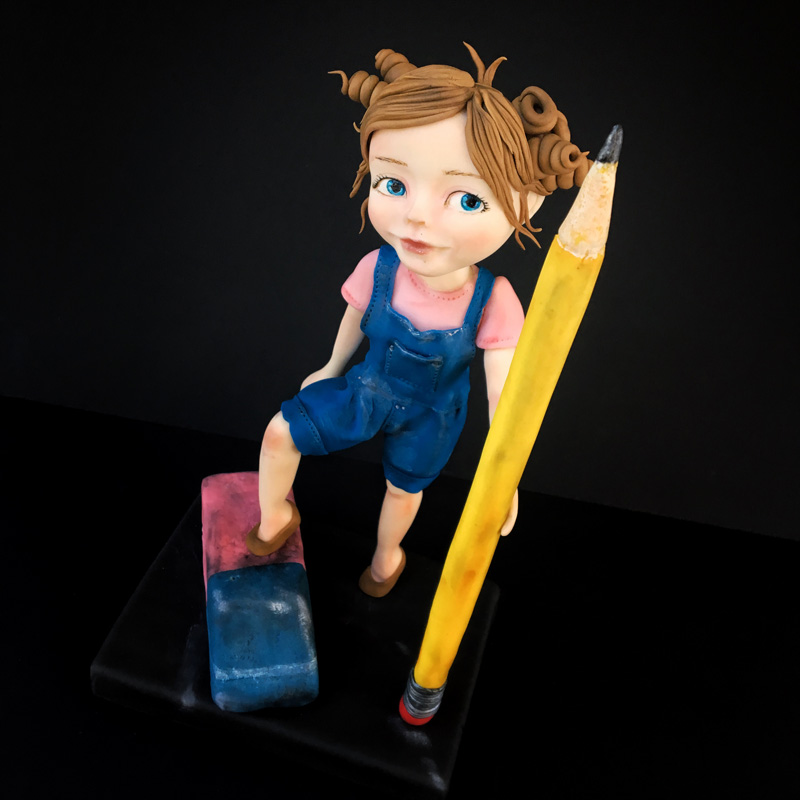
Prepare 50g of light blue modelling paste and 75g of pink modelling paste
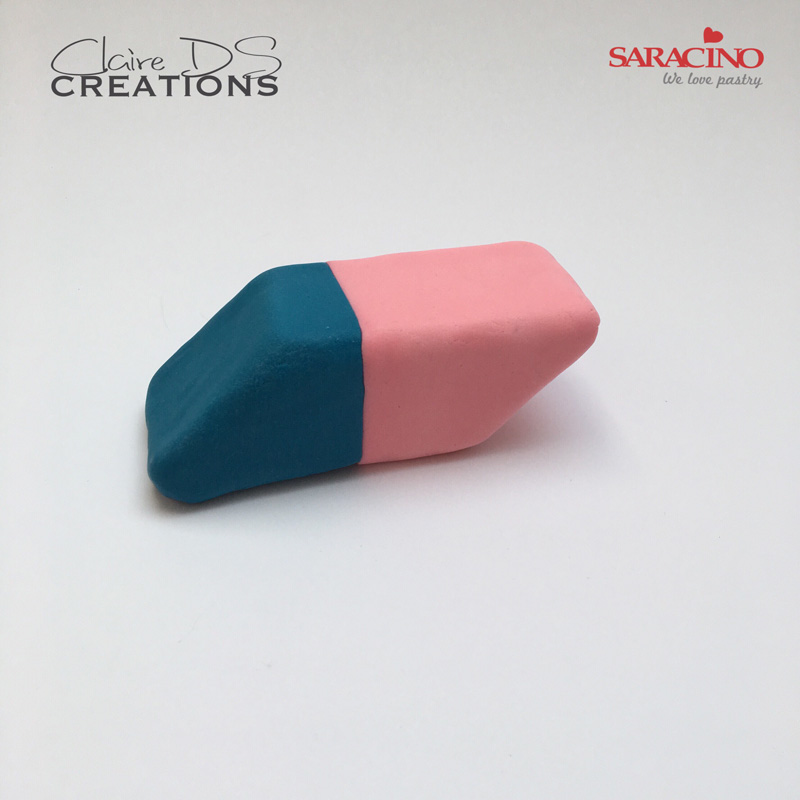
Step 2
Attach 2 colours together and make the shape of an eraser
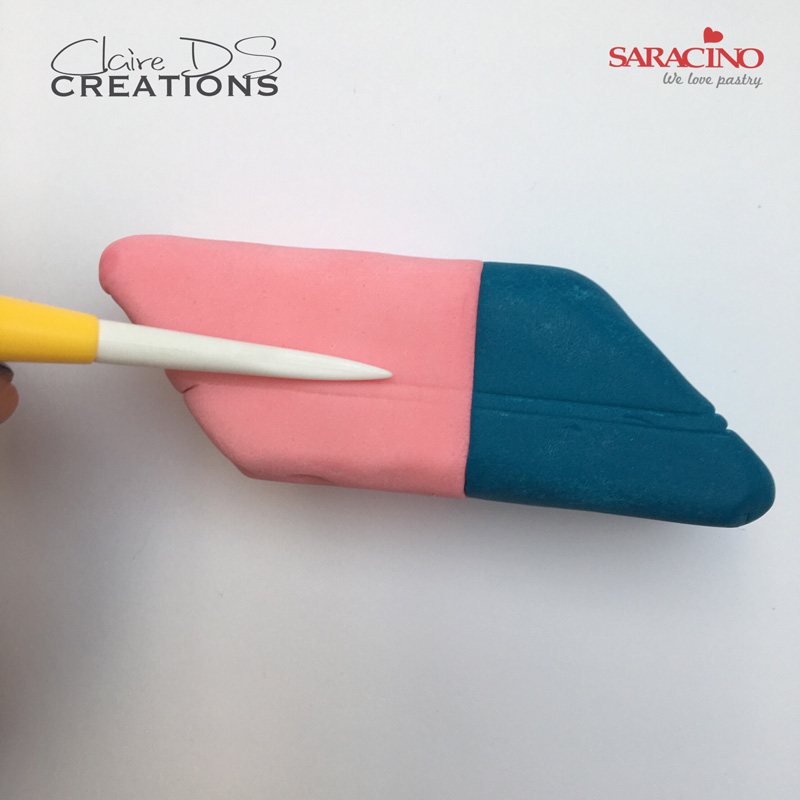
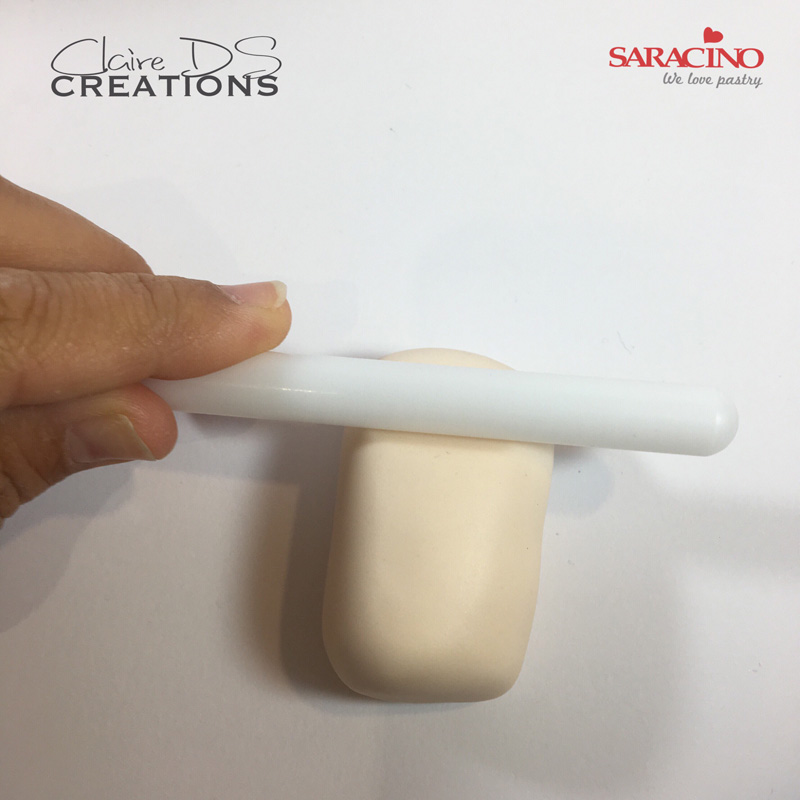
Step 3
Using Dresden tool, make two horizontal lines, then paint the gap between with the white gel colour

Step 4
Apply black and white powder with a painting brush
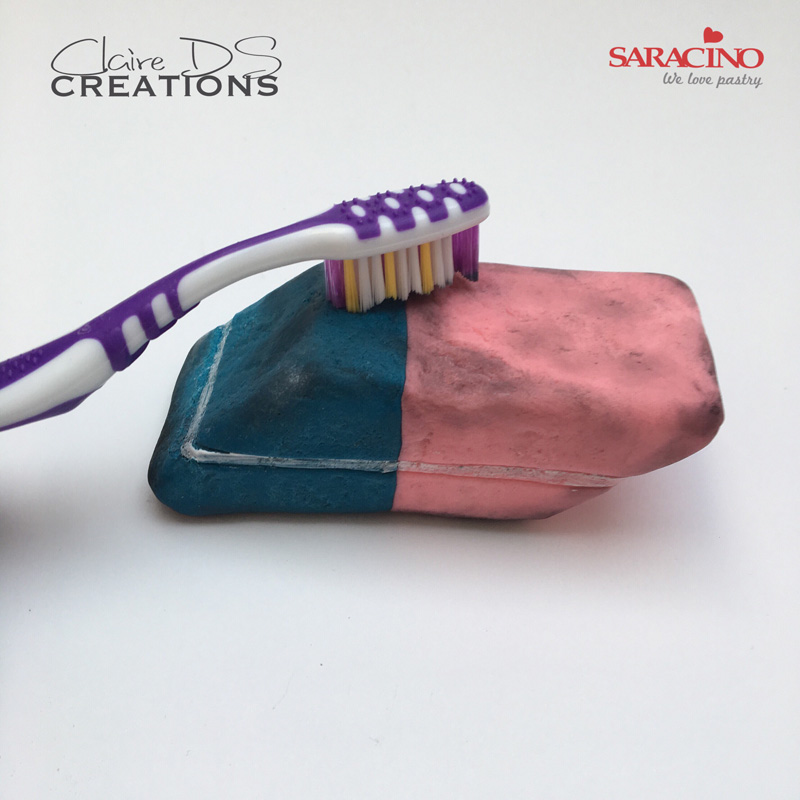
Step 5
Using toothbrush, pat on the eraser to give texture
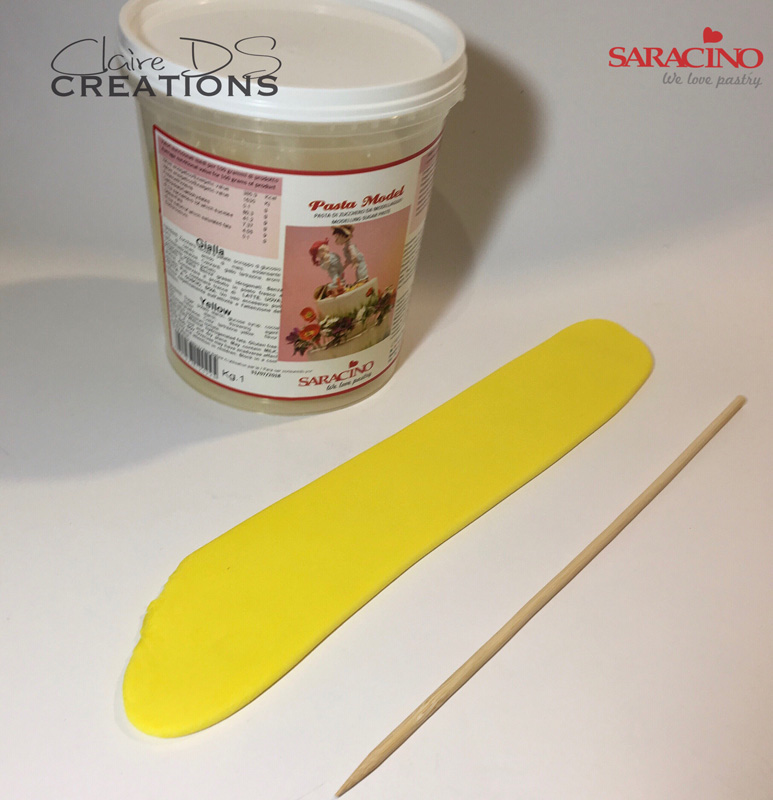
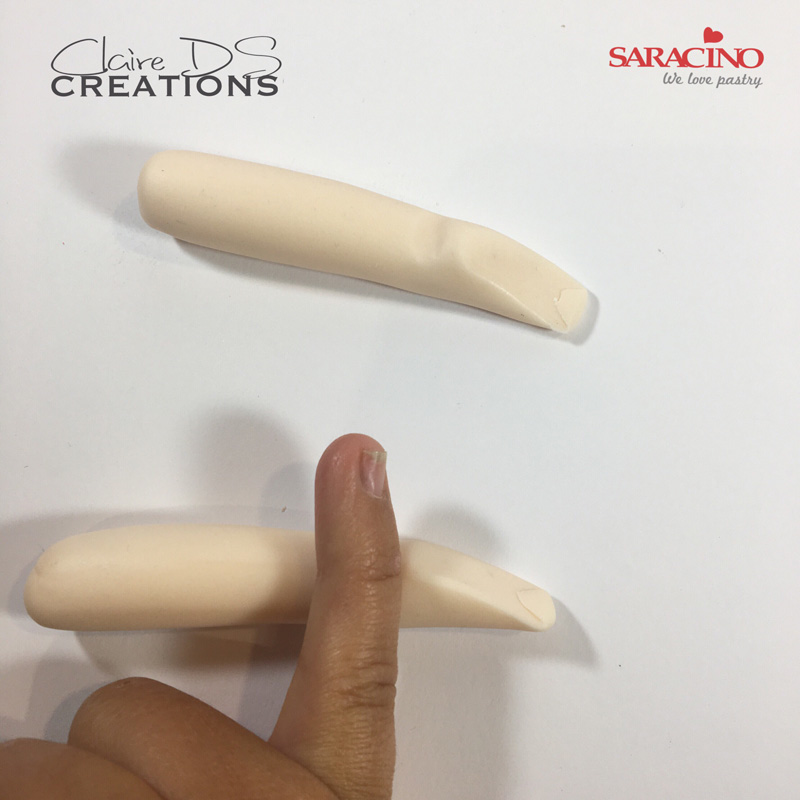
Step 6
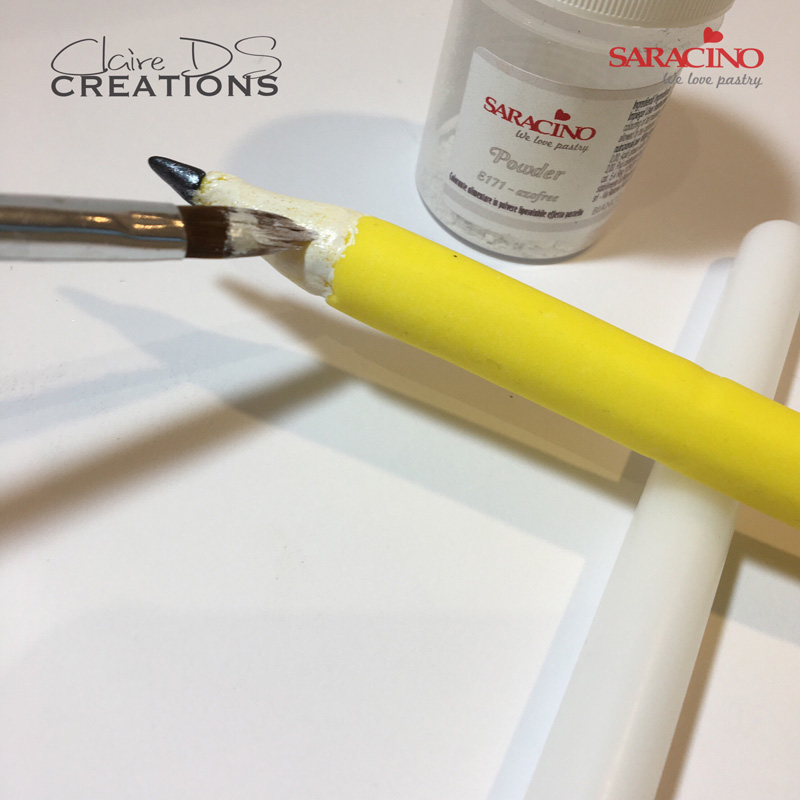
Roll 75g of yellow modelling paste and wrap a skewer to create a giant pencil.
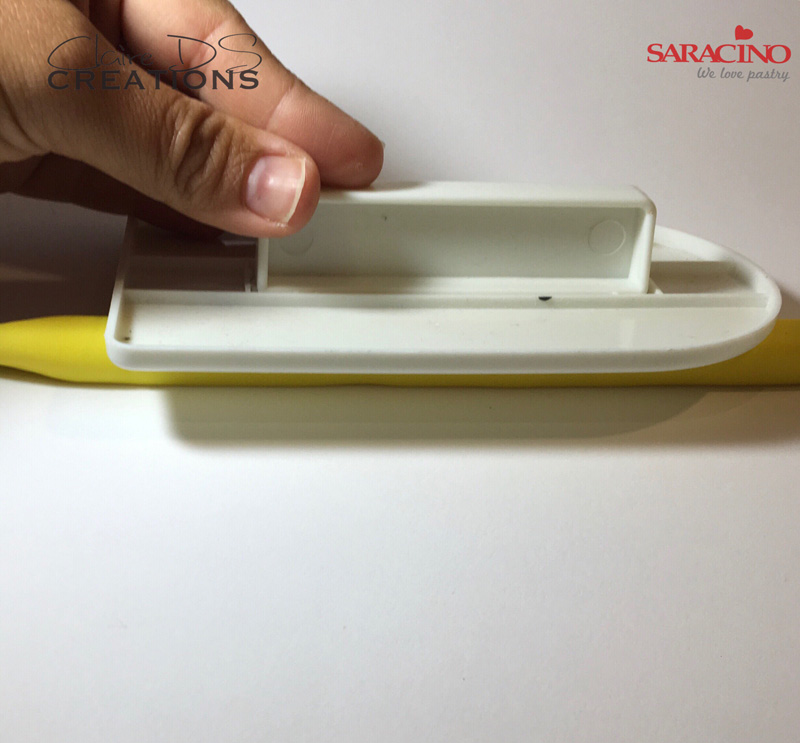
Step 7
With a smoother, flatten the angles to give the hexagonal sides to the pencil and sharpen one end.
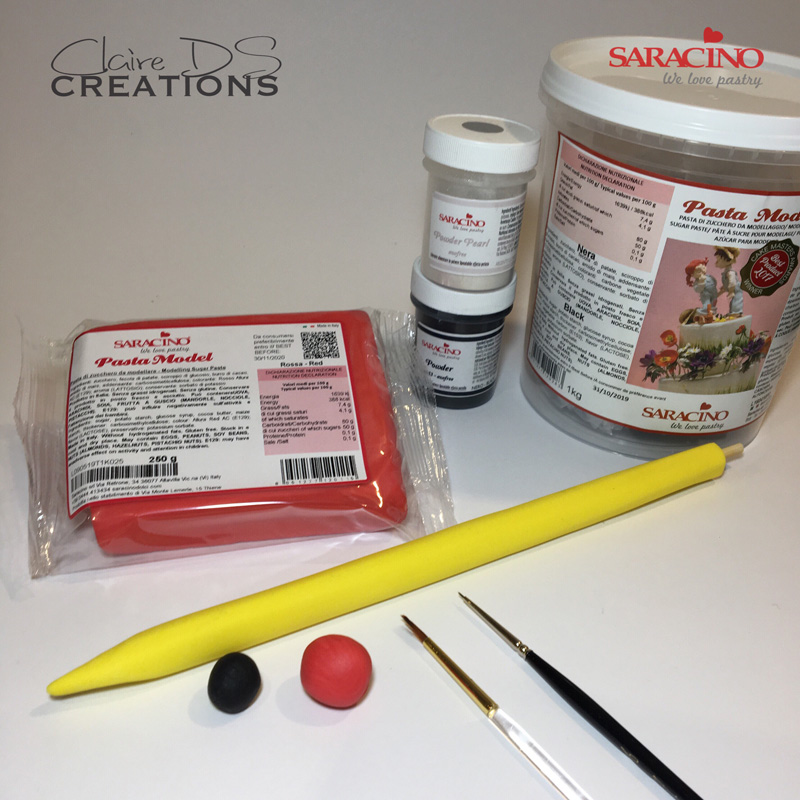
Step 8
You will need these shown in the picture to finish your pencil
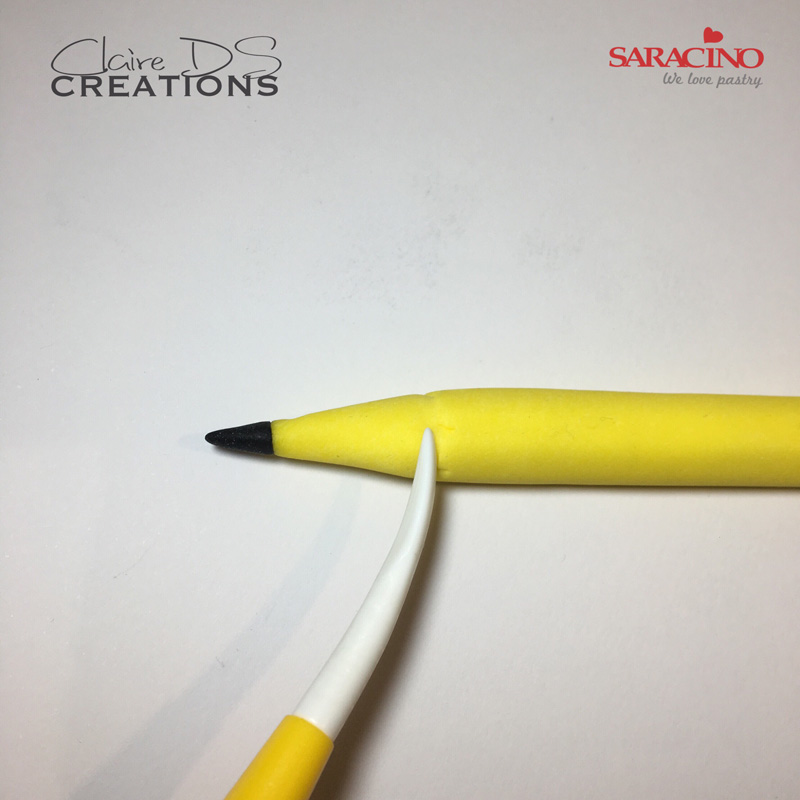
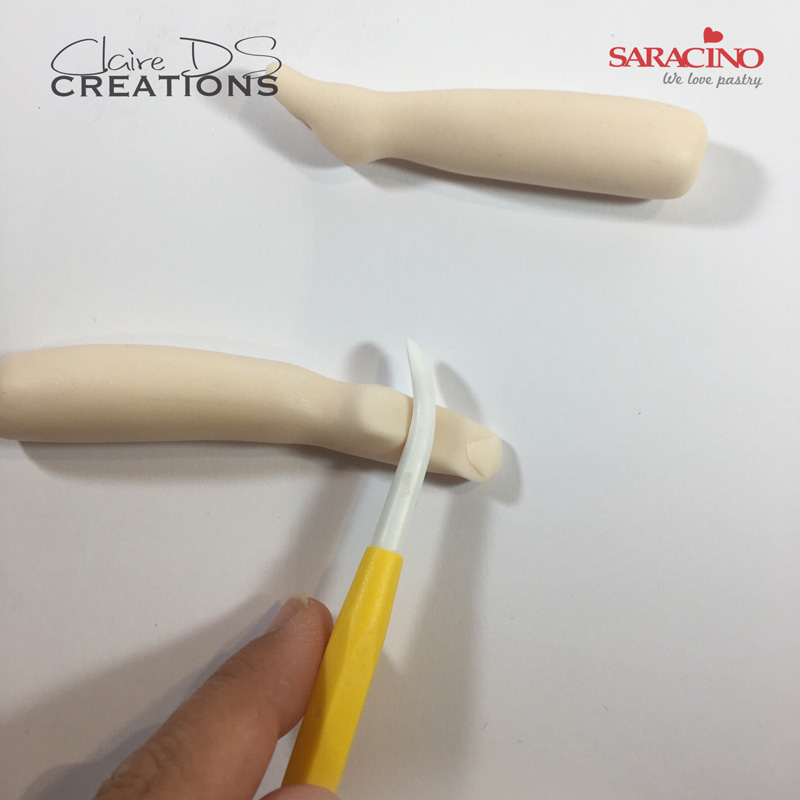
Step 9
Using black paste, create the pointed tip and with the Dresden make a line around so it looks like a sharpened pencil
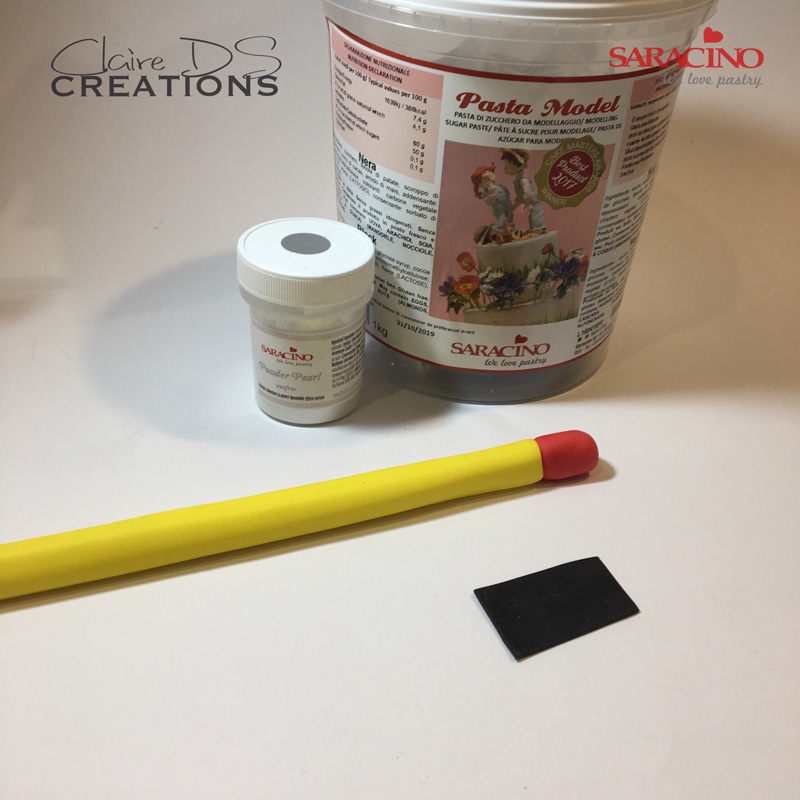
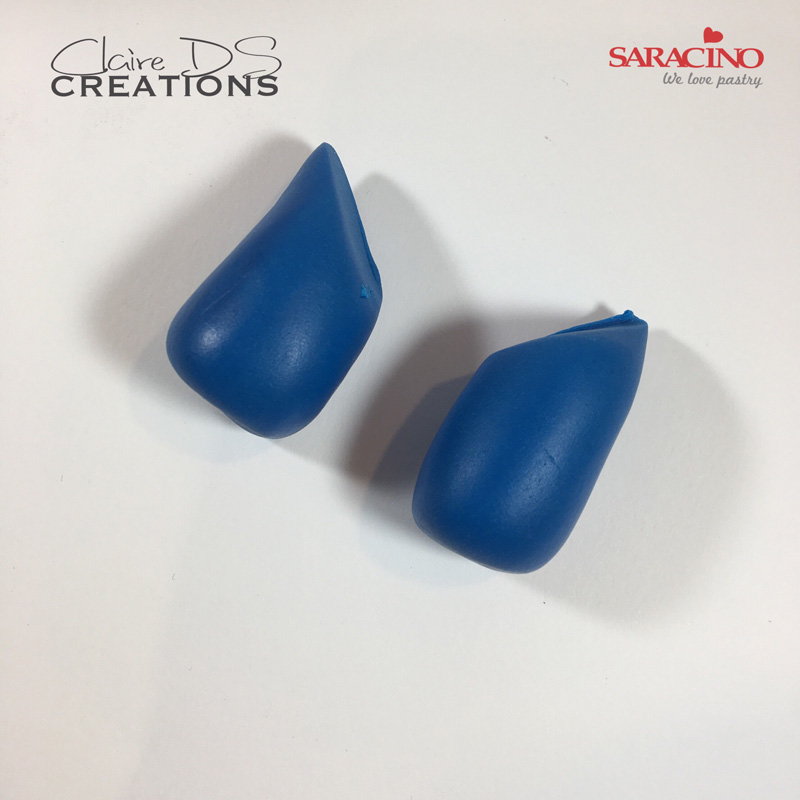
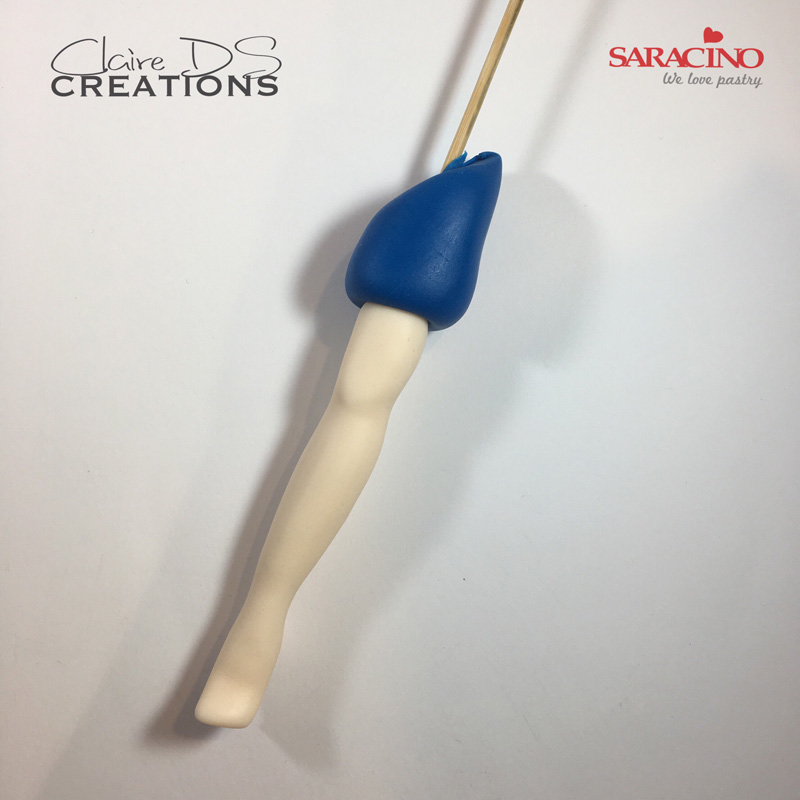
Step 10
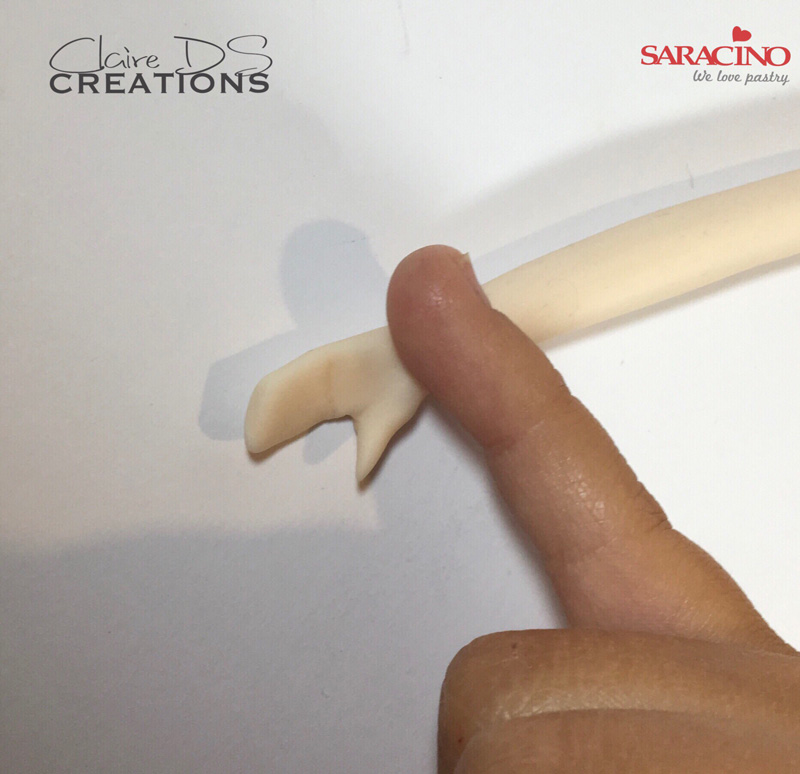
Using the red paste make the eraser and glue on to the end of the pencil. Roll 2g of black paste and surround the top of the pencil (below the eraser).
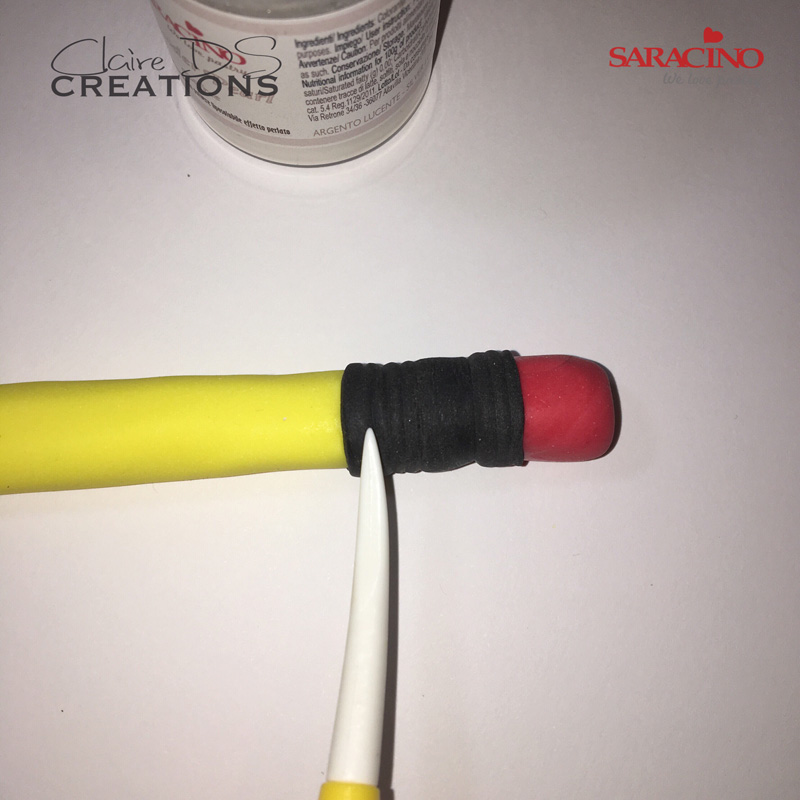
Step 11
With Dresden tool create grooves as shown
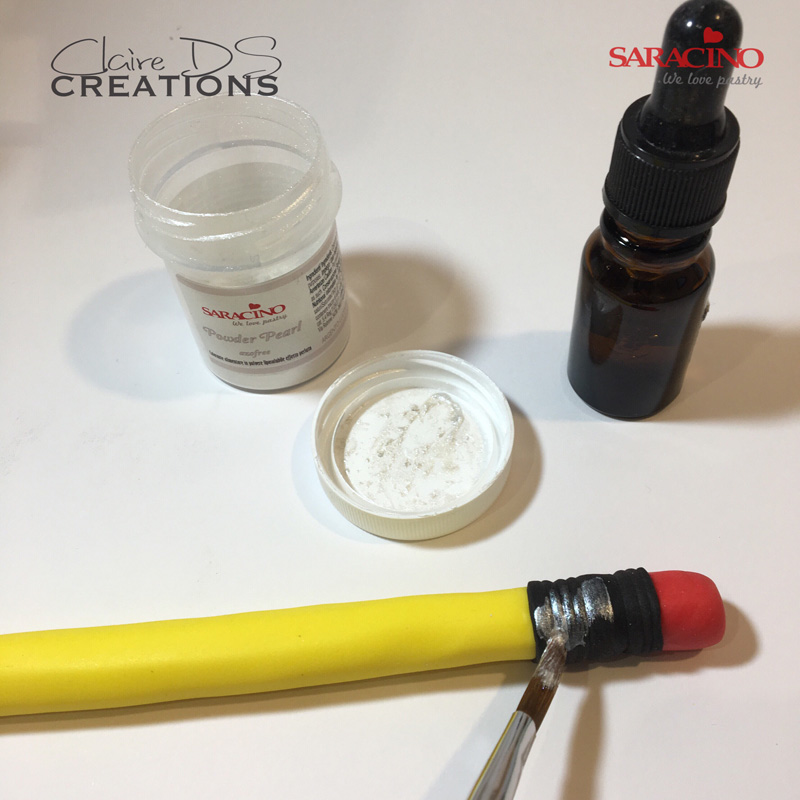
Step 12
Dilute silver powder in a small amount of clear alcohol and paint the black band.
Step 13
Dilute white powder in clear alcohol and paint the pencil between the tip and the yellow.

Step 14
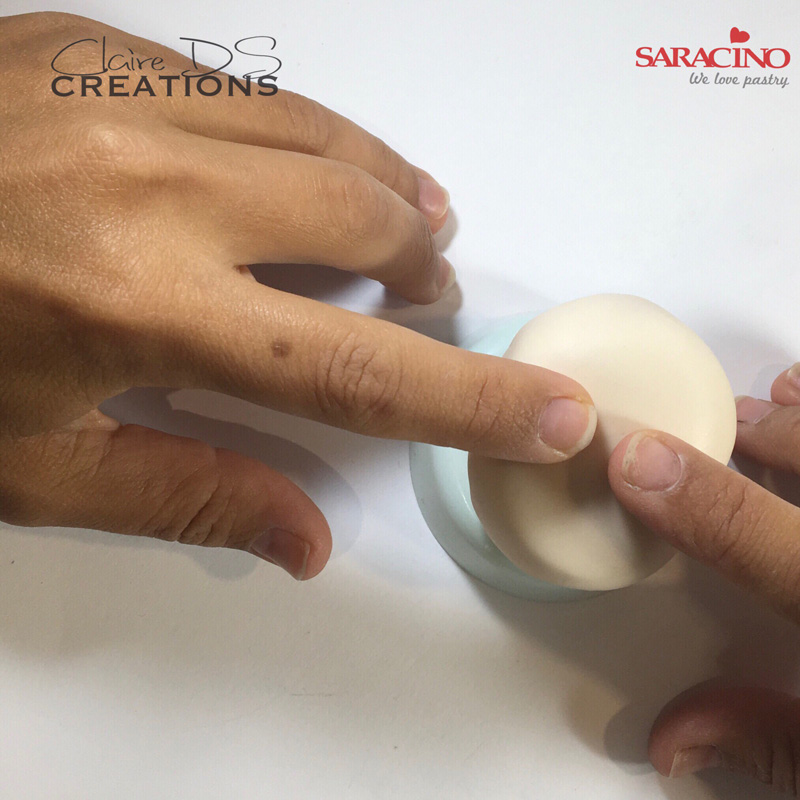
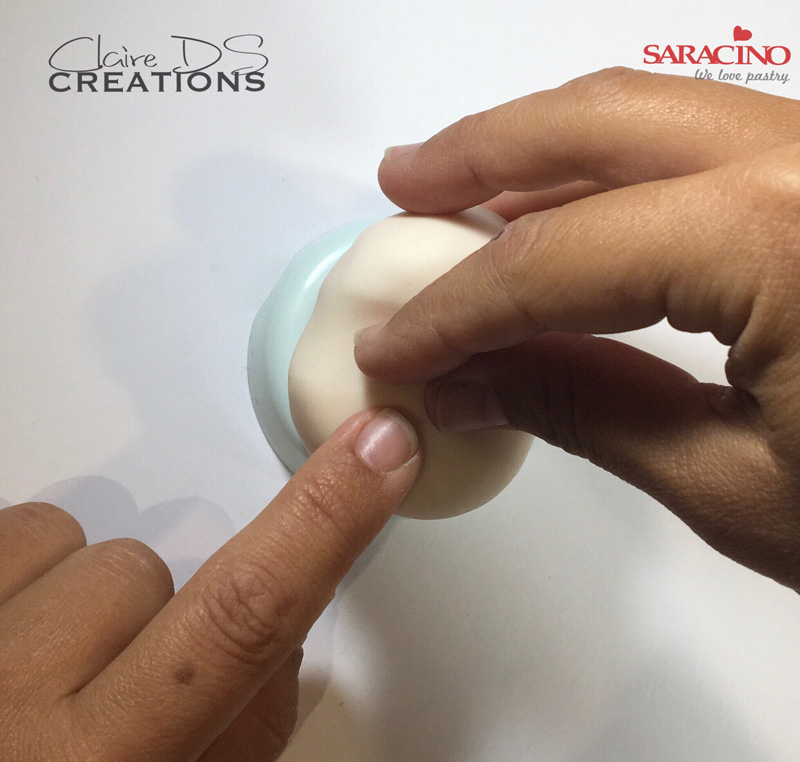
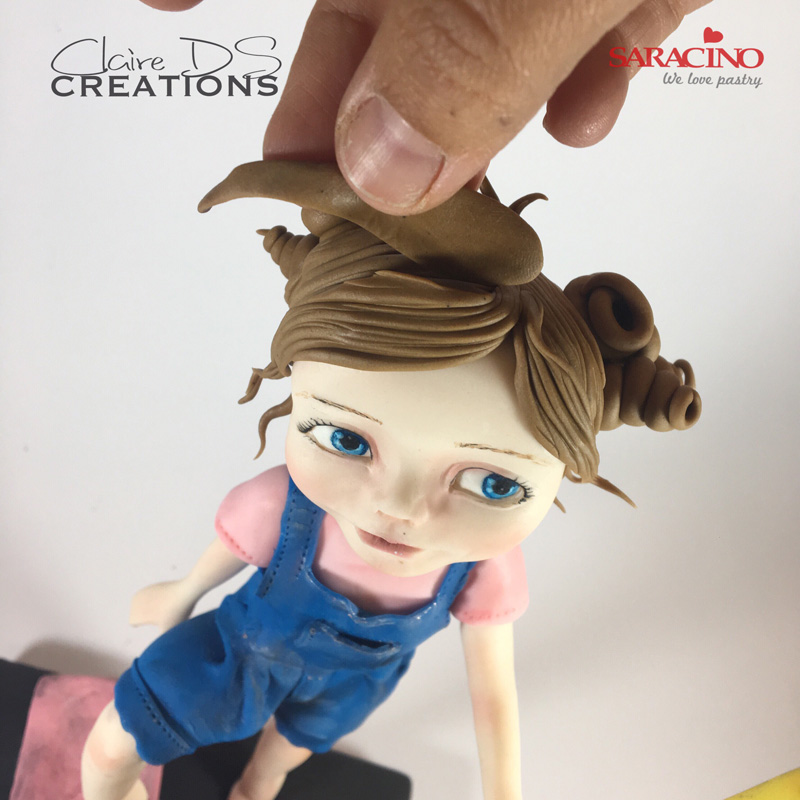
To create head take 55g of skin modelling paste and a 4cm diameter polystyrene ball. Cover the ball with the paste and smooth to blend all joints.
Step 15
Use the ends of your fingers to form the eye sockets.
Step 16
Use your fingers in a triangle shape to form the nose shape.
Step 17
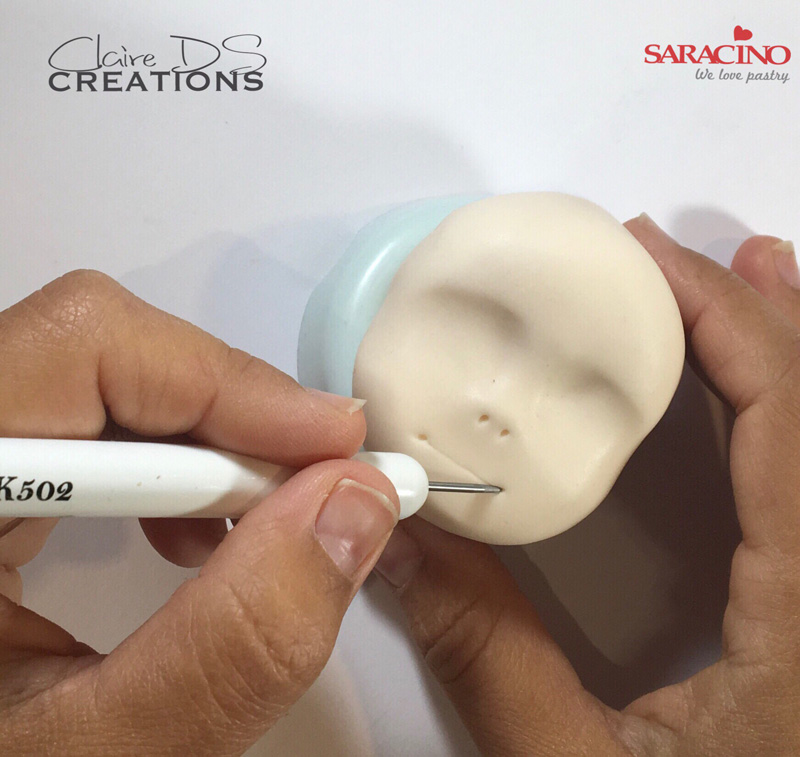
With a sharp tool, make the holes for the nostrils and mark the corners of the lips
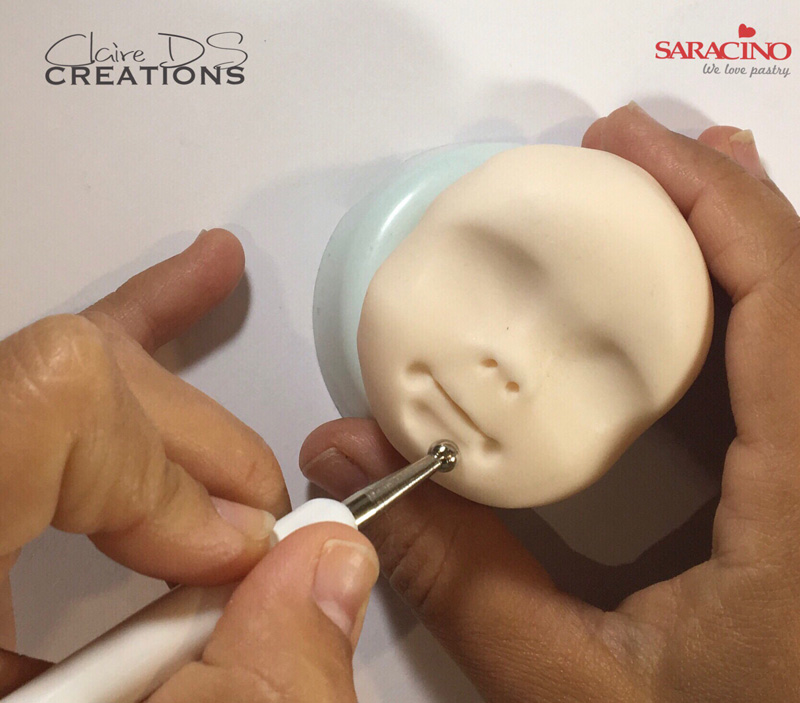
Step 18
Use a sharp tool to open the mouth. Use a small ball tool to add definition as shown.
Step 19
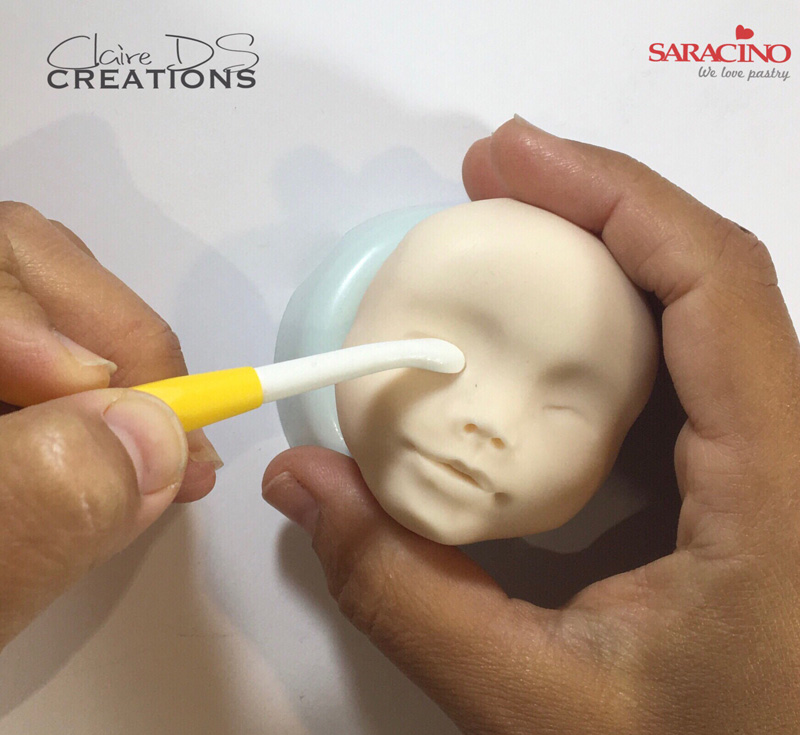
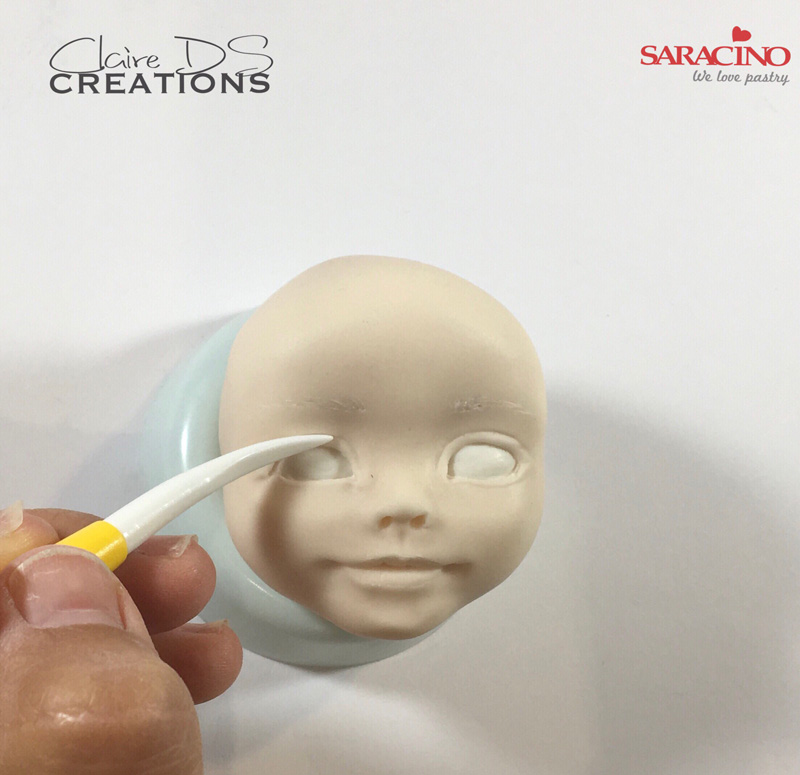
Using the wide end of the Dresden tool form the dents in the eyes as shown.
Step 20
With the small ball tool, dig and smooth to form the eyes
Step 21
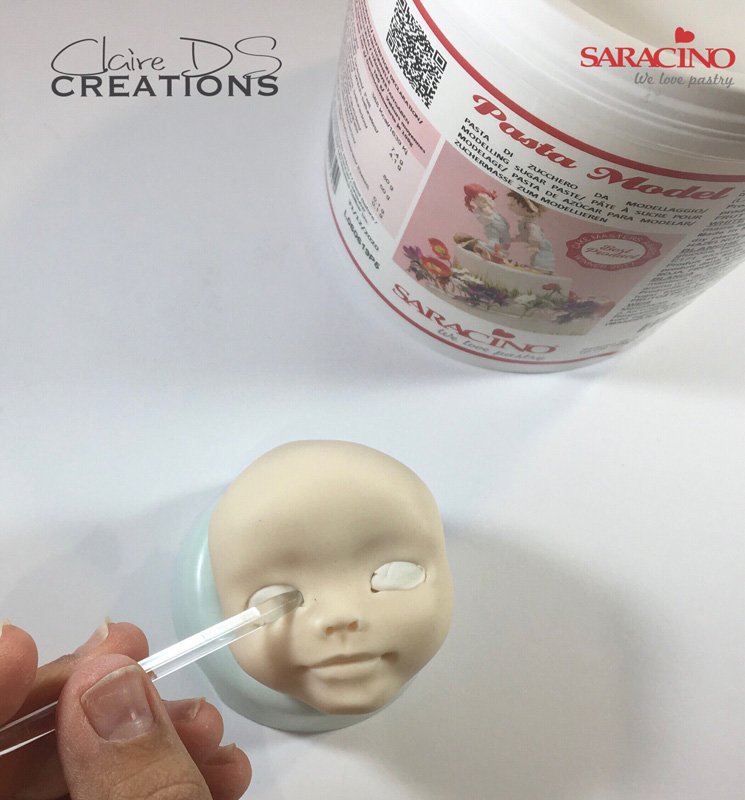
Place 2 small balls of white modelling paste onto the eyes and smooth.
Step 22
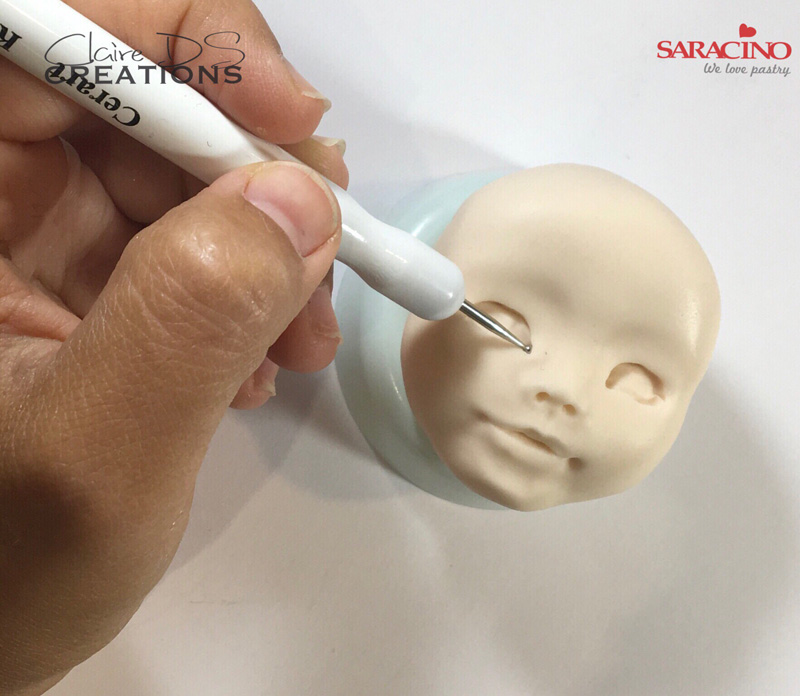
Draw eyelids with the Dresden tool and mark eyebrows with the scalpel
Step 23
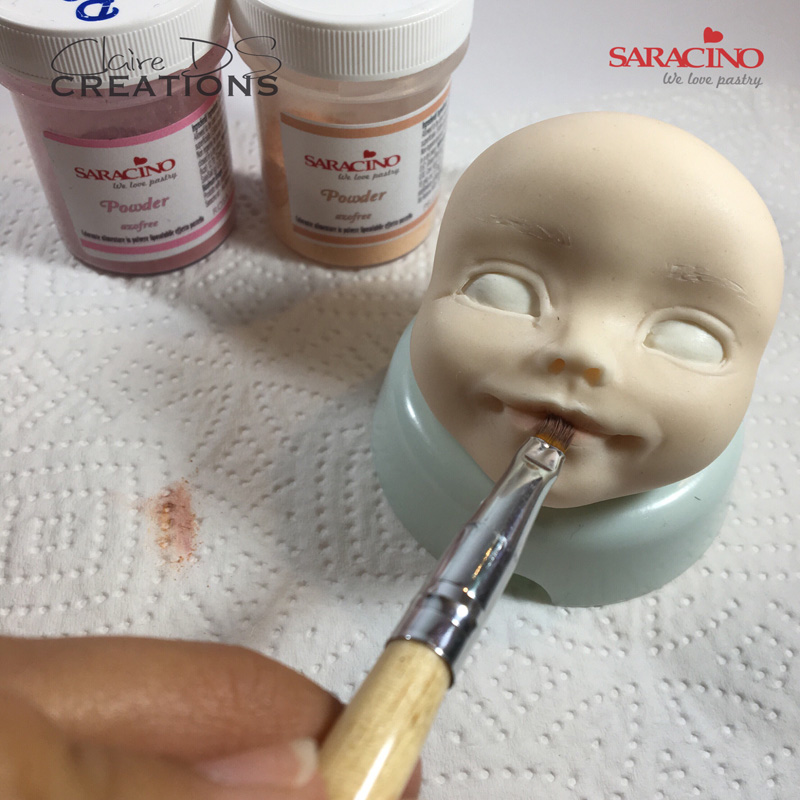
Apply pink and flesh powder on the lips and eyelids
Step 24
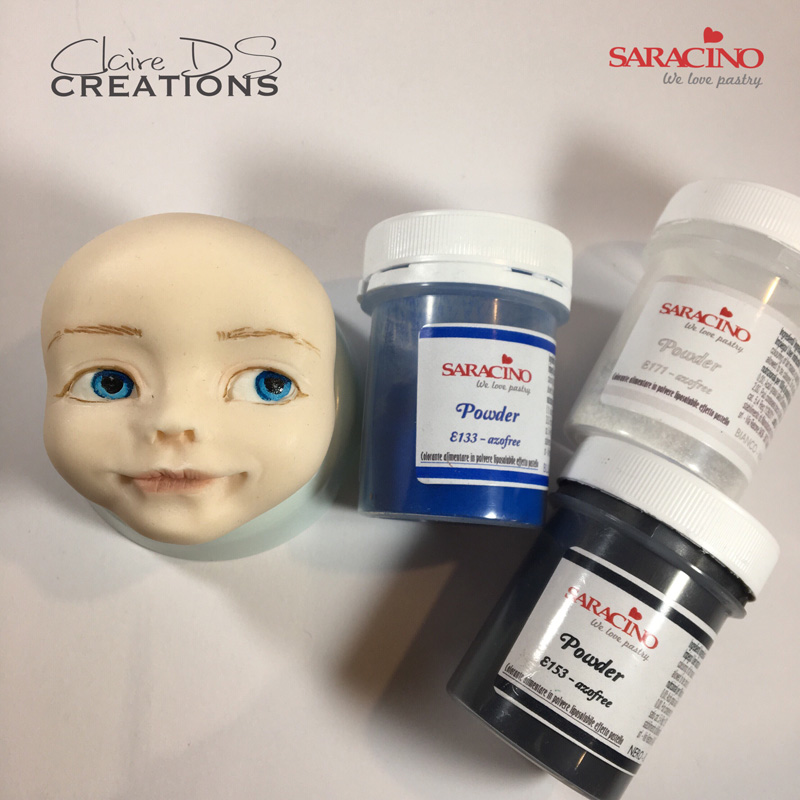
Paint the eyes, the iris in blue, the pupil in black, the eyelashes and eyebrows in brown.
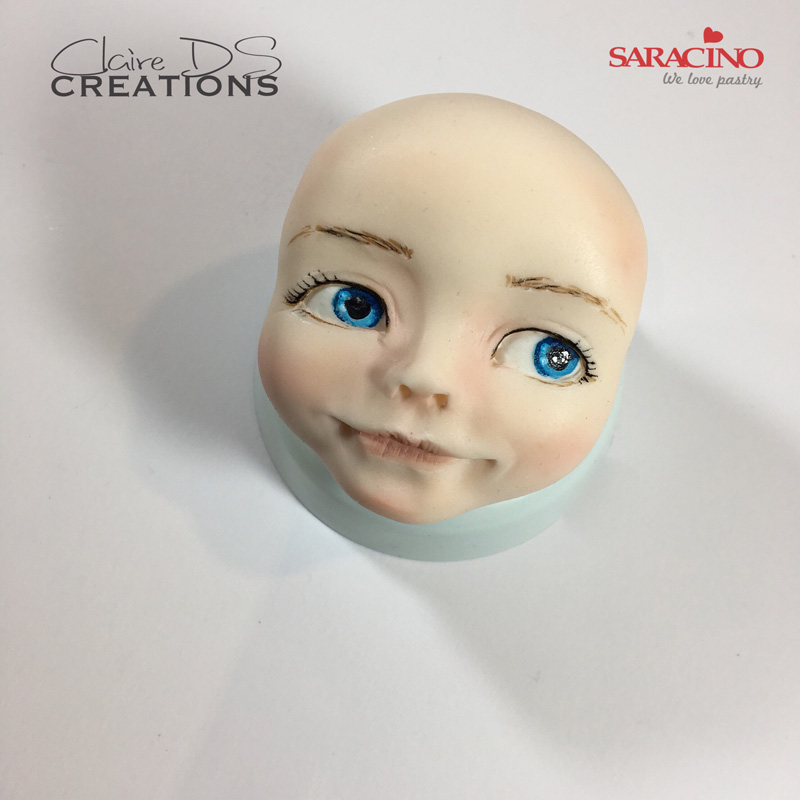
Step 25
Add 2 dots of white gel colour to bring the light point to the eyes
Step 26
Using 30g of skin coloured modelling paste, form into sausage shape and cut halfway to a 45 degree angle, roll with your finger to create the foot and ankle.
Step 27
Mark the arch of the foot with the Dresden tool
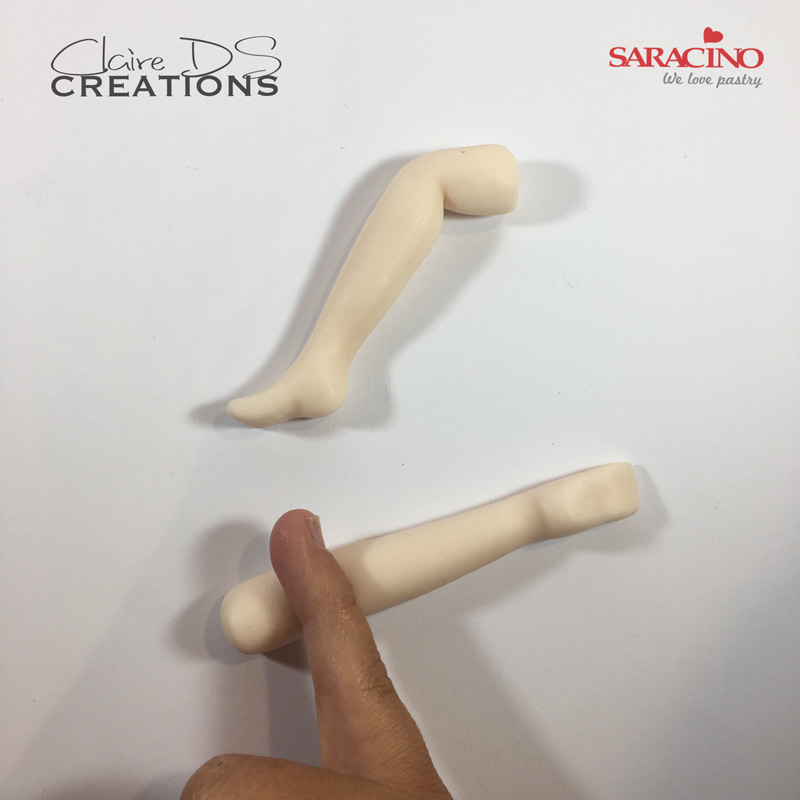
Step 28
Using your finger press to form the back of the knee
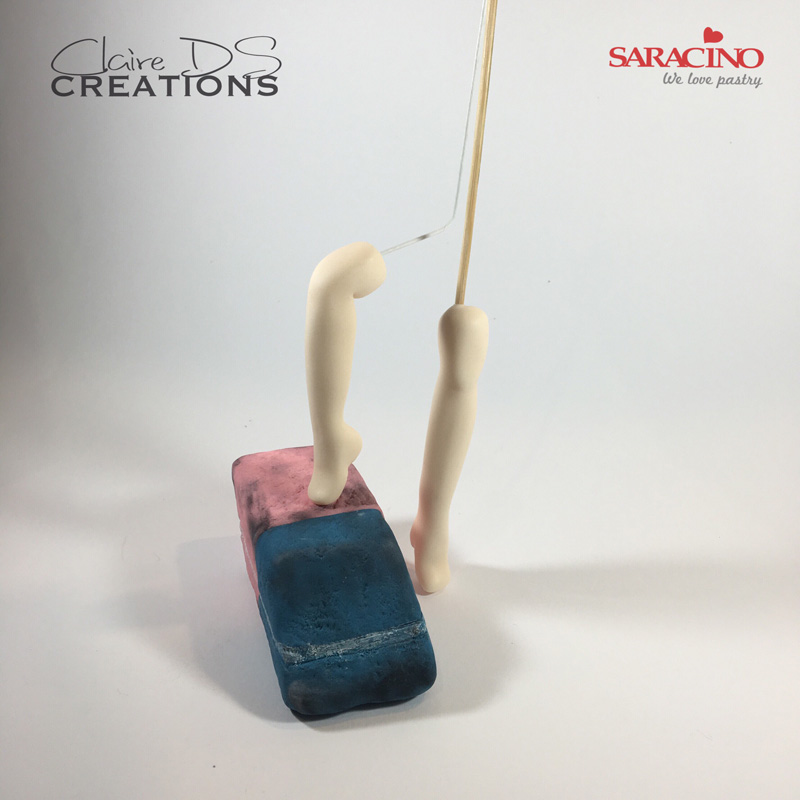
Step 29
Using wire in one leg stick it to the top of the eraser. Insert a skewer into the other leg.
Step 30
With 40g of skin coloured modelling paste, roll to form the torso.
Step 31
Using a small rolling pin press down at the top to form the taper for the chest.

Step 32
Refine the top to form the neck
Step 33
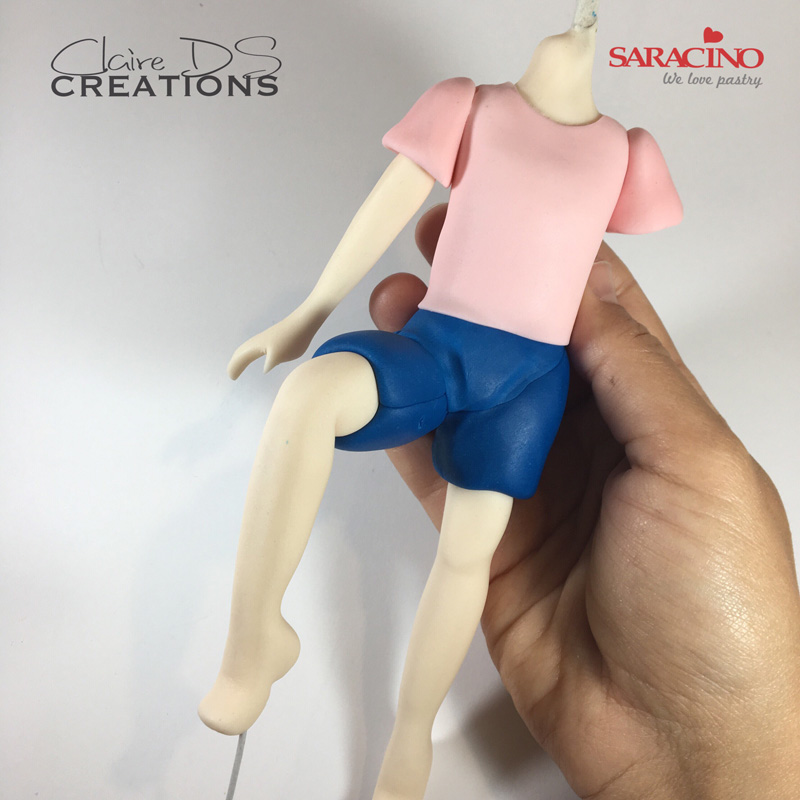
With 30g dark blue modelling paste, roll a sausage shape and cut halfway to a 45 degree angle to create the shorts.
Step 34
Place on the legs.
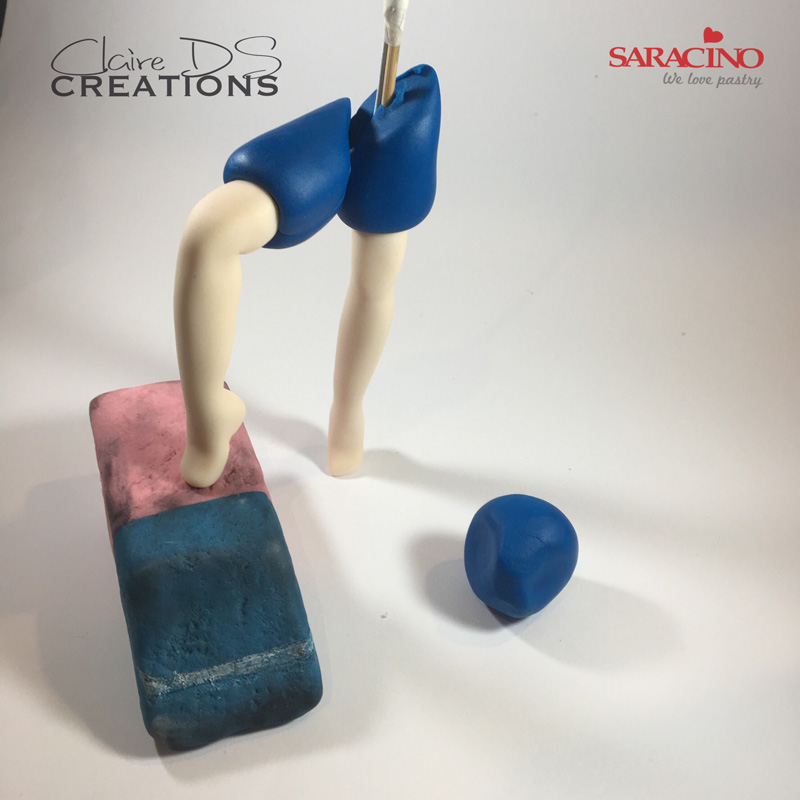
Step 35
Make sure the legs for the shorts meet at the top as shown. Using florist tape wrap the wire to the skewer. Using 10g of dark blue modelling paste, make a ball and form a dent either side to fit onto the shorts.
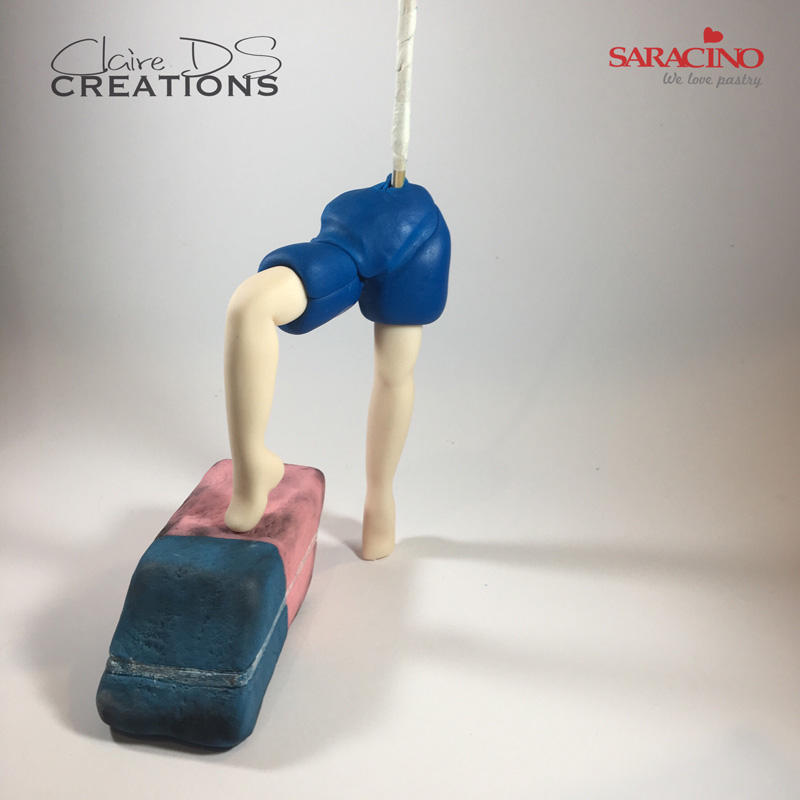
Step 36
Place the ball onto the skewer and join to the two short legs.
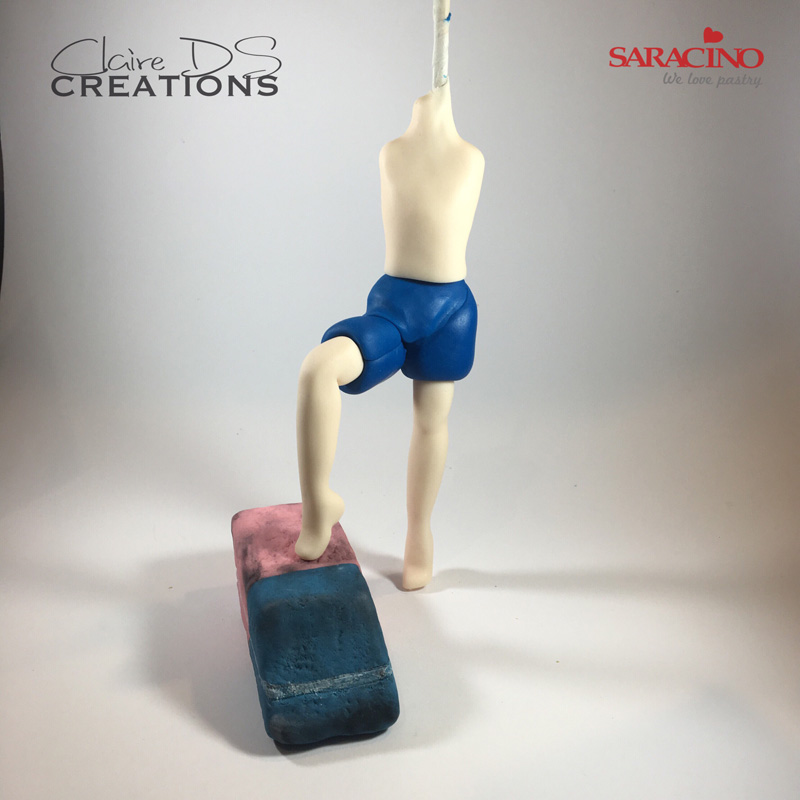
Step 37
Place the torso on to the skewer.
Step 38
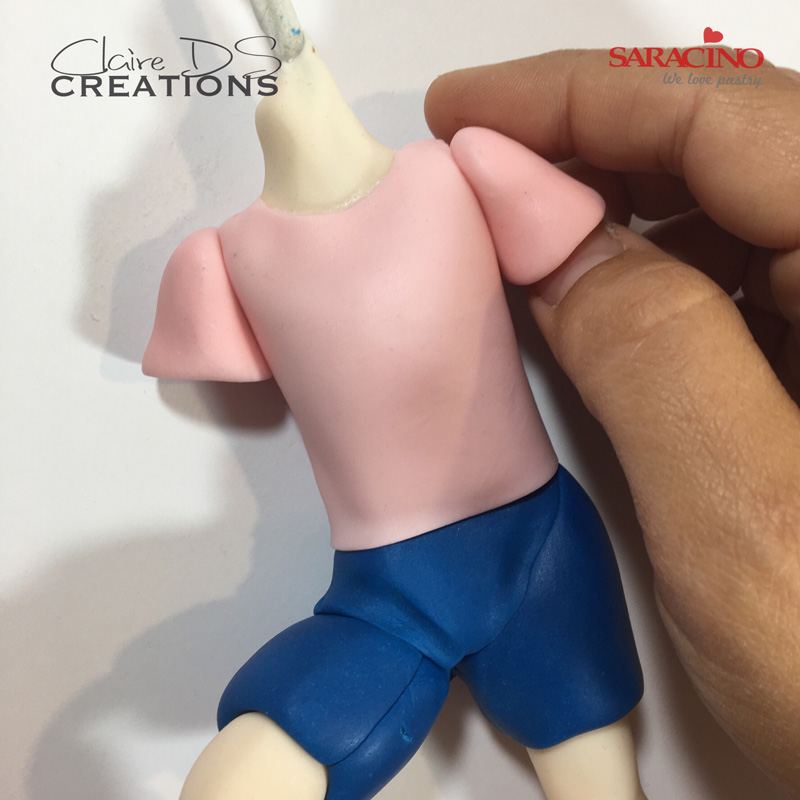
Using 20g of pink modelling paste, roll a strip for the T shirt and make a sausage shape for the sleeves.
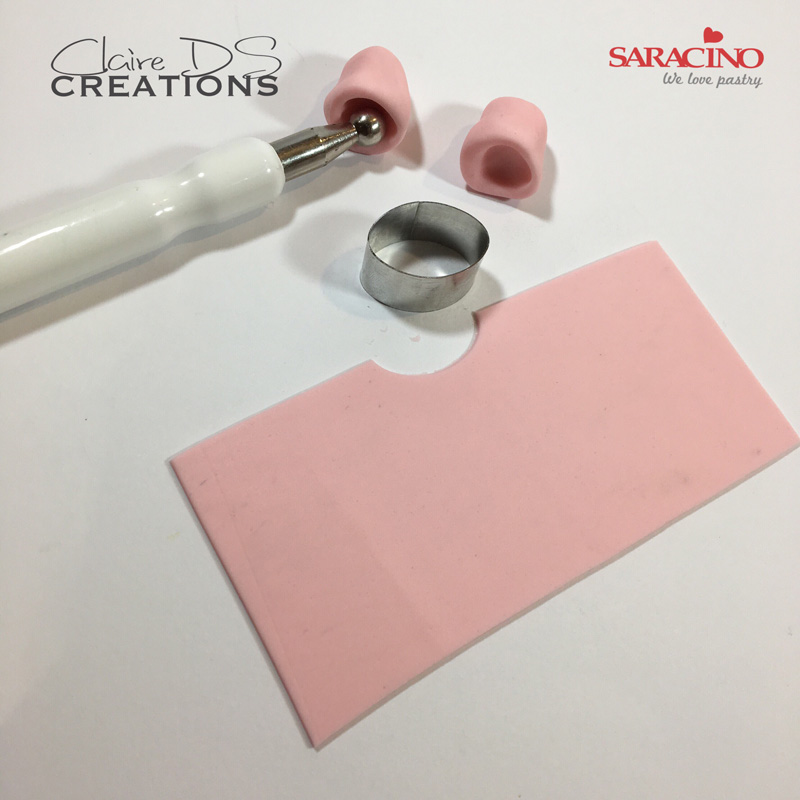
Step 39
With a small oval cutter, form the neckline of the T shirt. Cut the sausage in 2 and hollow with a ball tool
Step 40
Place the rolled sheet on to the torso to create the t-shirt and stick the rolls to the shoulders to make the sleeves.
Step 41
With 20g of skin modelling paste, roll a thin sausage shape.
Step 42
Cut to 45 degree.
Step 43
Cut to form the thumb of the hands
Step 44
Using your fingers roll to form the wrist
Step 45
Stick the arm into the sleeve.
Step 46
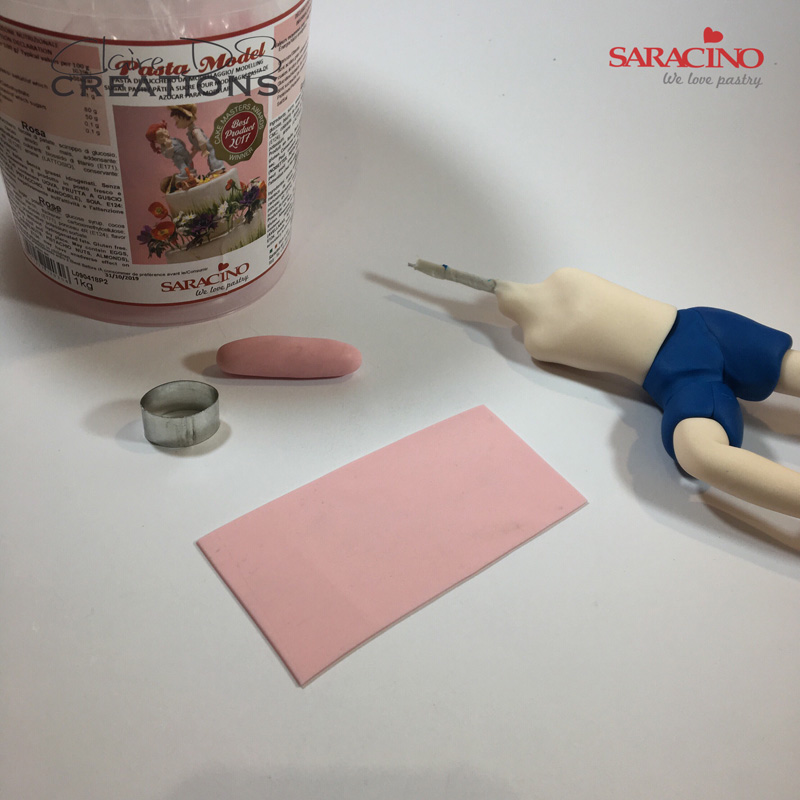
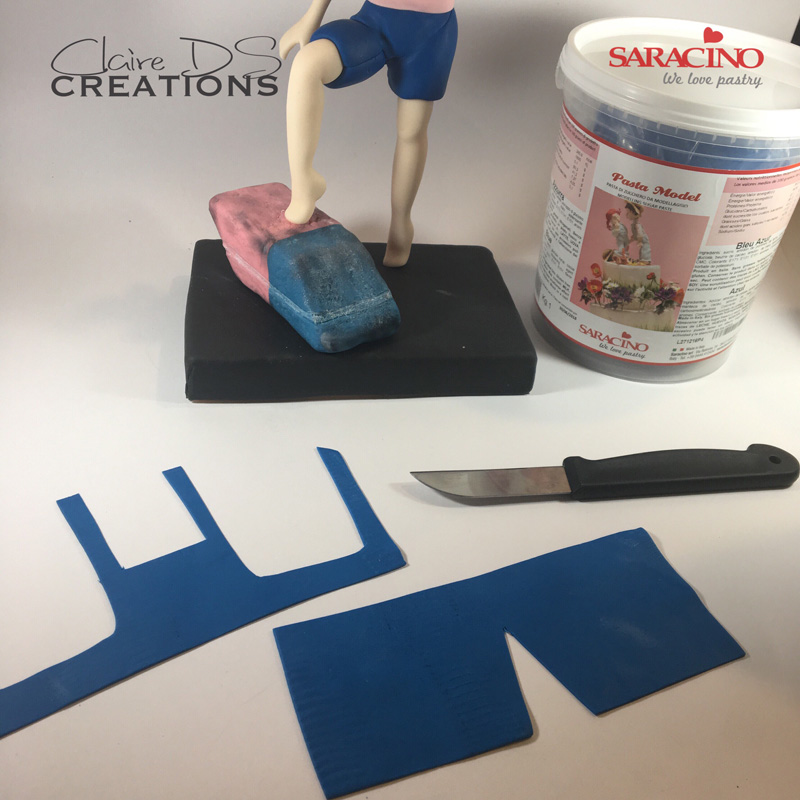
Roll 15g of dark blue modelling paste and cut out to create the top of the dungarees.
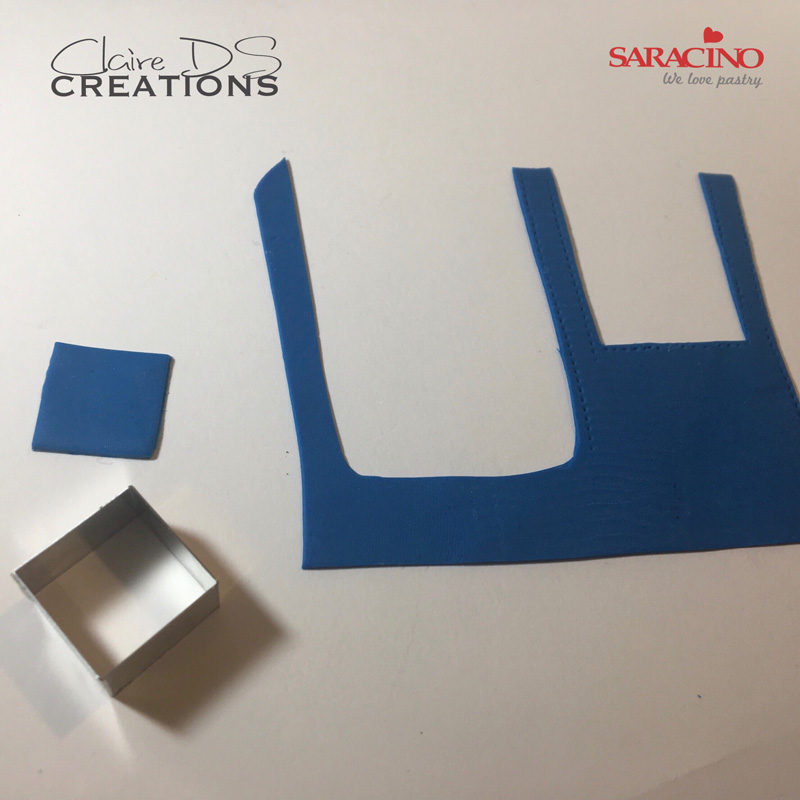
Step 47
With a square cutter, make a pocket to the front of the dungarees.
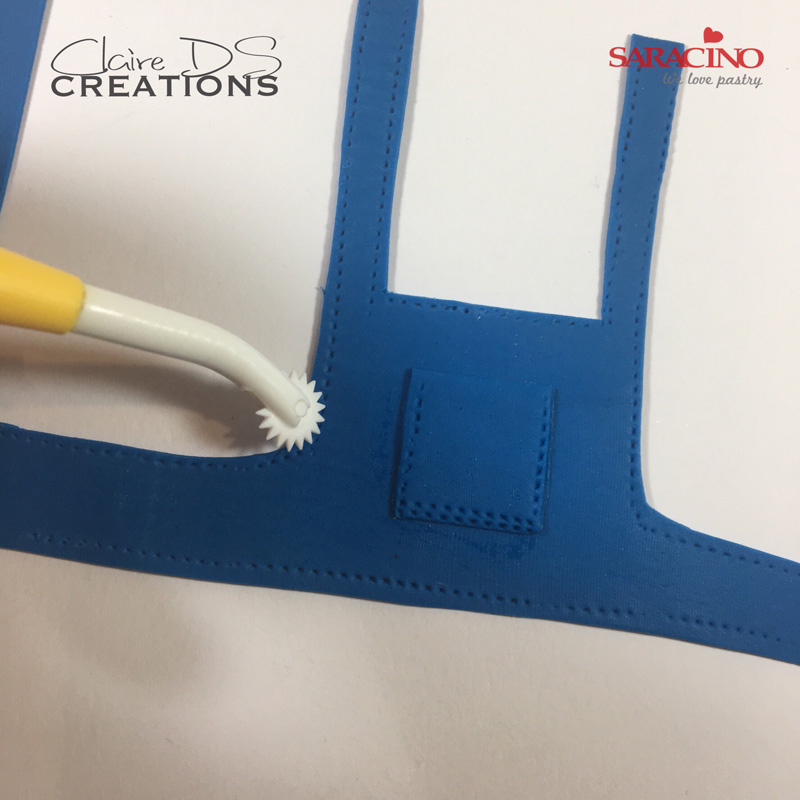
Step 48
Using the stitching roller tool, create the topstitching of the dungarees
Step 49
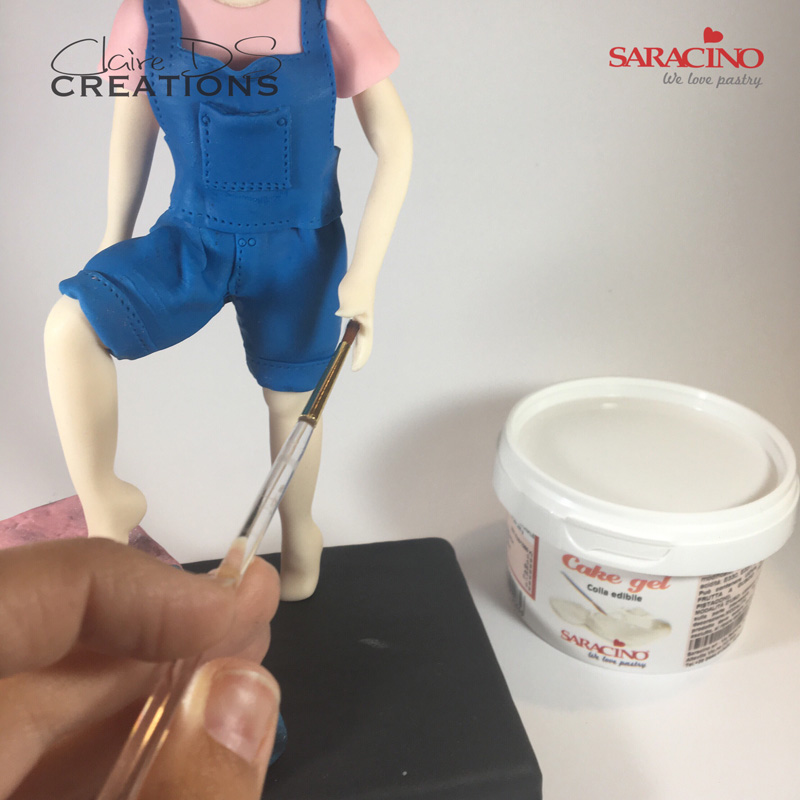
Put a 20 gauge flower wire into the 2nd arm and form a bend. Put some cake gel on the hand.
Step 50
Place the pencil into the hand with the cake gel and secure.

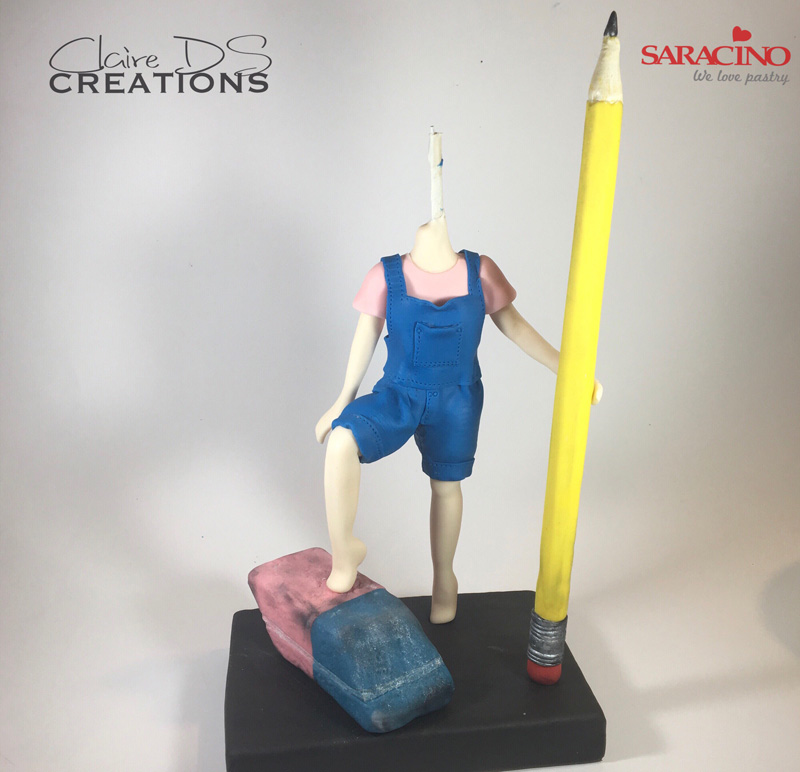
Step 51
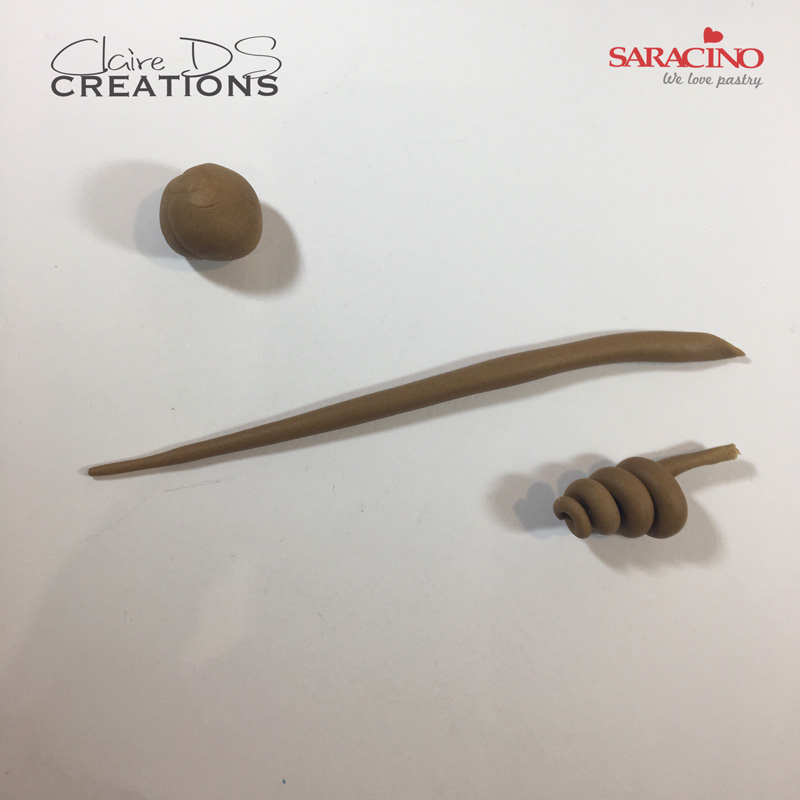
Place the head on the skewer. Dust the dungarees with dark blue and black powder colours. Dust the body and T shirt with pink powder colour.
Step 52
Mix 15g of yellow paste and 15g of brown paste together to make the hair
Step 53
Roll out thin strands of the coloured paste and roll them up
Step 54
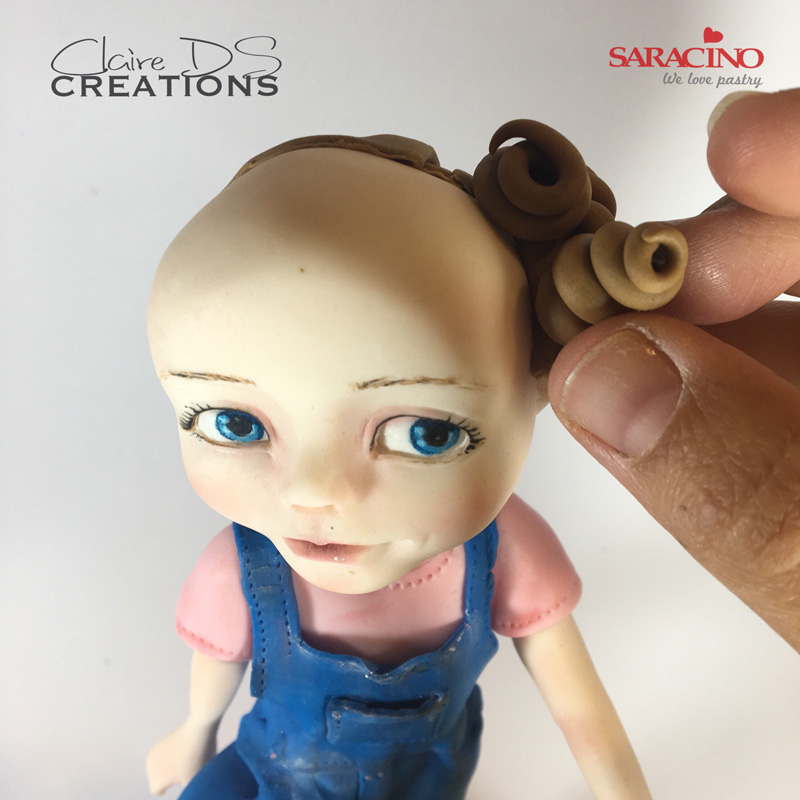
Fix to the head to make curls
Step 55
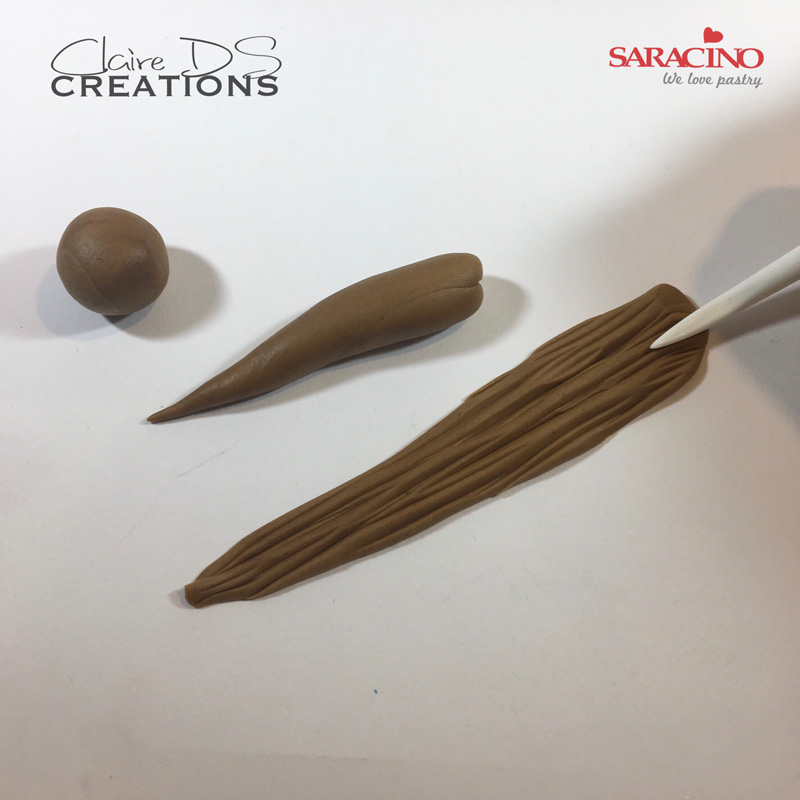
Roll out carrot shapes and flatten them. Mark lines with the Dresden tool
Step 56
Fix onto the head to make the fringe

Step 57
Using the left over paste from the hair roll out and cut 2 strips for the shoes

Step 58
Wrap around the feet and fix to create shoes

Step 59
Using shiny liquid, varnish the eyes with a small brush
Step 60
The school girl is ready for her busy day……….
