You will need:
- Saracino Dark chocolate drops
- Saracino white and green Pasta Top
- Saracino modelling chocolate
- Saracino Pasta Model: white, skin tone, light blue
- Saracino gel colours: blue and red
- Airbrush colours blue, mother of pearl
- Saracino dust colours: red, white, blue, brown, skin
- Saracino liquid shiny
- Cream for ganache
- Rice krispie mix
- Cake drum or wooden board
- Cake
-
Wooden skewers
-
Hot glue gun
-
Armature wire
-
Dresden tool
-
Bulbous tool
-
Ball tool
-
Rolling pin
-
Craft knife
-
Frill cutter
-
Paintbrushes
-
6mm threaded rod 9inch long, 2 nuts and washers
Step 1
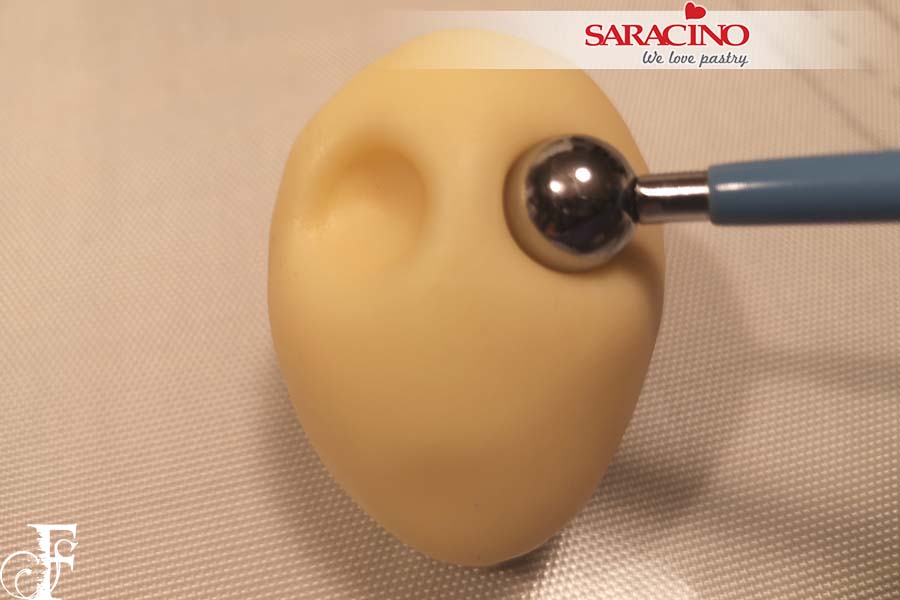
Start by making the head. Take some Saracino skin tone modelling paste and roll it into an egg shape. You can use a small piece of paste to support the head while you work. Using a ball tool, make 2 eye sockets. Soften the edges with a Dresden tool.
Step 2
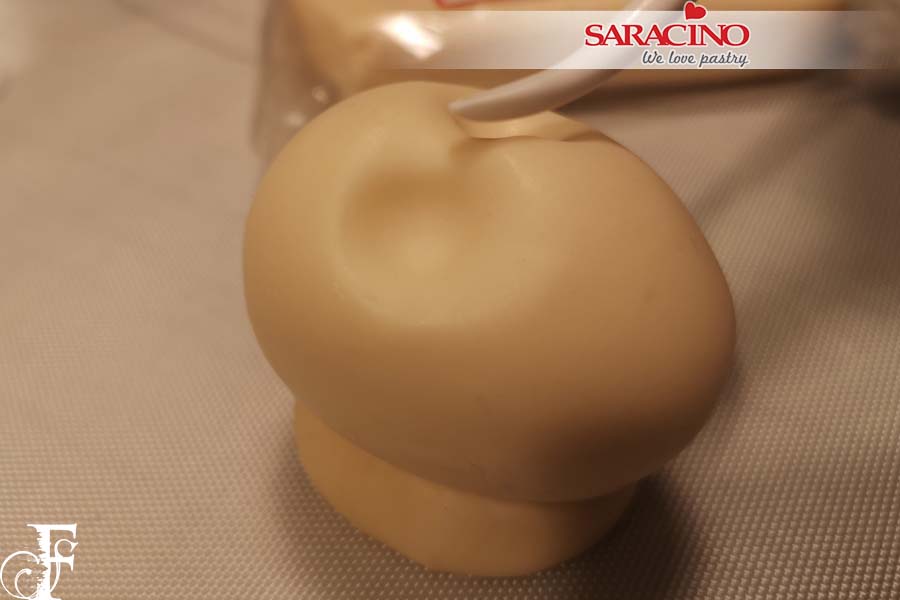
Make an indent with the Dresden tool for the top of the nose. With your fingers squeeze paste together to shape the nose.

Step 3
Using your Dresden tool form the nostrils and shape the details for the nose.
Step 4
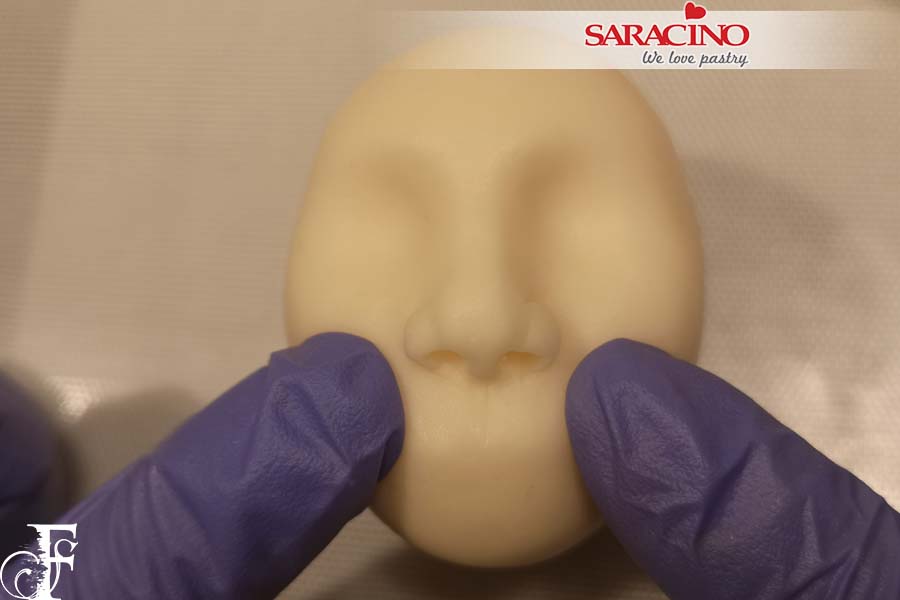
With your fingers push up to form the cheeks and blend them in using the Dresden tool.
Step 5
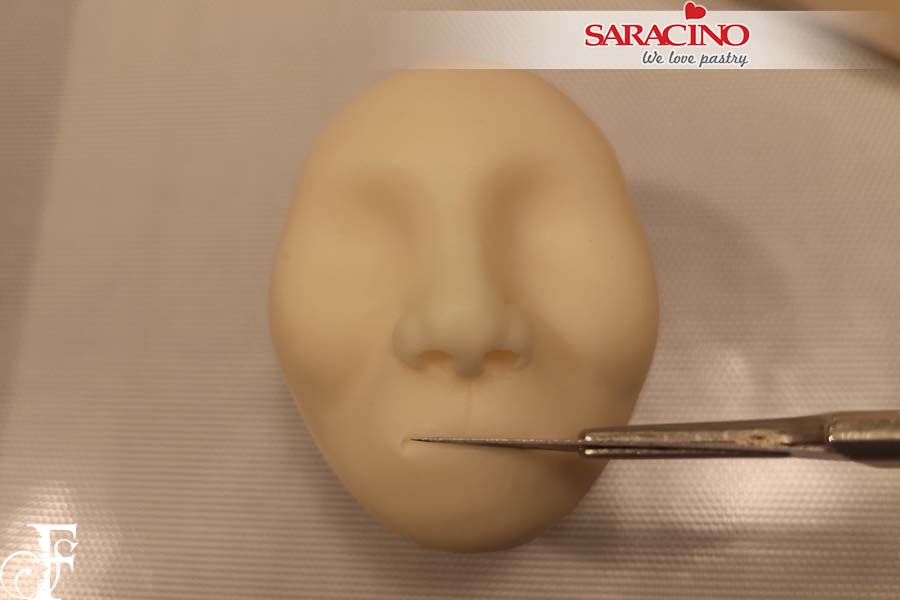
Cut a line to create the mouth with a craft knife.
Step 6
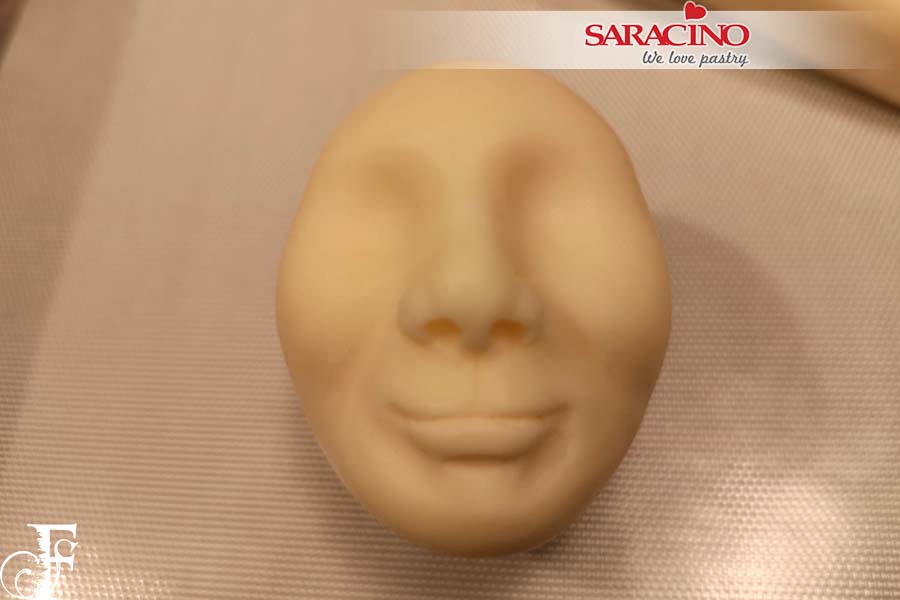
With the Dresden tool shape the bottom lip.
Step 7
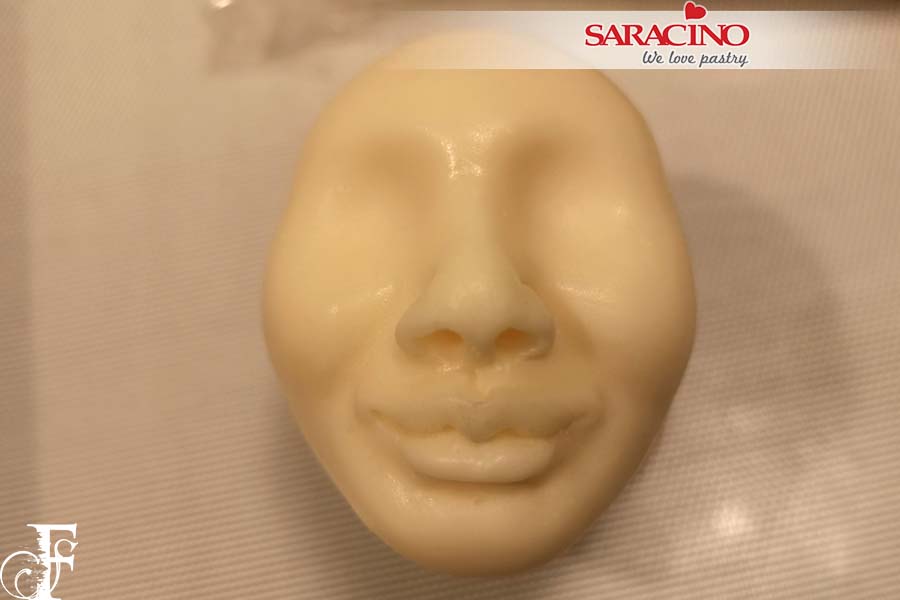
Shape the top lip. Add a little more paste if needed. Add extra details to the face around the cheeks and mouth to your desired effect.

Step 8
Use your fingers to pinch and shape to bring out the chin.
Step 9
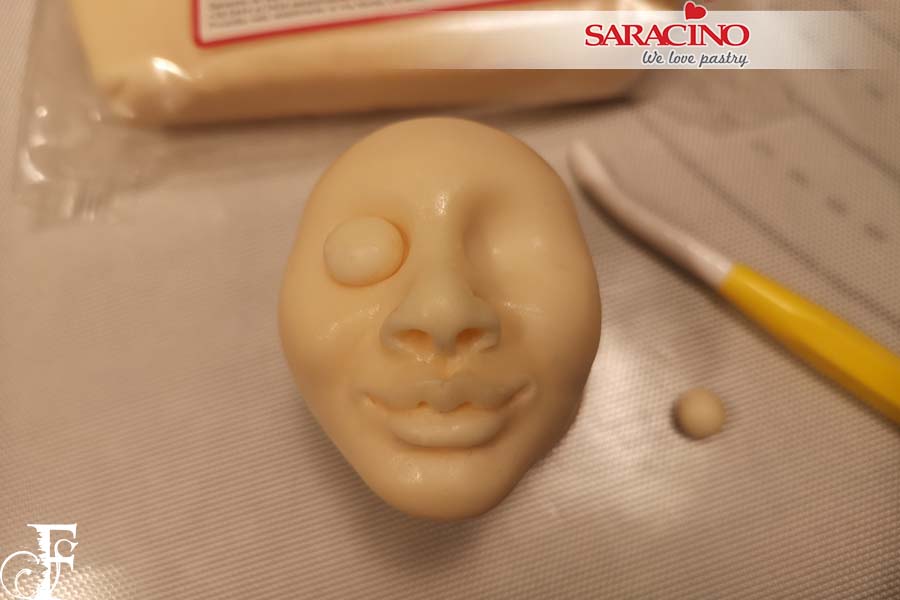
Make 2 small balls of skin tone modelling paste and place in the eye sockets.
Step 10
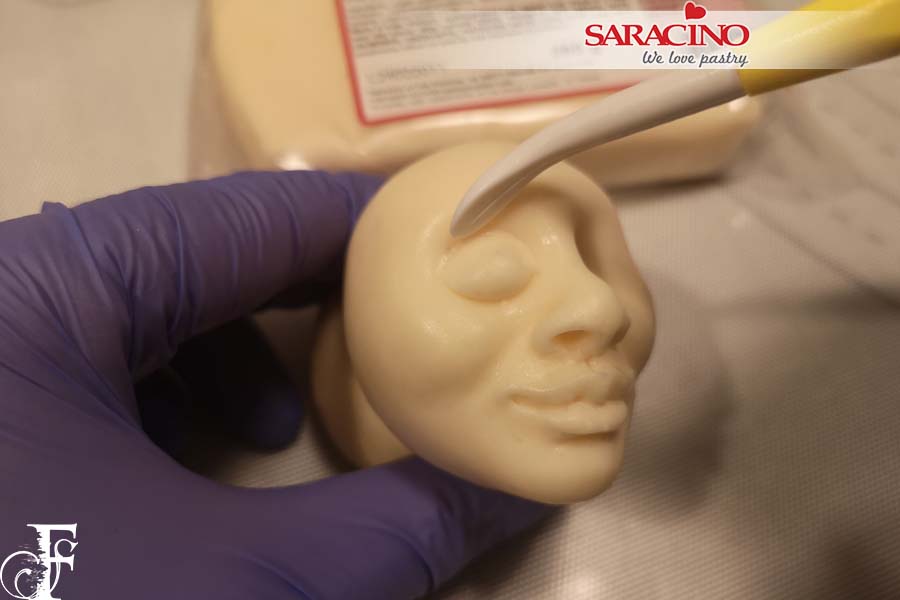
Blend the eye into the socket. Use a Dresden tool to shape the eyebrow area.
Step 11
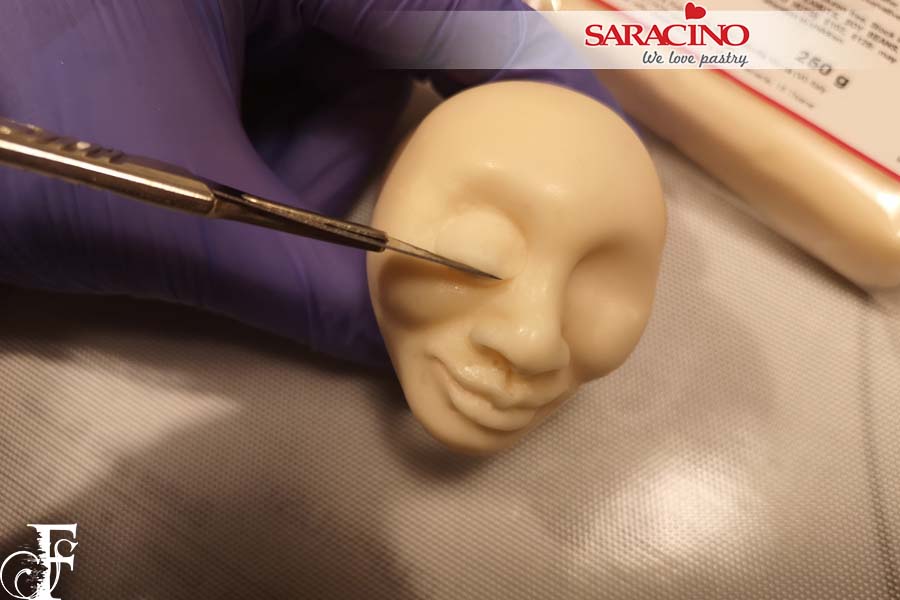
Using the craft knife, cut to form the eyelid.
Step 12
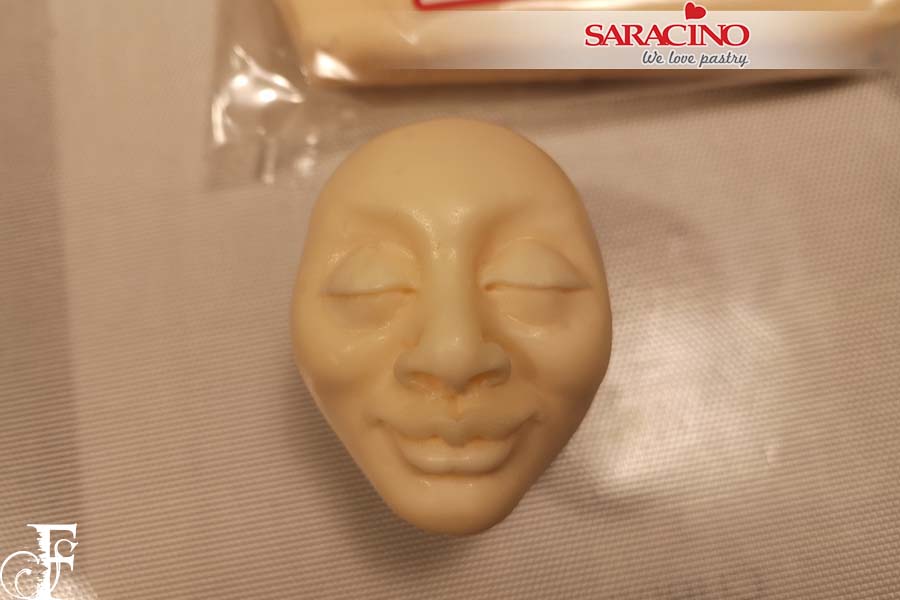
Blend in the bottom lid, then repeat for the second eye.
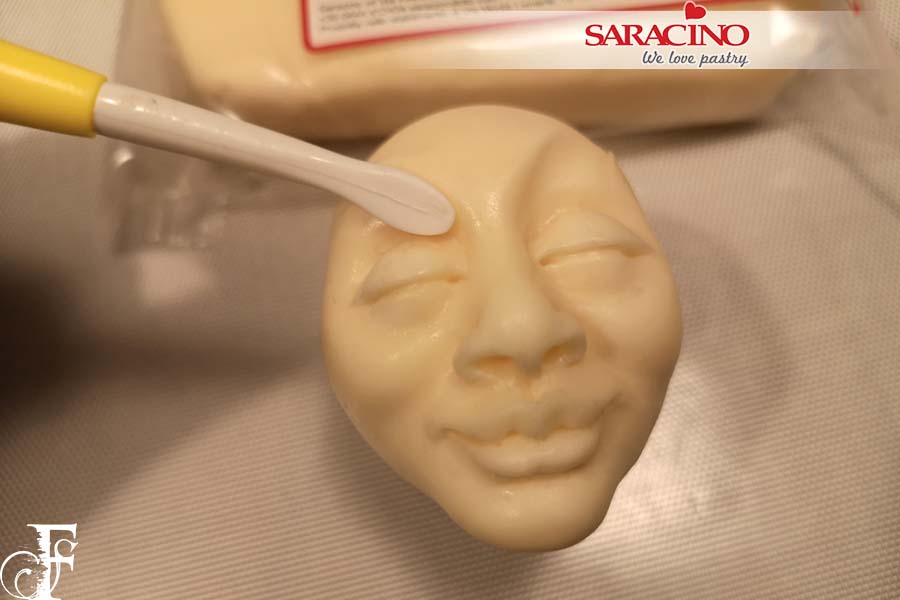
Step 13
With the Dresden tool shape in high eyebrows.
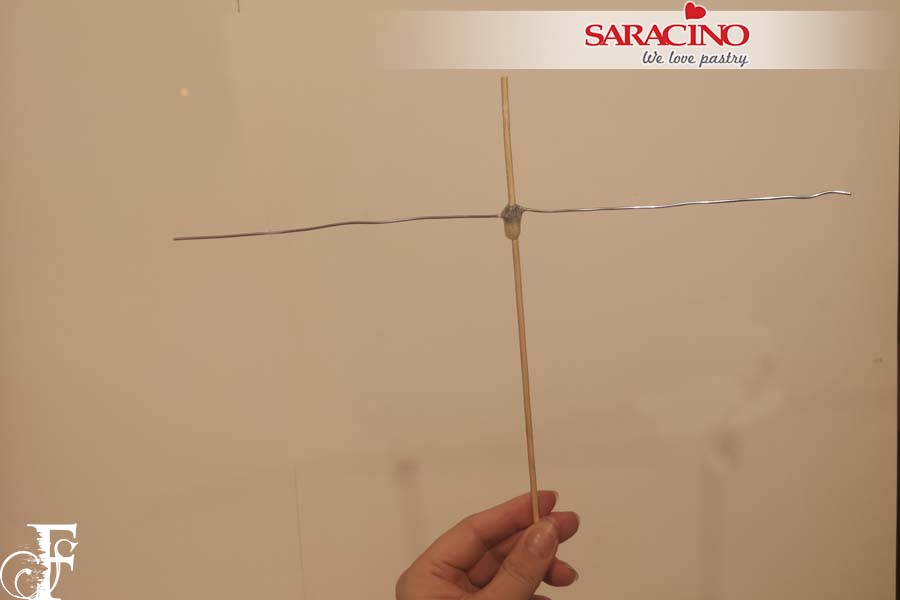
Step 14
Cut a wooden skewer down to around 10 inches in length. From the top measure down roughly 2 1/2 inches. Wrap a length of armature wire around as tight as you can. Add a good amount of hot glue to keep it in place.
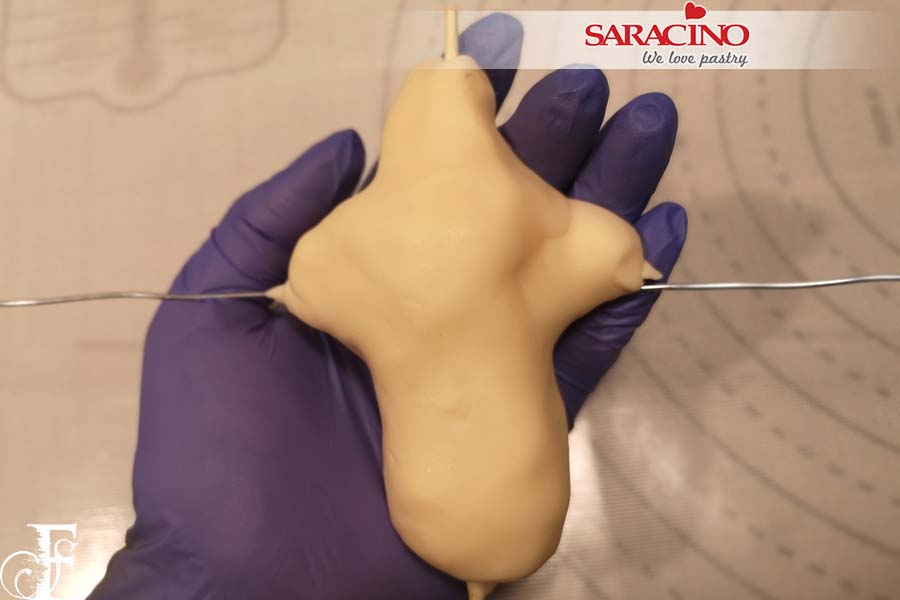
Step 15
Add edible glue to the skewer and wrap skin tone modelling paste around, blending in joints with your fingers.
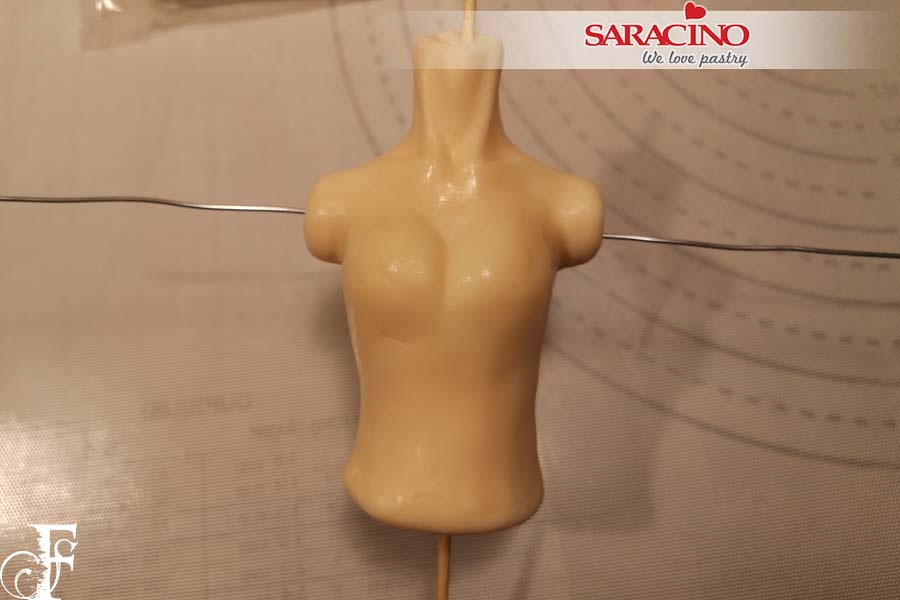
Step 16
Mould the neck, shoulders and breasts into shape with your fingers and the Dresden tool, adding all the details as shown. You can add and blend more paste if needed. Don’t worry about the size of the waist at this time.
Step 17
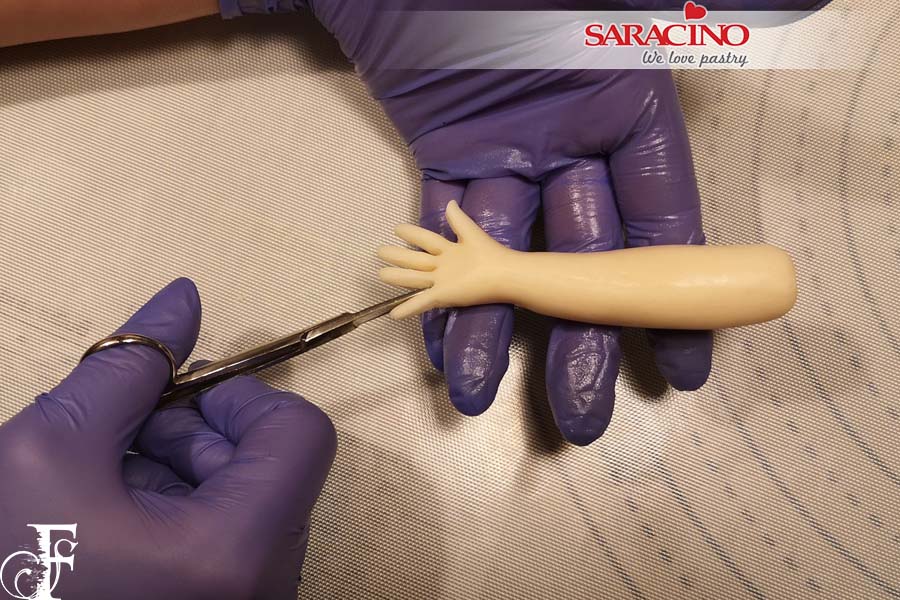
Shape skin tone modelling paste into a baseball bat shape. At the thin end flatten into a spoon shape. Using small scissors or a knife cut to form fingers.
Step 18
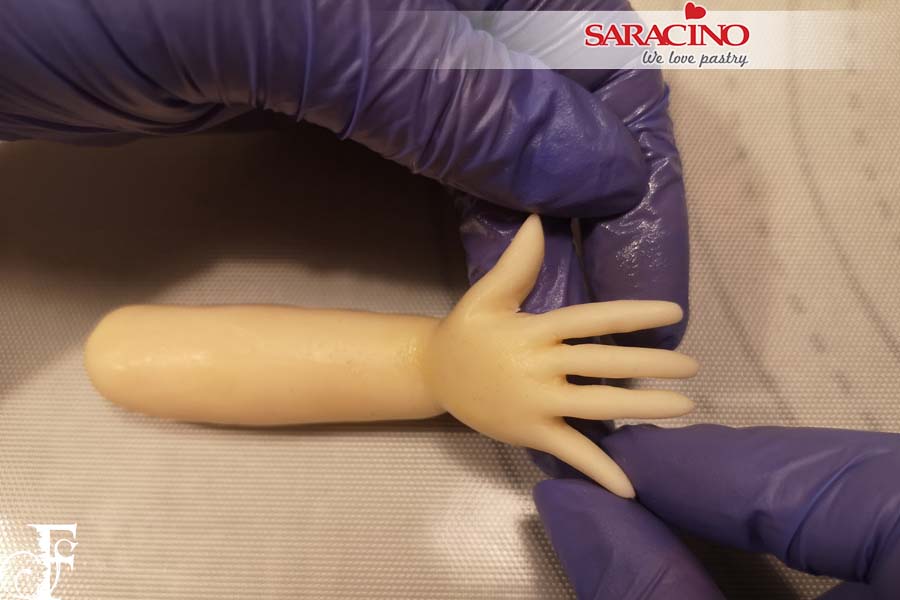
With your fingers gently roll each of the fingers into shape, then use the Dresden tool to add details.
Step 19
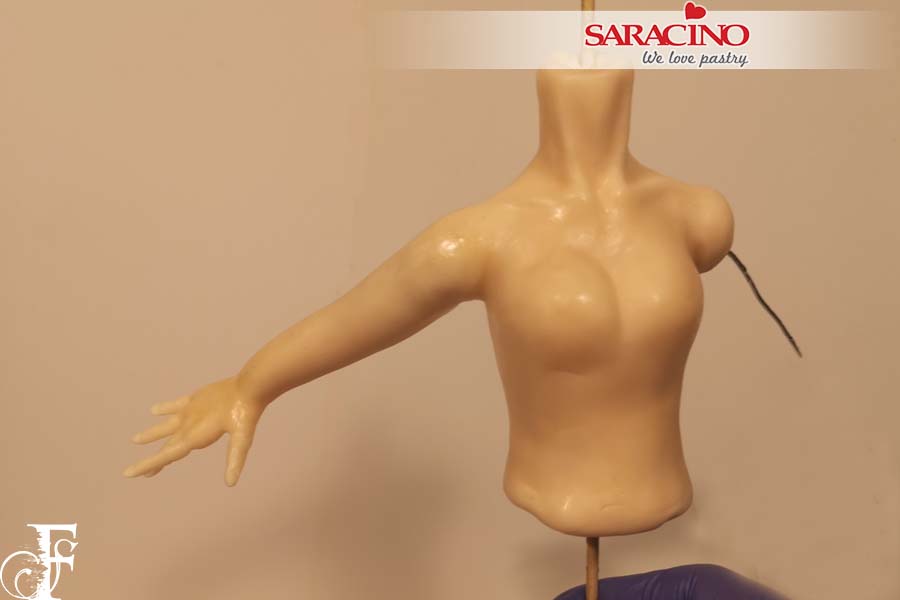
Cut the arm wires to roughly 3 inches in length and bend the wires back from the shoulders. Cover the wires in glue and feed the arms up over the wire. Blend at the shoulders. The arms will be covered so don’t worry about any imperfections.
Step 20
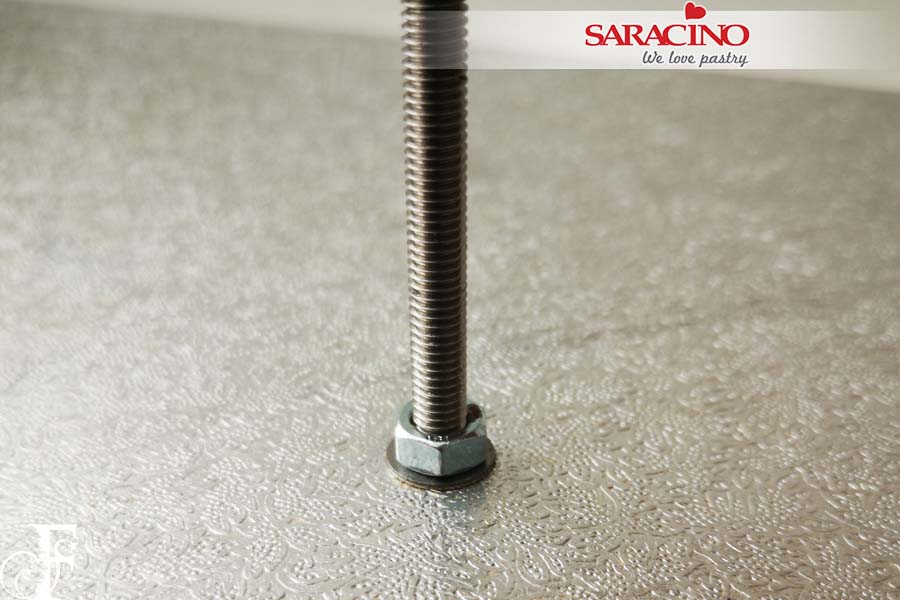
With the drum board, drill a 6mm hole off center. Put the threaded rod in and fix with nuts and washers, tighten with a spanner.
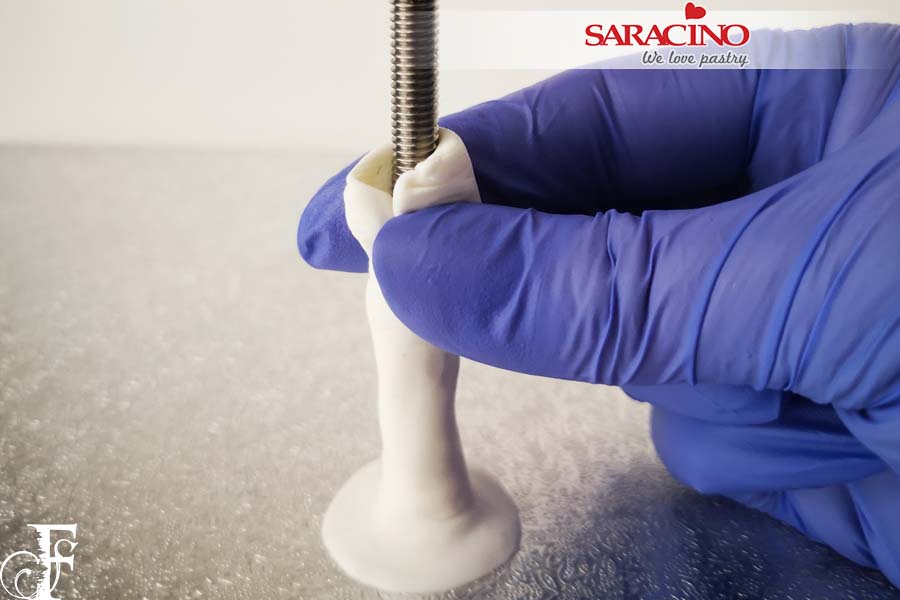
Step 21
Cover the threaded rod with modelling chocolate or alternatively cover with a straw.
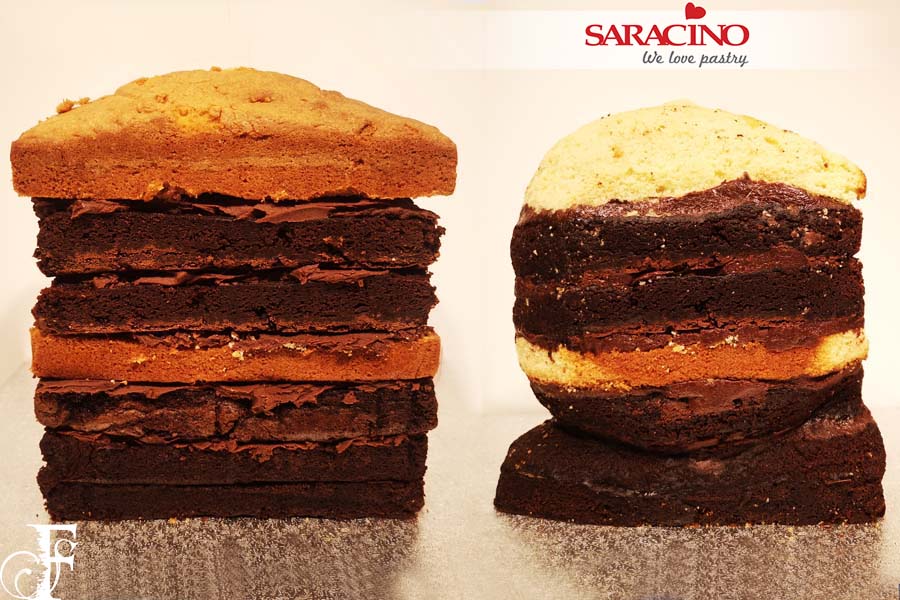
Step 22
Stack cake using your filling of choice, carve the cake into a round shell shape.
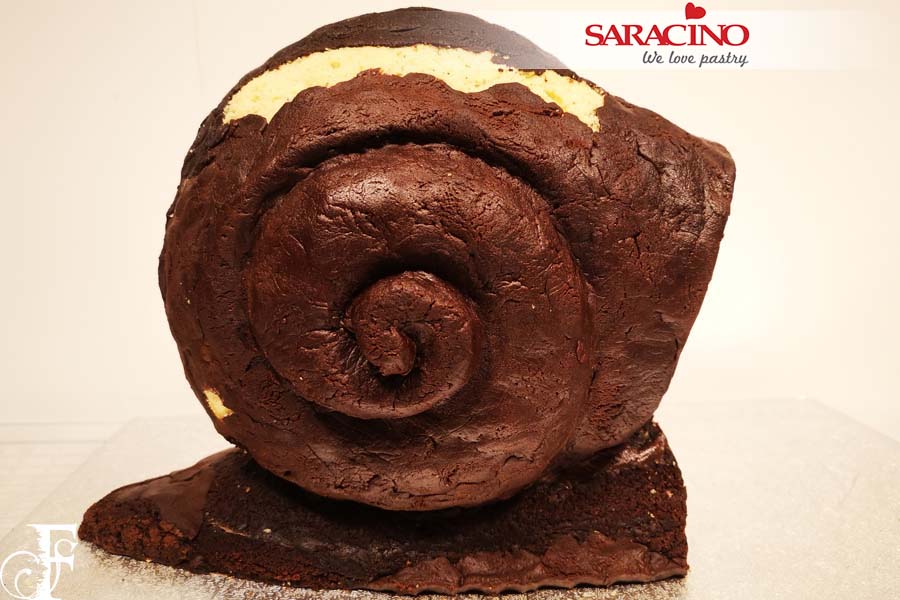
Step 23
With the crumbs from the carving mixed with ganache make a cake pop mixture. I like to call this ‘cake putty’. Form the swirl on the side of the shell. The back of the shell can be any of design you wish.
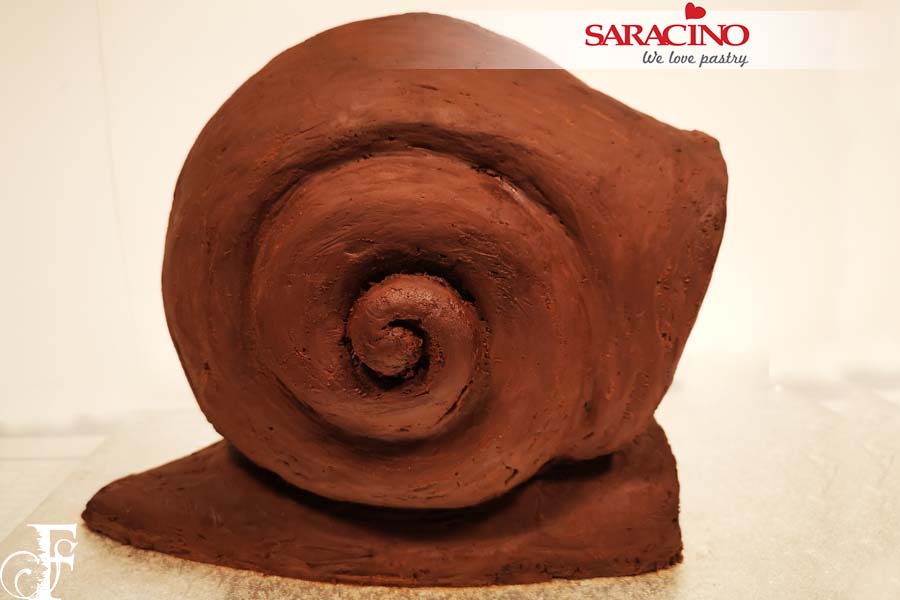
Step 24
Cover the carved cake in ganache and leave to set or chill in the fridge.
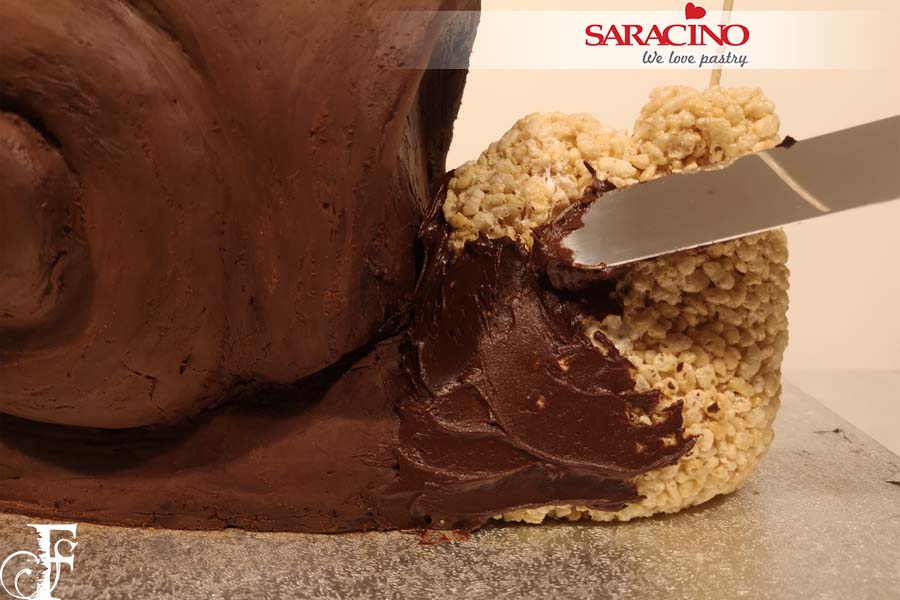
Step 25
Using a marshmallow and rice krispie mix, make the shape of a duck body with a hump on its back. Add a skewer while it’s cooling. Alternatively this piece can be made of cake if you wish.
When cooled, stick to the cake with ganache and cover with ganache. Leave to set.

Step 26
Blend together equal amounts of modelling chocolate and white pasta top.
If too hard, place in the microwave for a few seconds to soften it then knead into a soft pliable paste.
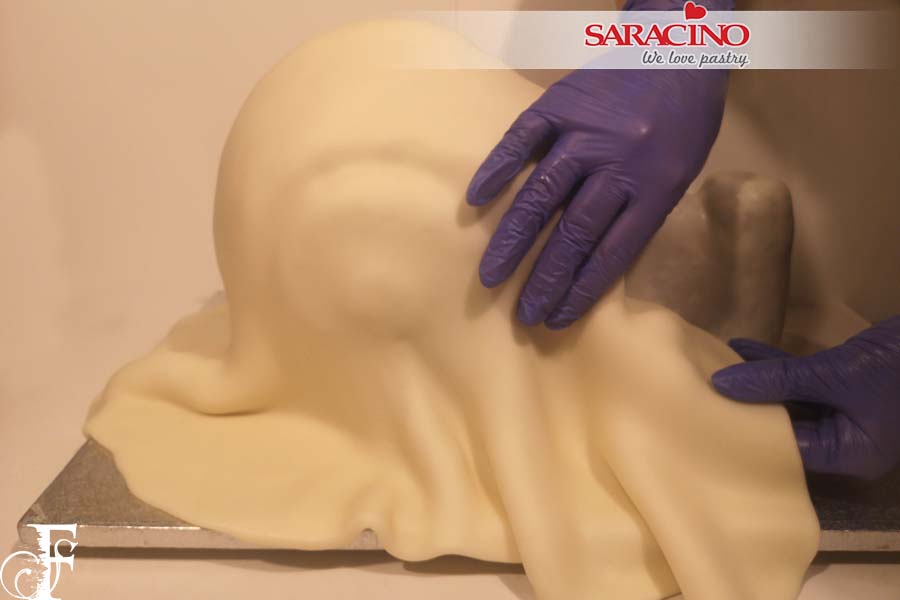
Step 27
Roll out and cover the cake, you can cover it in two pieces if this makes it easier. Smooth into the swirl of the shell, gently manipulate the paste into all the crevices with your fingers.
Don’t worry about the finish on the duck shaped body as it will be covered.
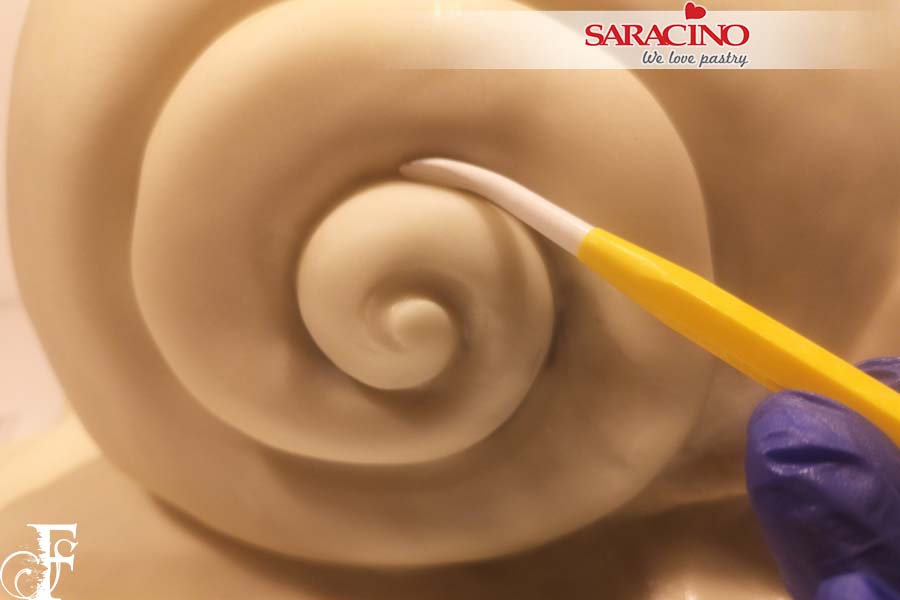
Step 28
Using a Dresden tool gently shape in the swirl.
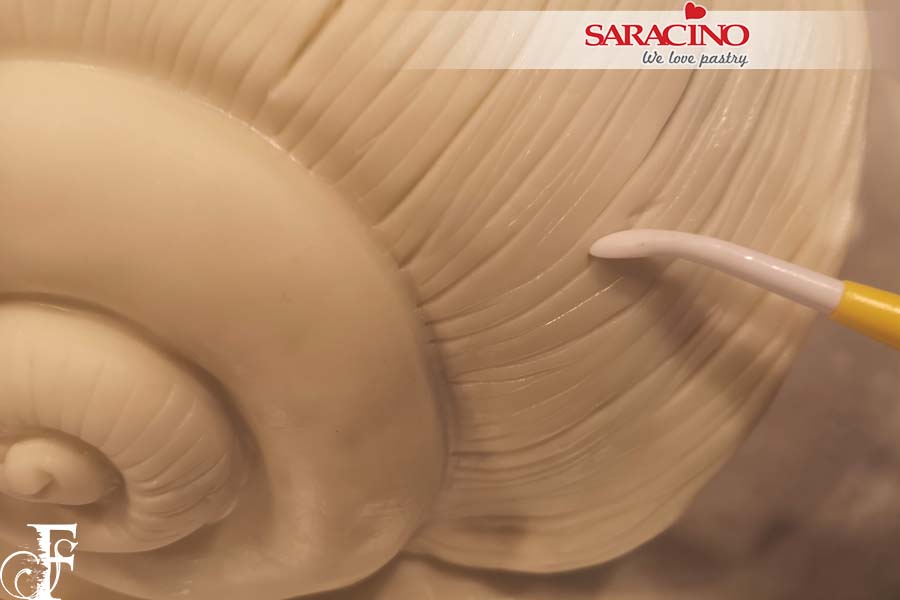
Step 29
Then make the details on the shell body with lines and dents. Have fun with this bit.
Step 30
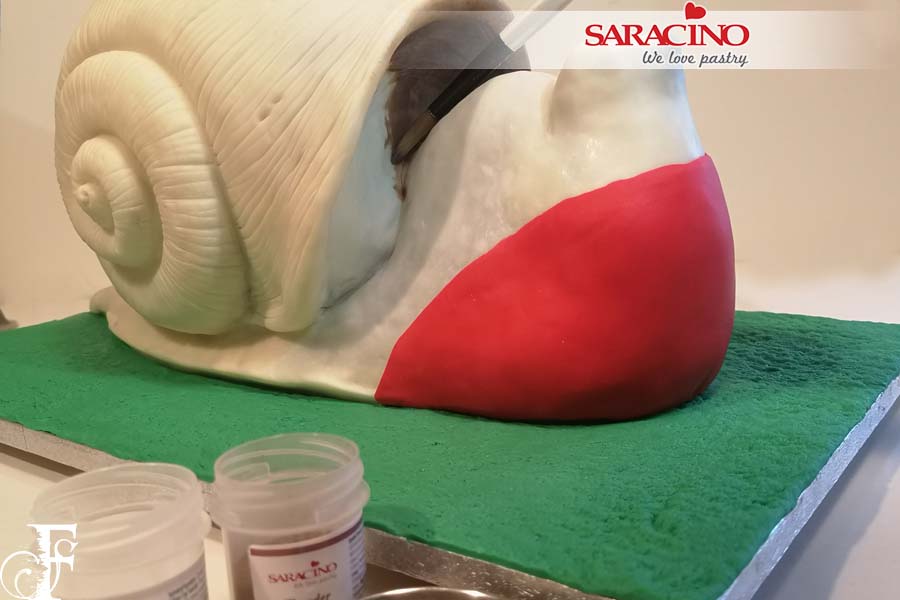
Paint inside the shell with brown and white dust mixed with a little water. Take some of the red modelling paste and roll out. Cut to a semi circle, stick using water or edible glue to the front as shown.
Step 31
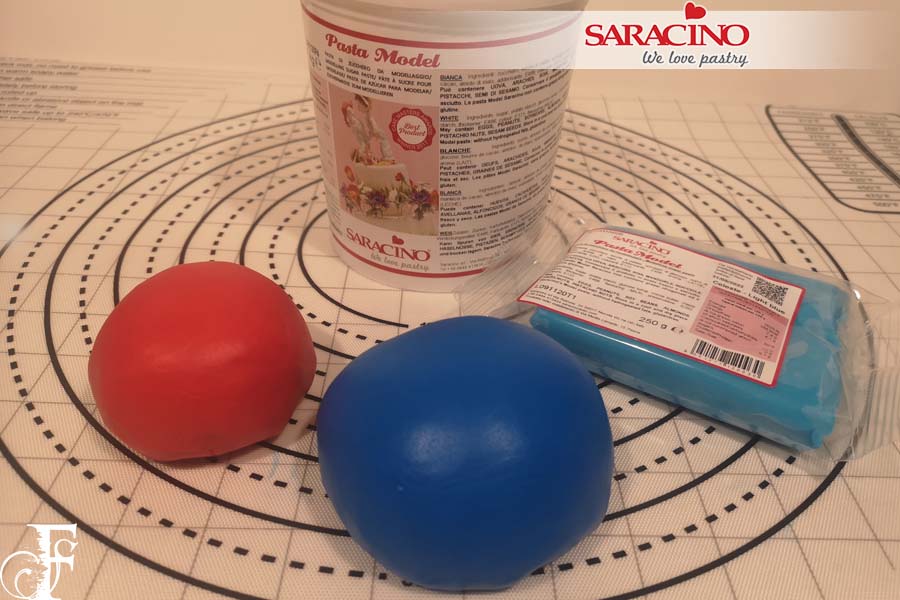
Mix Saracino modelling paste with red and blue gel colours. Alternatively add colouring to pre-coloured paste. Keep adding until you reach your desired colour, keep in mind the blue has to be dark.
Step 32
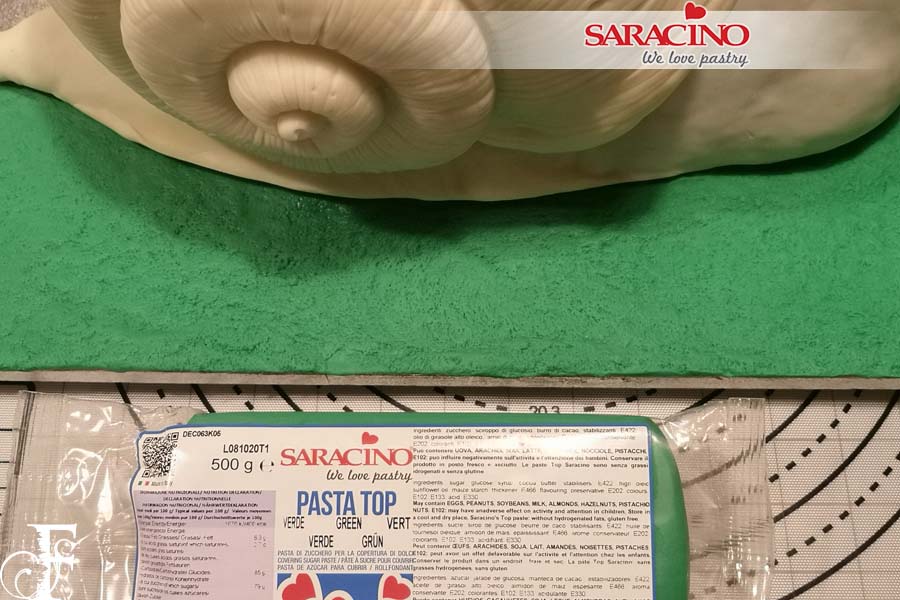
Cover the board with green Pasta Top. Use a hard stiff brush to give texture.
Step 33
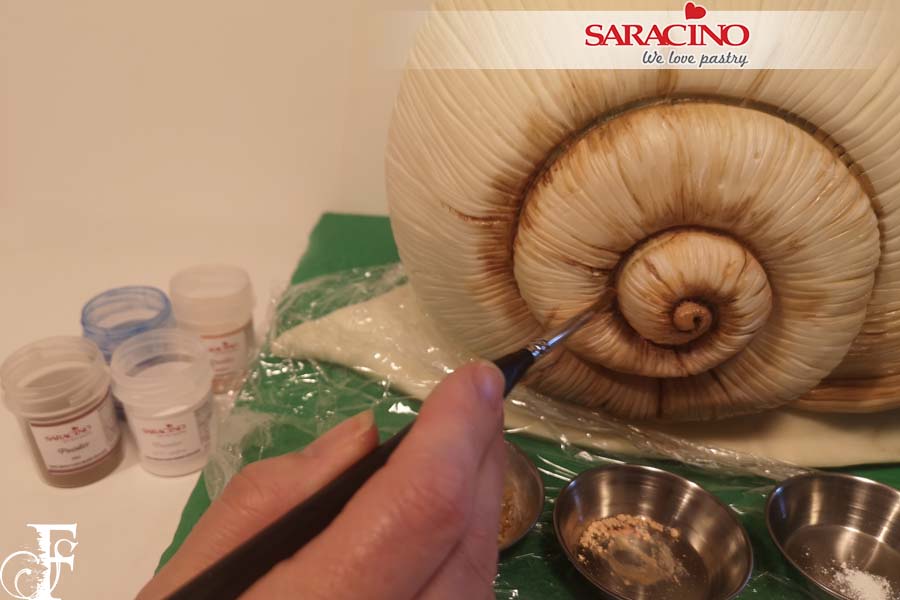
Start painting the shell with white, brown, blue and skin tone Saracino dust colours mixed with a little water or alcohol. Start from the center with a little brown and gradually paint around the swirl using different colours.
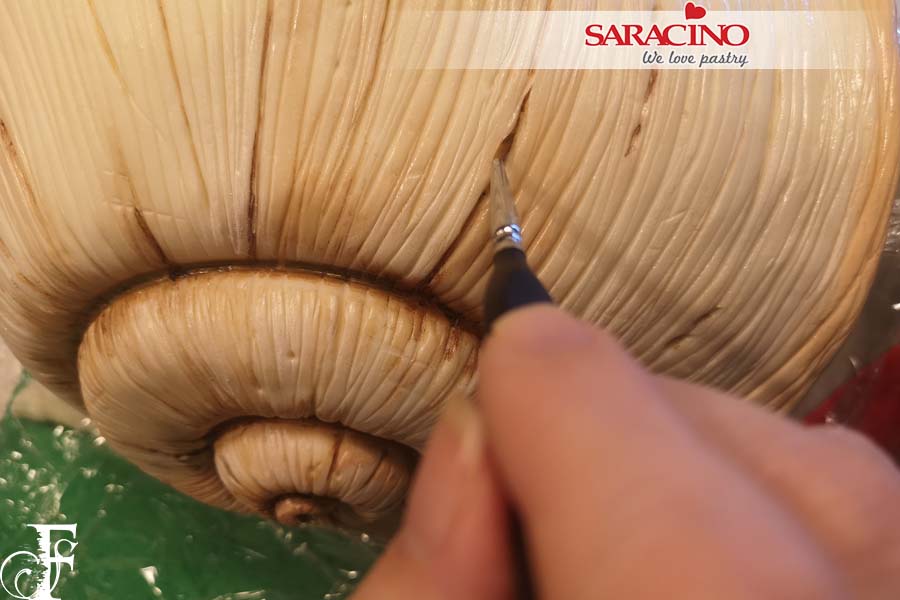
Step 34
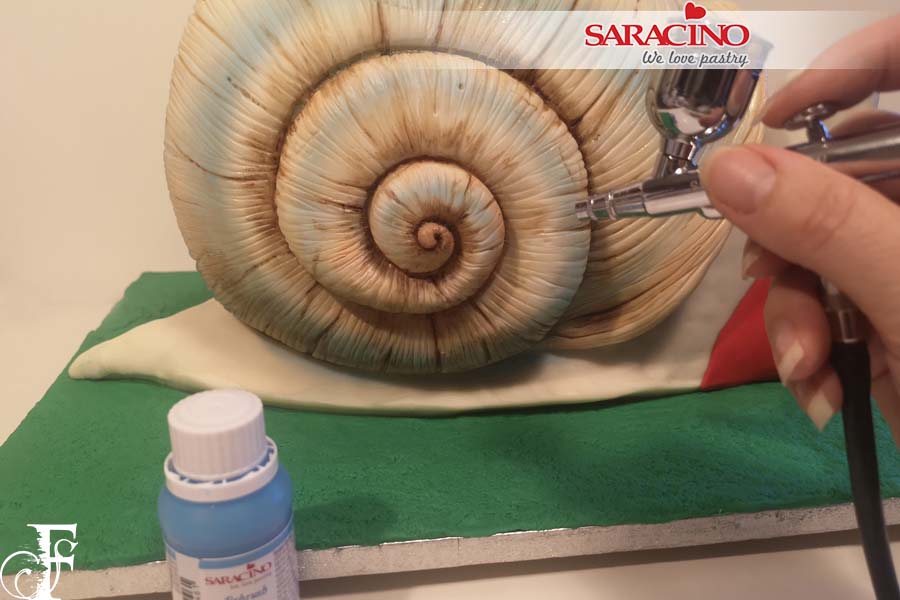
Step 35
To achieve the blue swirl airbrush with blue colour.
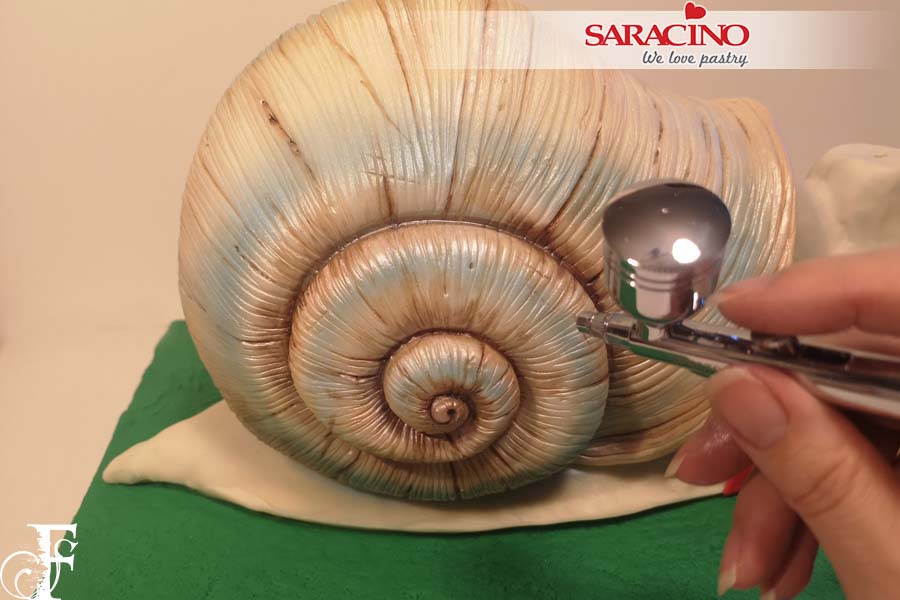
Step 36
Using the mother of pearl airbrush colour, airbrush the shell completely to give it a lovely sheen.
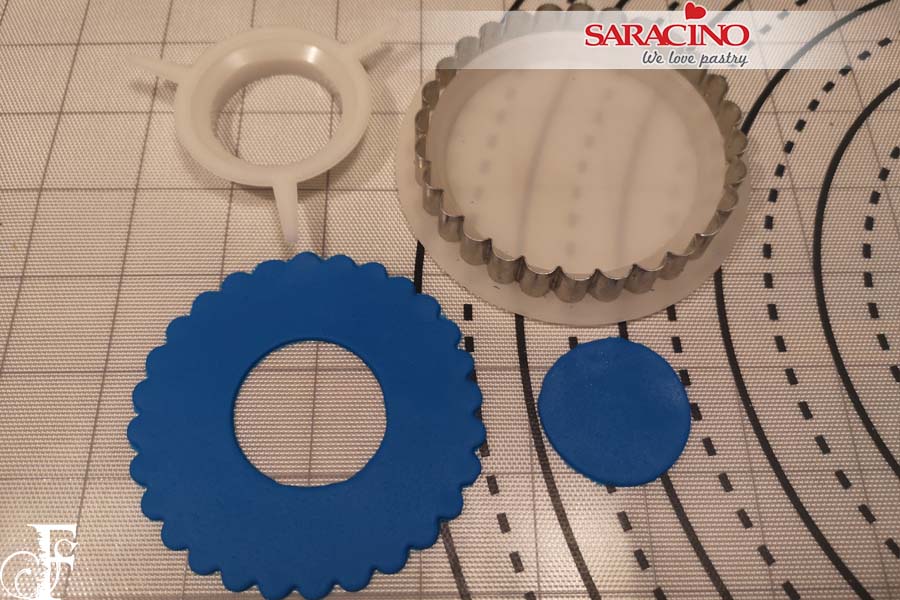
Step 37
Take some of the blue modelling paste and roll it out thinly, cut out circles with a frill cutter. You will need to make lots of these. Alternatively you can use a cookie cutter.
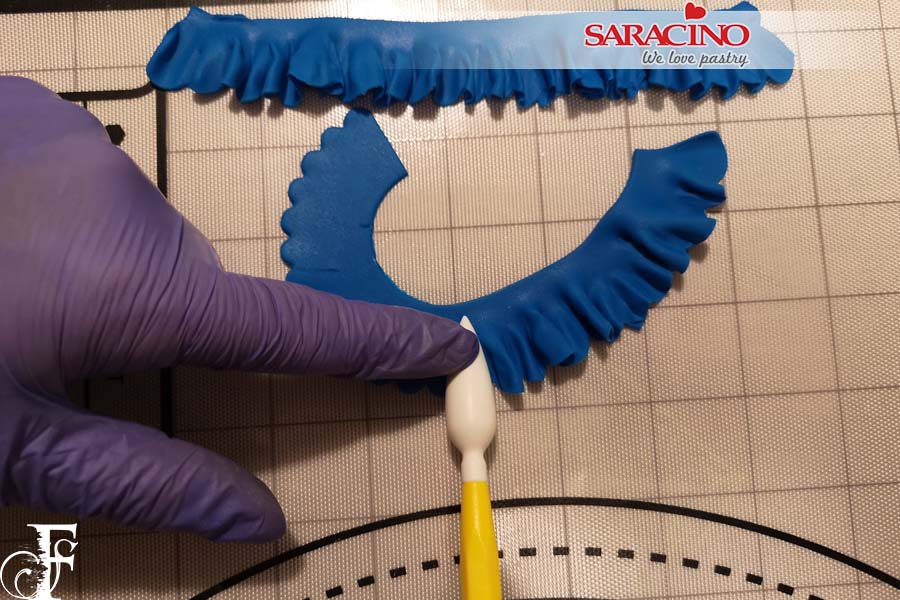
Step 38
Using a bulbous tool, roll back and forth creating a frill.
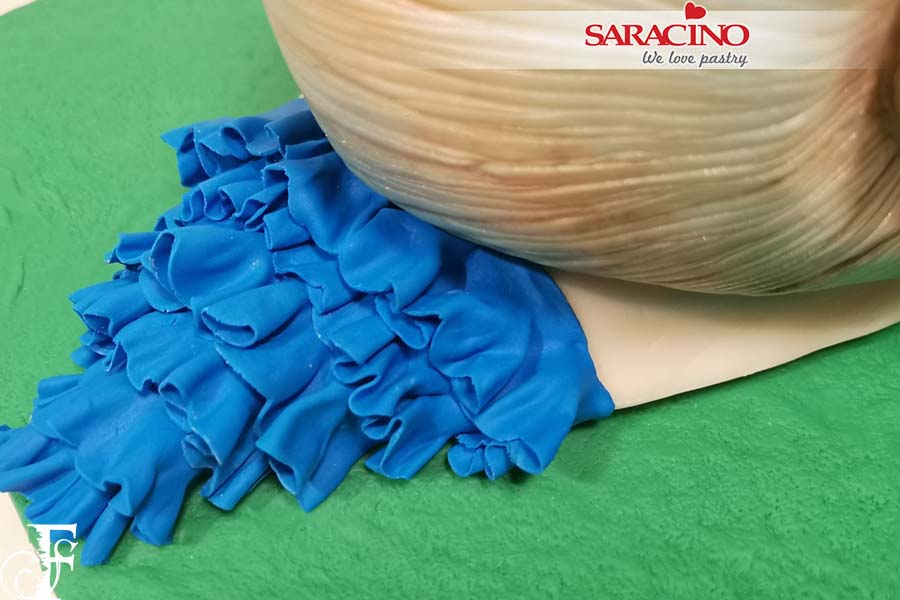
Step 39
Starting from the tail work your way along the body fixing with water or edible glue.
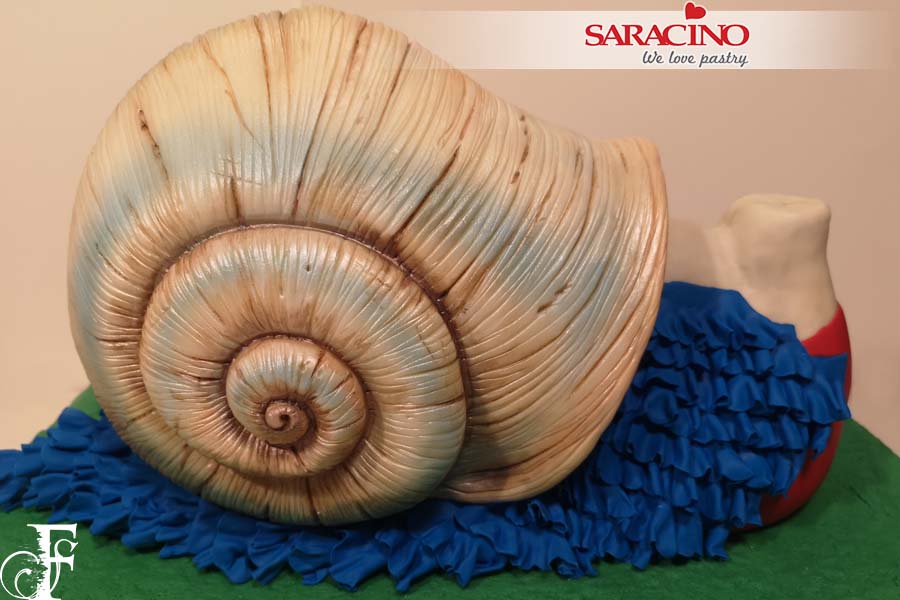
Step 40
Adding each frill on top of another until you reach the front, stagger the layers up as shown. Some will be covered.
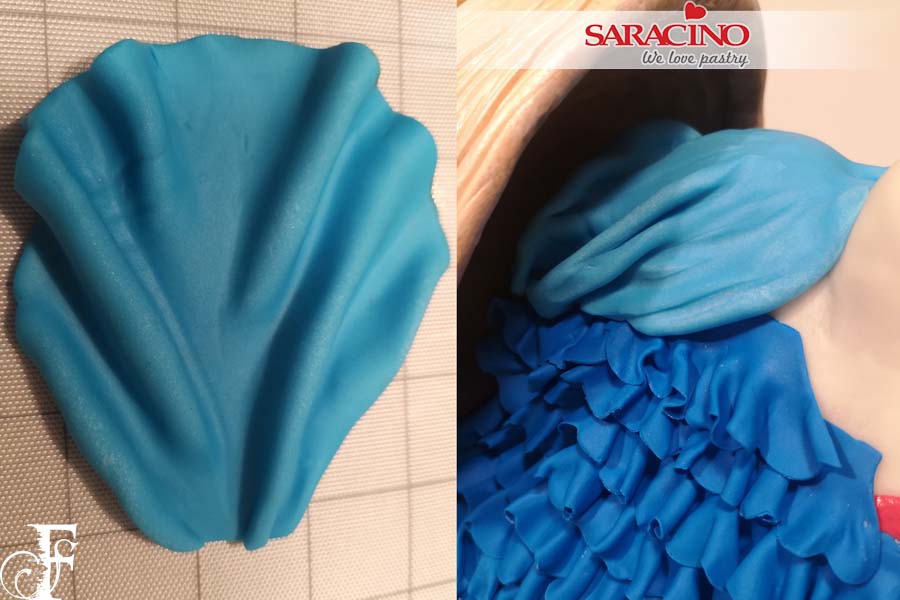
Step 41
With some of the light blue Saracino modelling paste roll out and cut out a large circle, pinch at one end and make some folds. Cover the hump up into the shell.
Step 42
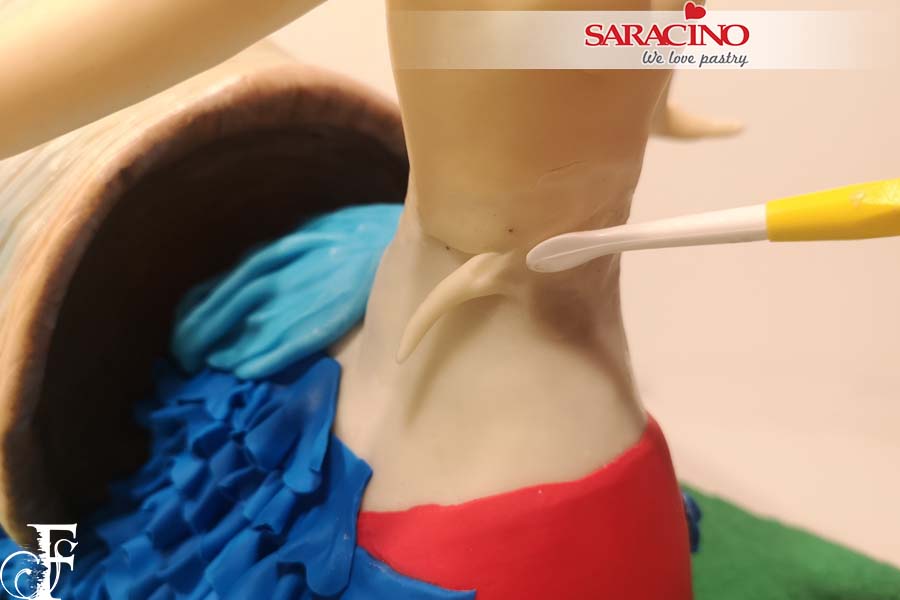
Take your modelled torso and with a little edible glue fix it on the cake. If needed trim the waist to fit and add a little paste to fill and blend the joint.
Step 43
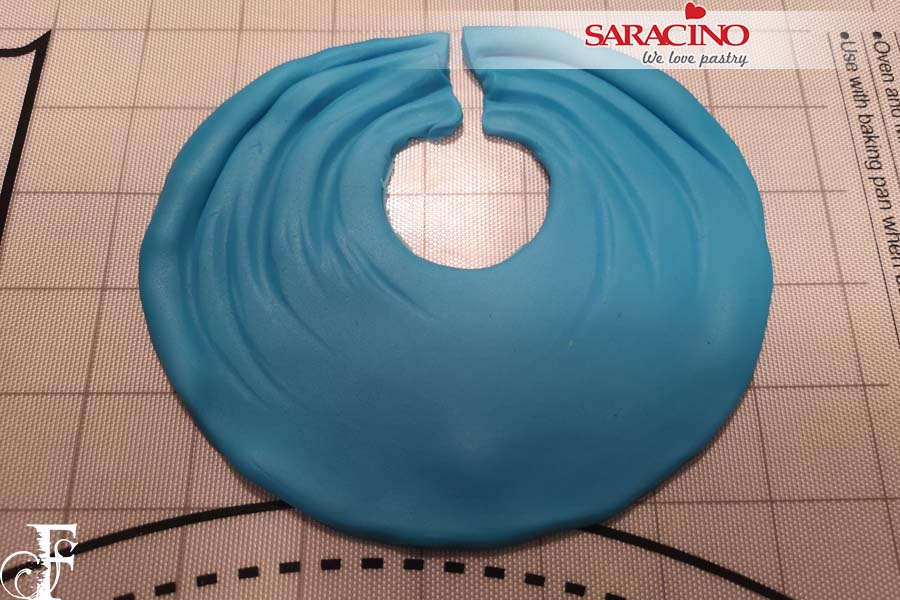
Roll out the light blue modelling paste (not too thinly) into a large circle, cut an off centre hole and add a few creases.
Step 44
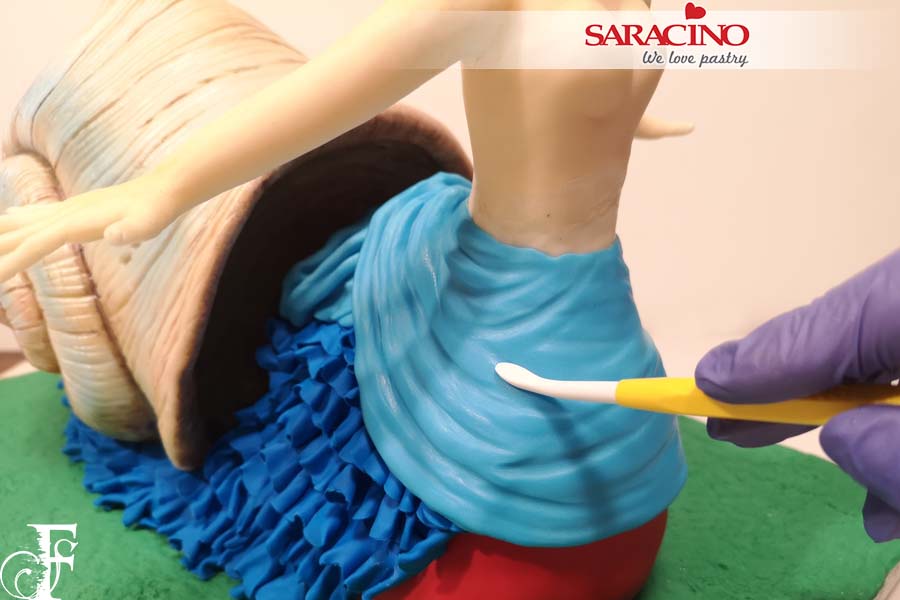
Glue to the model. Position the joint on top of the hump, blend in enhancing the pleats with a Dresden tool.
Step 45
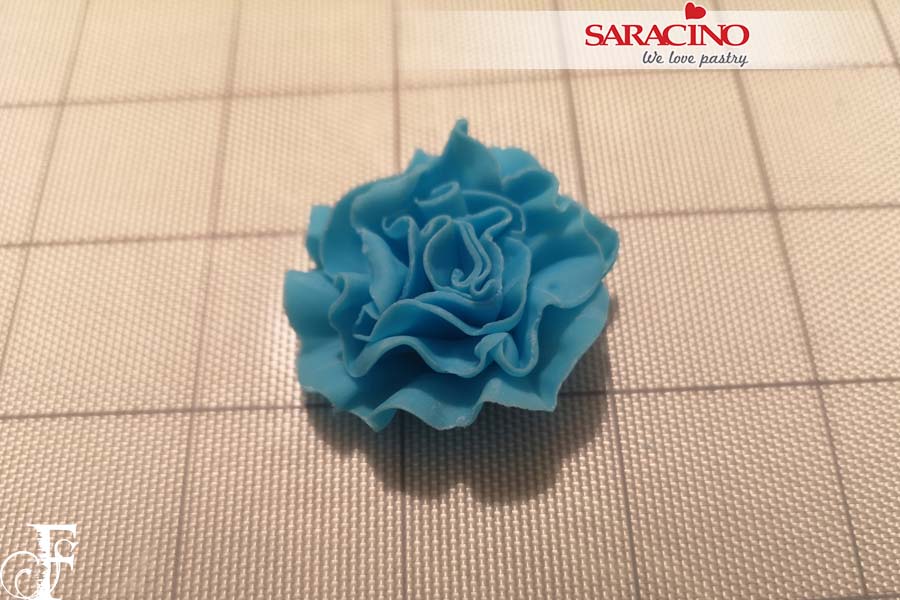
For the back of the dress make a long frill from light blue modelling paste and roll it up.

Step 46
Roll out red modelling paste thinly and cut four fine strips for ribbons. Fold two in half and make four separate loops with the other two.
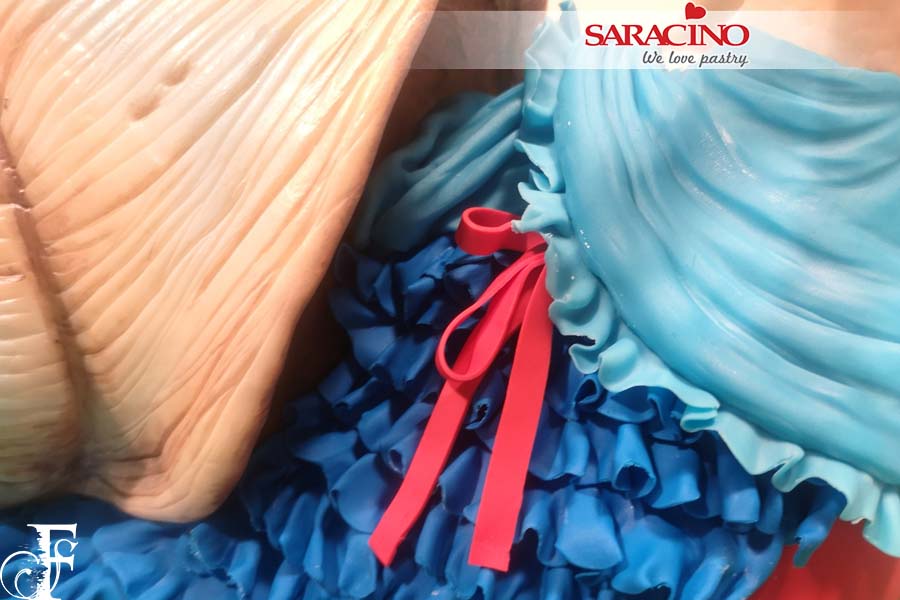
Step 47
Roll a light blue frill and fix around the bottom of the dress. Carefully fix ribbons in place with a little glue.
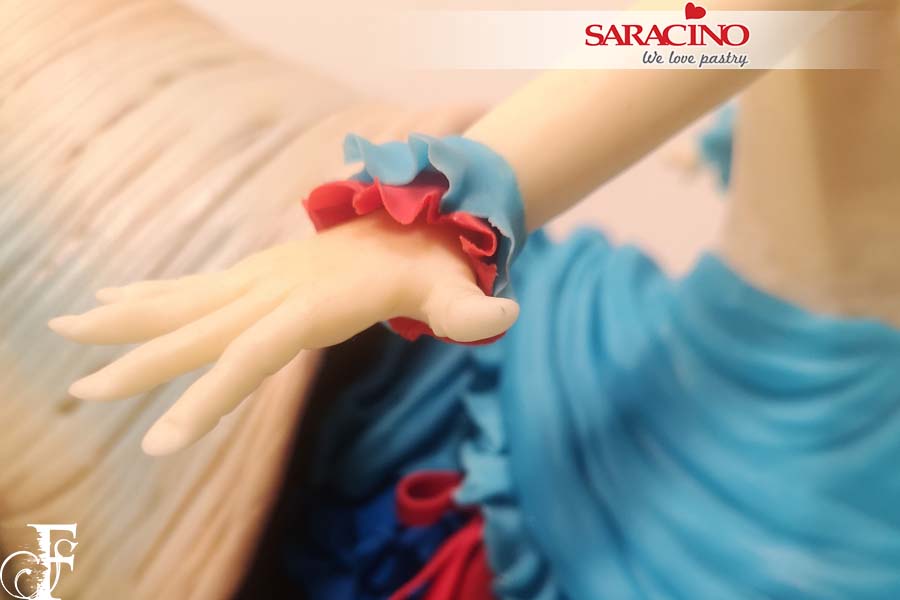
Step 48
Add red and blue frills to the wrists.
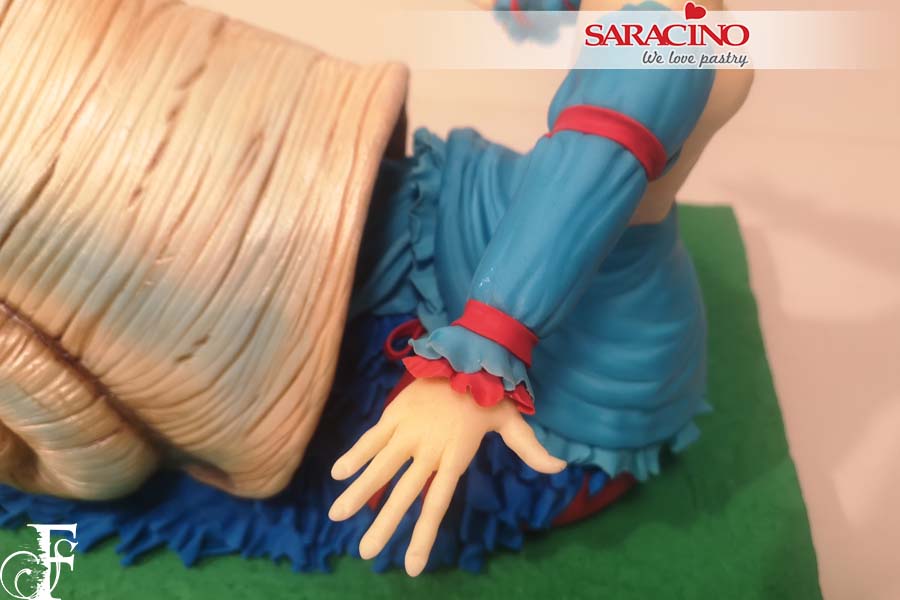
Step 49
Roll out the light blue modelling paste into two fan shapes a little larger than the length of the arms. Glue to the arms adding creases and trimming off the excess. Add red ribbon strips at the wrists and upper arms.
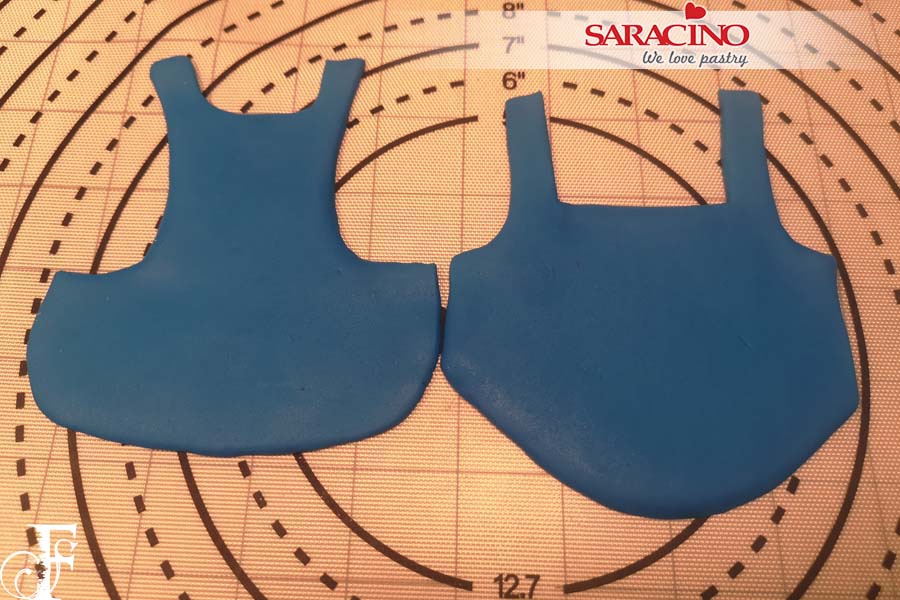
Step 50
Roll out the dark blue modelling paste and make apron shapes for the bodice front and back.
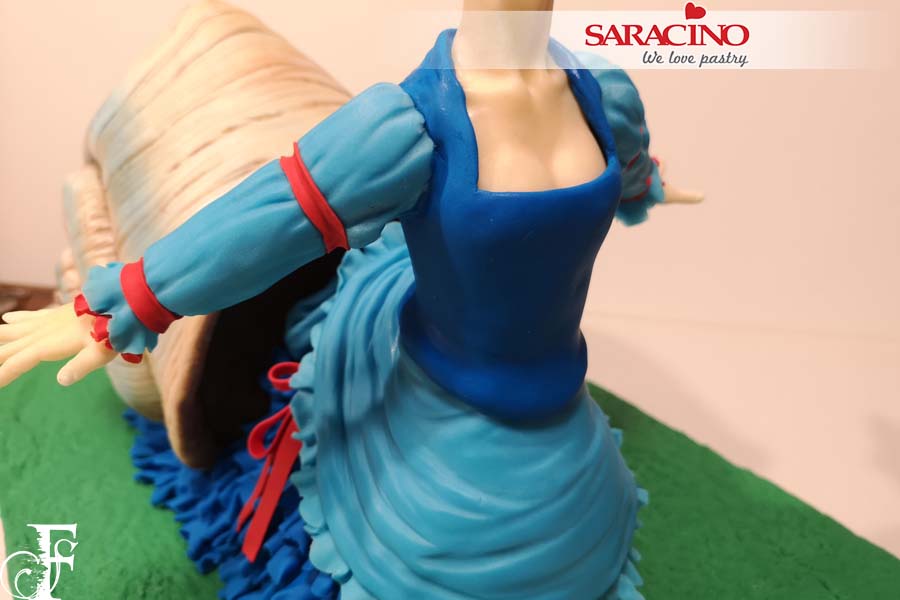
Step 51
Stick to the body with edible glue. Trim and shape to the body blending in the joints with your fingers and Dresden tool.

Step 52
Glue a little bow to the front of the bodice and glue the rolled frill on top of the hump.
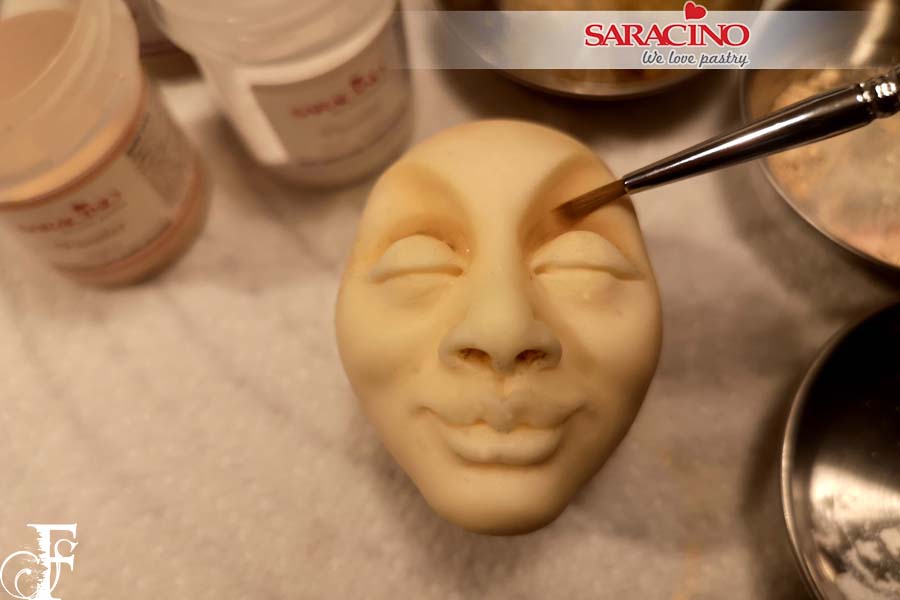
Step 53
With brown and skin tone powder colour start to dust around the eyes and brows.
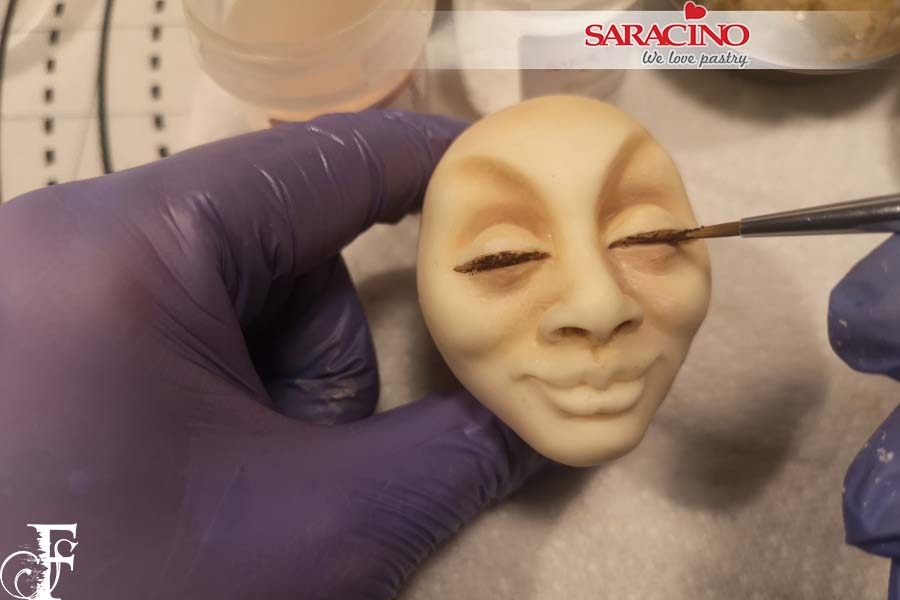
Step 54
Paint an eyelash line with brown dust mixed with a little water, add white dust to lids.
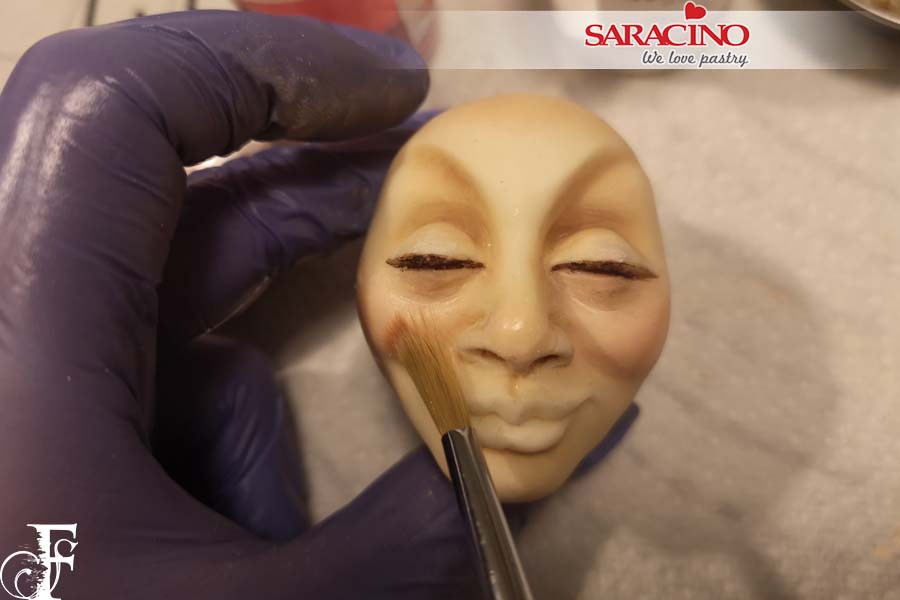
Step 55
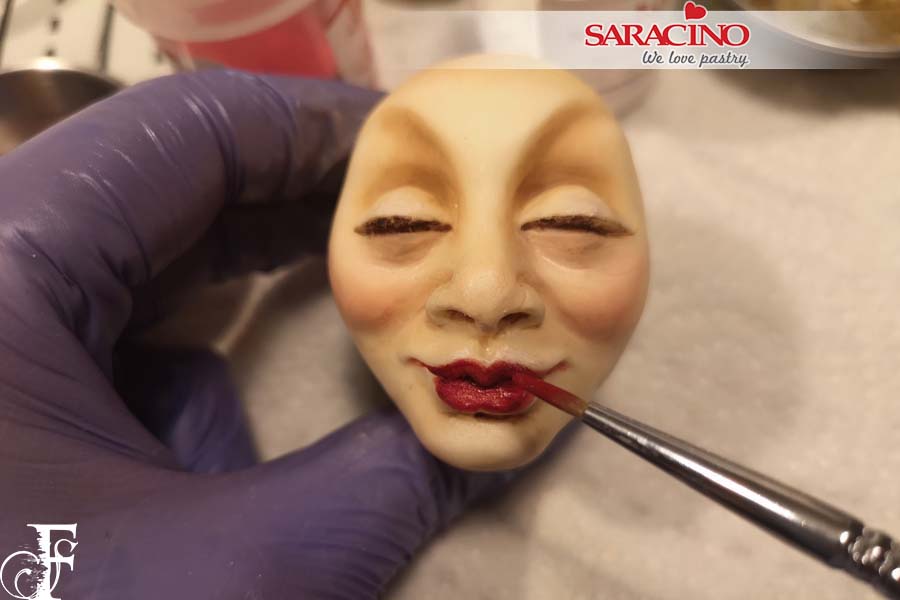
Dust her cheeks with red dust.
Step 56
Paint her lips with red dust colour mixed with a little water, blend around with skin tone dust colour.
Step 57
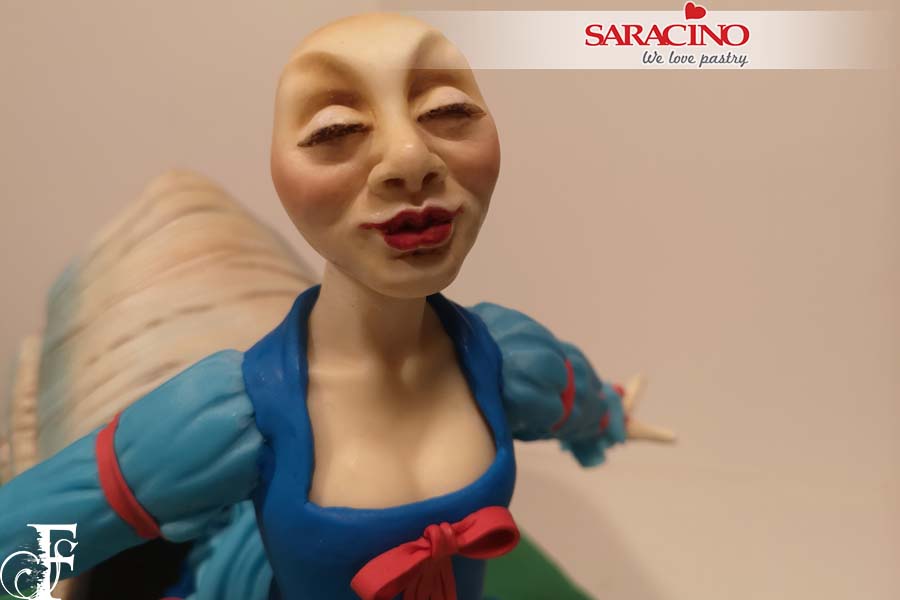
Trim the neck down to desired size and add a little glue then attach the head.
Step 58
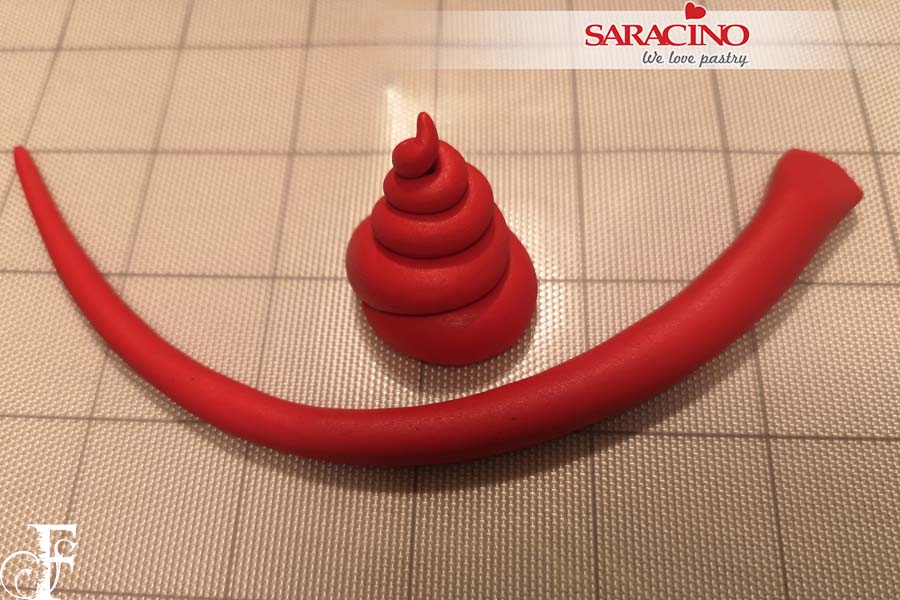
Roll two tapered sausage shapes and curl them to make two swirls.
Step 59
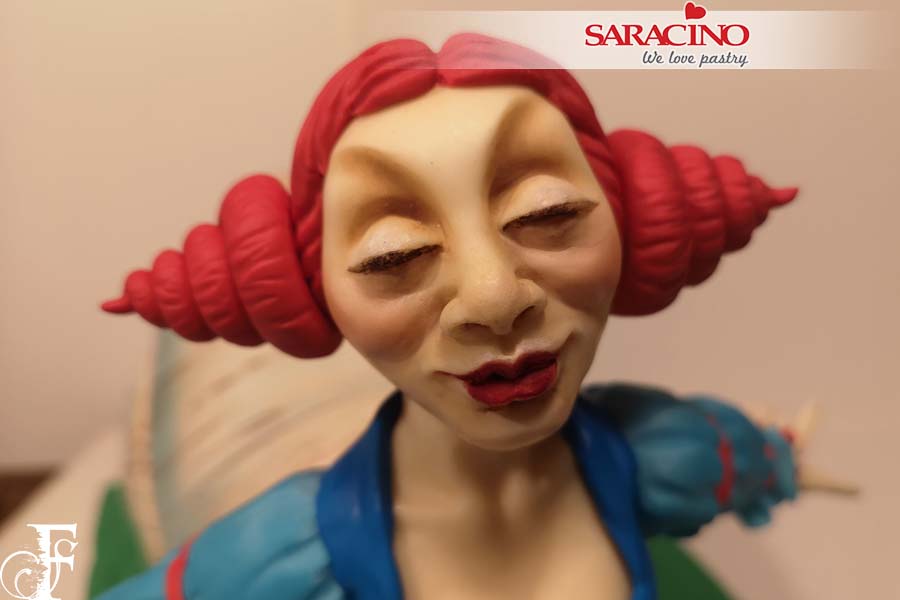
Cover the head with a little red paste, then use your Dresden tool to give the effect of hair texture. Fix the two swirls to the side of the head.

Step 60
Make two antennae out of skin tone modelling paste and glue to the top of the head, very gently dust them with skin and red colour powders.
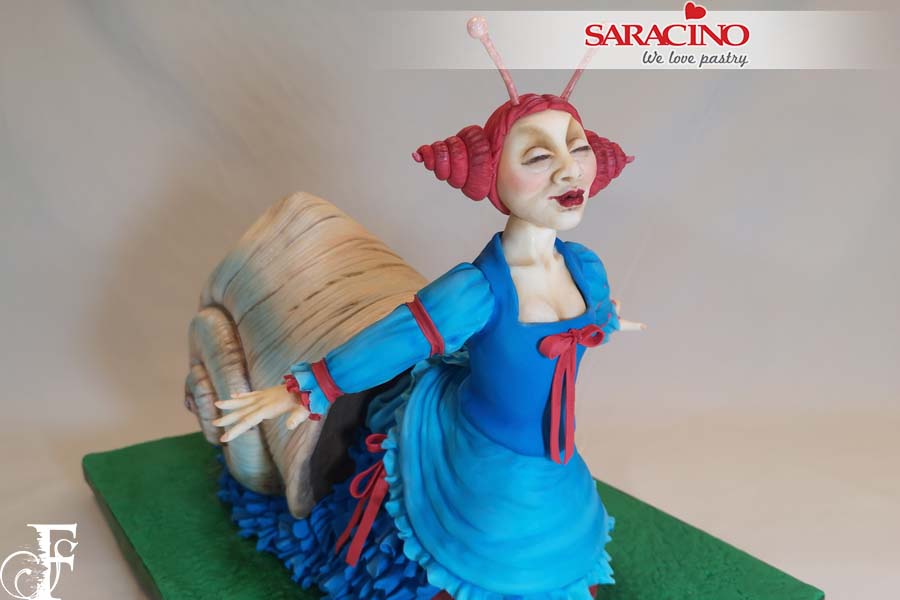
Step 61
Dust the neck, hair, clothes and board to give shadow, depth and highlights. Using Saracino liquid shiny, paint the antennae, lips and the red underside.
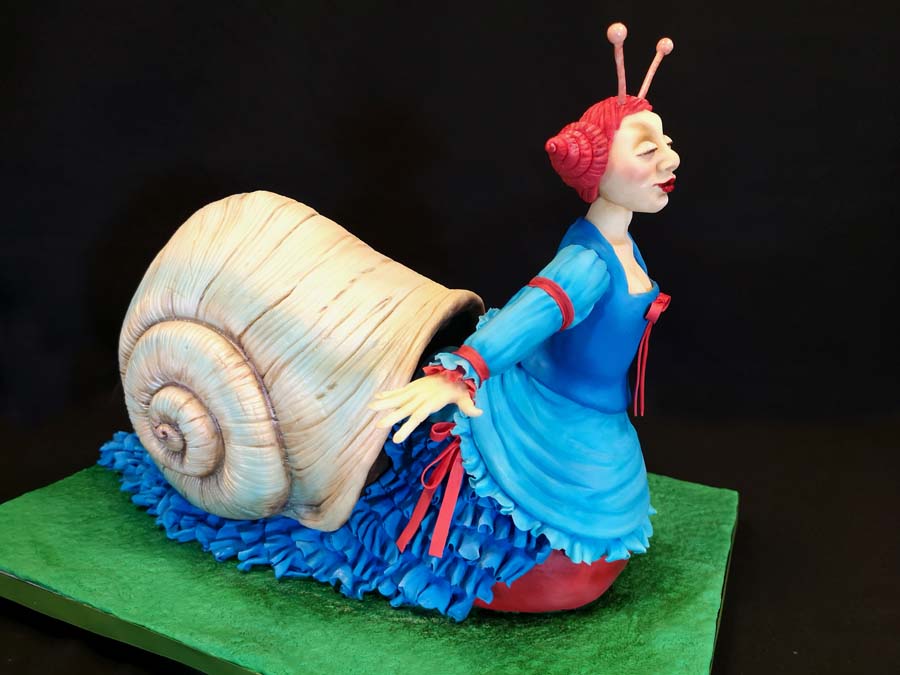
Your Snail Lady is ready!


