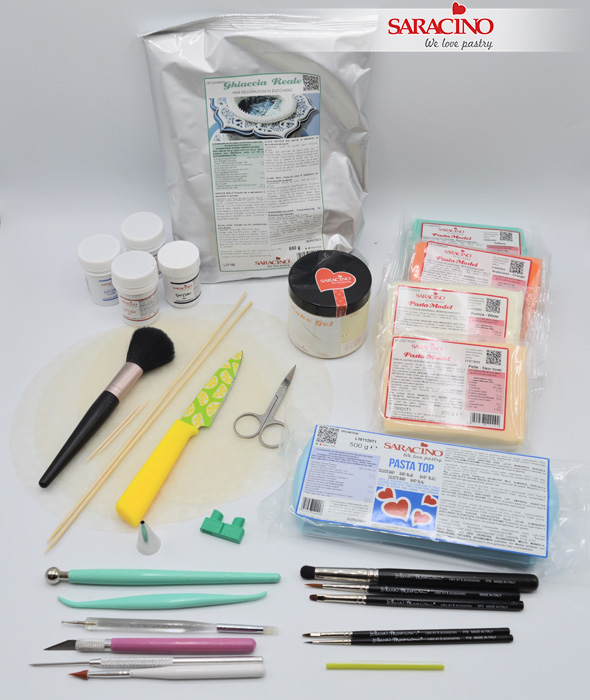
You will need:
- Download templates HERE
- Saracino gel colours : red, black, brown, light blue,white
- Powder colours: gold, pink
- Cake gel
- Pasta Top : baby blue and white (for the board colour it with brown and yellow gel colour and a little black)
- Pasta Model : white, orange, brown, tiffany, red, black, yellow
- Royal icing
- Rice paper sheets
- Cakes : 15cm dia x 19cm high and 10cm dia x 10cm high
- Clear alcohol
- Dresden tool
- Ball tools (small and 10mm size)
- Scalpel
- Pointed hard brush
- Sharp pointed tool
- Small scissors
- Straw
- Piping tube nr 5
- Easy Eyes green pack
- Knife
- Cocktail stick and toothpicks
- Big brush
- Fine paint brushes
- Cake board 25cm diam
- Rolling pin

Step 1
Cut out all the templates.

Step 2
Roll out different colours of Pasta Model and cut out each part of the boat using the templates. Fix them together using a little edible glue, one on top of the other starting from the largest (shape 1). Use a scalpel to add the wood effect.

Step 3
Using red gel colour and gold powder colour (thinned with clear alcohol) paint the details.

Step 4
Using a soft brush and brown powder colour dust the wood sections.

Step 5
Wrap a cocktail stick with a thin piece of brown paste and attach the flag to the top.

Step 6
Create the treasure chest in the same way you created the boat. Paint the treasure with the gold powder paint made earlier, cut the edible jewels into small pieces and attach them to the treasure chest using a little water.

Step 7
We want it to look like this.

Step 8
Using the template make the palm tree using the same techniques. Using the gold paint we made previously paint stripes on the tree and to the edges of the leaves. Dust the leaves using green powder colour.

Step 9
For the Octopus take 15g of pink Pasta Model and roll into a teardrop shape. Use a ball tool to press an eye socket.

Step 10
Using white paste roll a small ball for the eye. Add the eye details. Use black Pasta Model to make a small eye patch for the other eye. Fix to the Octopus head.

Step 11
Cut a cross shape on the bottom side using a pair of small sharp scissors.

Step 12
Stretch and roll out each of the 4 parts to create the tentacles. Add more tentacles to give 8 in total.

Step 13
For the mermaids tail use 30g of pre-coloured tiffany Pasta Model (as an alternative mix 2/3 light blue + 1/3 green) and roll a long tear drop shape. Use your finger to push the paste to create the back side of the tail .

Step 14
Use a ball tool to form a dent on the top of the wider end.

Step 15
Use a scalpel to remove a small piece of paste on the front side. This will help when we bend.

Step 16
Bend the tail as shown.

Step 17
Secure the tail to a dummy using a cocktail stick. Use a Dresden tool to create two folds. Mark the scales using a straw which has been cut in half lengthways.

Step 18
For the body use 15g of light skin tone Pasta Model and roll to a shape with one end a little bit smaller than the other.

Step 19
Use your finger to press down across the wider shoulder area.

Step 20
Use your fingers to shape the neck area.

Step 21
Again use your fingers to press in and create the waist, tummy and breast.

Step 22
Bend the back.

Step 23
Fix the torso to the tail.

Step 24
Insert a cocktail stick or wooden skewer through the body and the tail into the dummy. This will be used to secure the mermaid to the cake. Leave enough at the neck to secure the head. Create the navel with a pointed tool.

Step 25
Use a scalpel to mark the cleavage.

Step 26
Cut out a small strip of white Pasta Model and wrap around the chest. Twist at the back and fix.

Step 27
Create some random cuts.

Step 28
For the head use 20g of light skin tone Pasta Model. roll to a teardrop shape then flatten with the palm of your hand. Create the eye area by pressing gently with fingers.

Step 29
Shape the nose using the Dresden tool.

Step 30
Place the Easy Eyes tool (small size of the green pack) centrally above the nose and push gently.

Step 31
Use the Dresden tool to press the eye sockets in away from the edge.

Step 32
Use a sharp pointed tool to define the outline of the eyes.

Step 33
Use a Drseden tool to shape the eyebrows (for added expression make one of them higher than the other).

Step 34
Use a scalpel to cut a smile and carefully remove the paste from inside the mouth.

Step 35
Flatten the surface using a very small ball tool. Replace with a piece of white Pasta Model.

Step 36
Use the Dresden tool to add lines and character to the smile.

Step 37
Using a small brush paint the eyes with white gel colour.

Step 38
Using a fine brush paint the eyebrows. Roll out the light blue paste very thin and cut out two circles using a straw or small circle cutter.

Step 39
Fix the blue circles to the eyes as shown. Press two holes for the pupils and paint them with the black gel colour.

Step 40
Blend the iris with a dark blue gel colour. Paint the eyes contour, the eyelashes and the outline of the smile using the black gel colour. Dust the cheeks with a bit of light pink powder colour. Add the light point to the eyes with white undiluted gel colour.

Step 41
Cover the cake using baby blue Pasta Top. For the sea I found that the rice paper sheets were very versatile and easy to use with a very nice result. Dilute some powder colours in water. Remember that the tone of the colour you see in the bowl is different to when applied so you may want to practice on another piece of paper before you start.

Step 42
Paint the sheet with the colour using a large brush.
TIP Pay attention not to soak the paper too much.
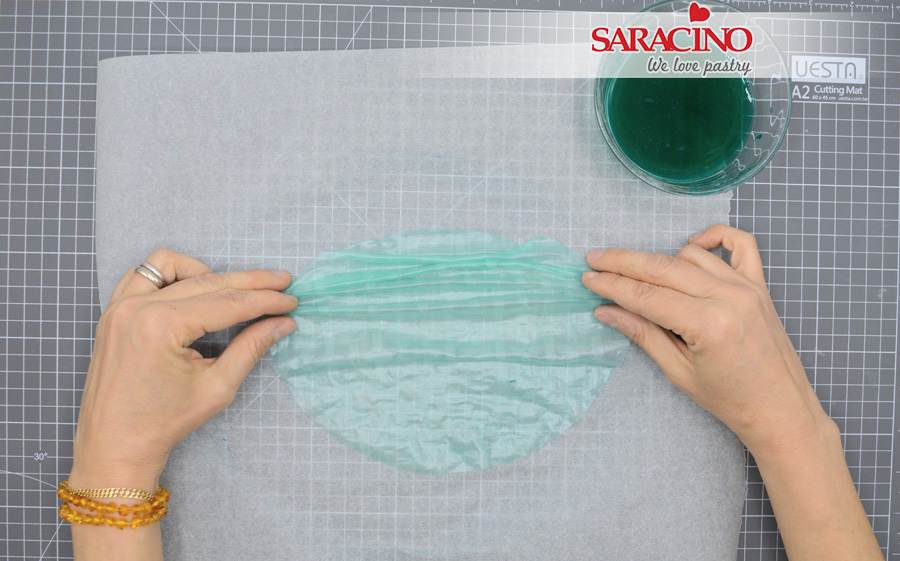
Step 43
Wait about 5 minutes (touch the paper to check if it is ready or not) then shape the ruffles with the fingers.

Step 44
Place it on a dummy (preferably of the same size of the cake) and continue to make another. Don’t let them dry completely so after making three or four pieces start attaching them to the cake using a little water.
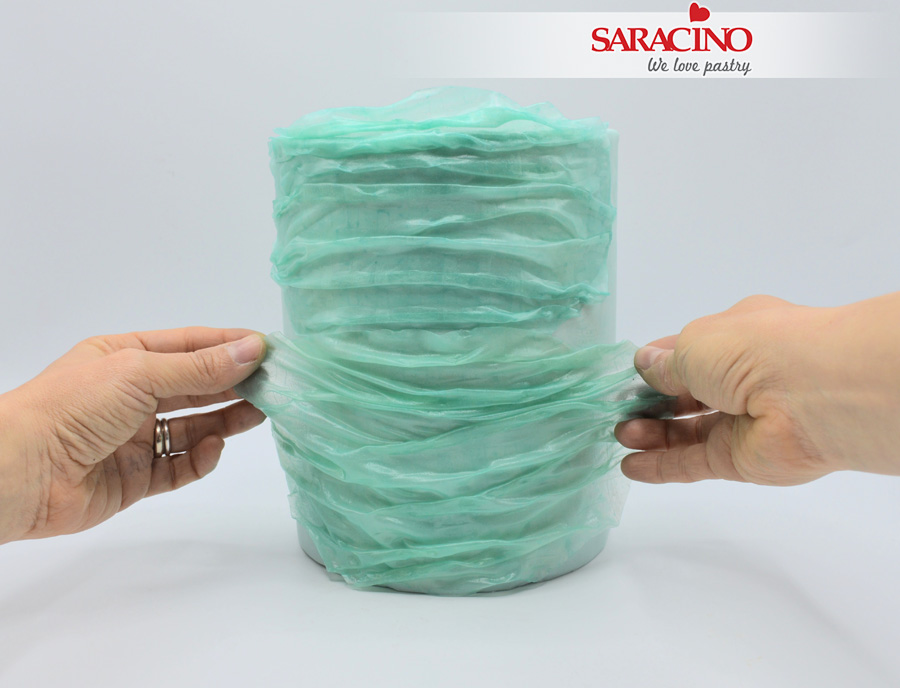
Step 45
Overlap each paper but avoid to overlap them too much. The sheets will now be flexible and stretchy so it is not difficult to place and shape them to the right position.
Step 46
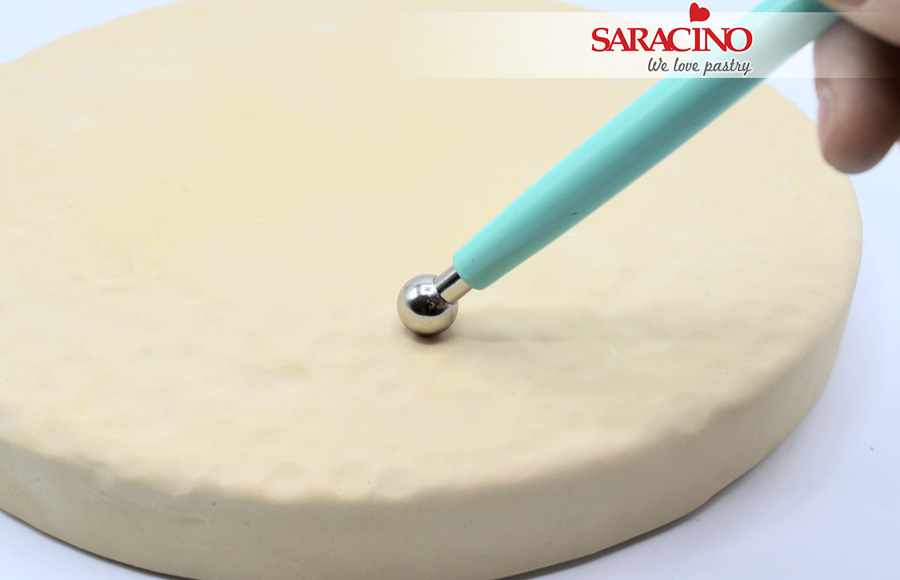
Cover the board with a sand coloured paste and add all the grooves using a large ball tool.
Step 47
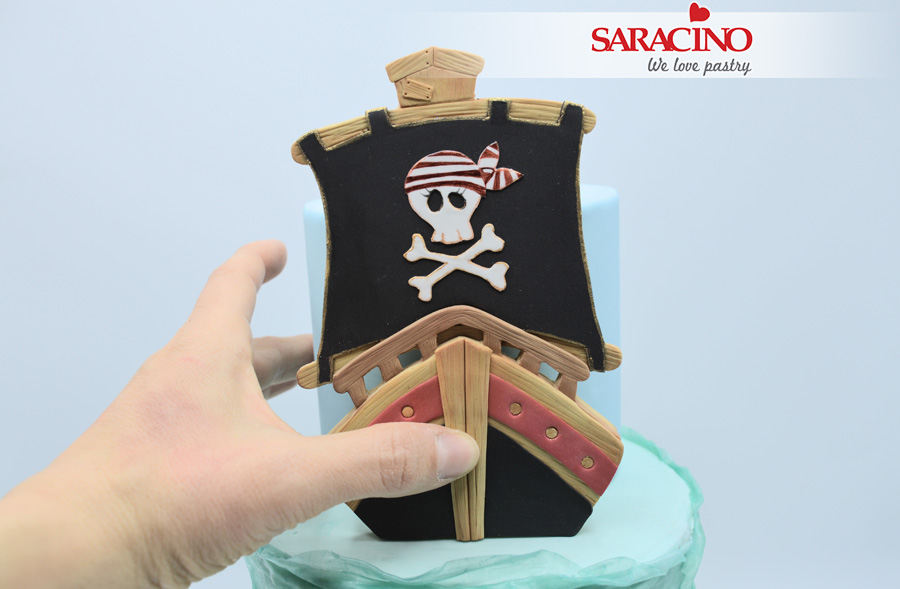
Transfer the lower tier cake to the prepared board. Add the smaller top tier. Use dowels to support if required.
Use a little edible glue to fix the boat to the top tier.
Step 48
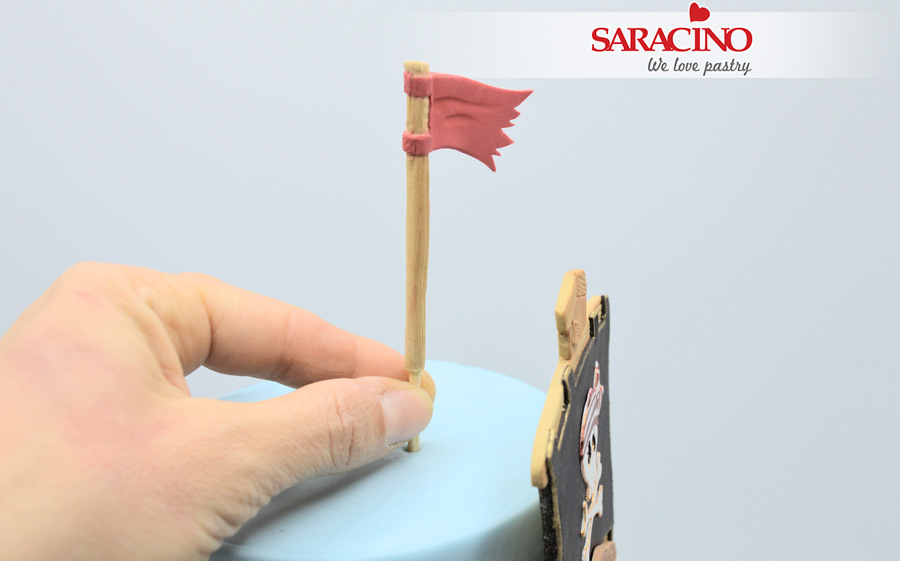
Insert the flag so that it is visible from the front. If the cake is edible you may want to use a posy pick.
Step 49
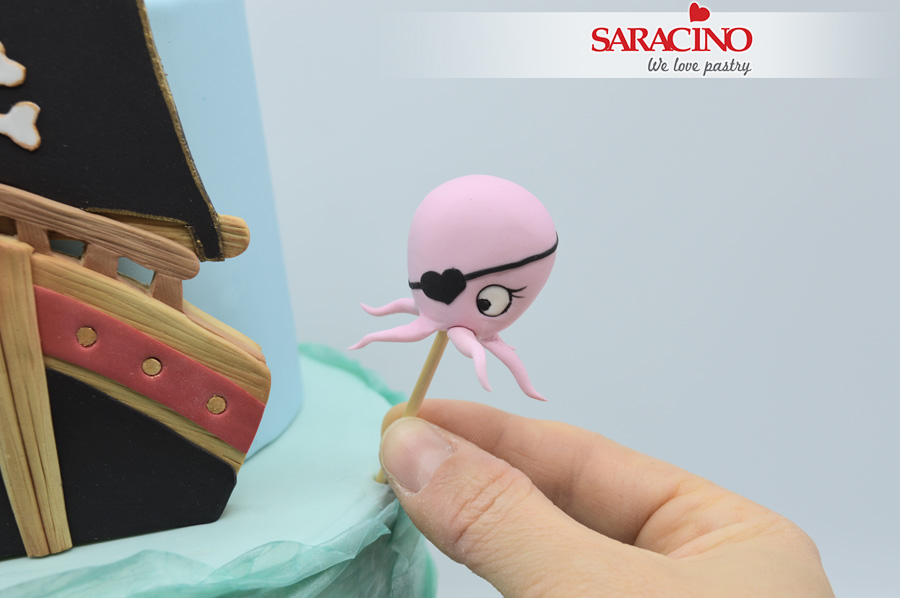
Attach the Octopus on the right hand side and the mermaid’s body on the left.
Step 50
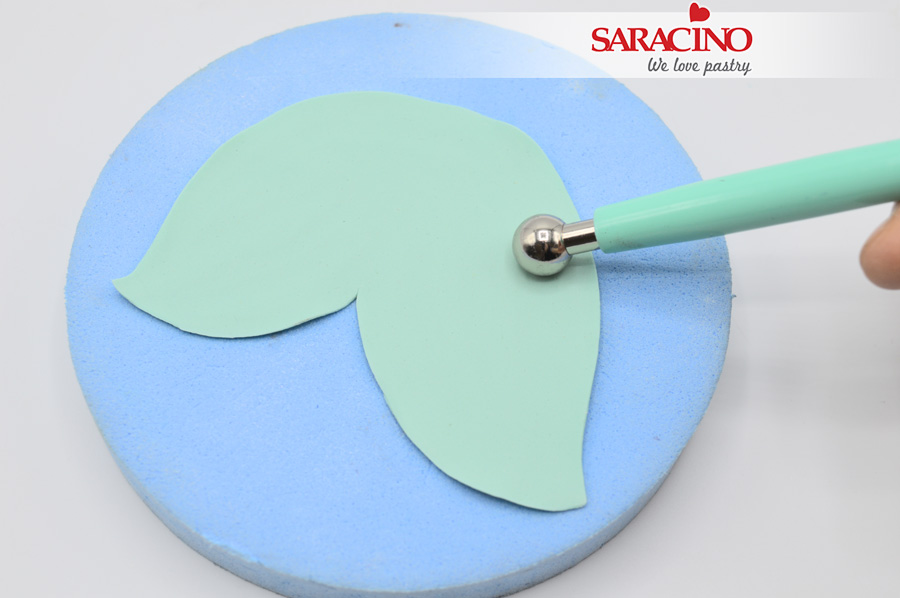
Add a little white paste to the paste you used for the tail and roll it out very thin. Cut out a large tail fin and place on a foam pad. Add texture with a ball tool.
Step 51
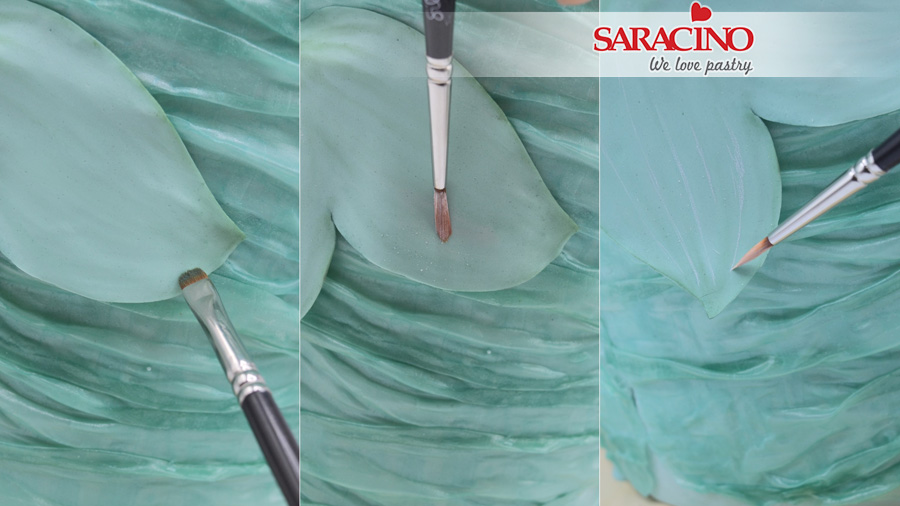
Fix to the end of the tail using a little water. Dust the edges using green powder colour and the grooves with a white powder colour. Finish the tail by painting white lines.
Step 52
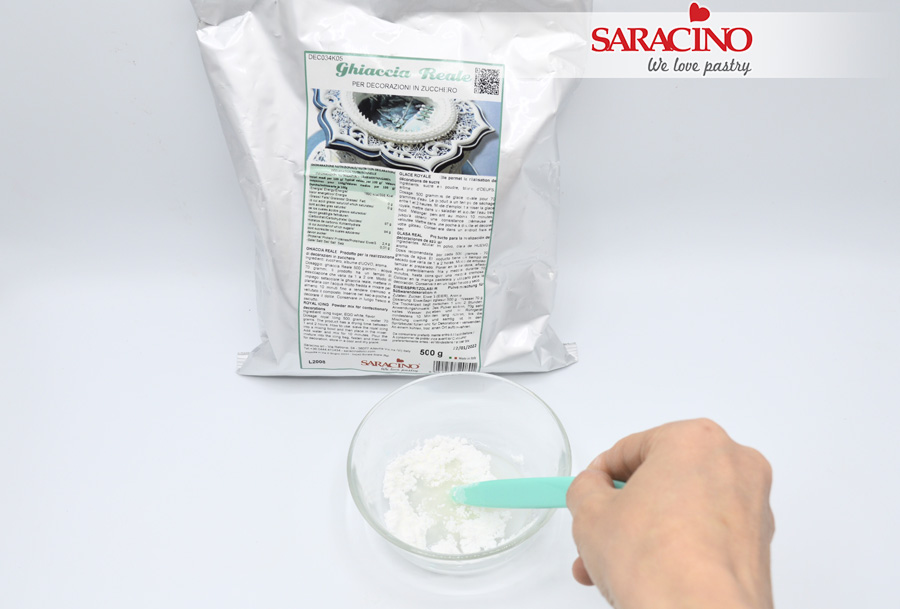
For the waves mix the royal icing as per the instructions on the packet (just add water). We need a medium consistency so be careful not to add too much water.
TIP You can prepare the whole packet of royal icing if you will soon need it for other decorations. The mixed result is likely to be better.

Step 53
Pipe the royal icing along the edges of the waves and use a wet brush to blend and create the crests.

Step 54
Fix the palm tree and the treasure chest on the board to the sides of the cake.

Step 55
For a sand effect crumble some biscuits and spread around the cake.

Step 56
Using 5 – 6g of light skin tone Pasta Model roll a sausage shape with each end narrower. Cut it in half and flatten the hand ends to create the palms. Roll to thin the wrist and the elbow area.

Step 57
Cut out the thumb making a V shaped cut with the scalpel. Push the thumb forward and smooth the edges. Bend the right arm.

Step 58
Fix the arms to the torso using a toothpick and a little water.

Step 59
Use the end of the piping nozzle to cut out some small circles for the coins. Paint with the gold paint we made previously (if it has dried add more clear alcohol).

Step 60
Fix the coins on the hand of the mermaid. Make another arm and attach to the body.

Step 61
Using about 50g of orange Pasta Model cut out strands of hair as shown.

Step 62
Start by attaching the smaller strands to the back of the head.

Step 63
Fix the the largest piece to the back and pinch the excess together on the top of the head. Cut away the excess paste.

Step 64
Continue attaching the other strands.

Step 65
Continue attaching all the other strands until the last one is fixed at the back of the head.

Step 66
Add random marks using the scalpel to add character. Add some very small strands between the larger ones.

