You will need:
- Saracino Pasta Model (light skin tone, white, black, brown, orange and red)
- Saracino Pasta Top (white)
- Saracino dust colours (yellow, orange, black, brown and light gold)
- Saracino gel colours (light green and green)
- Saracino cake gel
- Saracino Liquid Shiny glaze
- Dummy or cake (20cm/15cm)
- Mat
- Cake board (30 cm dia.)
- Rolling pin
- Smoother
- Scalpel
- Knife
- Scissors
- Dresden tool
- Ball tool
- Aluminium foil
- Cling film
- Brushes
- Clear alcohol
- Paper towel
- Baby wipes
- Cornflour
- Cocktail sticks
- Wire cutter
- Whisk
- Bowls

Step 1
For the body of the fox we will need 55g of orange Pasta Model, knead it well and roll a ball. With the palms of the hands roll the paste into a cone shape. Insert a cocktail stick and cut to length.

Step 2
Roll out white Pasta Model and cut out a teardrop shape with a cutter.

Step 3
Using your fingers lengthen it a little and glue it onto the body.

Step 4
For the back legs we need 2 x 5g orange Pasta Model. Roll into two balls, flatten them and with your Dresden tool give them the shape shown. For the back leg paws use 2 x 1.5g black Pasta Model rolled into two small balls. For the front legs we need 2 x 4g of orange Pasta Model. Roll it into two sausage shapes of the same length with one end thinner. For the front leg paws use 2 x 4.8g of black Pasta Model rolled into two balls.

Step 5
For the front leg paws roll the black Pasta Model into a sausage shape then bend to form the feet. Fix each foot to the orange legs.

Step 6
Attach the back legs and feet onto the body. Use your Dresden tool to add grooves for the toes.

Step 7
Attach the front legs. Make toes as previous.

Step 8
For the tail we need 16g orange Pasta Model. Roll it into a sausage shape with one end thinner. Roll white Pasta Model. Using a scalpel cut a small piece of paste and cut one edge with a zig-zag outline as shown.

Step 9
Glue the white patch to the tail. Attach the tail to the body.

Step 10
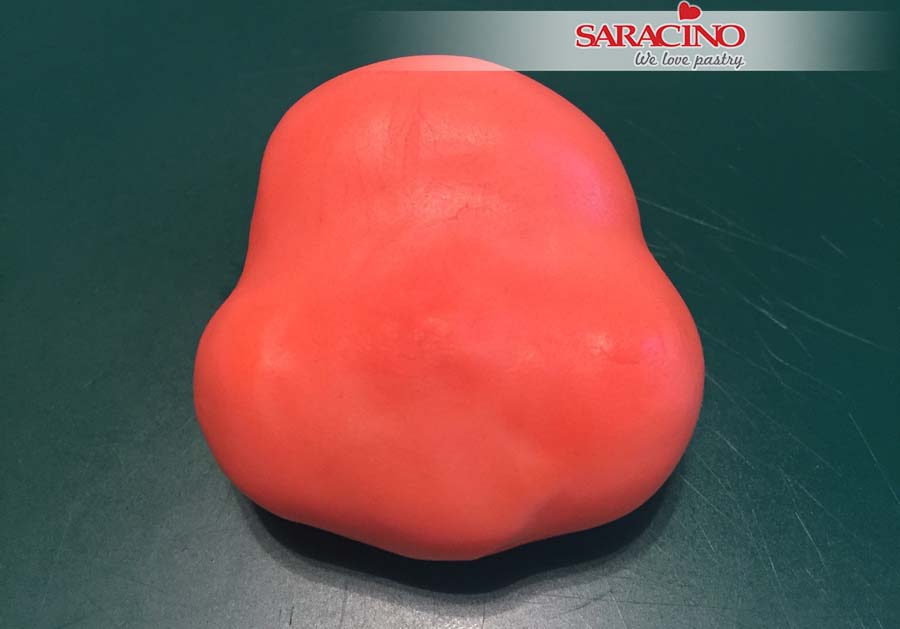
For the head roll a 60g ball of orange Pasta Model. Using your thumb press across the face where the eyes will be to form the forehead.

Step 11
The head shape should look like this.
Step 12
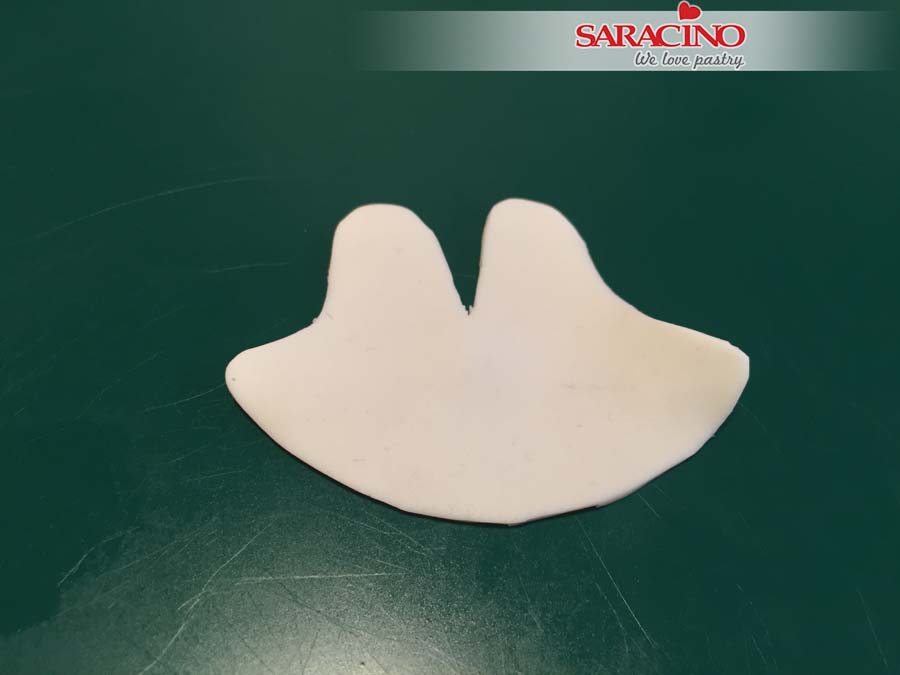
Use your fingers to shape the cheeks and chin.
Step 13
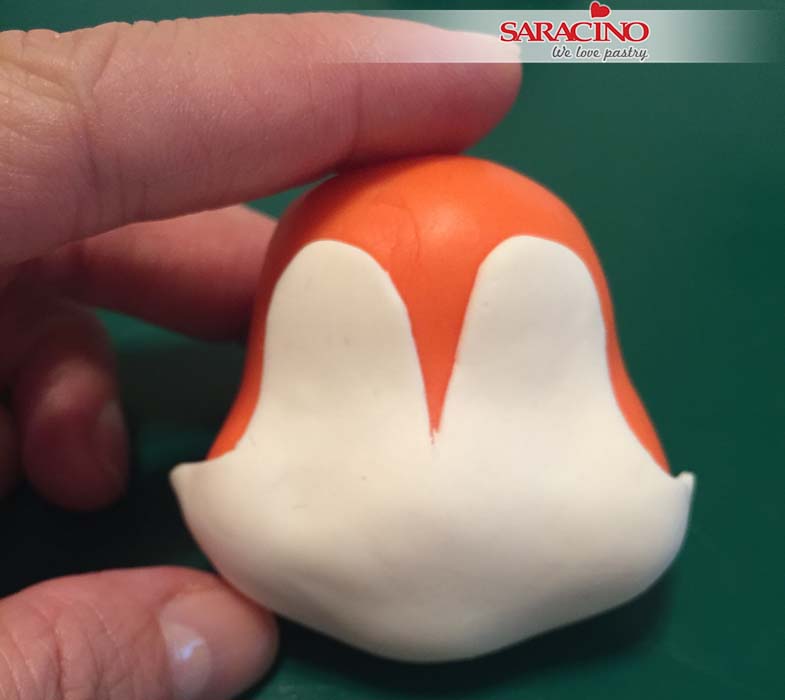
Roll a piece of white Pasta Model. Using a scalpel cut the shape shown.
Step 14
Glue the face onto the head. Do not add glue to the end of the cheeks as we want these to protrude.

Step 15
Using a ball tool create the eye sockets.

Step 16
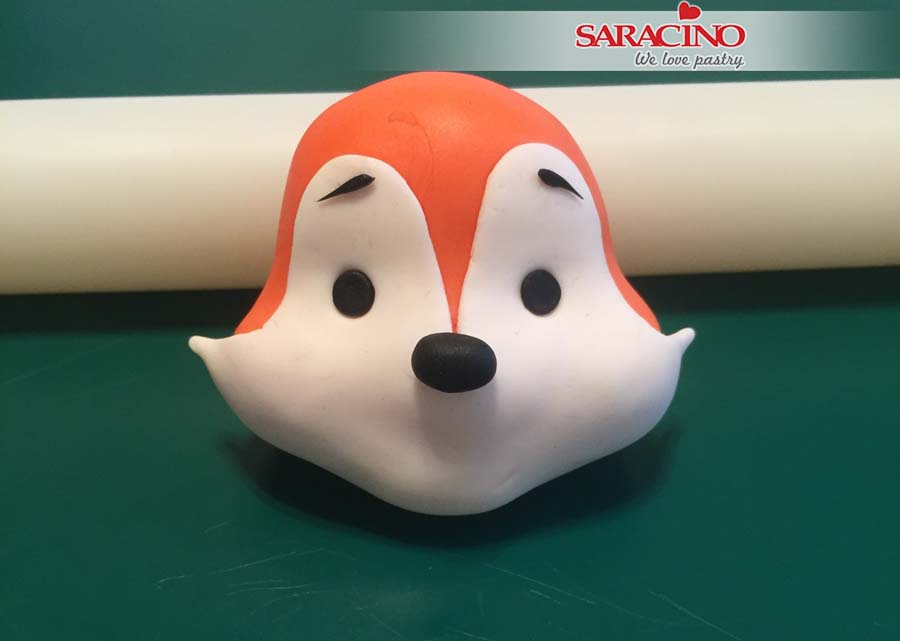
For the nose and eyes roll three small balls of black Pasta Model. Using a modelling tool flatten the eyes. Fix to the face as shown.
Step 17
Roll a thin piece of black Pasta Model then cut in half to form the eyebrows. Glue them onto the forehead.

Step 18
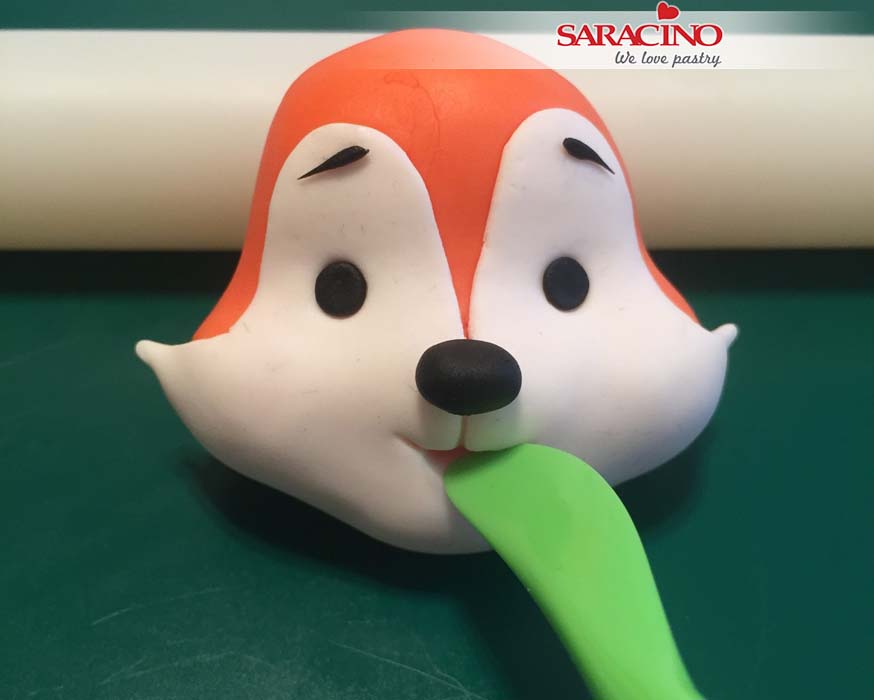
Using a Dresden tool, form the mouth.
Step 19
Shape the mouth to give a cute look. Add the line between mouth and nose.
Step 20
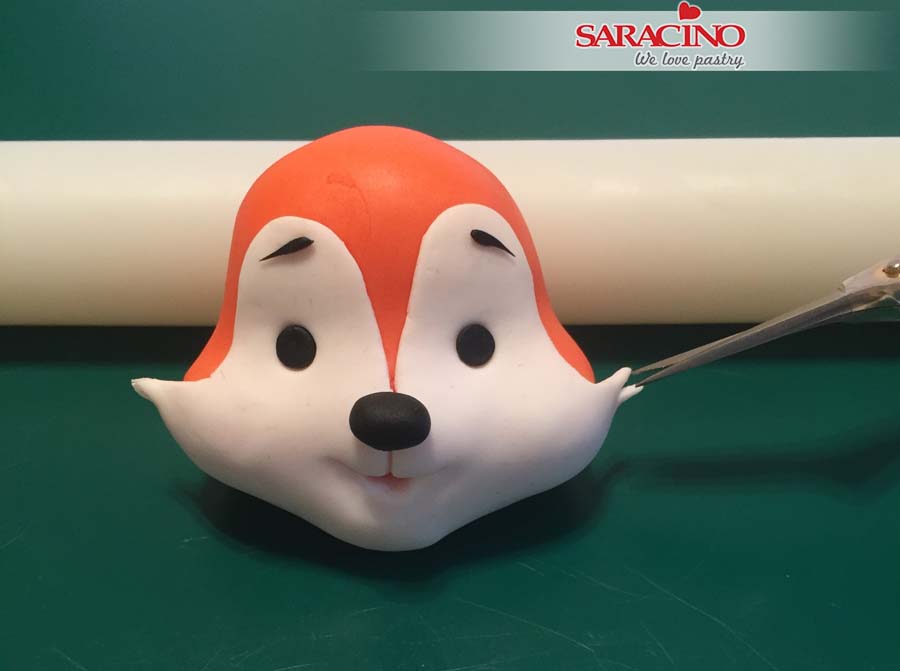
Using a pair of scissors cut the cheek fur.

Step 21
Roll two white small balls and add them to the eyes.

Step 22
For the ears we need 2 x 2g black Pasta Model and 2 x 1g orange Pasta Model. Form teardrop shapes and flatten. Glue them together. Cut them to the size needed.

Step 23
Fix them to the top of the head.

Step 24
Roll four thin strands of orange paste. Glue them together to form a tuft of hair.

Step 25
Use a little cake gel to fix to the top of the head.
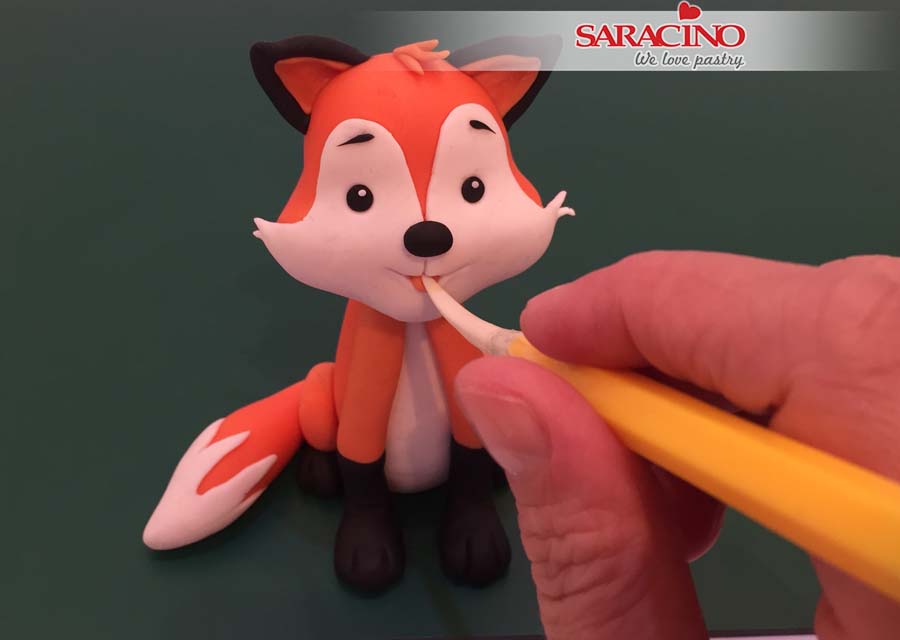
Step 26
Use a small piece of orange paste to form the tongue. Insert into the mouth and with the Dresden tool give it the right shape.
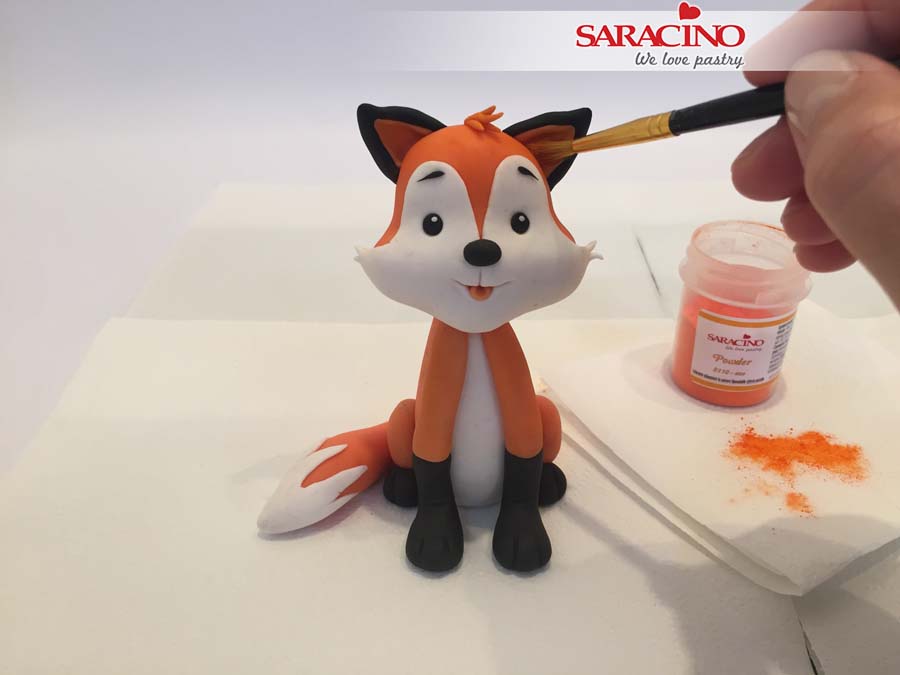
Step 27
Dust the head with a soft brush and orange powder colour.
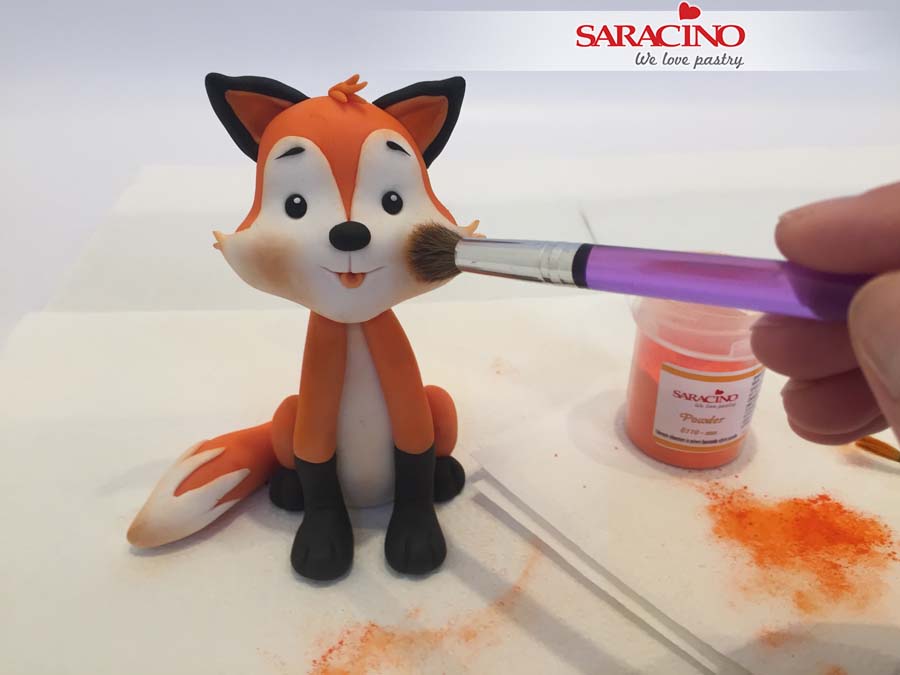
Step 28
Dust the face, tail and body with orange powder colour.

Step 29
For the body of the racoon we need 40g grey Pasta Model. Knead it well and form a ball. With the palms of our hands roll into a cone shape. Insert a cocktail stick and cut to length if required.

Step 30
Roll white Pasta Model and cut a teardrop shape with a cutter. Use your fingers to lengthen a little and glue it onto the body.

Step 31
For the back legs we need 2 x 4.5g of grey Pasta Model. Roll into two balls, flatten them and bend to form the feet.

Step 32
Using a modelling tool shape the paw.

Step 33
For the arms we need 2 x 2g grey Pasta Model. Roll into two sausage shapes of the same length and with a scalpel cut the paste to form the fingers. Add shape to the fingers.

Step 34
Fix the legs and arms to the body.

Step 35
For the head roll a 50g ball of grey Pasta Model. Using your thumb press across the face where the eyes will be to form the forehead shape. With your fingers shape the cheeks and chin.
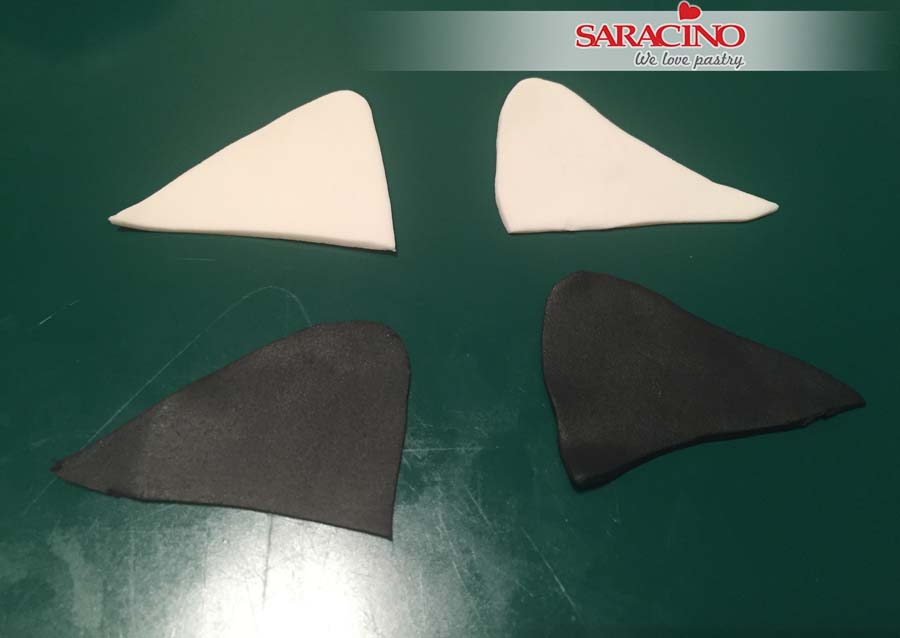
Step 36
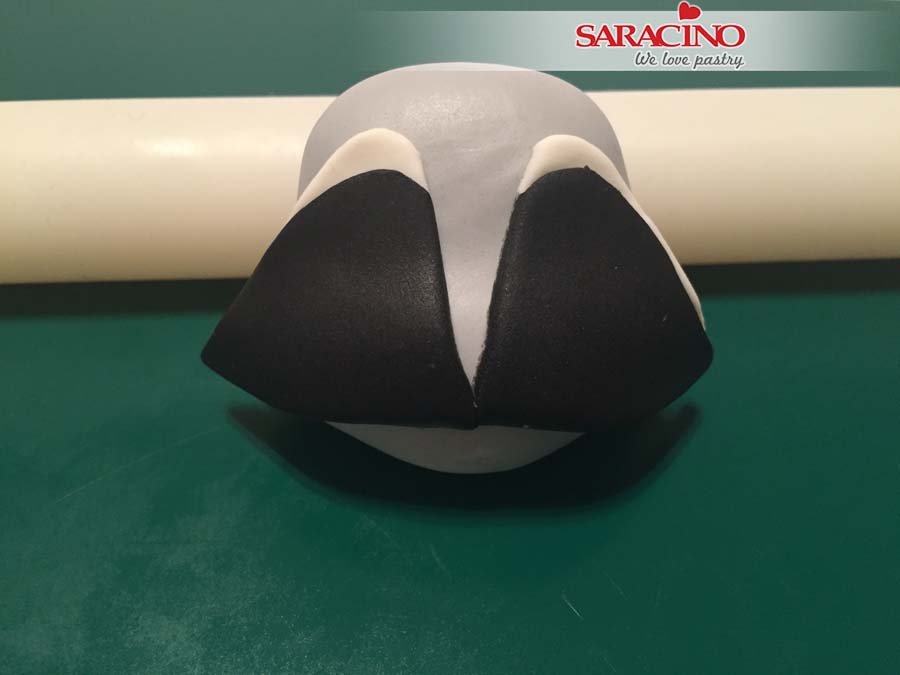
For the eyes roll white and black Pasta Model thinly. Using a scalpel, cut the shapes shown. We need two mirrored pieces for the two eyes.
Step 37
Fix the black part onto the white. Fix to the head but leave the outside cheek edges without glue and protruding as we did for the fox.
Step 38
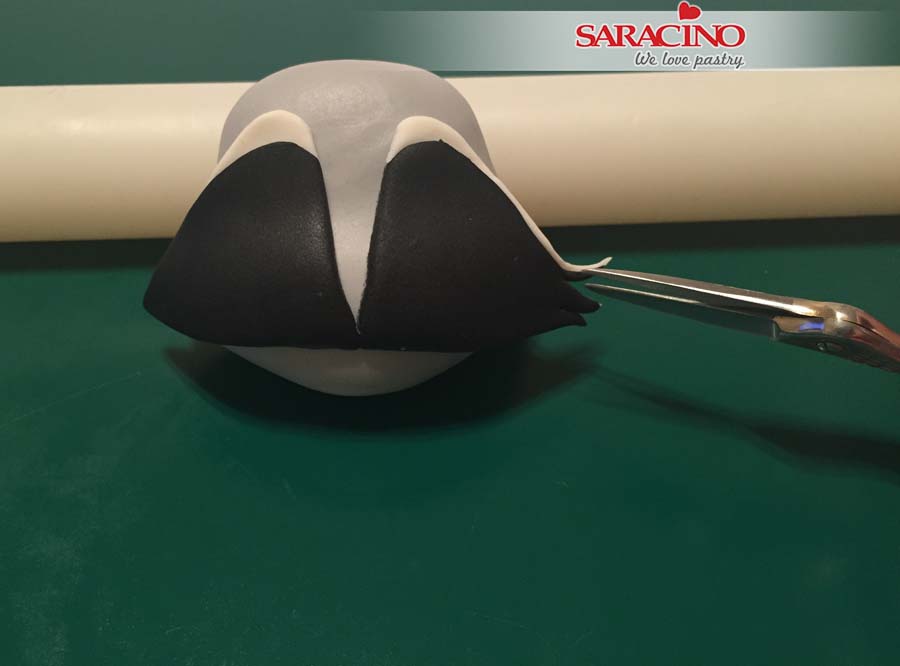
Using scissors cut the cheek fur as shown.

Step 39
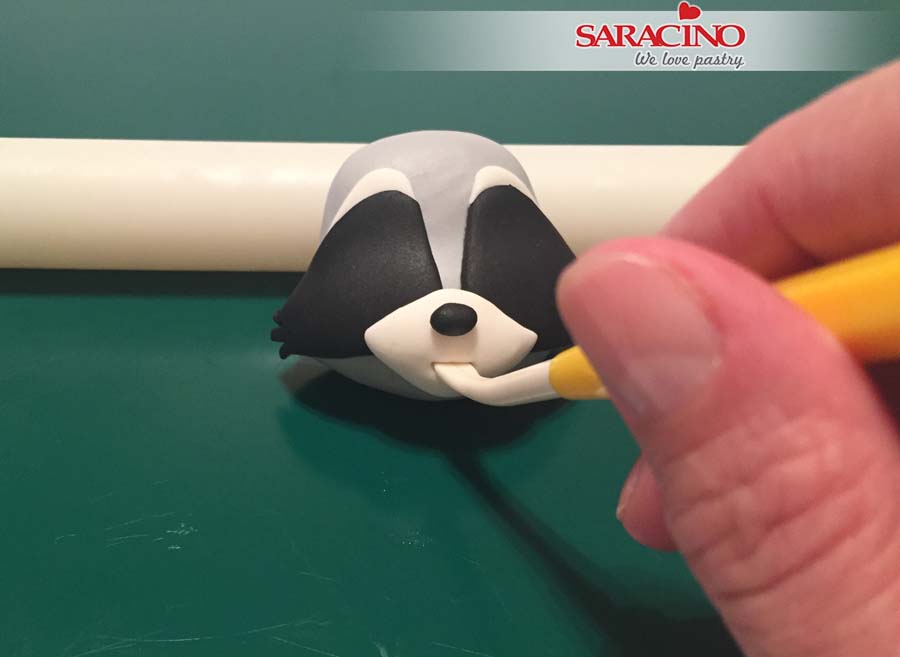
For the nose area use 4g white Pasta Model and with your fingers shape it and fix to the face. Roll a small piece of black paste to a ball and fix for the nose.
Step 40
Using a Dresden tool press and shape the mouth.
Step 41
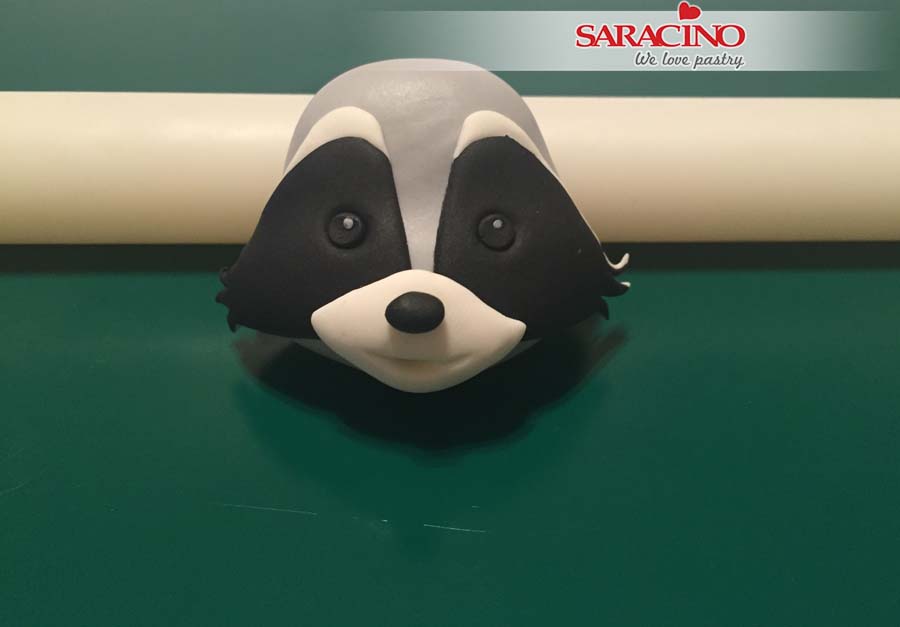
Using a ball tool create the eye sockets. For the eyes roll two small balls of black paste and fix them into the eye sockets. Flatten them and add two small white balls.
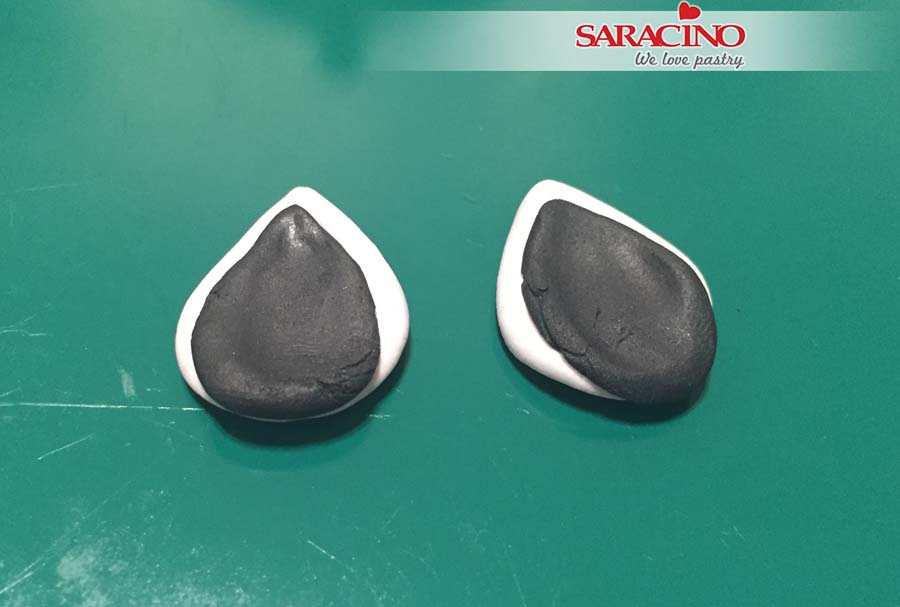
Step 42
For the ears we need 2 x 1.5g grey paste and 2 x 1g black paste. Form to teardrop shapes.
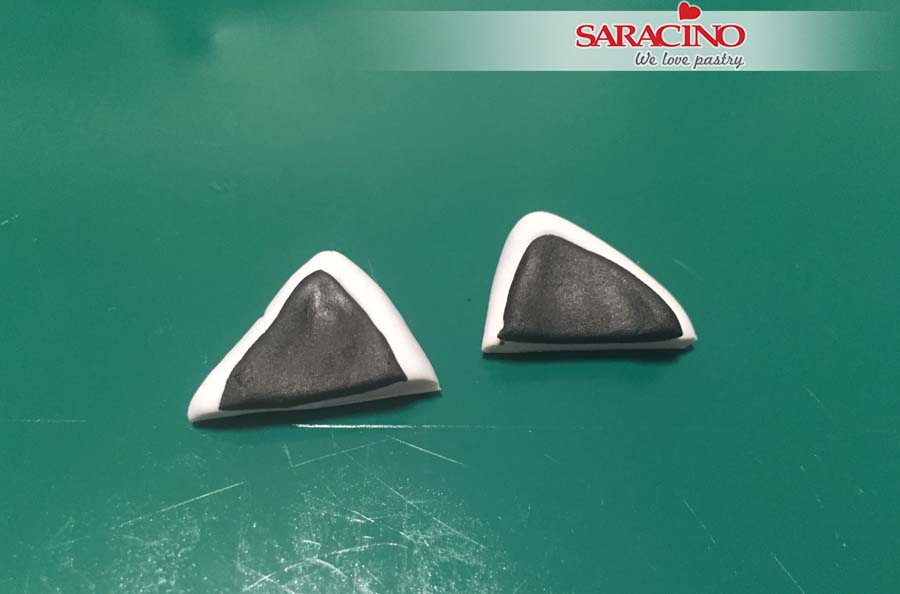
Step 43
Fix the black to the grey. Cut them to the size that is needed for the ears.
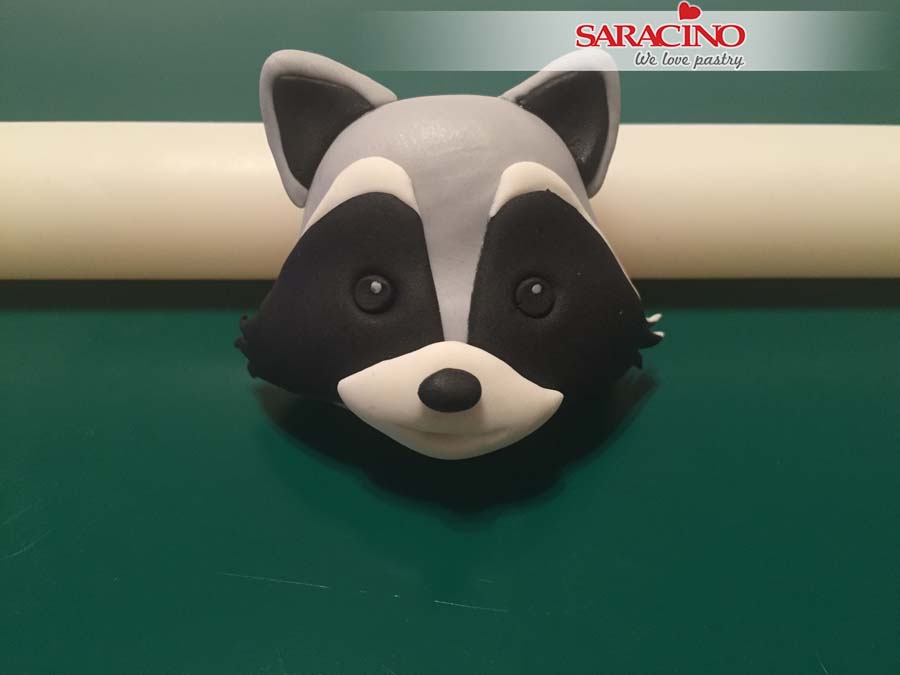
Step 44
Fix to the top of the head.
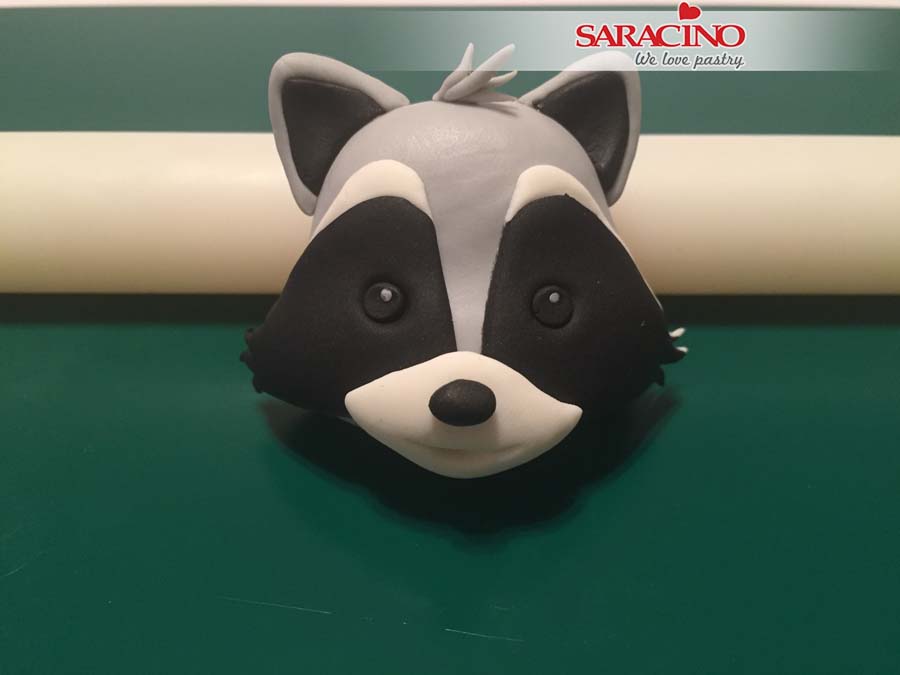
Step 45
Using grey paste add a tuft of hair to the head as we did with the fox.
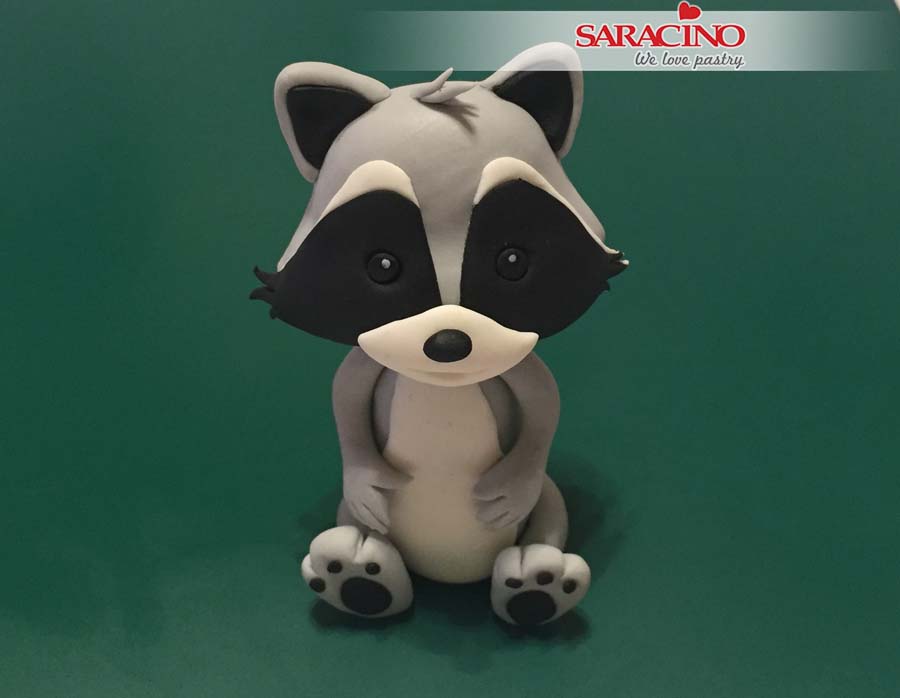
Step 46
Fix the head to the body. Add four balls of black paste to each foot to look like a paw.

Step 47
For the tail we need 14g grey Pasta Model. Roll to a sausage shape with one end thinner. Roll some black paste thinly and cut into thin strips.
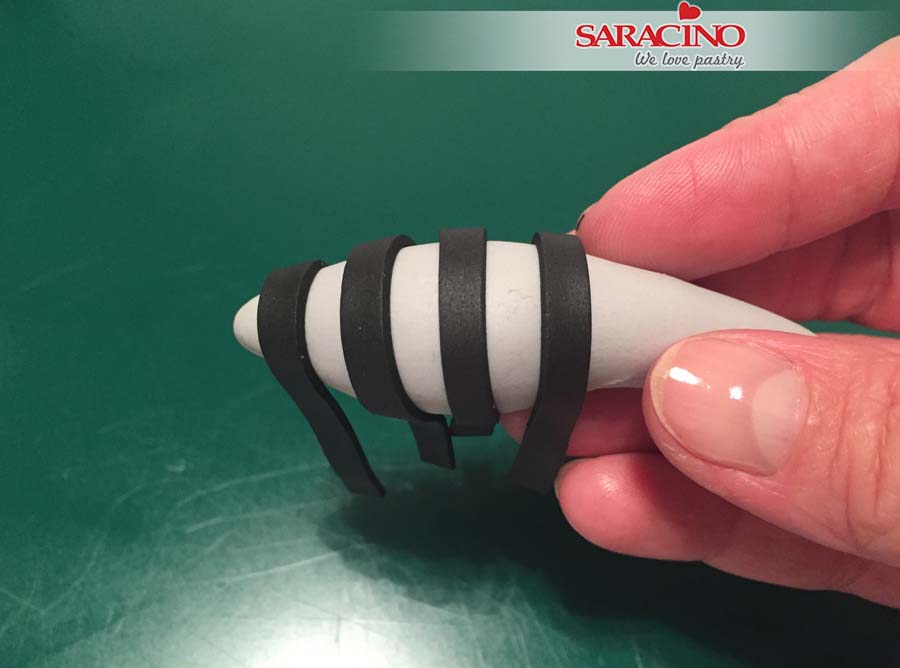
Step 48
Fix the strips around the tail. Fix the tail to the body.
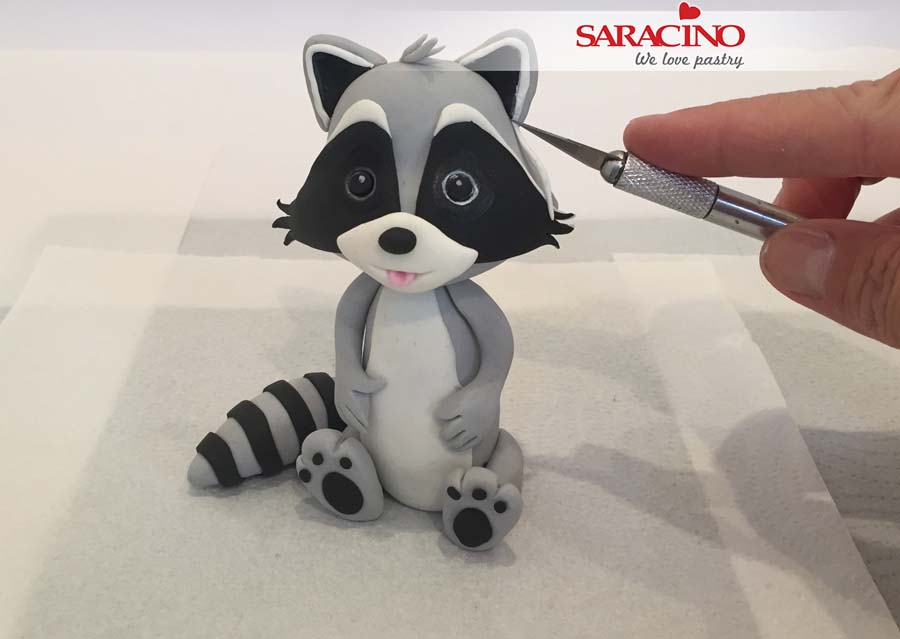
Step 49
Add a pink tongue. Roll a thin strand of white paste and add it to the ears as shown. Using a thin brush and white gel colour paint a thin line around the eyes.
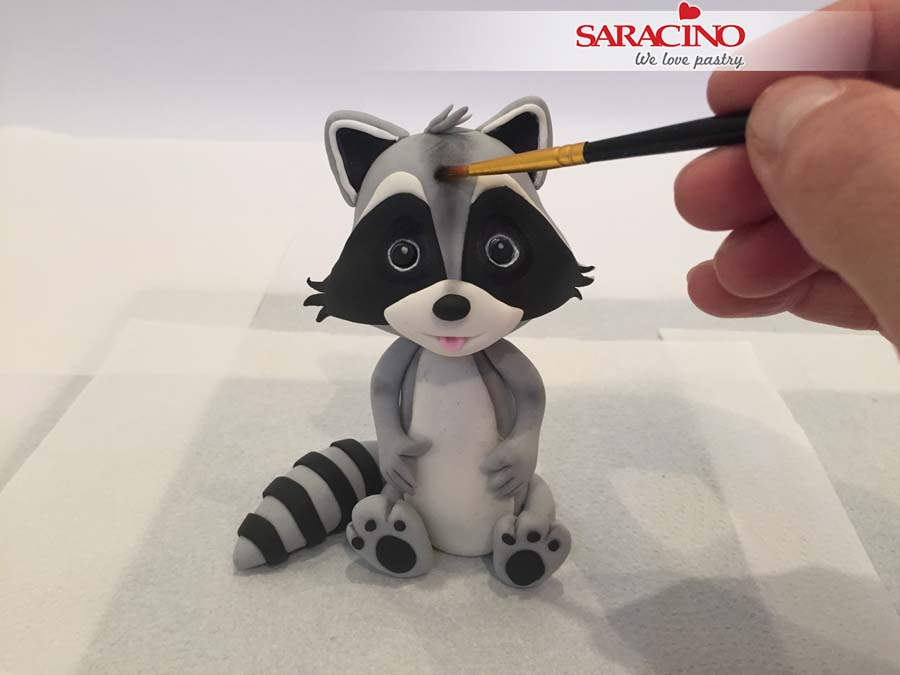
Step 50
Dust the face and body with black powder colour.

Step 51
For the hedgehog’s body we need 85g light skin tone Pasta Model. Knead it well and roll a ball. With a little finger shape the body as shown.

Step 52
Using your thumb shape the head and form the snout. Press an indent where the eyes will be.

Step 53
Use a ball tool to form the eye sockets. For the eyes and nose roll black paste to form three small balls. Fix to the face. Use a Dresden tool to form and shape the mouth.

Step 54
Add eyebrows. For the arms we need 2 x 2.2g of light skin tone Pasta Model. For the feet we need 2 x 2.5g light skin tone paste.

Step 55
Using a scalpel cut the paste to form the hand and fingers to the arms. Use a modelling tool to form the toes on the legs.

Step 56
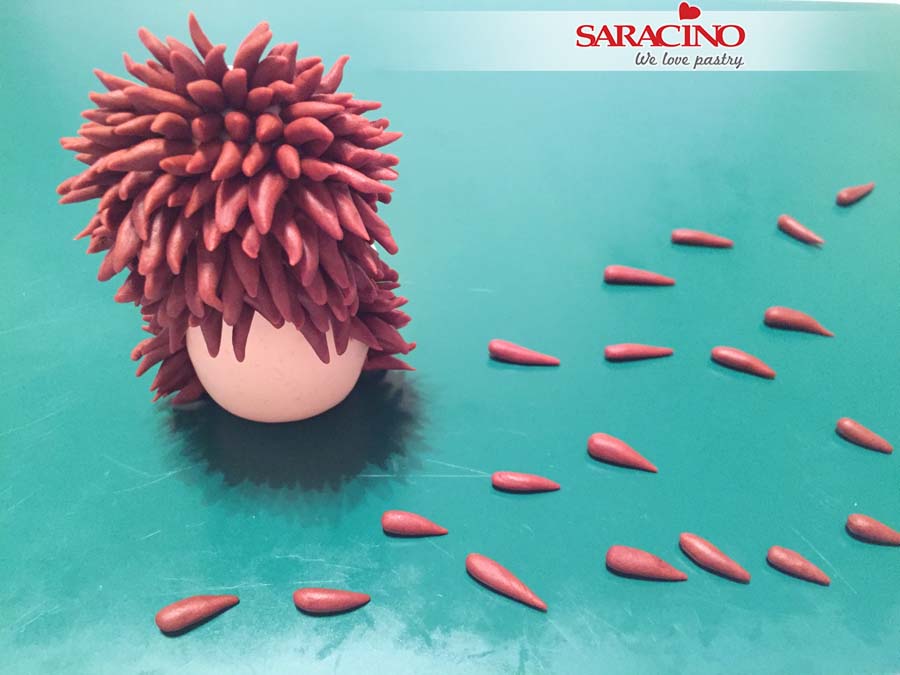
Fix the arms and legs to the body. Add white dots to the eyes. Add a black tongue. Roll brown Pasta Model into small cone shapes to form the needles.
Step 57
Start adding them from the top to the bottom. You will need patience with this step.
Step 58
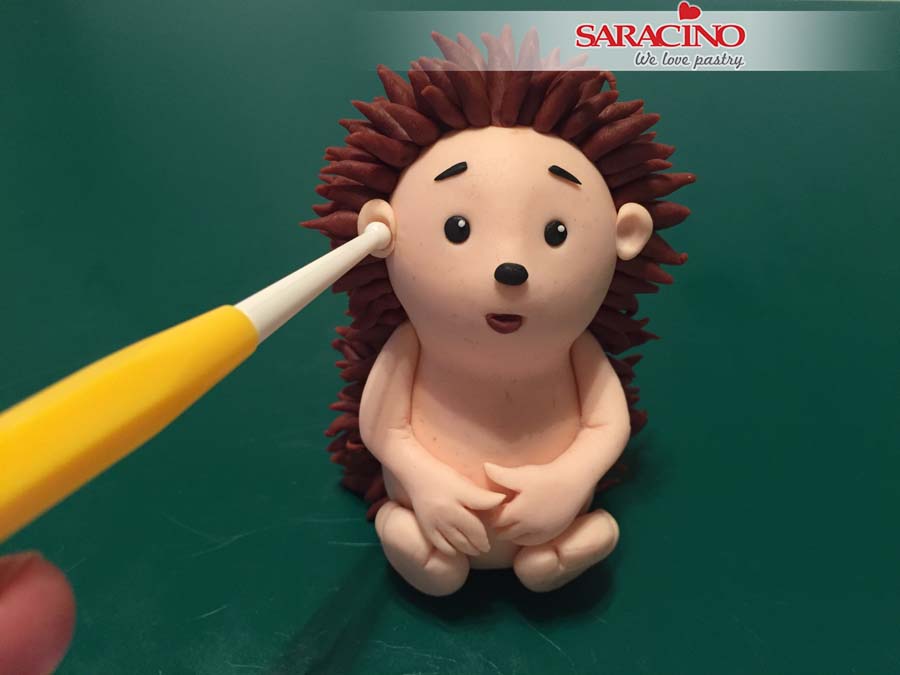
For the ears we need 0.3g light skin tone paste. Roll into two small balls, flatten slightly and fix to the head. Use a small ball tool to press and form the ears.
Step 59
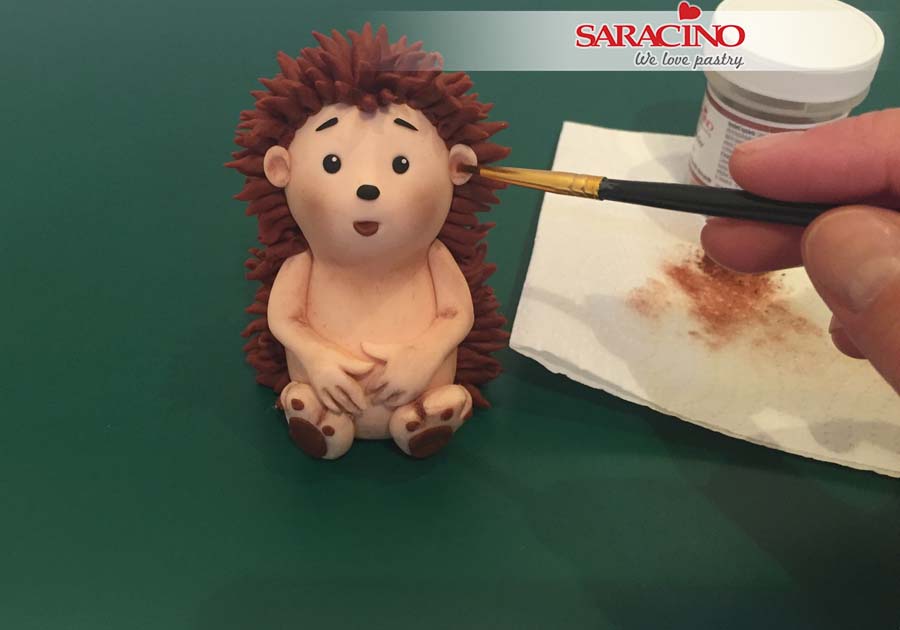
Roll eight small brown balls and fix to the feet to look like paws. If required add more needles to the forehead. Dust the face and body with brown powder colour.

Step 60
For the largest mushroom we need 12g of white Pasta Model. Knead well and form a ball. Roll out to shape the stalk. For the mushroom cap we need 9g white paste and 9.6g red paste. Knead and use your fingers to flatten and form one red circle and one white circle.

Step 61
Place the white circle on the red to form the cap. Press the center with a ball tool.

Step 62
Use a knife to add a mushroom texture on the underside of the cap.

Step 63
Turn the cap over and shape to look like this. Fix the cap onto the stalk.

Step 64
Roll white Pasta Model thinly. Cut out different sized circles. Use a little water to fix randomly to the cap.

Step 65
Make as many mushrooms as you want in different sizes. Dust the mushrooms with brown powder colour.

Step 66
For a shiny look glaze the cap using Liquid Shiny.

Step 67
Prepare the ingredients for the moss: 1 egg at room temperature, 25g flour, 5g baking powder, 12g sugar, 30g honey.

Step 68
In a mixing bowl combine the egg and sugar. Whisk until light and fluffy, add honey and whisk again.

Step 69
Add green gel colour and whisk again.

Step 70
Use a sieve to add the flour and baking powder and gently mix it with a spatula. Fill the silicon cups to about 1/3 full. Microwave the cups for approximately 55 seconds and it should look as shown. Allow to cool completely then remove from the mould.

Step 71
Cover the top of your cake top using white Pasta Top that has been coloured with a little brown gel colour. Although Pasta Top can be rolled very thinly we dont want that in this case. Do not roll the paste too thin as we need to add texture and pattern. With a Dresden tool create circles on top of the cake.

Step 72
Use a small piece of scrunched up aluminium foil to add texture.

Step 73
Use the Dresden tool to add lines so it looks like the tree was recently cut. Start from the centre and work outwards.

Step 74
Using Pasta Top roll long, thin sausage shapes. Fix each one to the side of the cake using cake gel. The pieces should be touching each other to leave no gaps.

Step 75
Use the Dresden tool to add pattern and texture. With the flat end of the Dresden tool shape a realistic “hole” as you would see in tree bark. Continue around the cake adding random pattern.

Step 76
Use the silver foil to add more texture.

Step 77
Once the side of the dummy is fully covered we add some deeper lines on top as shown.

Step 78
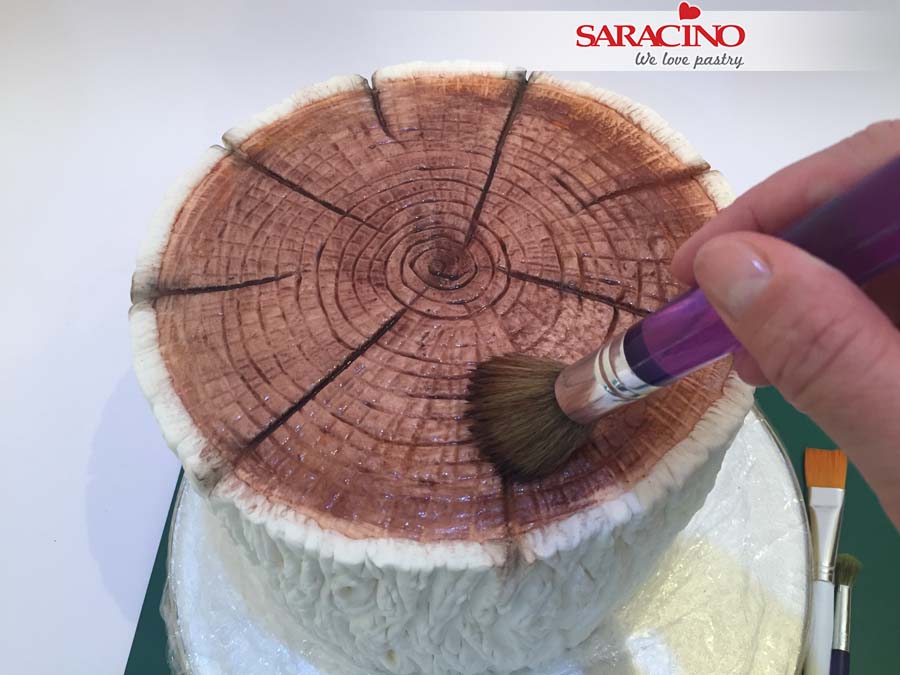
Cover the cake board with cling film to keep it clean as this part can be messy. Using a soft brush dust the top of the cake with brown, orange and yellow powder colours. Also add some black powder in areas.
Step 79
Using a bigger brush and clear alcohol paint the top of the cake using a circular movement.
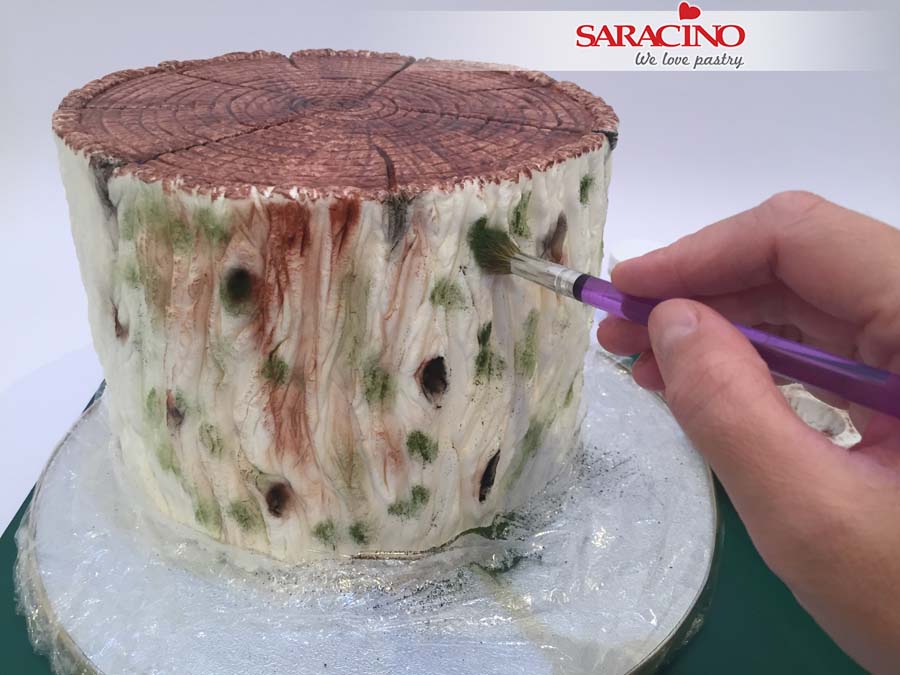
Step 80
Using a soft brush dust the side of the cake using green, black, orange and brown powder colours. As with the top use a bigger brush and clear alcohol to paint the side of the cake.
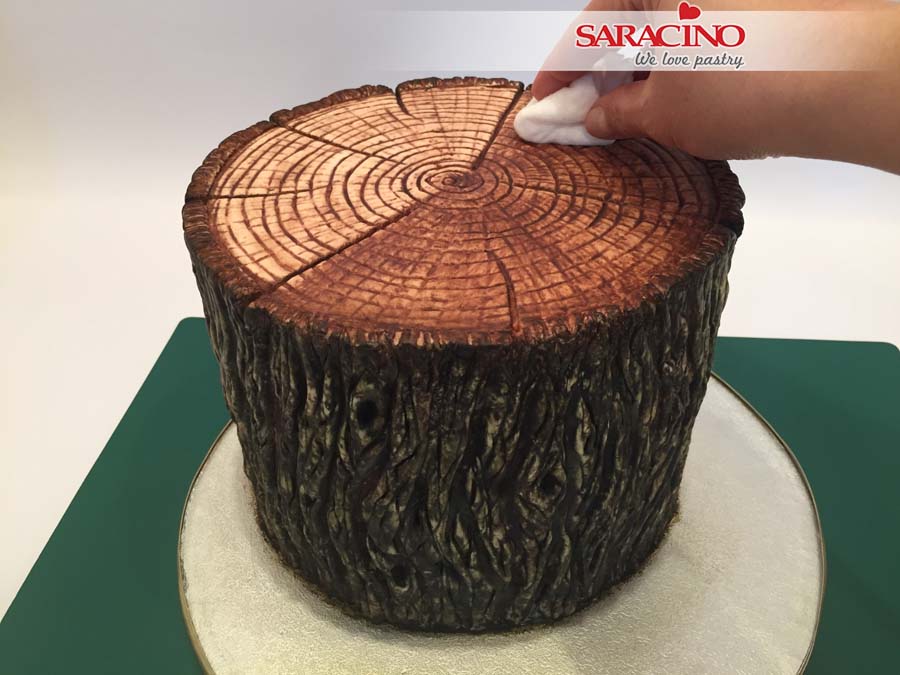
Step 81
When finished dusting remove the cling film. Clean the cake board and allow all to dry. If yours is a real cake use kitchen towel and clear alcohol to clean excess powder. If the cake is a dummy we can use baby wipes. We want the top of the cake to be a lighter colour than the bark. Clean the excess powder from the side of the cake.

Step 82
Using a soft brush and Saracino light gold colour powder dust the top and side of the cake.
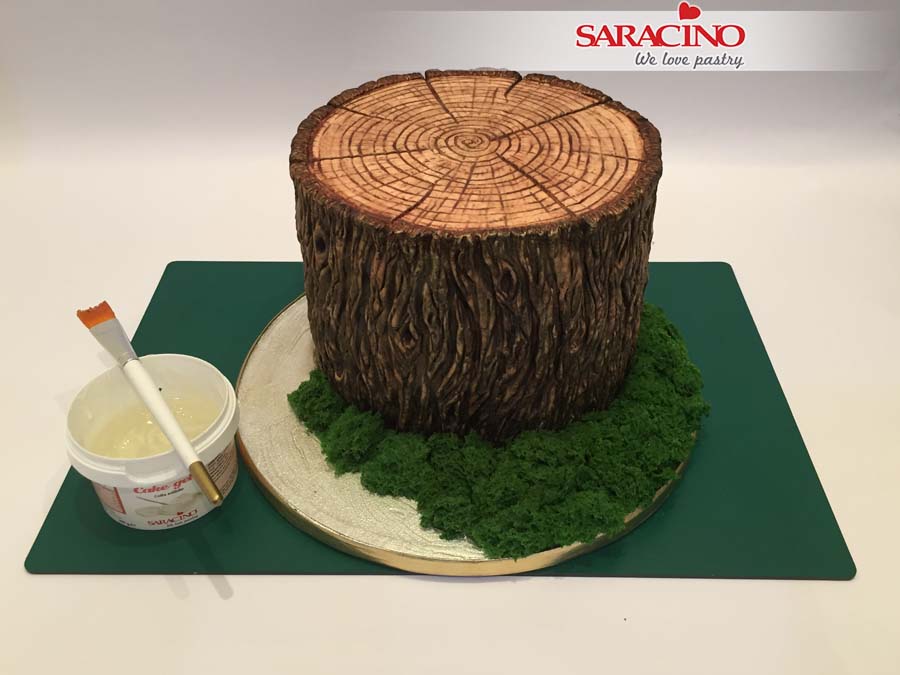
Step 83
Crumble the moss sponge into random pieces. Using a flat brush apply cake gel to the cake board and add the edible moss. Continue to add more edible moss until the cake board is fully covered.
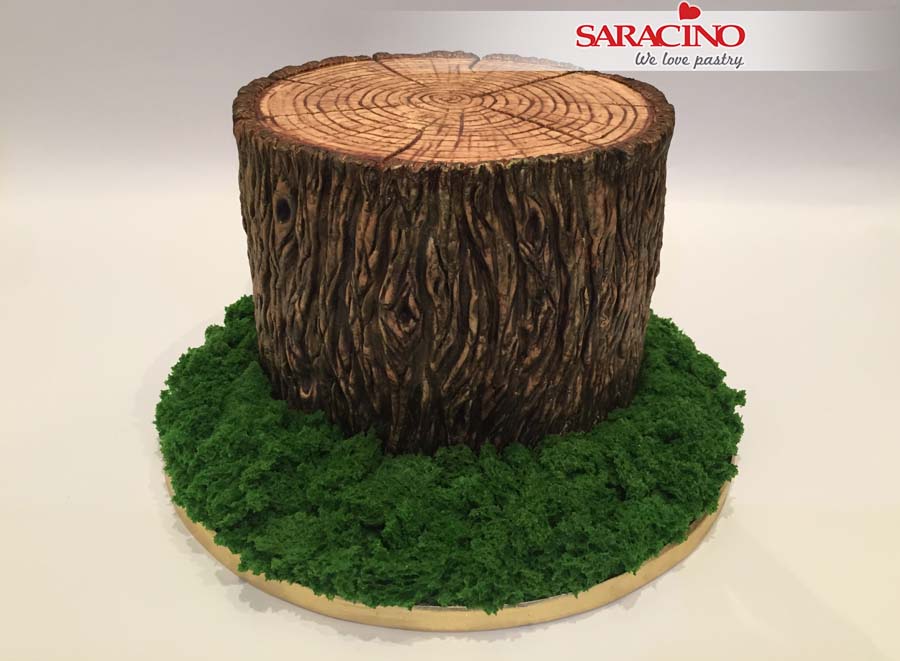
Step 84
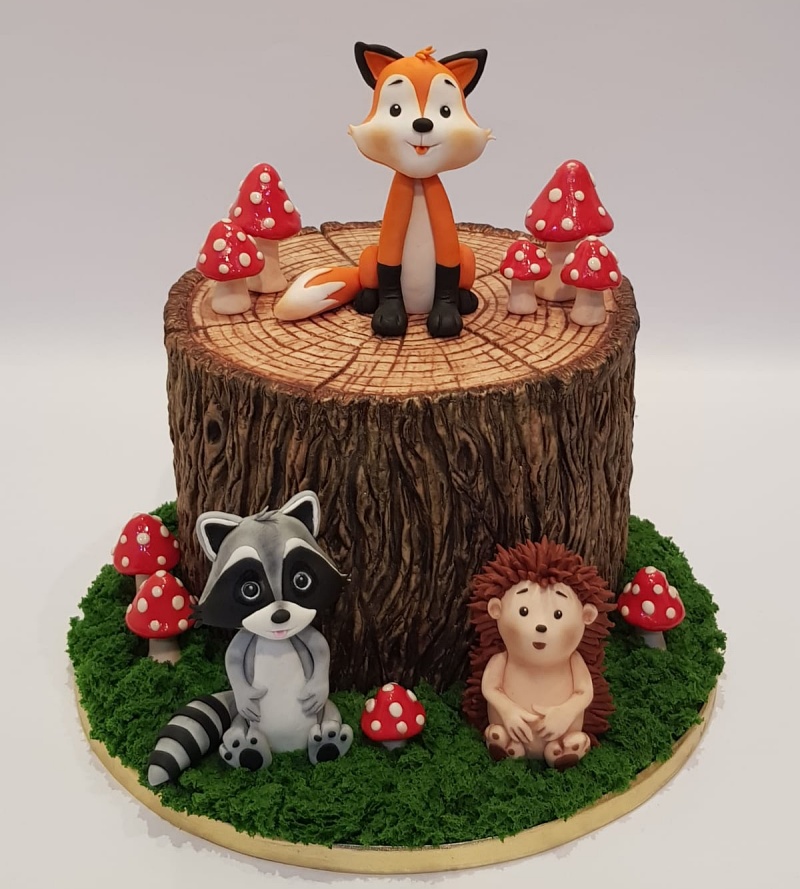
The cake is ready. Now we can add the mushrooms and the cute animals we modelled previously.

