You will need:
- Saracino Pasta Model: black, white, brown, red, pink, light skin
- Saracino black gel colour
- Saracino pink powder colour
- Dragees: black, pink
- Polystyrene foam
- Knife
- Dresden tool
- Tapered cone tool
- Quilting tool
- 24 gauge wire
- Cocktail sticks

Step 1
For the rug roll a rectangle of pink modelling paste and use a Dresden tool to mark lines on both ends of the rectangle. Set aside to dry.

Step 2
For the cushions roll a large ball of light pink modelling paste then slightly flatten it using your hands. Use the tapered cone tool to indent the centre of the flattened circle.

Step 3
Use a Dresden tool to mark some short and long lines from the centre outwards.

Step 4
Roll out a tiny ball and put some edible glue or water and stick it to the centre.

Step 5
Use the same method to make a small cushion using red modelling paste and fix it to the front of the pink cushion. Use a quilting tool to add stitch lines on both cushions.

Step 6
Insert a cocktail stick through the pink rectangular paste rug into the polystyrene foam base then push the cushions onto the cocktail stick.

Step 7
For the pyjama bottom mix brown and white modelling paste to give the required colour then roll out a sausage shape slightly thicker in the centre. Bend both ends / legs towards each other.

Step 8
On the back use a Dresden tool to form lines at the back of the knee.

Step 9
Bend both legs and set aside to dry in that position.

Step 10
For the pyjama cuffs roll out a thin strip of paste and fix it around the end of the legs as shown.

Step 11
Use a Dresden tool to shape the cuff line and add some stitching detail to the side of each leg.

Step 12
Use the end of a paint brush to indent the end of each leg.

Step 13
For the feet and ankles use some light skin colour modelling paste and roll out a small sausage shape. Press on one end and bend it forward.

Step 14
Using a sharp knife cut four lines for the toes.

Step 15
Use the same method to make the other foot and round off all the edges. Remember to make a left and right foot!

Step 16
Insert a short length of 24 gauge flower wire into the bottom of each leg and fix the feet. Set aside to dry.

Step 17
For the body use the same colour paste as the trousers. Roll out a sausage shape as wide as the waist of the pyjama bottoms and flatten one of the ends for the shoulders.

Step 18
Cut it to length. Use the back of a paint brush to add an indent for the neck. Add some stitching and fix some small pink dragees for buttons.

Step 19
Insert a cocktail stick through the bottom into the foam base then attach the body.

Step 20
For the neck roll a small light skin colour sausage shape and add into the neck indent.

Step 21
For the arms roll out two sausage shapes. Using the back of a paint brush or your Dresden tool indent the sleeves and mark lines for creases. Bend both arms to shape.

Step 22
Attach both arms to the body using a little edible glue if required.

Step 23
For the book cut out 2 rectangular pieces of white modelling paste and one larger red rectangle. Mark a line in the centre and shape them like a letter ‘M’. Fix them on top of each other.

Step 24
For the bear use a lighter brown modelling paste. Roll one large ball for the head, a small oval for the nose, a large teardrop shape for the body, 4 small teardrops for the arms and legs. For the ears, roll out two small balls and slightly flatten them. Cut off 1/3 of the circle where the ears attach to the head.

Step 25
Fix them together using a little glue. Add two small black dragees for the eyes and one small black dragee for the nose.

Step 26
Flatten the top of the bear body and stick it in between the arm and leg.

Step 27
For the hands and wrists roll out a sausage shape and flatten the palm. Cut four lines for the fingers and round off all the edges.

Step 28
Fix the hands into the sleeves.

Step 29
Fix the book onto the hands.
Step 30
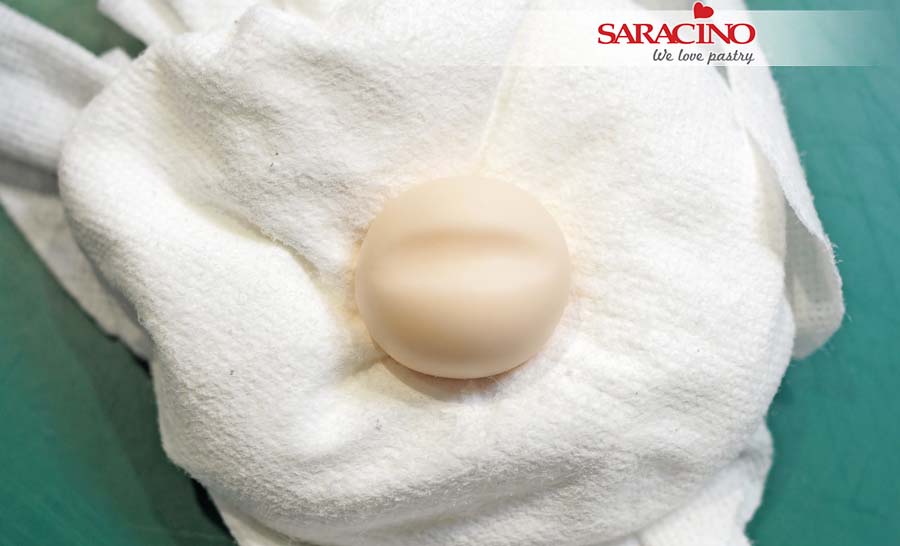
For the head roll a light skin colour ball and indent across with the back of a paint brush.

Step 31
Use your little fingers or ball tools to indent the eyes and to form the bridge of the nose.

Step 32
Use the Dresden tool to press down at the end of the nose and push up slightly to form the raised nose.

Step 33
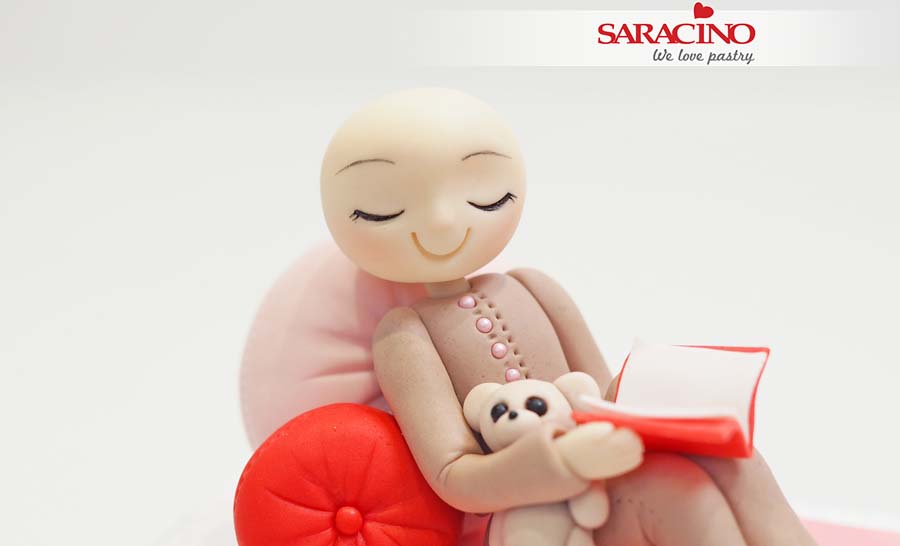
Use the smile tool to indent the eyes and mouth then use black edible paint and a fine brush to paint the eye lashes and eyebrows.
Step 34
Lightly dust the cheeks using pink powder and a soft brush. Fix the head onto the neck at your chosen angle.
Step 35
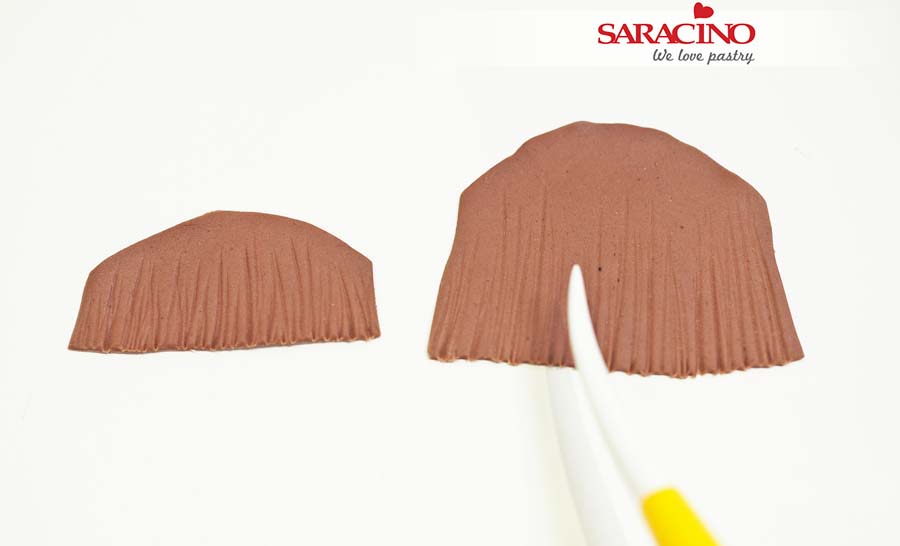
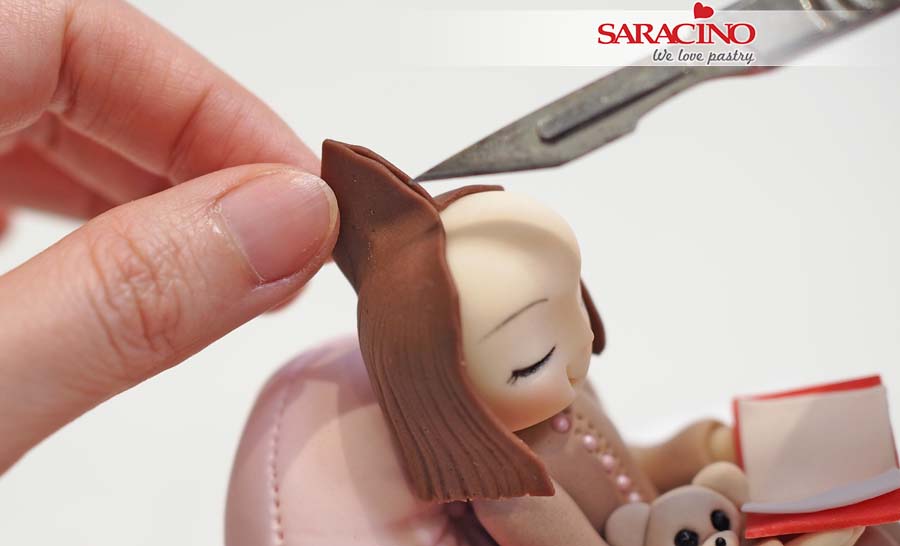
For the hair use the brown modelling paste and roll thinly. Cut out two shapes. One for the fringe and one for the longer hair. Use a Dresden tool to mark lines for the hair.
Step 36
Fix the larger piece around the head and gather the paste in the centre of the head. Cut off any excess paste and add the smaller fringe piece onto the front of the head.
Step 37
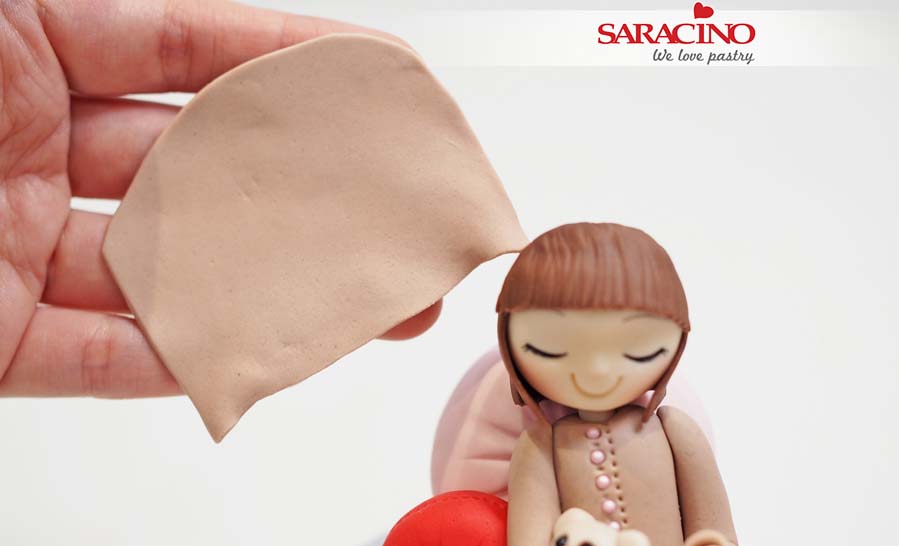
For the hood use the same colour paste as the pyjamas. Roll thinly and cut into shape.
Step 38
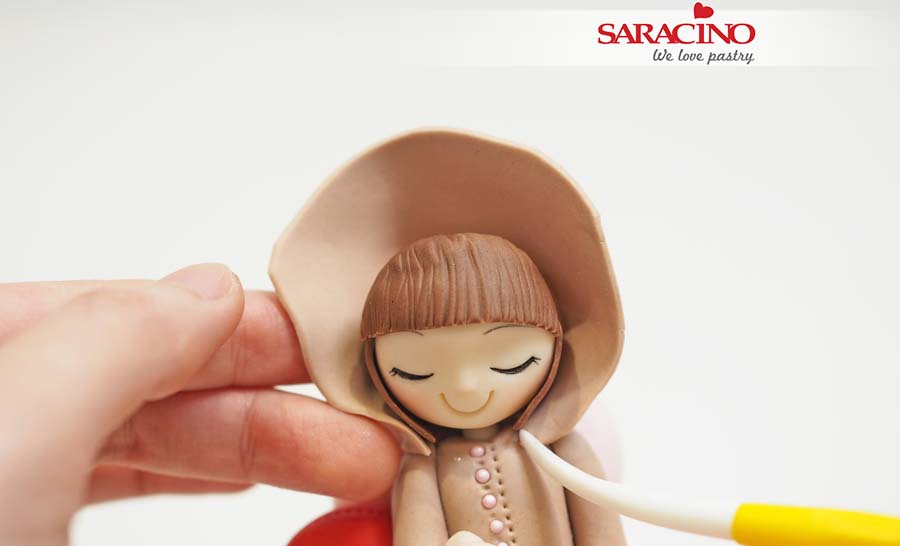
Fix the hood to the back of the head and to the shoulders. Press the joint with your Dresden tool to attach well to the shoulders.

Step 39
Gather the excess paste at the top centre of the head and cut off the excess.

Step 40
For the hood trim roll a thin sausage shape and flatten. Fix it to the edge of the hood and cut off any spare length.

Step 41
For the hoody ears roll two balls and slightly flatten them. Cut off 1/3 and fix to the hood.

Step 42
Your sleepy girl is ready.

