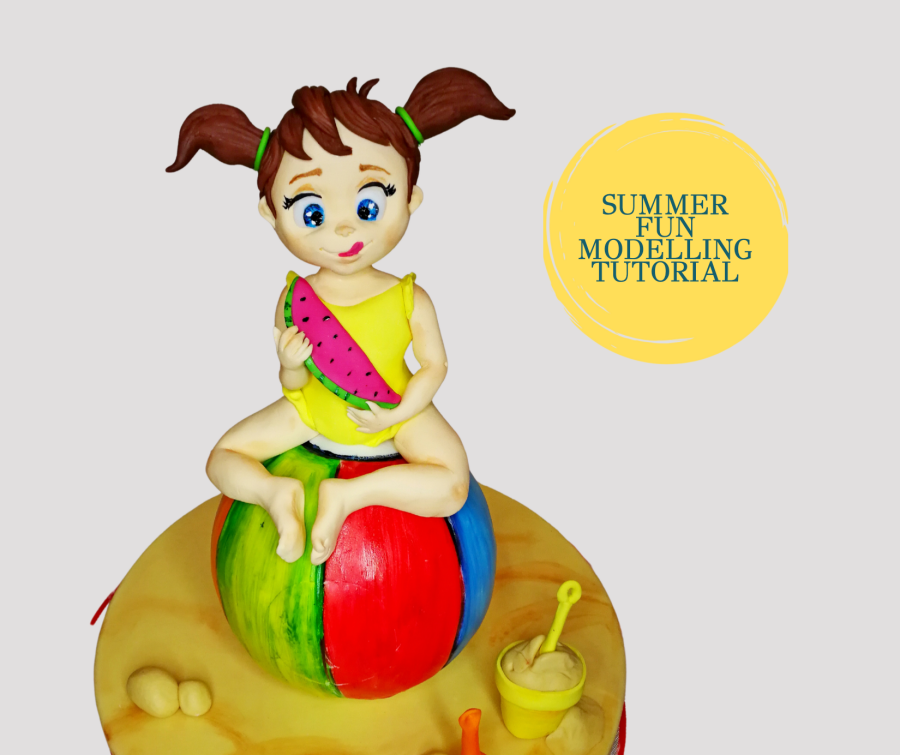
You will need:
- Saracino white Pasta Top
- Saracino white Pasta Model
- Saracino colouring gel: green, skin tone and brown
- Saracino powder colour: orange, green, yellow
- Destilled water
- Edible glue
- Thin soft brushes
- Flower wire gauge 18
- Wooden skewer
- Rolling pin
- Modelling tools
- Scalpel or a sharp knife
- 1 styrofoam ball

Step 1
Cover your styrofoam ball with Saracino Pasta Top.
Tip: If you want your piece to be entirely edible, make the ball out of Rice Krispie Mix.

Step 2
Mark a circle on the top of the ball by pressing the circel cutter gently on it.

Step 3
Mark the lines on the ball using your Drseden tool or similar.

Step 4
Paintthe ball using Saracino colouring gel mixed with distilled water.
Step 5
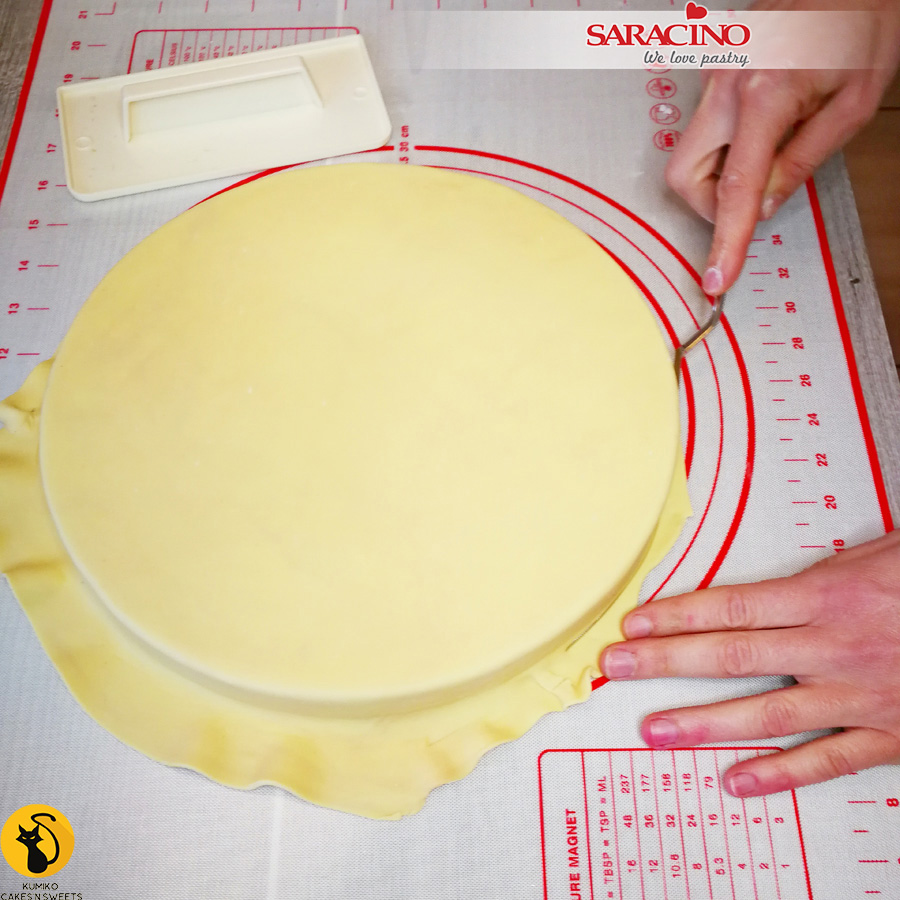
Cover your board with Saracino Pasta Top which has been coloured with yellow and a little brown Saracino gel colour. Don’t add too much brown otherwise it will be too dark. Trim the excess paste using a sharp knife.
Step 6
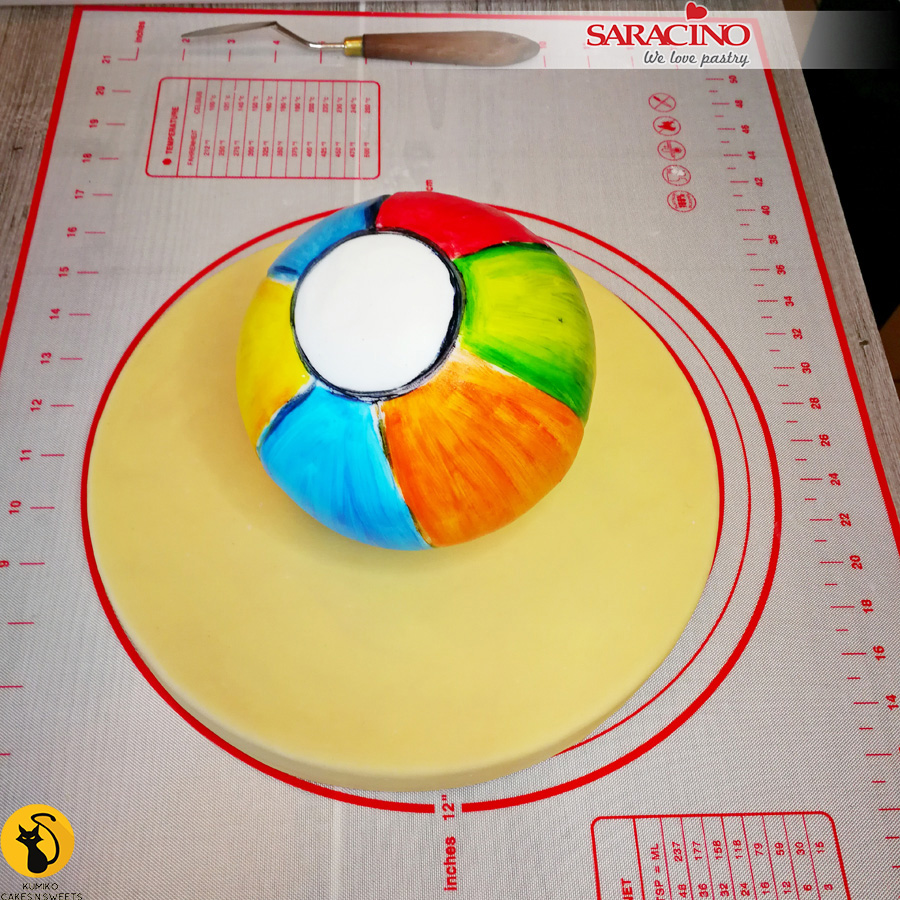
Place the ball in the centre of the board.
Step 7
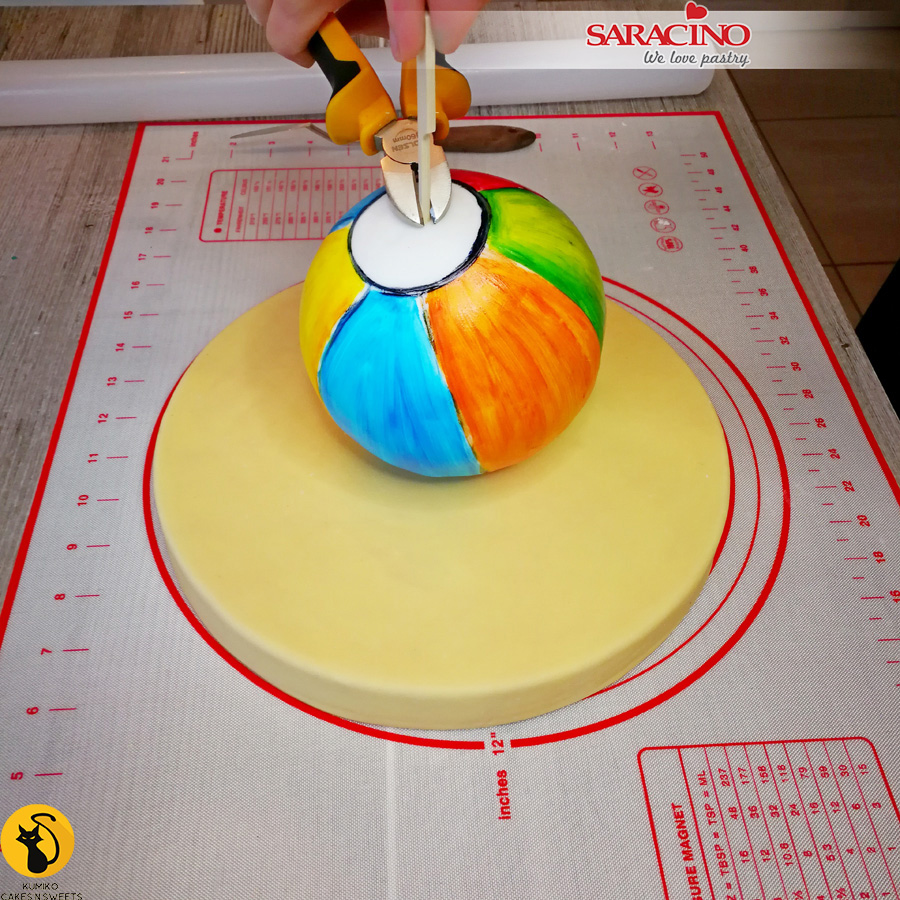
Pin the ball to the board with a sharp wooden skewer to make secure. Cut the excess skewer with pliers.
Step 8
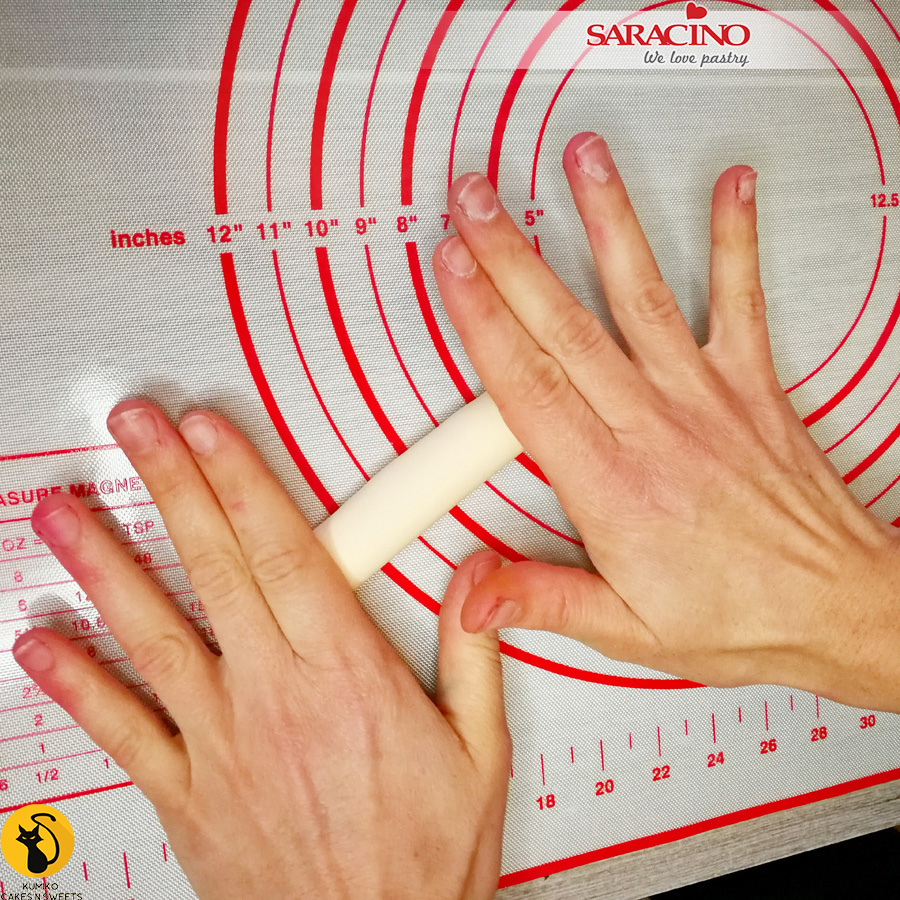
For the legs colour Saracino Pasta Model skin tone (or use pre-coloured skin tone) and roll with the palms of your hands to achieve a cylindrical shape.
Tip: Always try to use your palms more then your fingers, that way the piece will look smoother.
Step 9
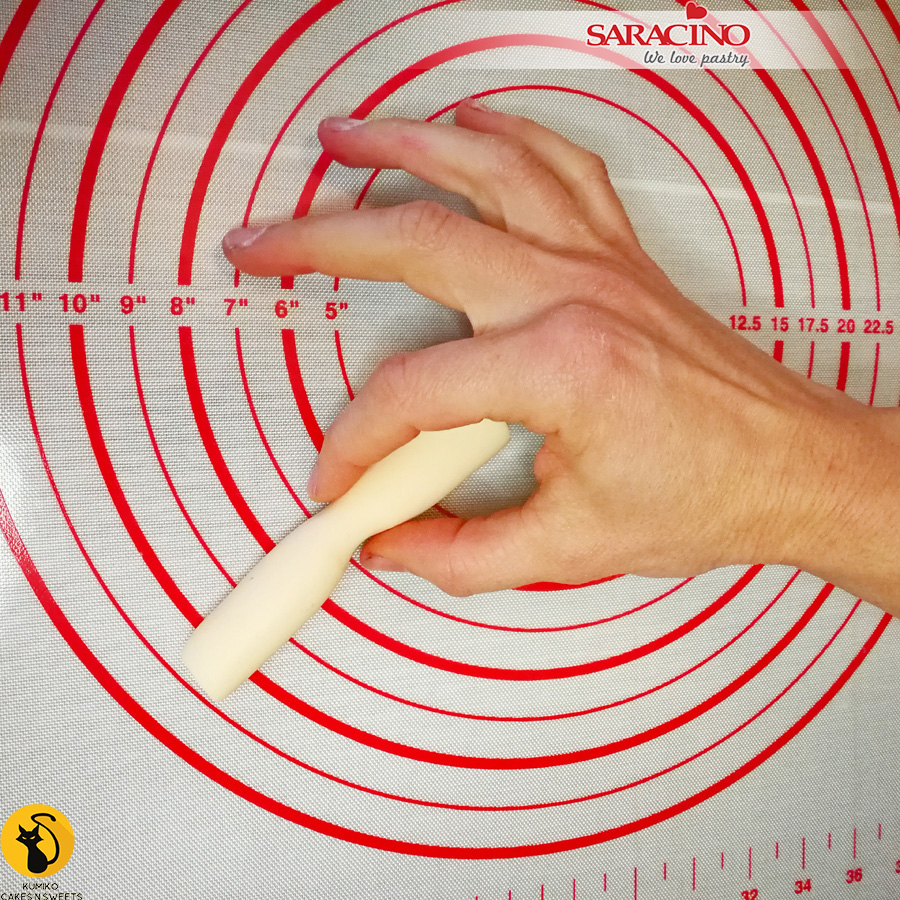
Pinch in the middle to shape the knee.
Step 10
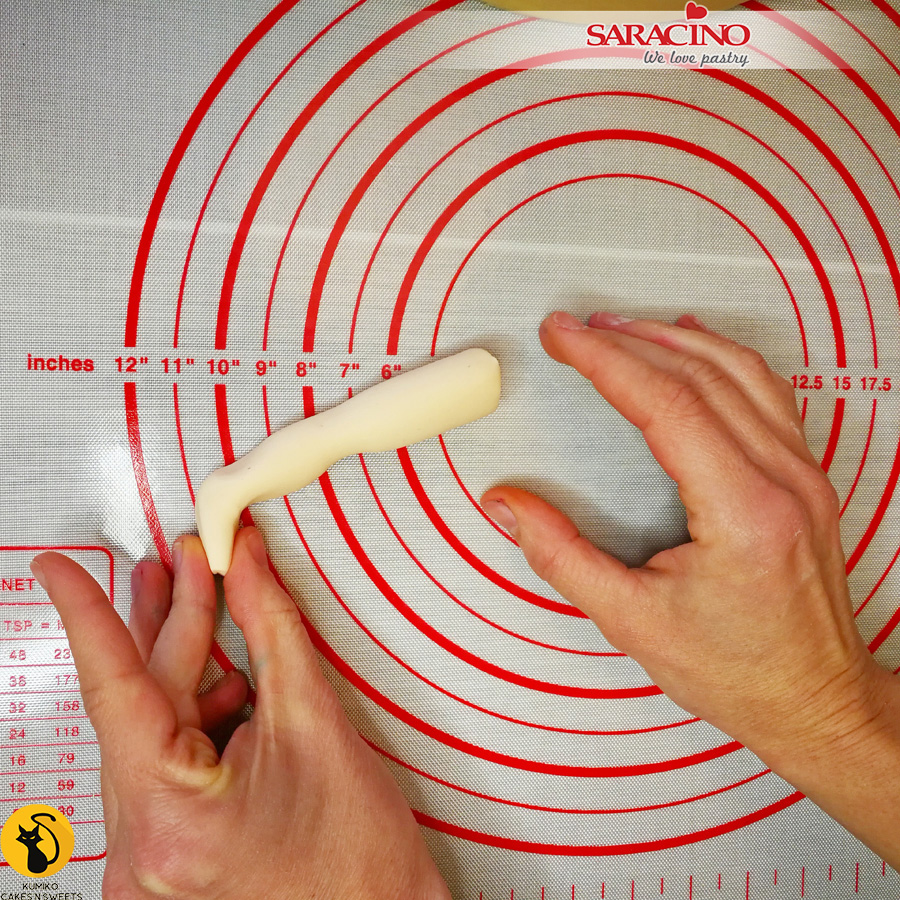
Pinch it again to form the ankle then fold back to form a foot.

Step 11
Bend the leg at the knee. Model and shape the foot using your modelling tools.

Step 12
For the body colour Pasta Model with a few drops of Saracino yellow colouring gel (or use pre-coloured paste). Roll a cylindrical shape then press it slightly in the middle to shape the waist.
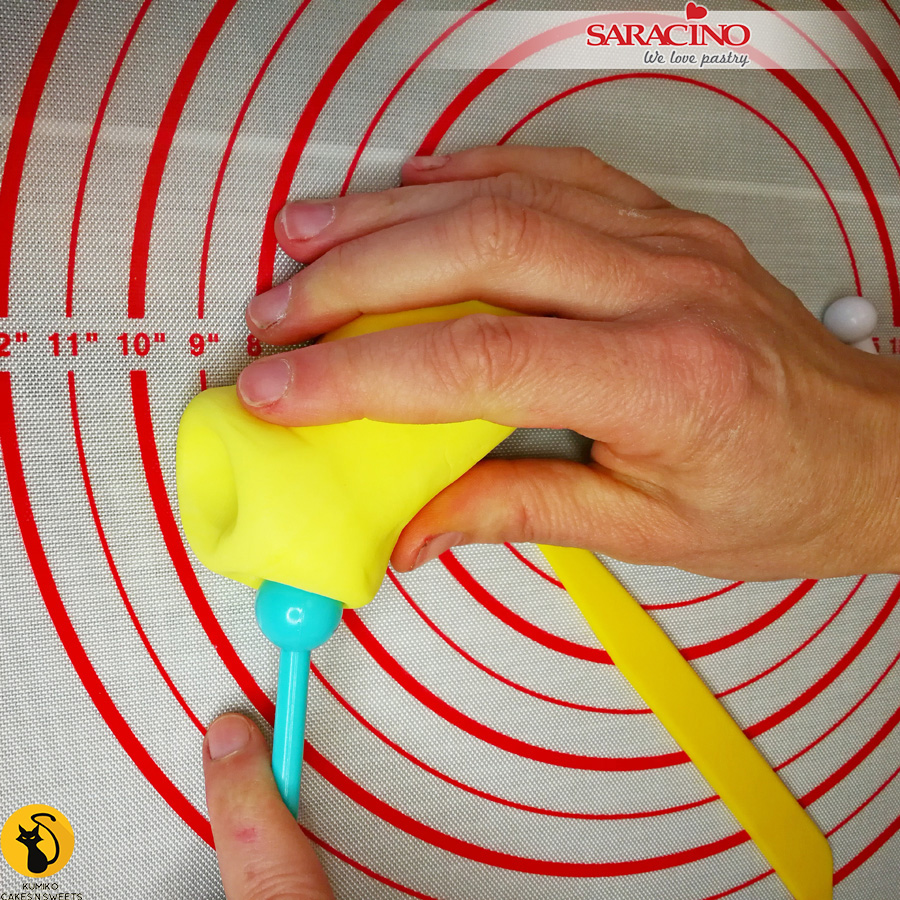
Step 13
Using a ball tool form two shallow sockets at the bottom for the legs.
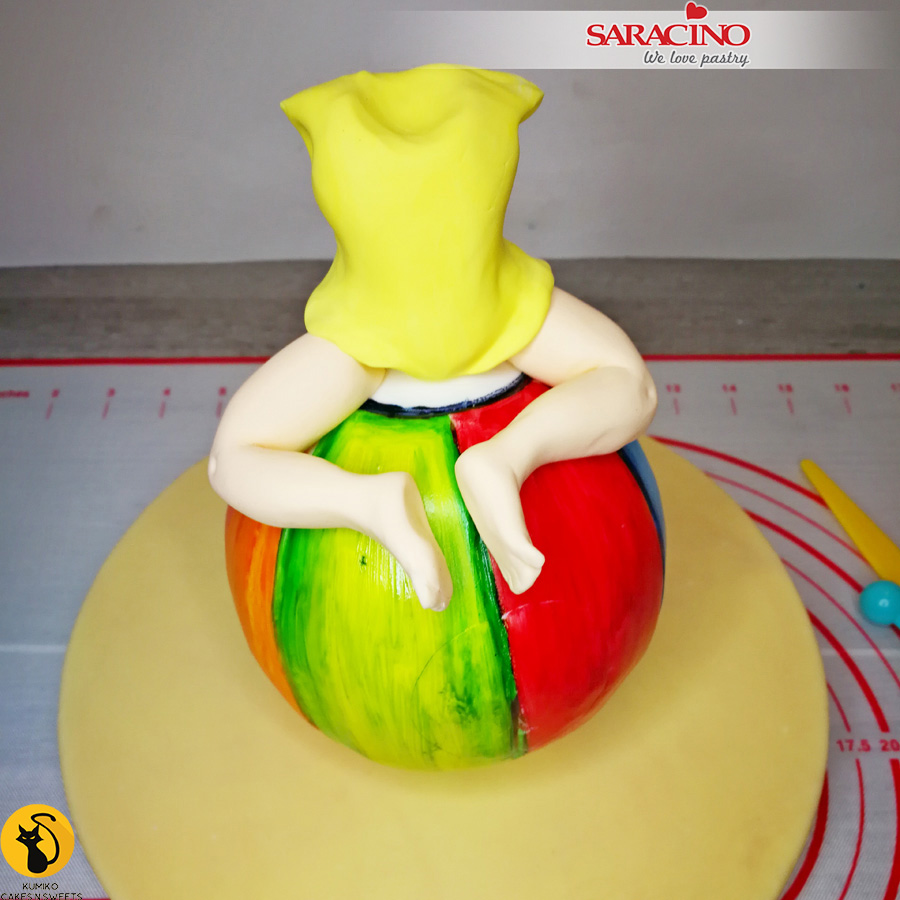
Step 14
Place the body on the top of the ball and insert the legs into the sockets made for them. Apply a little glue if necessary.
Tip: Don’t use too much edible glue as it can make the modelling paste too soft and sticky.

Step 15
Using a modelling tool create curved details on the swimming suit at the top of each leg. This adds to the model and also covers the joints.

Step 16
Using skin tone coloured Pasta Model roll two sausage shapes for the arms.

Step 17
Bend and pinch it in the middle to form the elbows. Press it at the end to form the flat palms. Cut the thumb and fingers with a knife or scalpel.
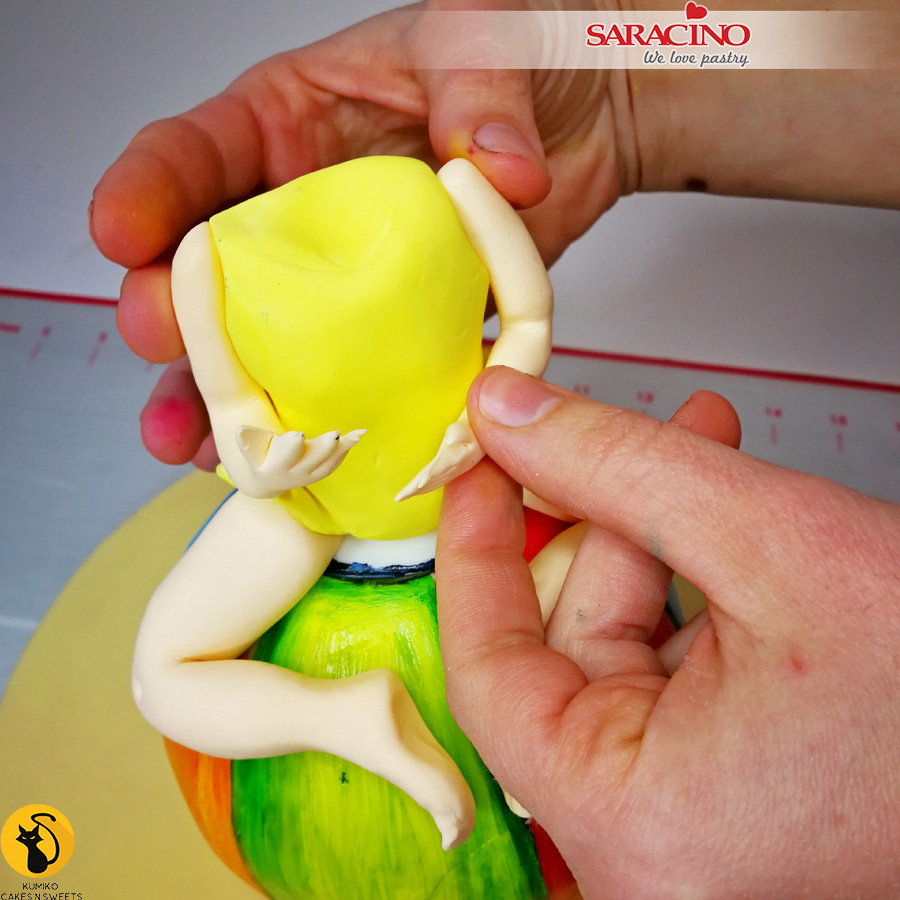
Step 18
Fix the arms to the shoulders using a little edible glue if needed.
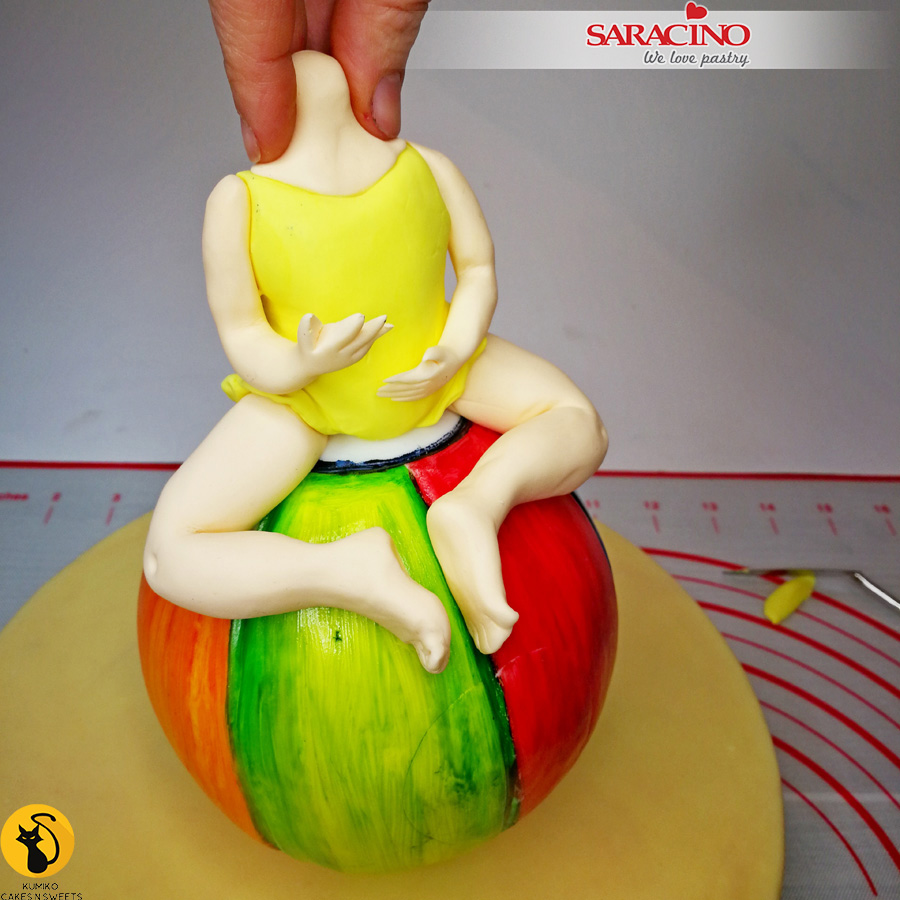
Step 19
Use your fingers to smooth the fingers into shape. Using skin tone Pasta Model shape a neck and fix it on the top of the body.
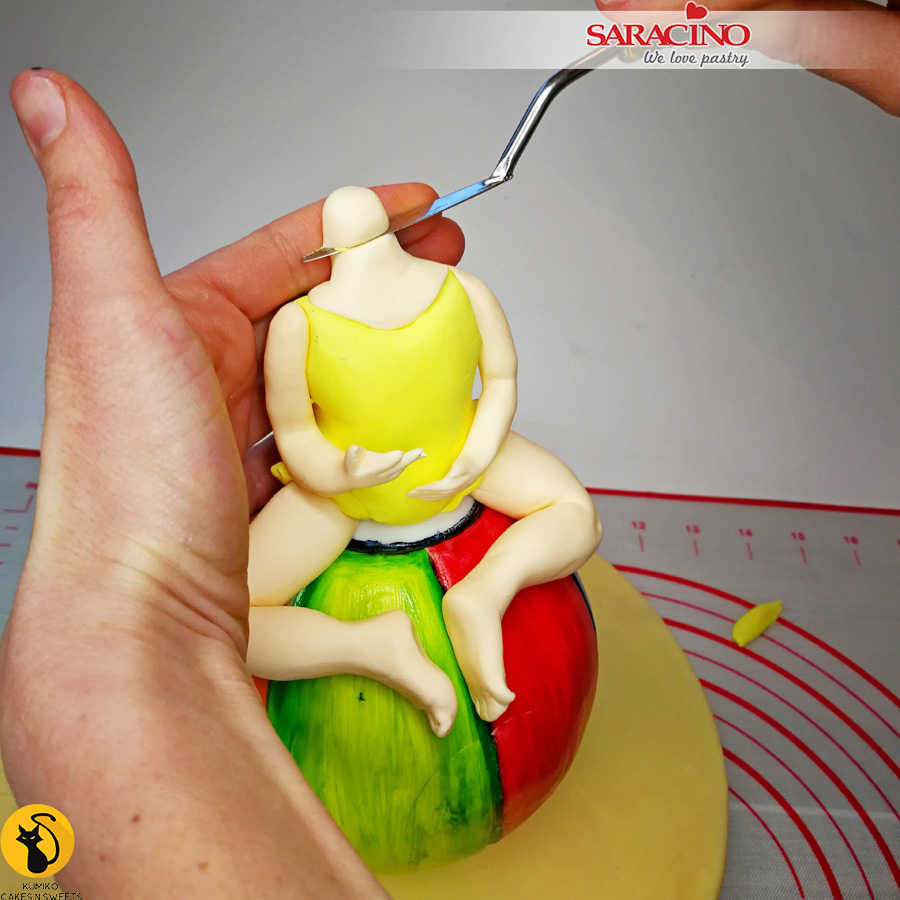
Step 20
If the neck looks too long trim the top to the required length.
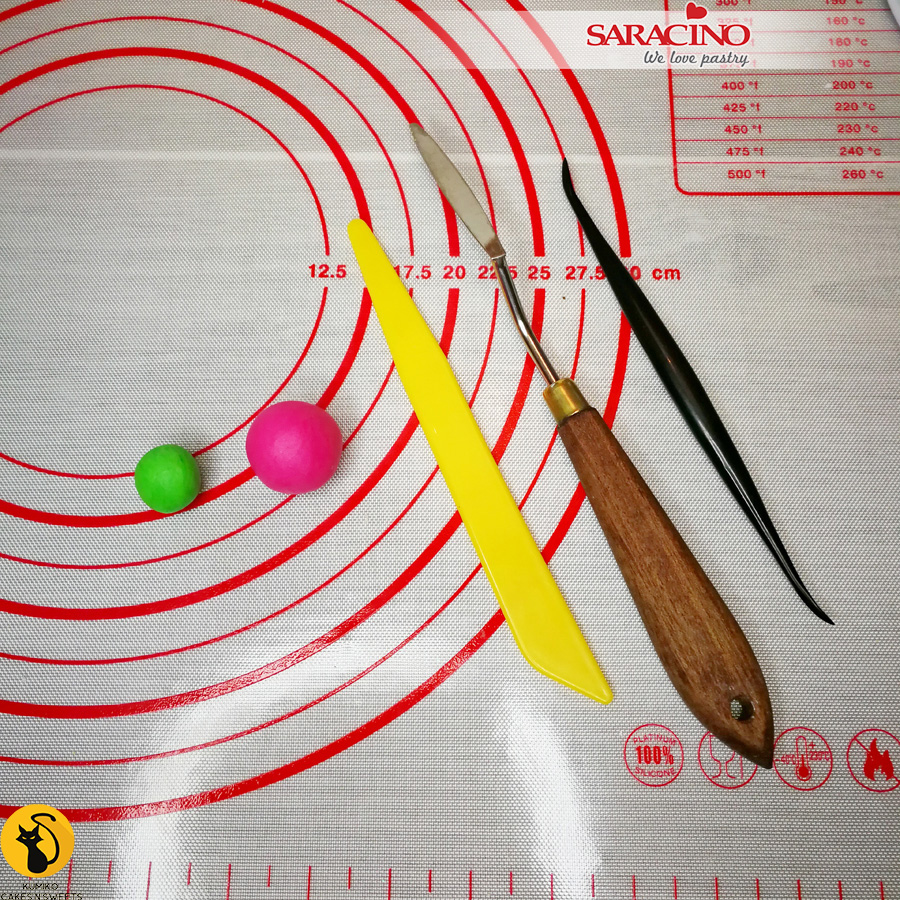
Step 21
For the watermelon prepare a small amount of fuchsia and light green modelling paste.
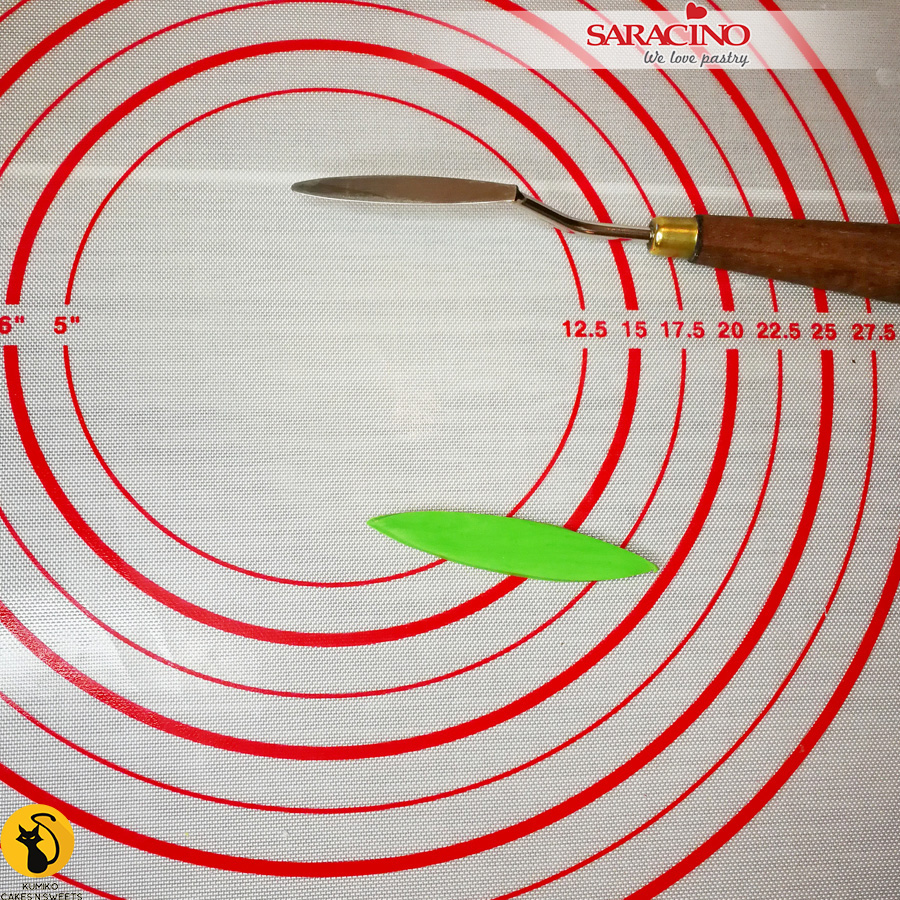
Step 22
Roll the green pasta model and cut out to an elongated leaf shape.
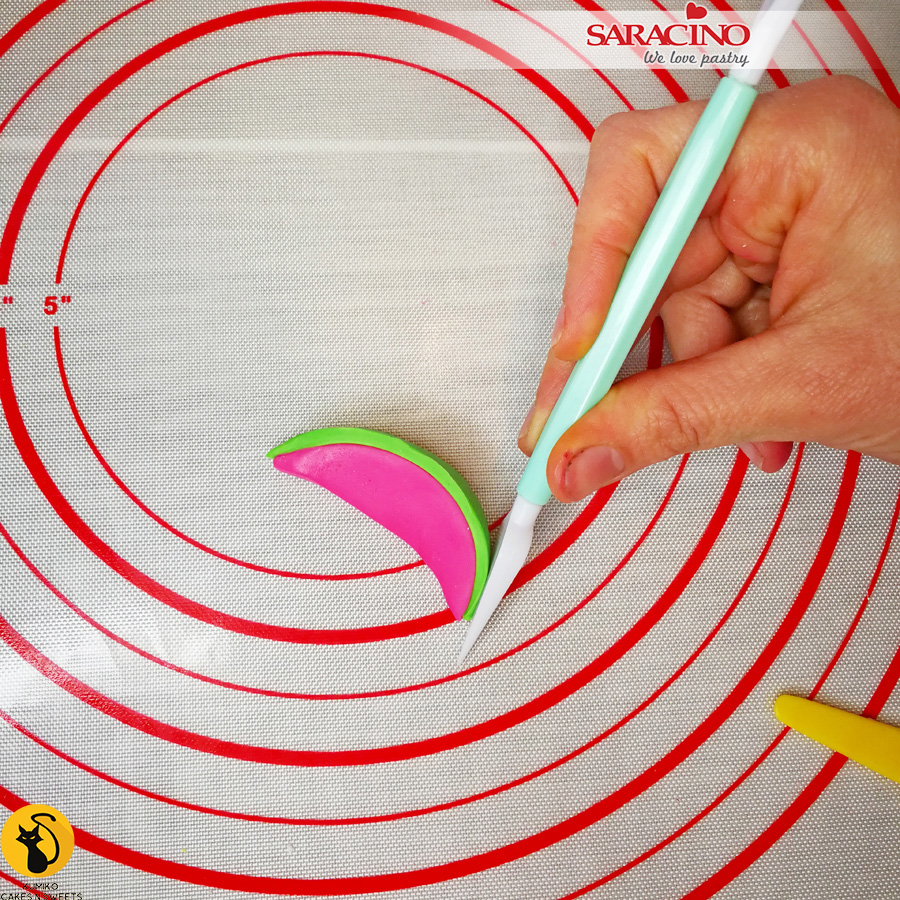
Step 23
Model the fuchsia paste to the shape of a watermelon slice. Fix the two parts together using a little edible glue.
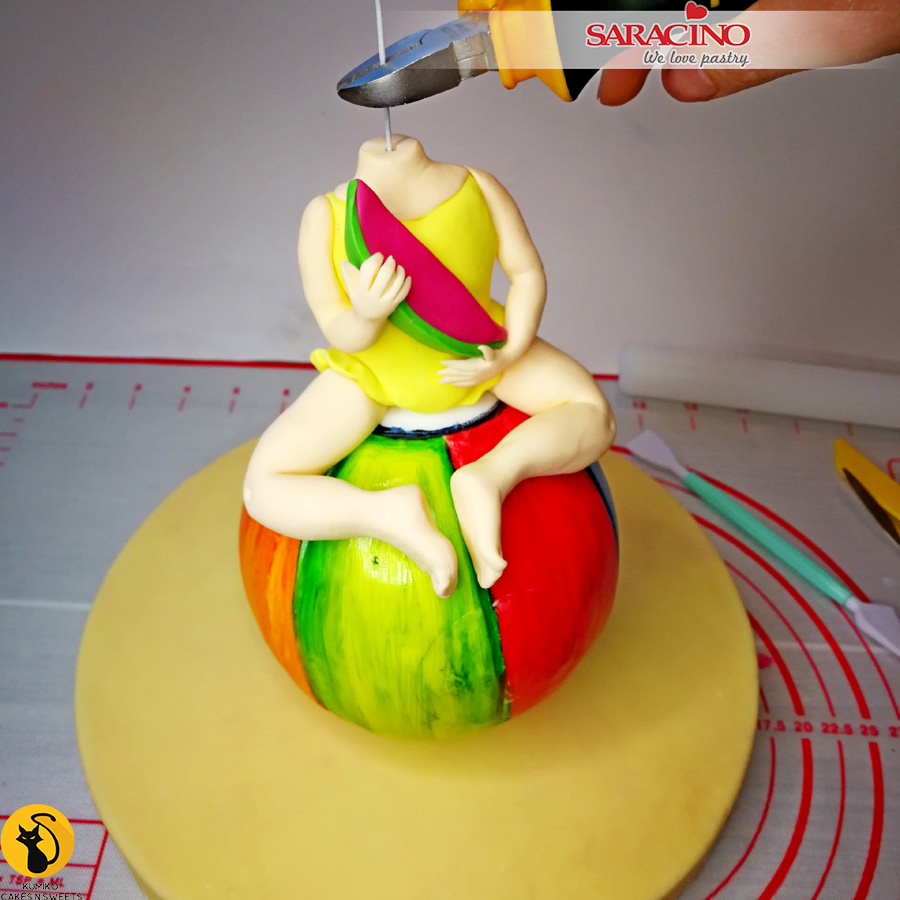
Step 24
Insert your gauge 18 flower wire through the body and the ball down to the board. Cut off any unnecessary wire. Leave enough wire to support the head.
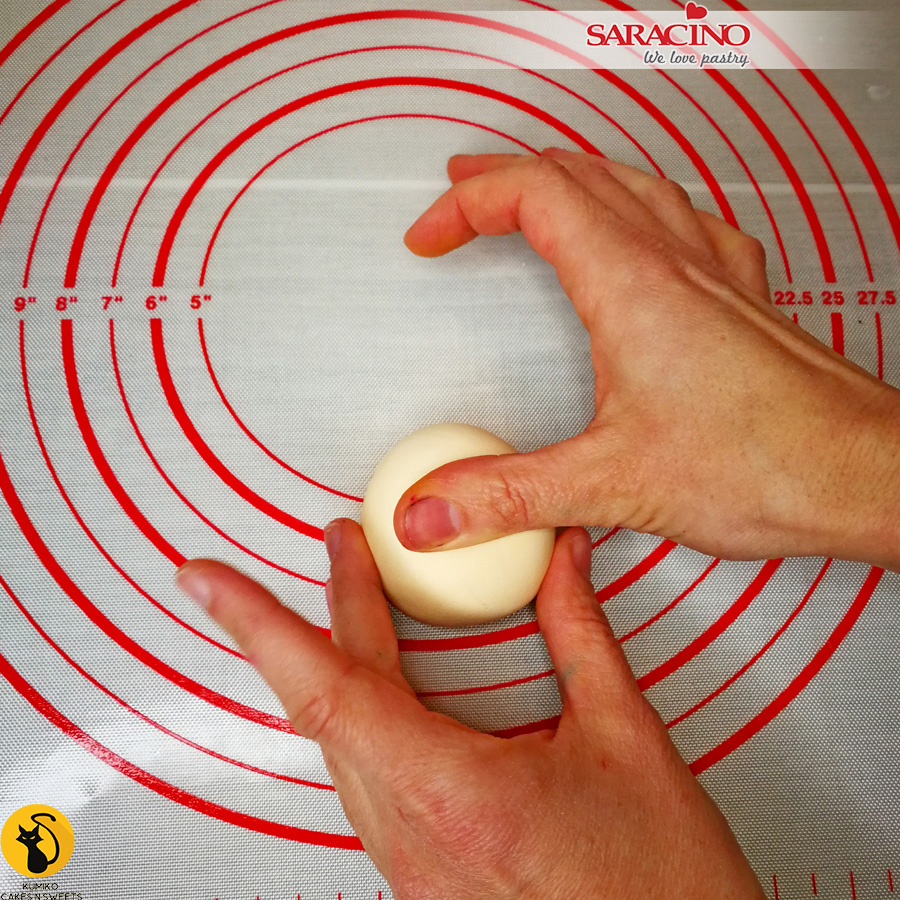
Step 25
For the head use Saracino skin tone Pasta Model and roll a ball. Using your thumb or finger press it gently below the centre.
Tip: Always make the head slightly larger when modelling a cartoon or kids character. This way it looks cuter.
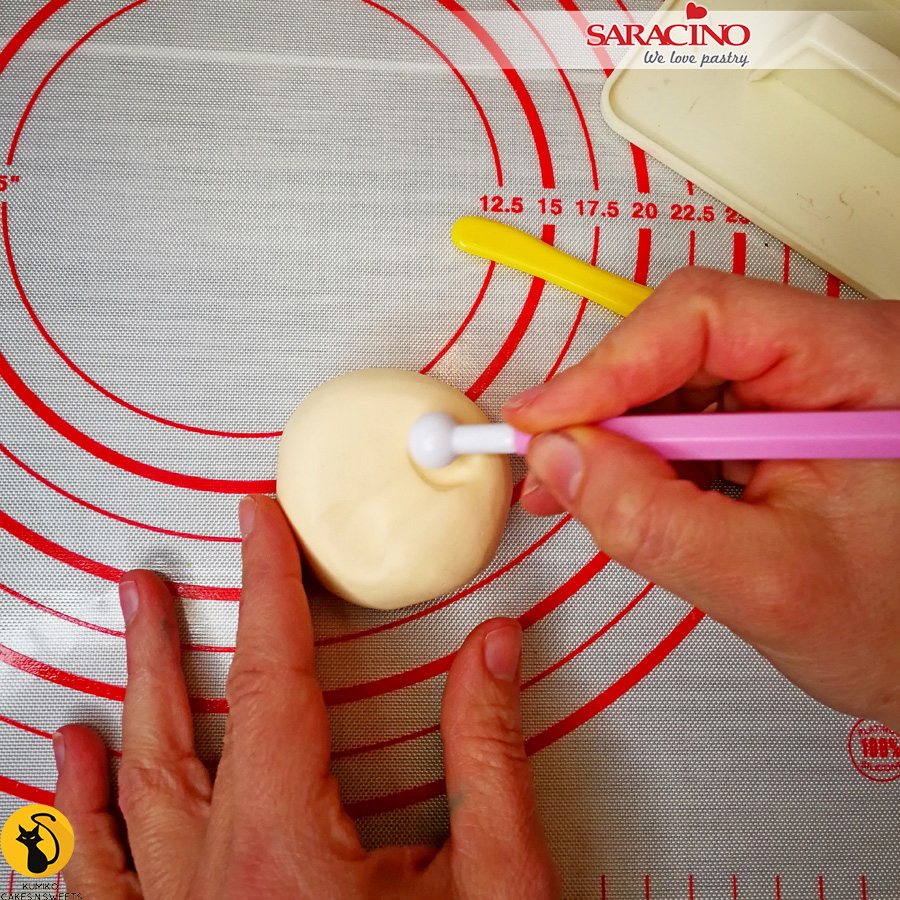
Step 26
Using your ball tool form two sockets for the eyes.
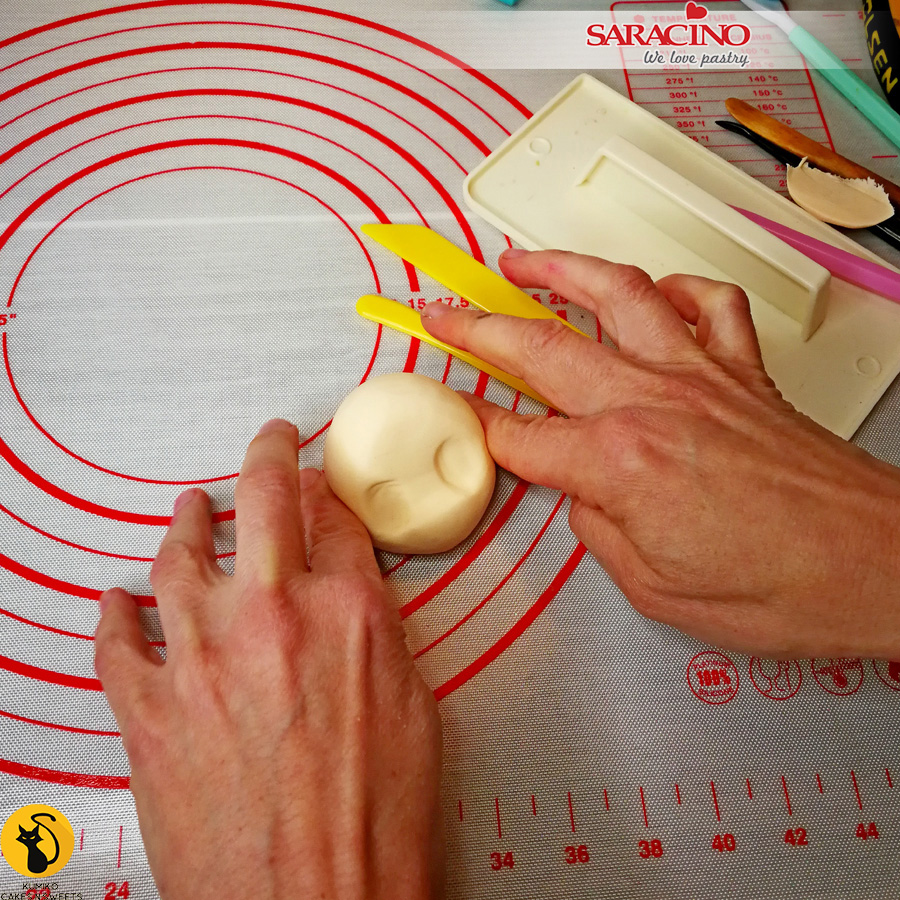
Step 27
Form the cheek definition. Use your fingers to push the head from each side.
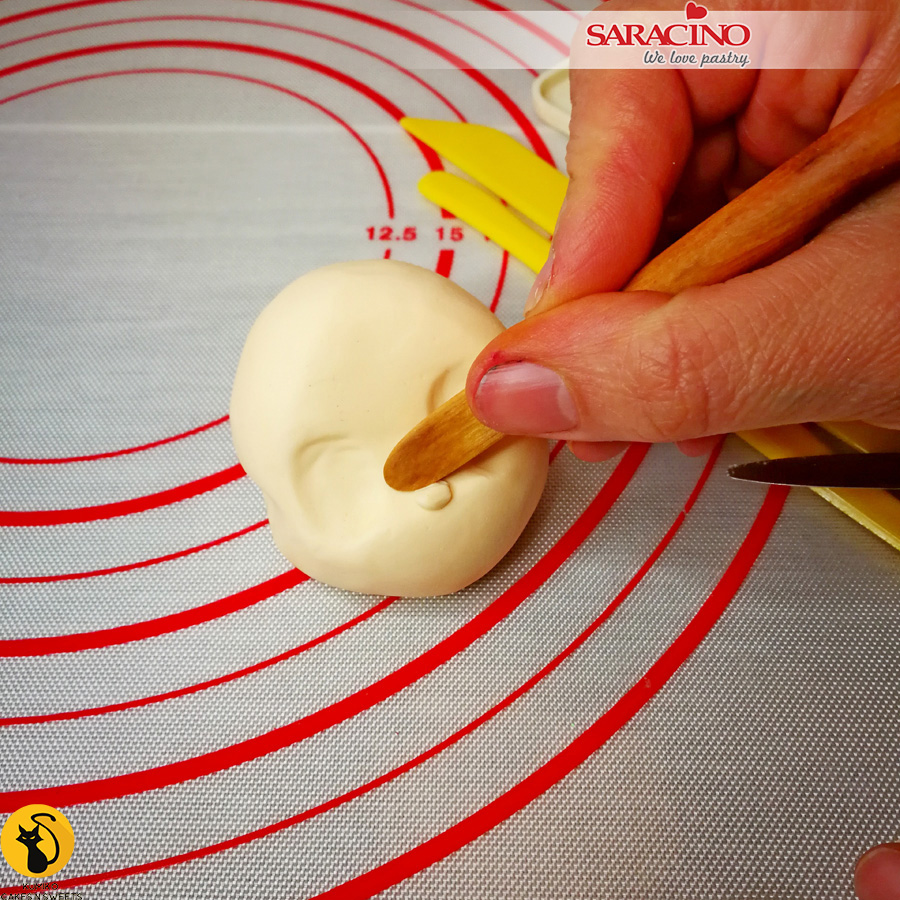
Step 28
For the nose roll a small ball and place it in the centre of the face. Use a modelling tool to blend the joints and smooth it to a nose shape.

Step 29
Use a sharp tool to make nostrils.
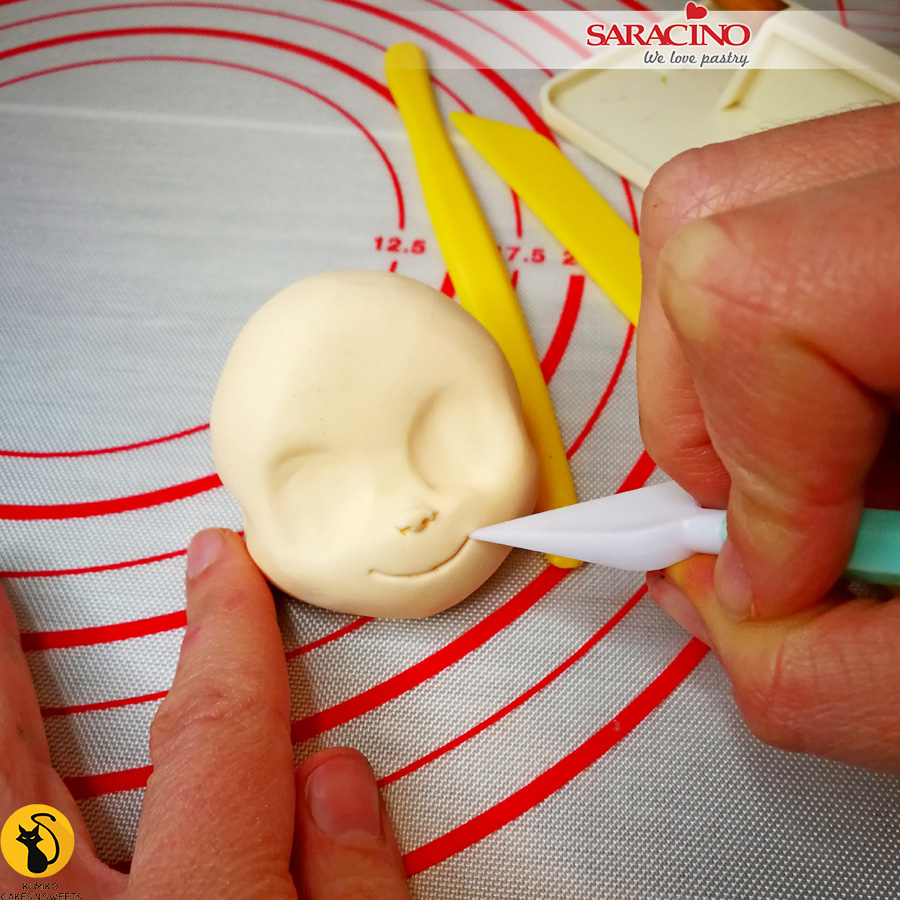
Step 30
Using a sharp tool draw a line for the mouth.
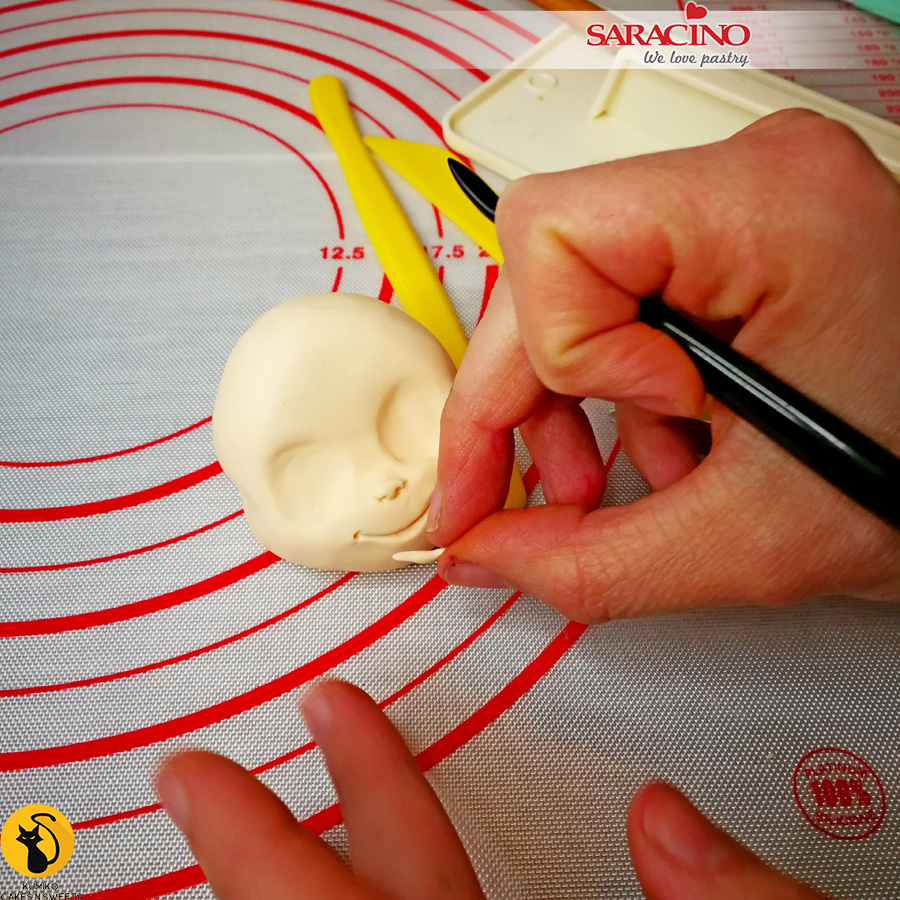
Step 31
Using skin tone Pasta Model roll a thin small piece and attach it to the line to form the lower lip. Blend with a modelling tool.
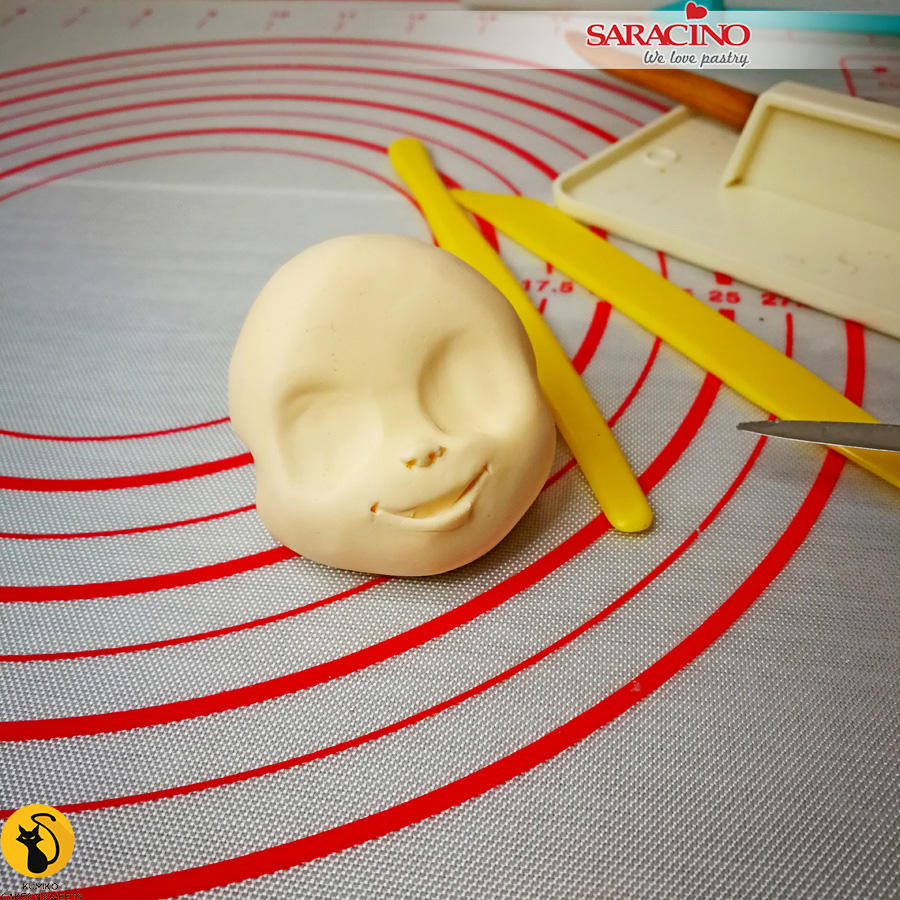
Step 32
Use a Dresden tool to give the mouth a slightly open look.
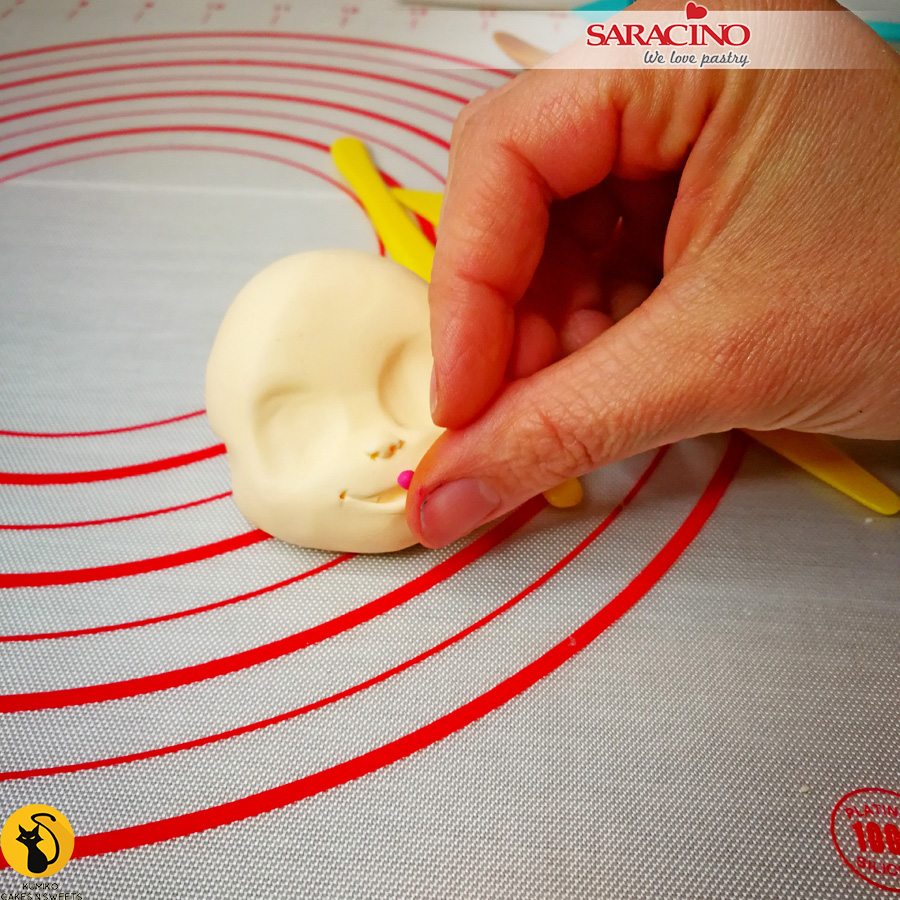
Step 33
For the tongue roll a small ball of pink paste and fix inside the mouth.
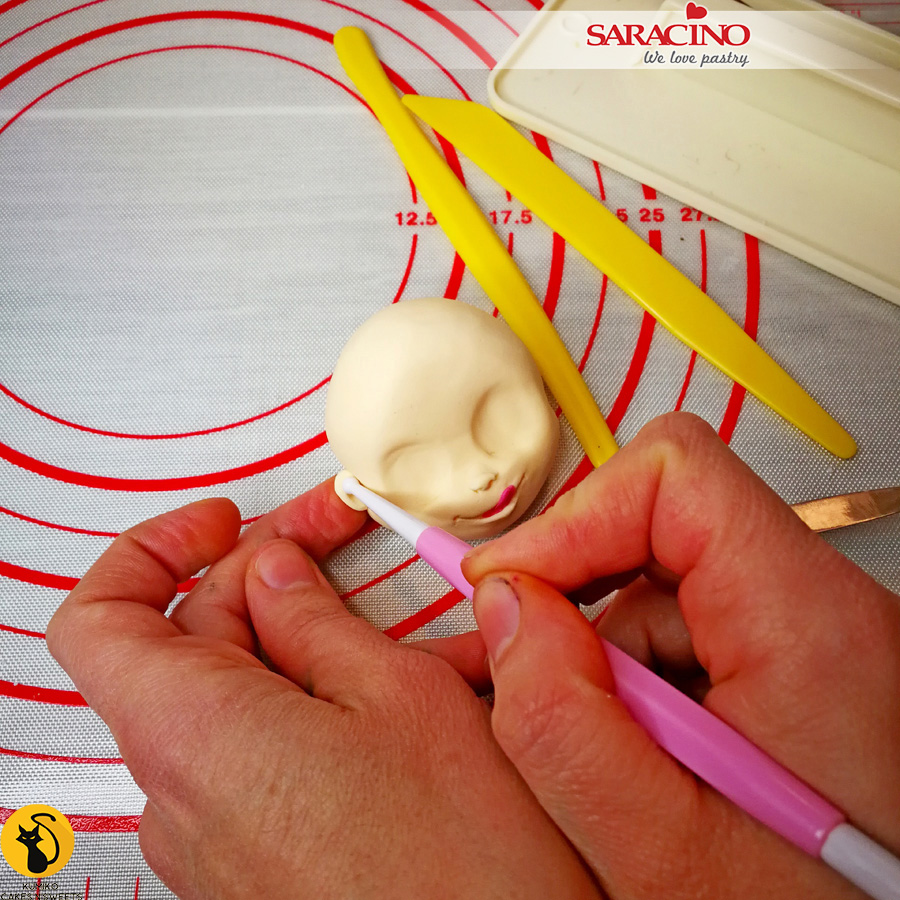
Step 34
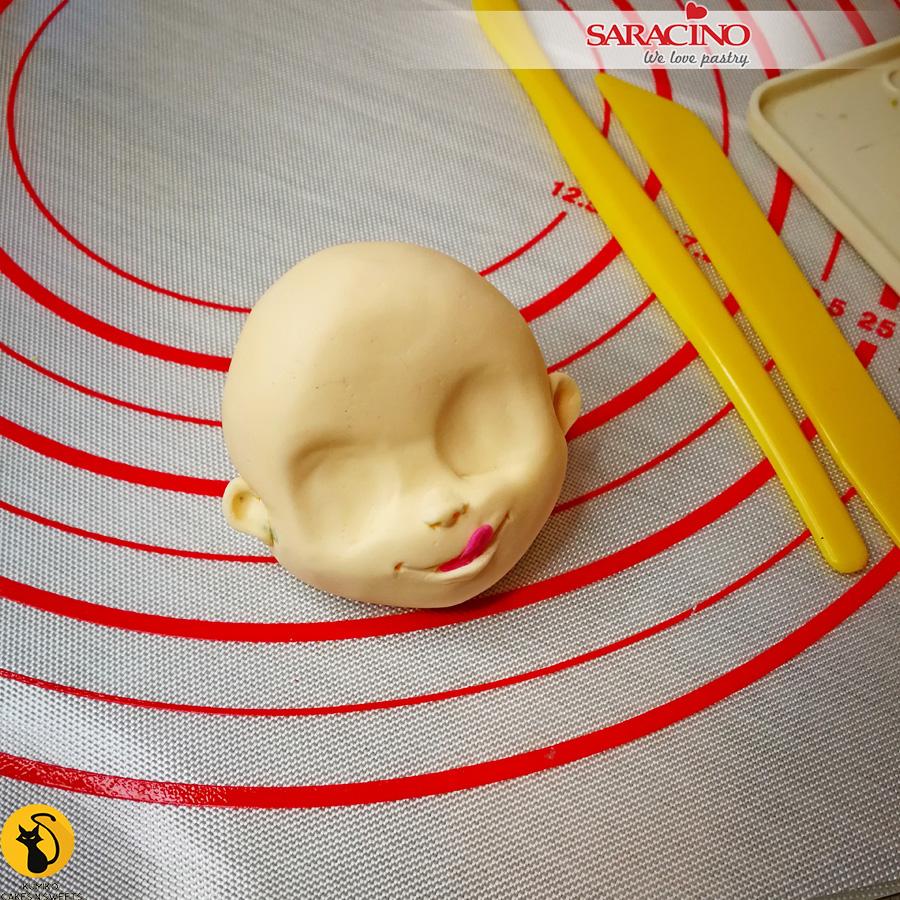
Step 35
Use the small end of a ball tool to form the holes at the centre of each ear.
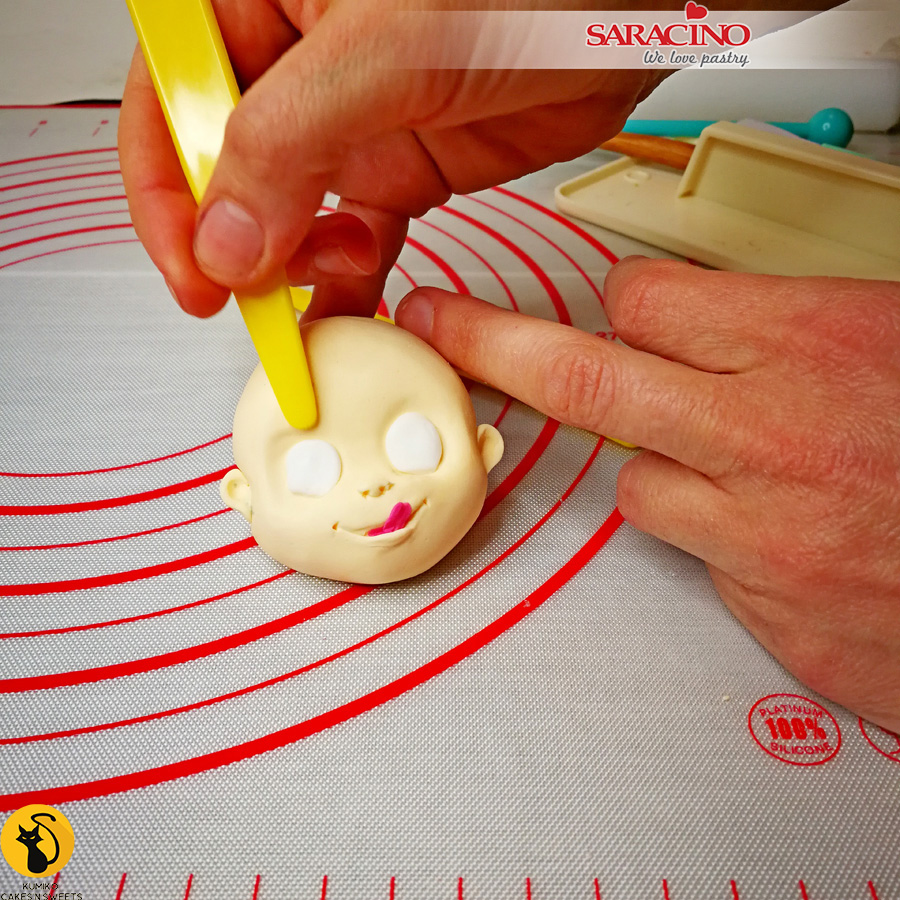
Step 36
For the eyes roll two small balls of white Pasta Model. Squeeze them until flat then insert them into the eye sockets.
Tip: To give a cuter look make the eyes slightly larger.
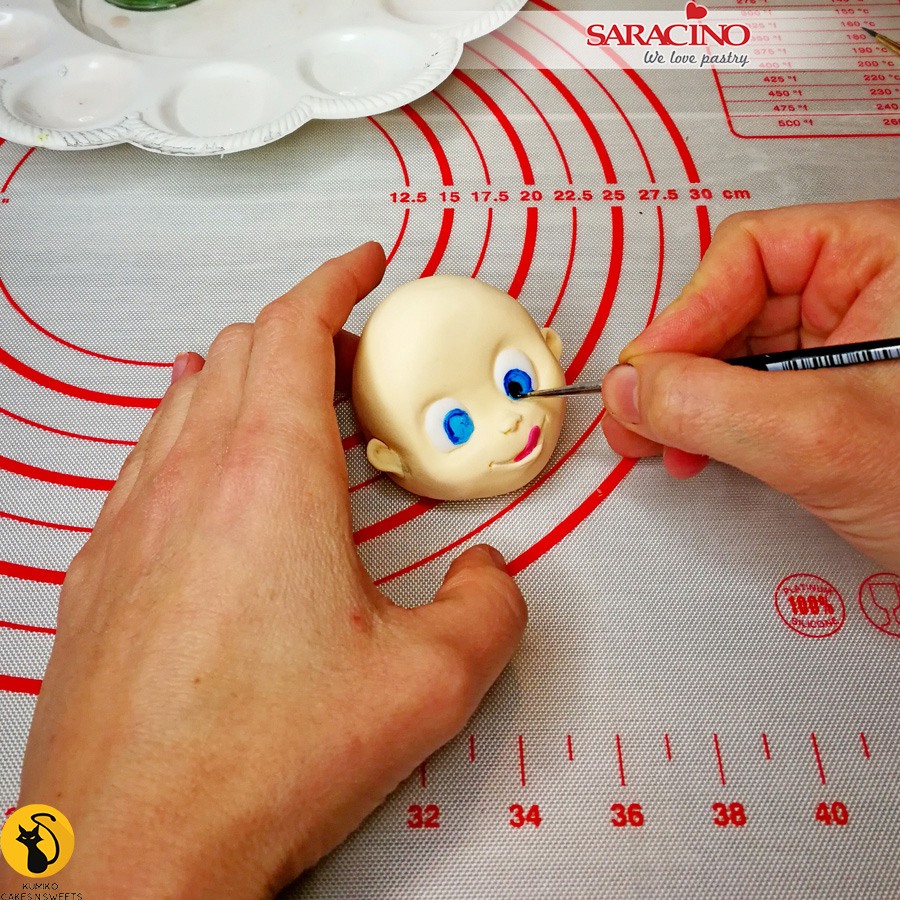
Step 37
Paint the eyes using Saracino colouring gel mixed with distilled water. Paint the eye pupils with black colouring gel.
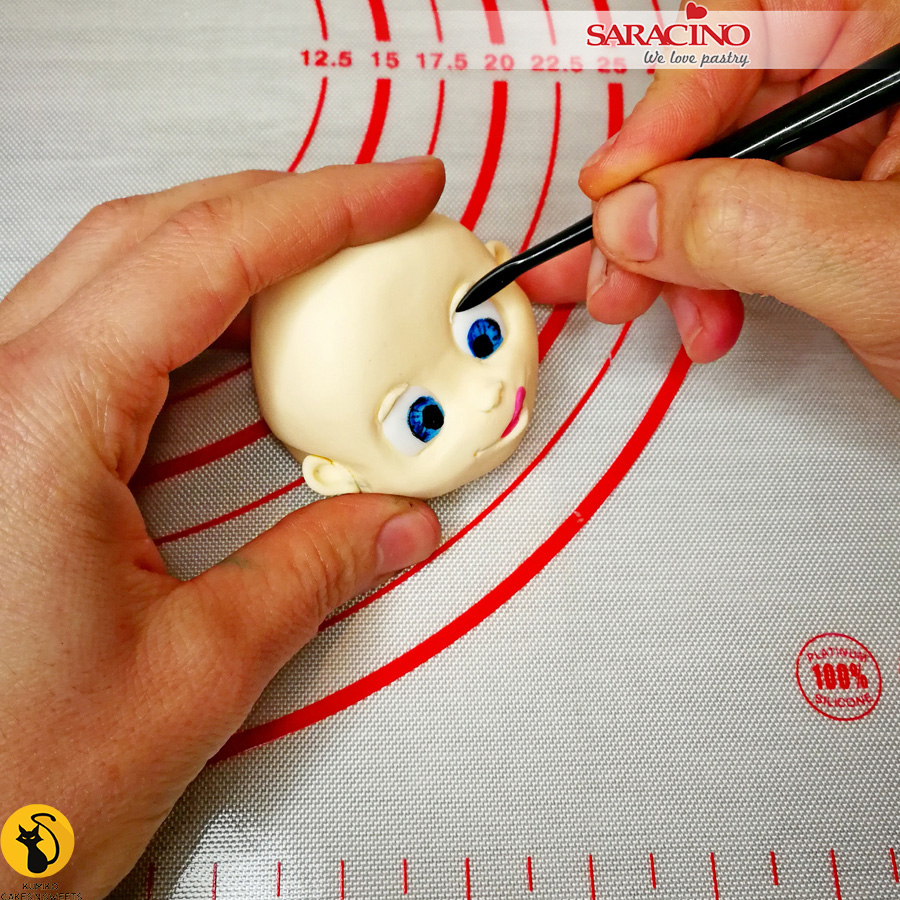
Step 38
Using a little skin tone paste roll the eyelids and attach.
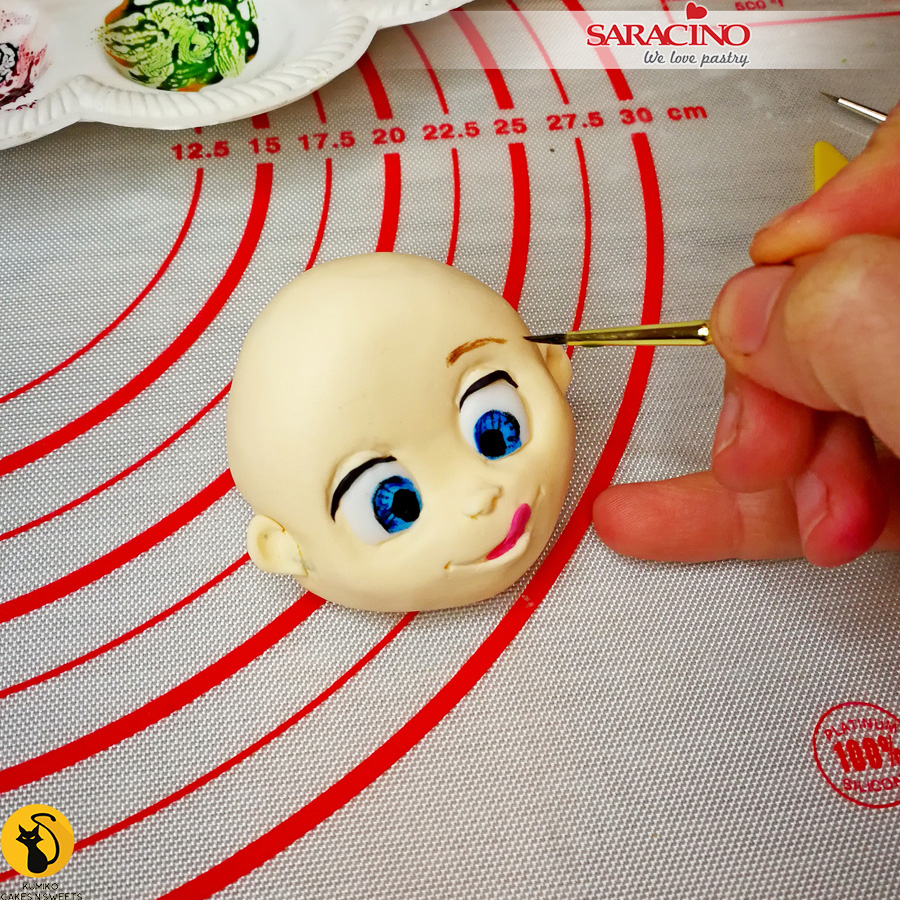
Step 39
Paint eyebrows and eyelashes using brown and black colouring gel.
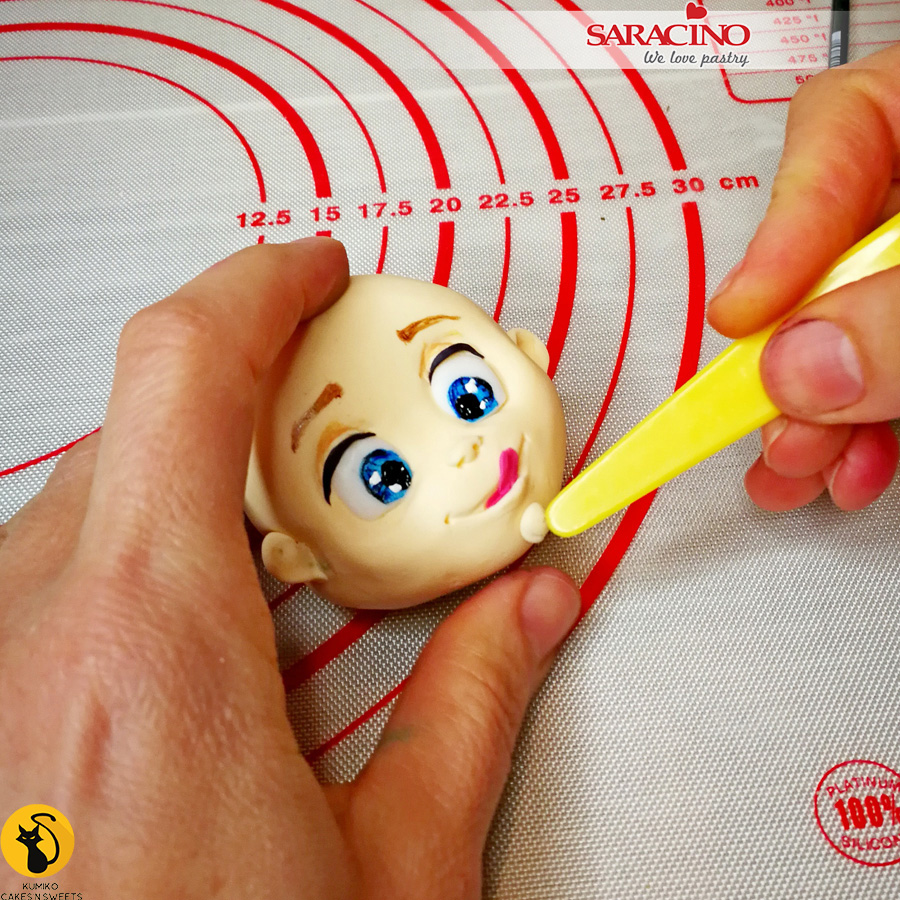
Step 40
Paint white dots onto the eyes to give reflection. Roll a small piece of Saracino skin tone Pasta Model and attach it to the face for the chin. Use a modelling tool to smooth and shape a cute chin.
Step 41
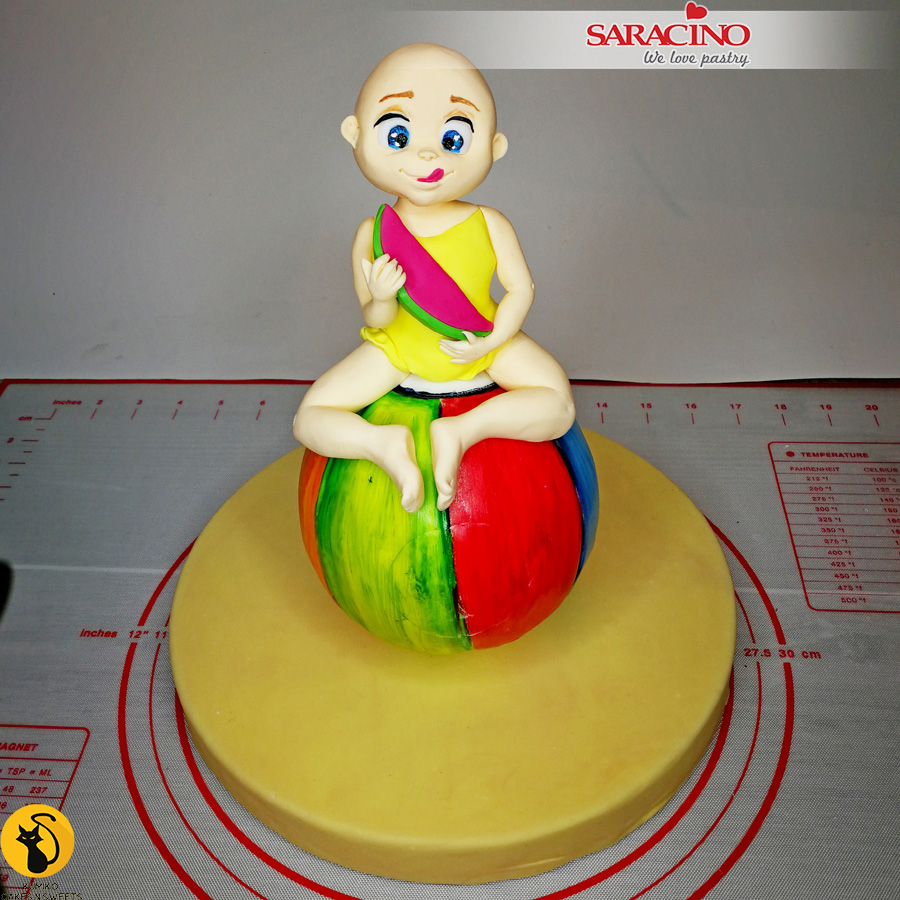
Attach the head to the body using edible glue and place the watermelon slice into the girls hands.
Step 42
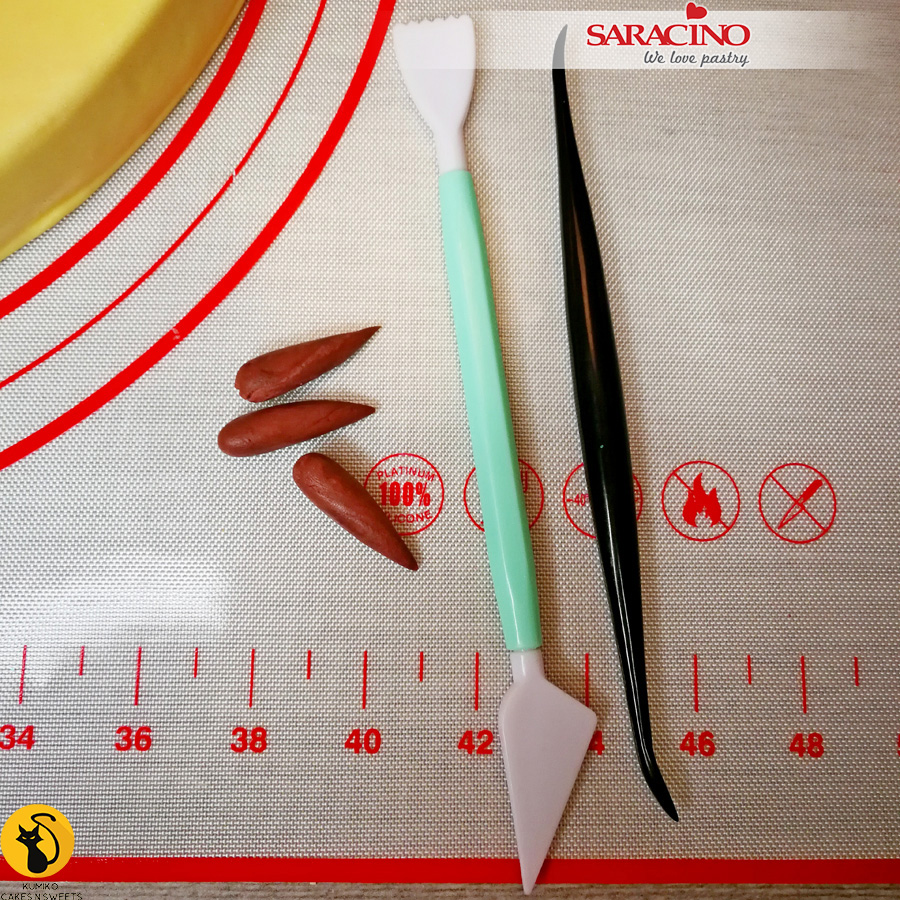
For the hair use brown Pasta Model and roll tear drop shapes.
Step 43
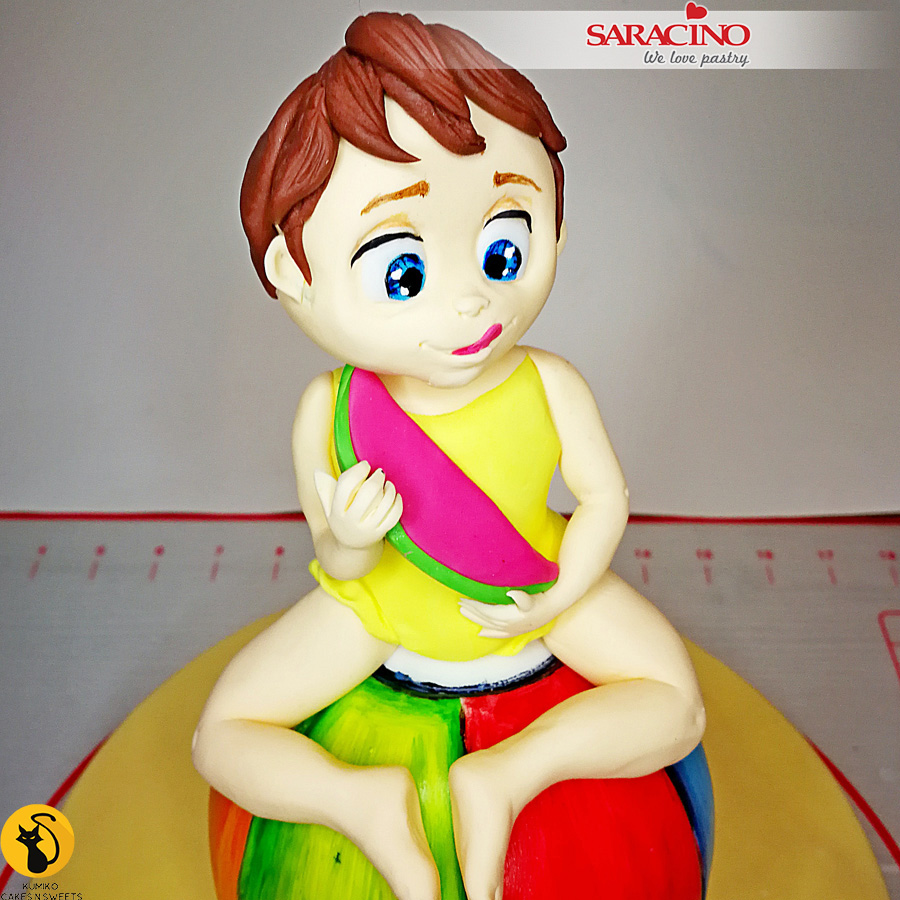
Fix the hair to the head using edible glue. Add hair texture with a sharp modelling tool by pressing each piece gently. Cover all the head with hair to achieve the look shown.
Step 44
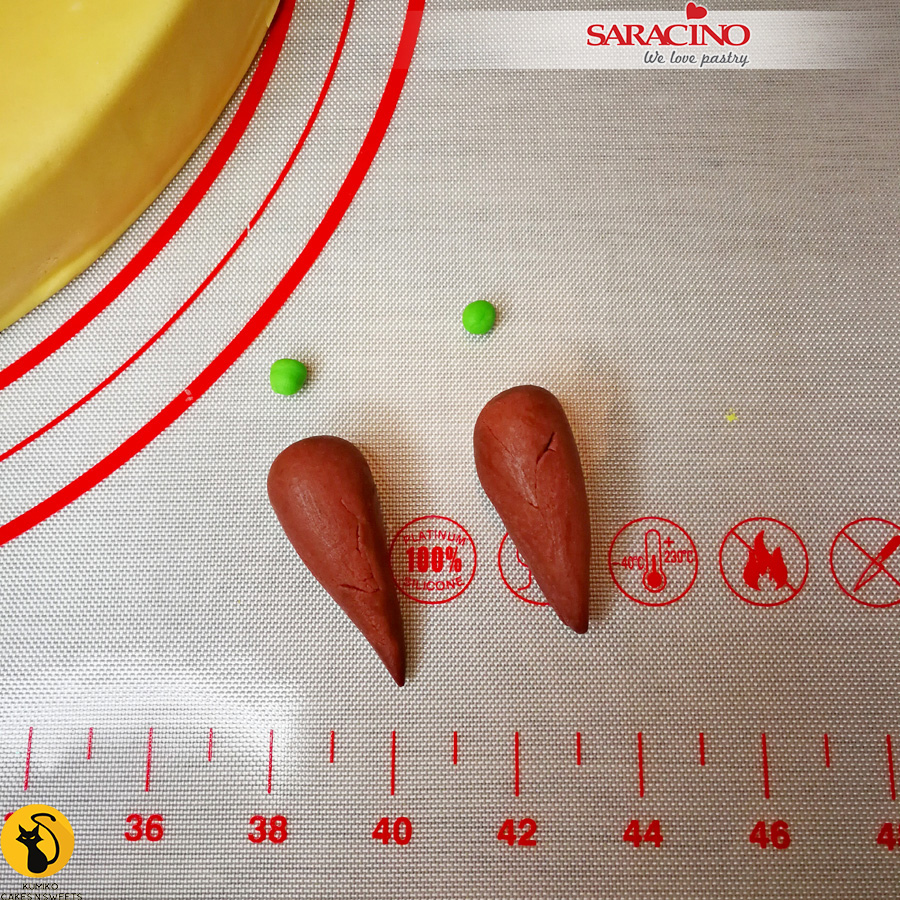
For the pony tails roll two brown teardrop shapes. Roll two green balls for the hairbands.
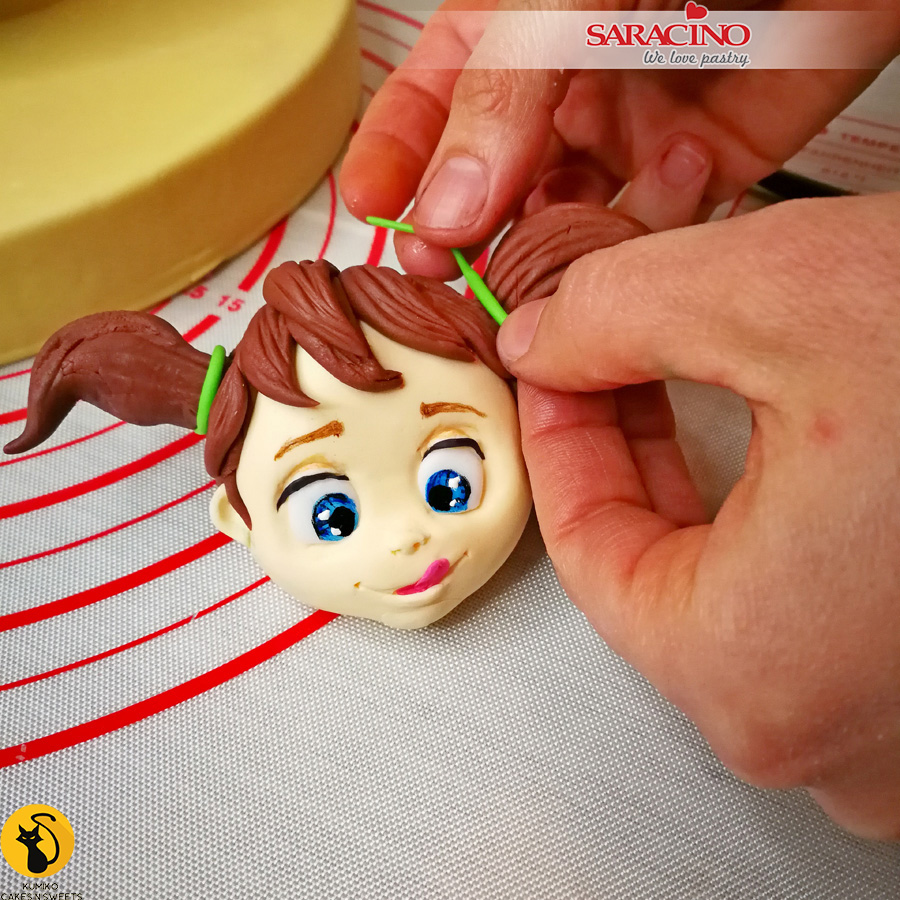
Step 45
Shape and give texture to the pony tails and glue them on each side of the head. You can use a short lenght of flower wire to make them more stable if required. Roll the green balls to form a thin strand of paste and add to the pony tail for the hair band.
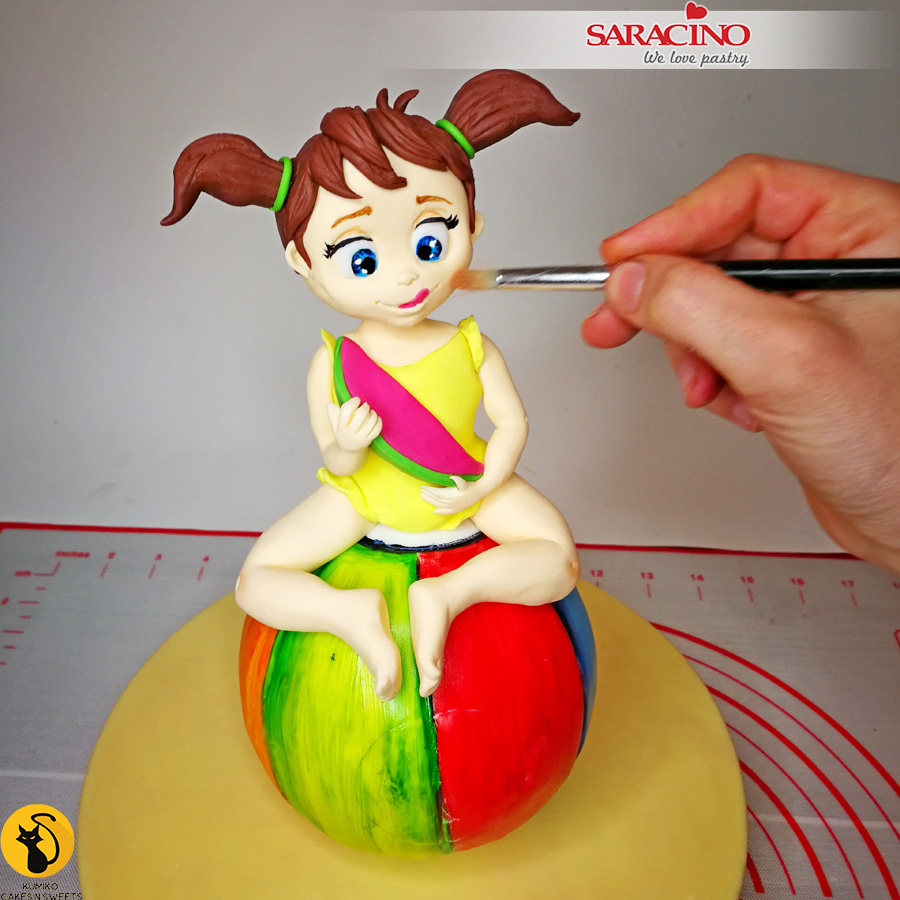
Step 46
Using yellow paste add a small frill detail to each shoulder. Using pink Saracino powder colour lightly dust the cheeks, elbows and knees.
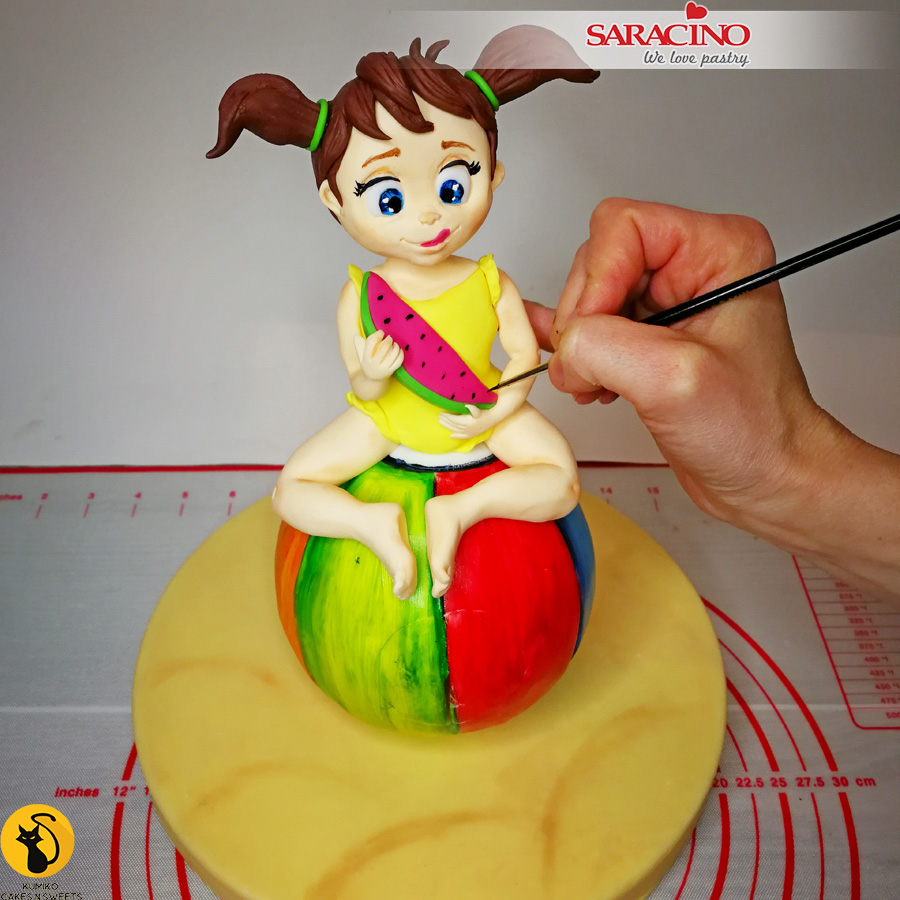
Step 47
Paint black dots and green stripes on the watermelon slice.
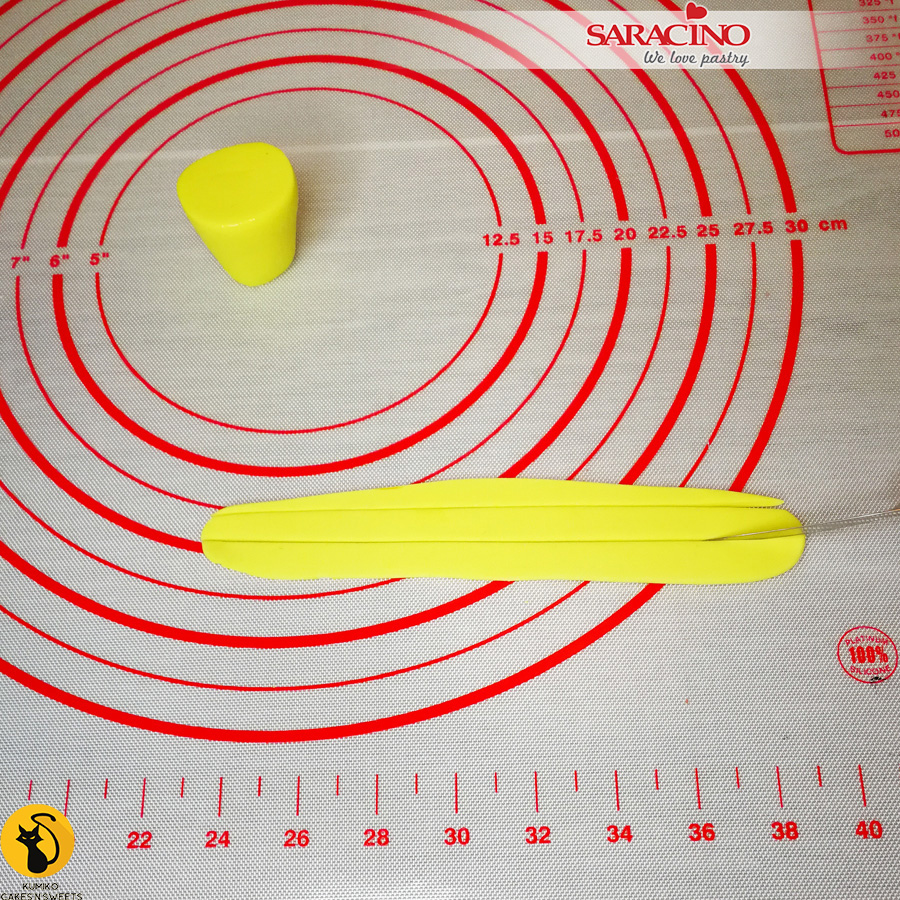
Step 48
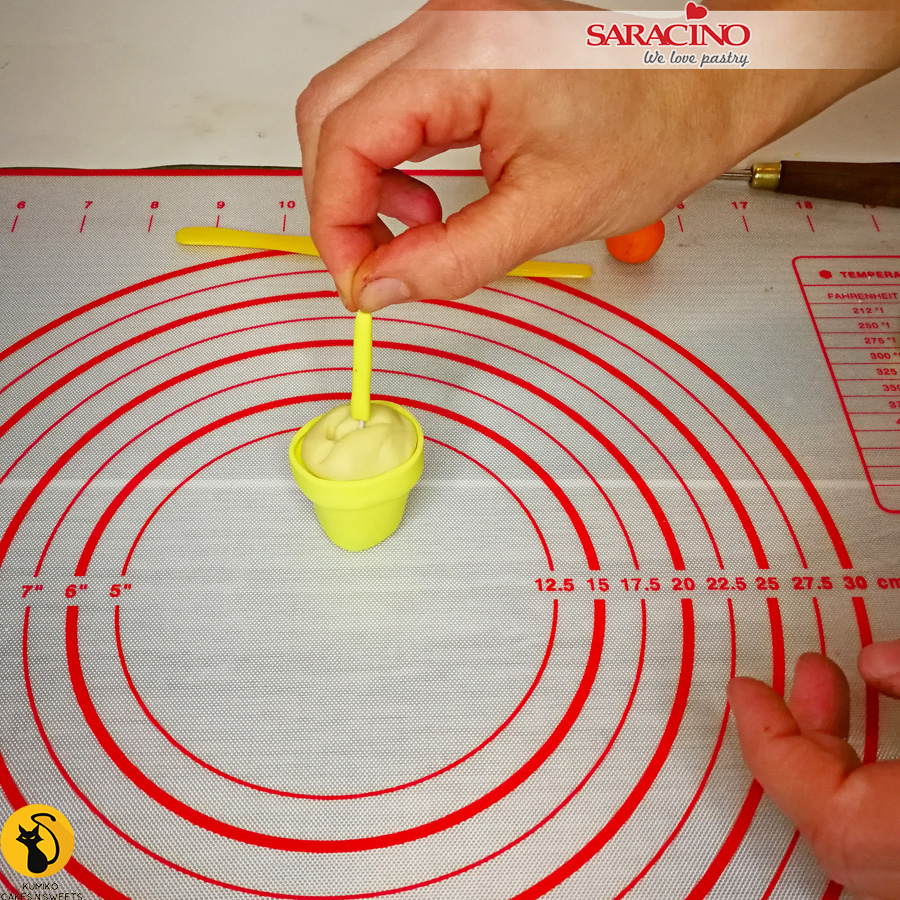
Using yellow Pasta Model form a bucket shape. Roll more yellow flat and cut a strip.
Step 49
Fix the strip around the top of the bucket. Add some textured paste to the top of the bucket to look like sand. Make a little yellow shovel handle and stick it into the sand using a flower wire.
Step 50
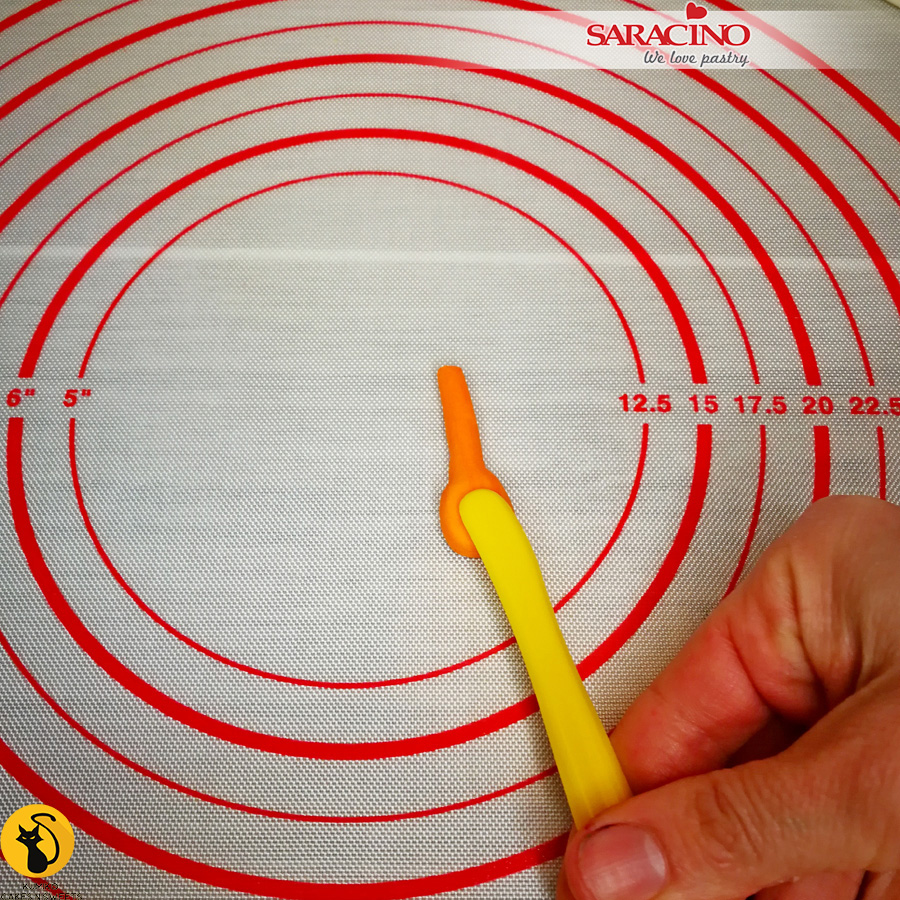
Make another little shovel from the orange ball.
Step 51
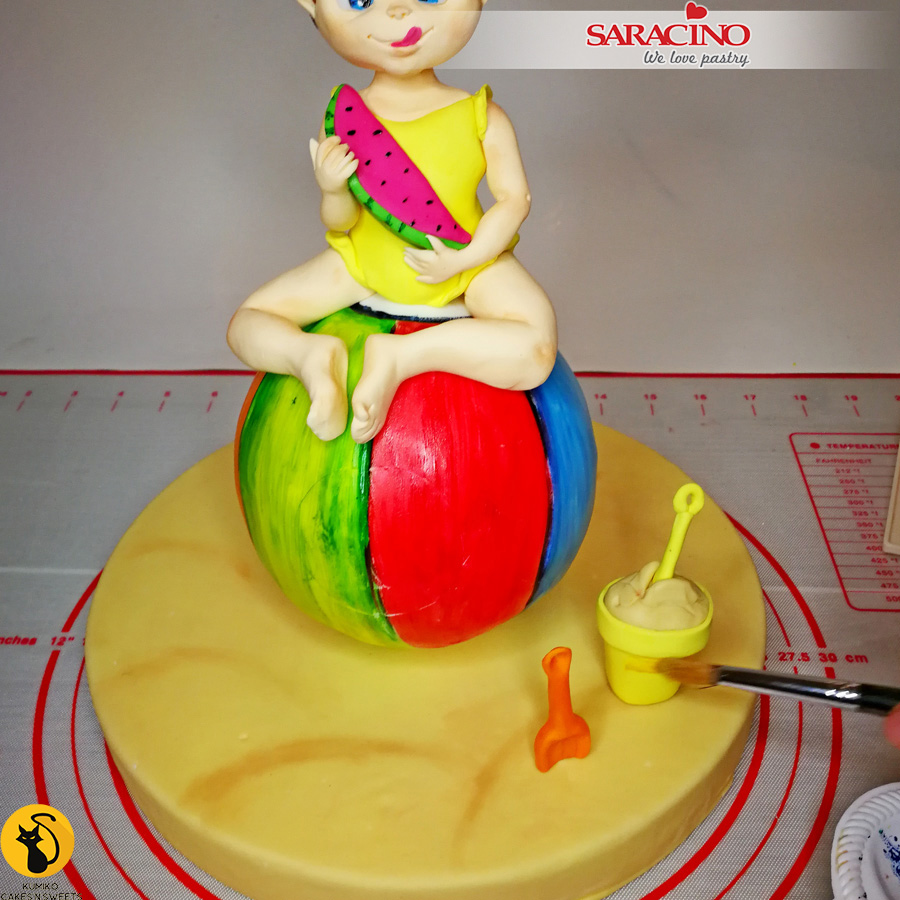
Using powder colours lightly dust the board and bucket to add character and depth.
Step 51
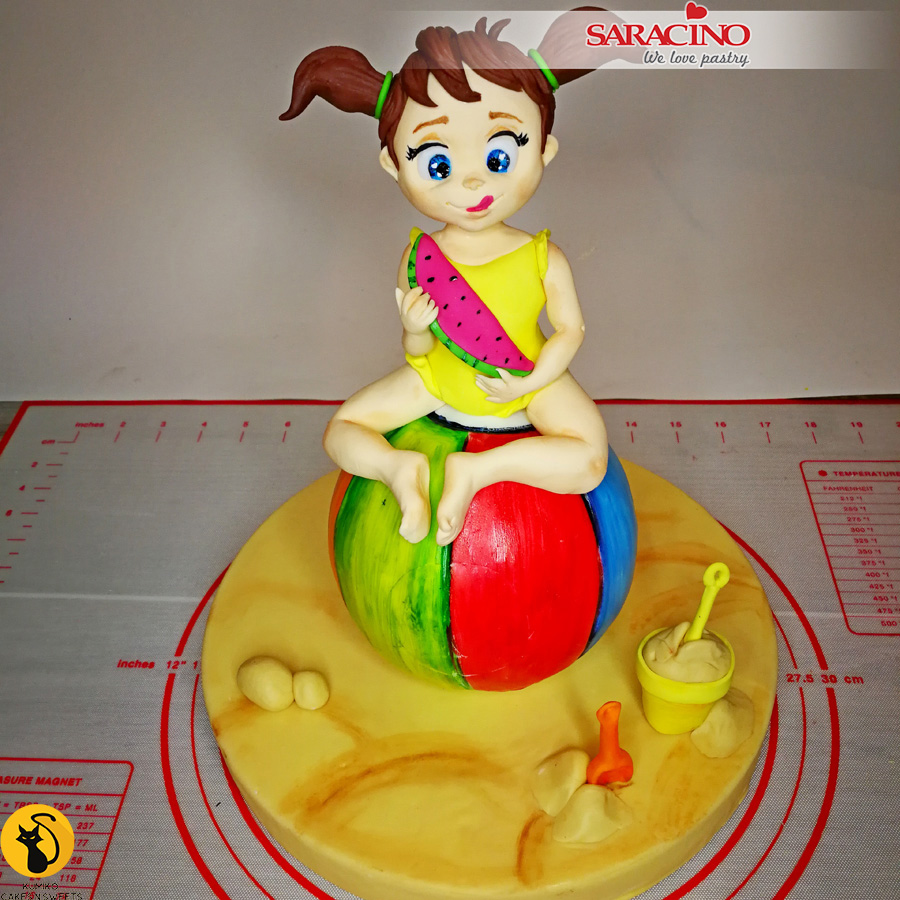
Add any seaside decoration of your choice. Your cute little girl is ready!

