You will need:
- Saracino Pasta Model white , fuchsia , skin, tiffany, orange, yellow, brown, pink, light blue, violet and black
- Saracino Pasta Bouquet
- Gel food colours: pink, yellow and green
- Cake gel
- Powder colours: yellow, pink, green, black, white and blue
- White Pasta Top
- Rolling Pin
- Dummy 15cm x 10cm and cake board
- Smoother
- Fine tip brush for eyes and lips
- Glue brush
- Ball tool medium and small
- Primrose mould and cutter
- Leaf mould
- Smooth plastic knife
- Scalpel
- Leaf shaping tool
- Cone tool silicon
- Toothpick
- Two brushes for blending
- Clear alcohol
- Palette
- Gauge 22 flower wires
- Pointed tools or pin
Step 1
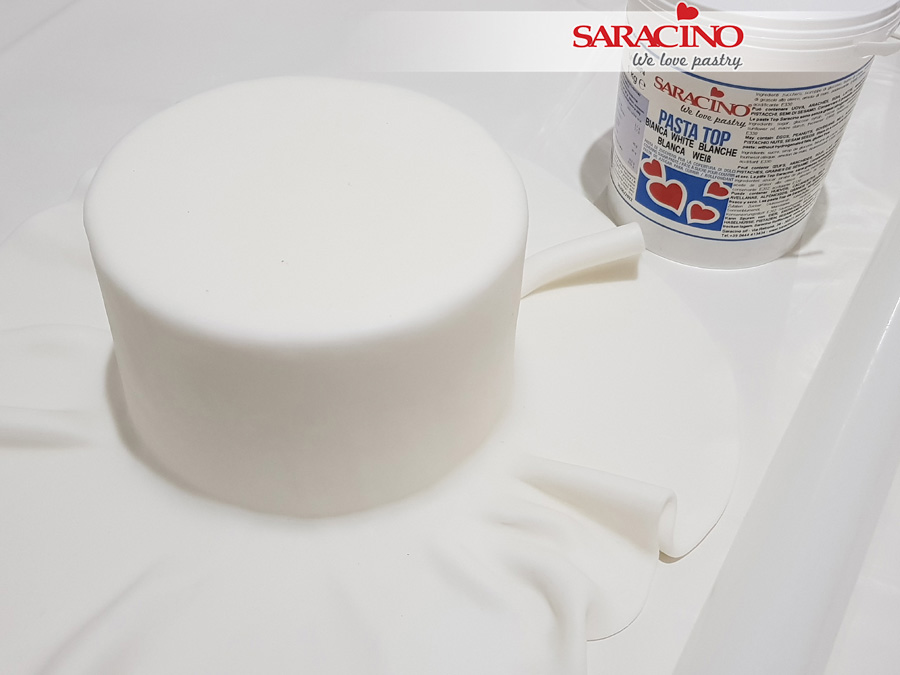
Roll out the Pasta Top and cover the dummy. Repeat for the cake drum. Trim the excess and place the dummy on the cake drum.
Step 2
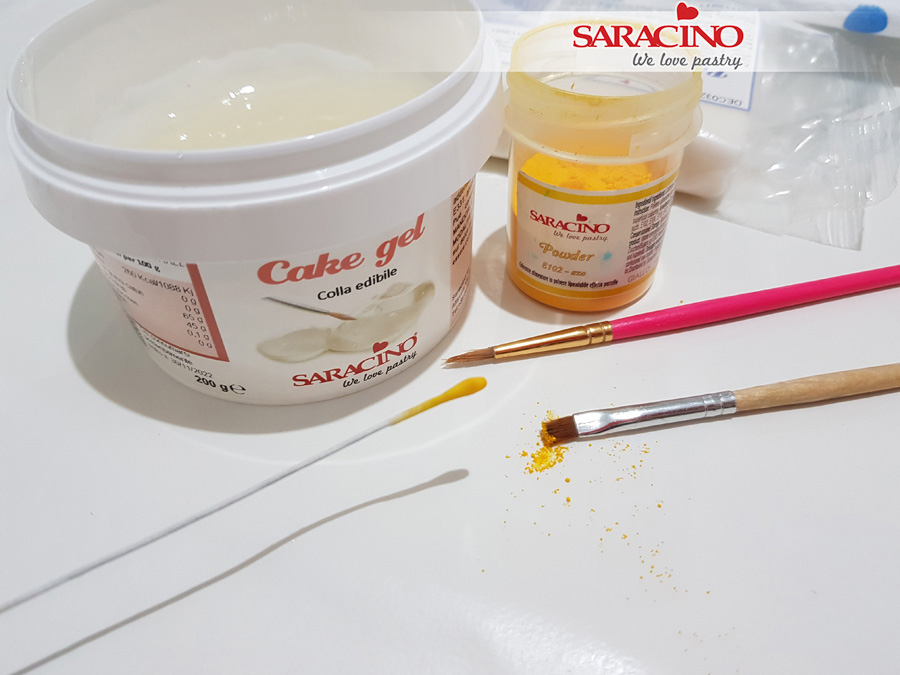
Use a small amount of Pasta Bouquet to make a rounded end to your flower wire. Dip the end of the flower wire in cake gel and form the Pasta Bouquet around to the shape shown. Allow to dry and then dust with a soft brush and yellow powder colour.
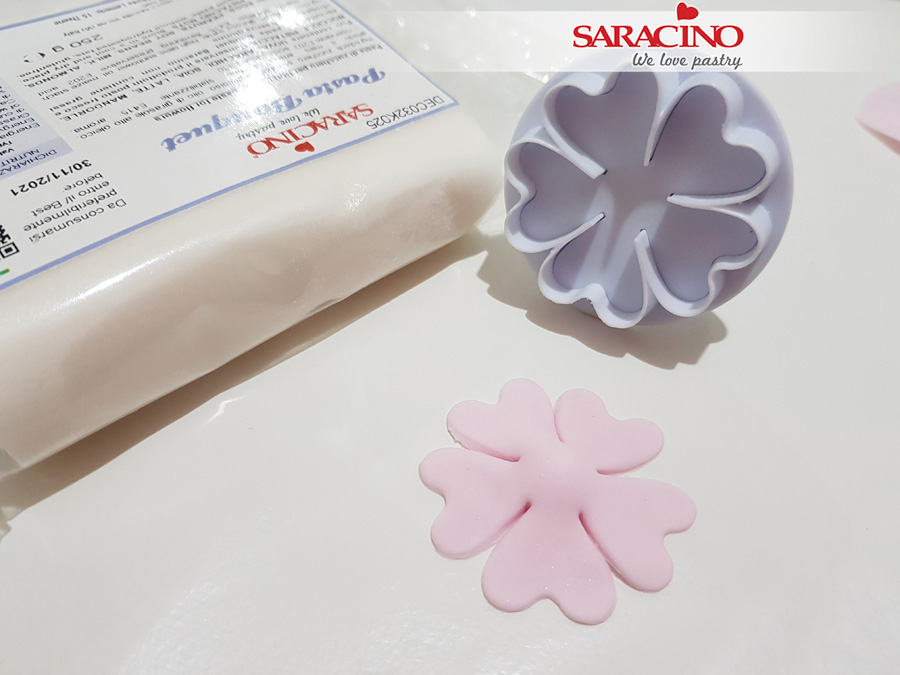
Step 3
Add a small amount of pink colouring to the white Pasta Bouquet. Mix well. Roll out the paste thinly. Using the Primrose cutter cut out the petals.
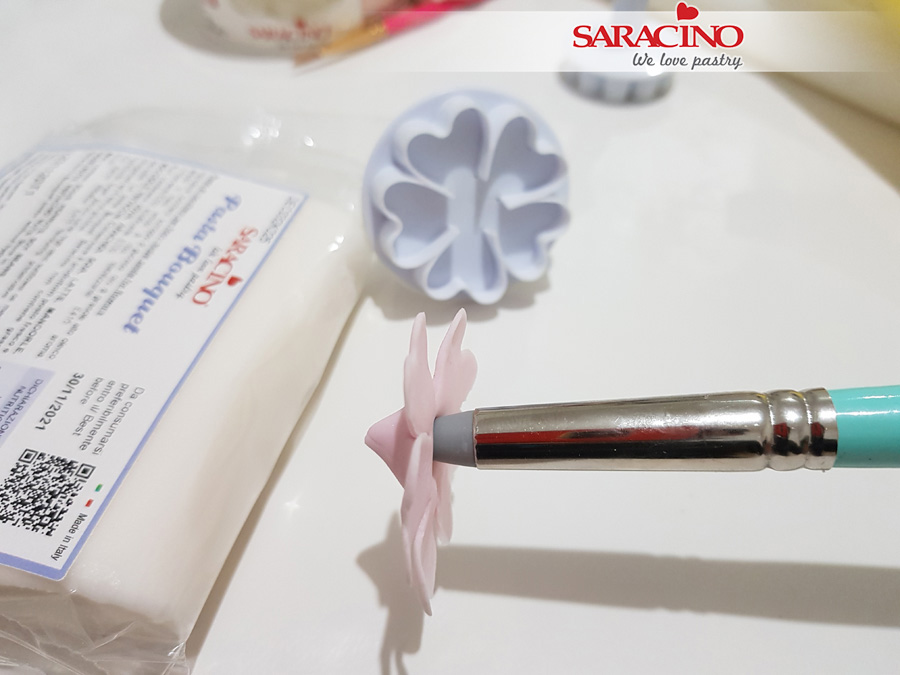
Step 4
Smooth the edges of the flower and use your silicon tool to form an indent in the centre.
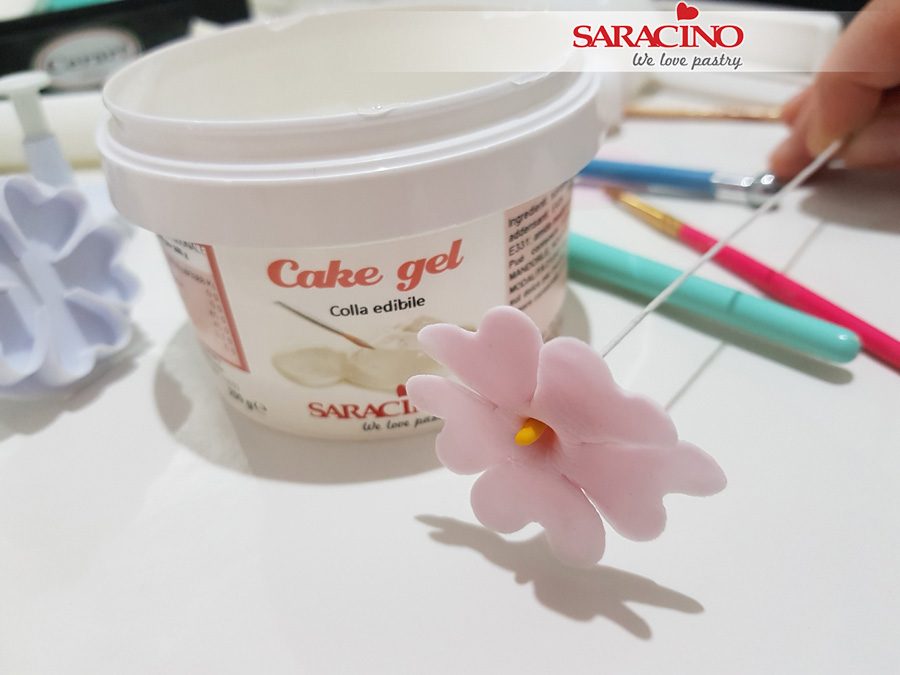
Step 5
Insert the flower wire through the centre of the flower.
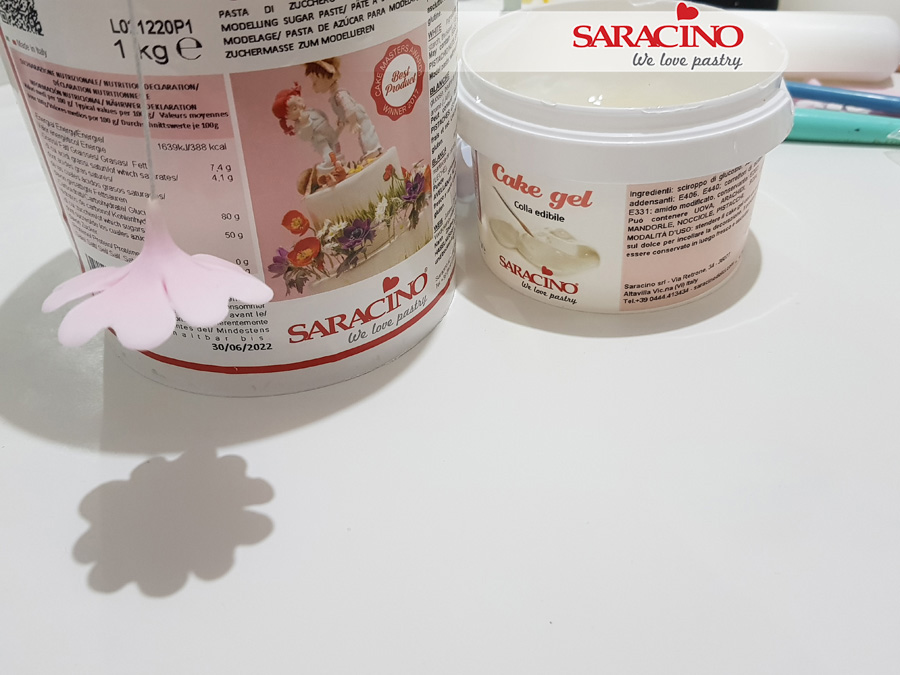
Step 6
Allow to dry.
TIP: I bend the end of my wire and use a Saracino tub lid to hang the flowers off.
Step 7
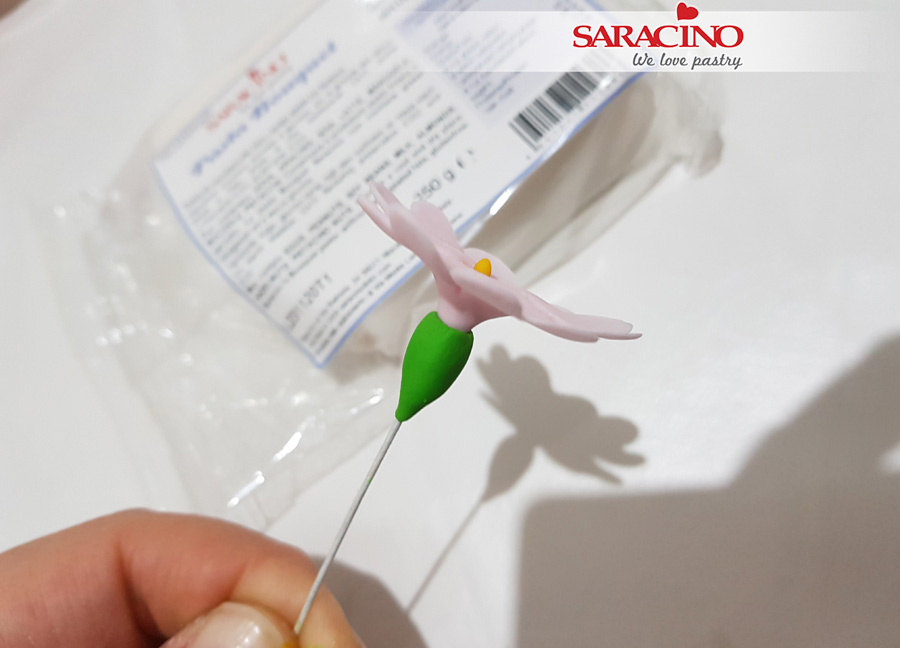
Using green coloured Pasta Bouquet form the bud beneath the petals. Use your fingers to form the shape shown.
Step 8
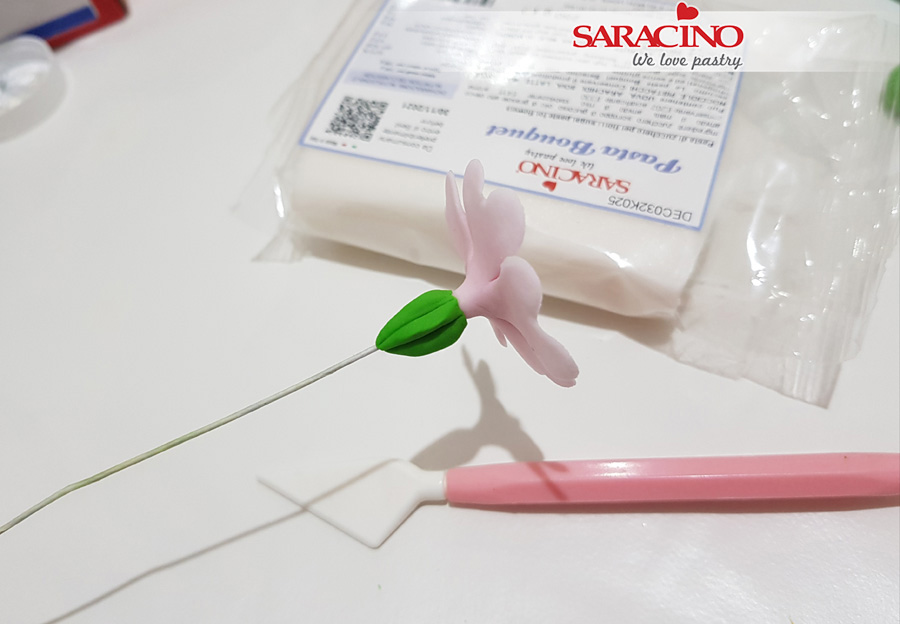
Use a modelling tool to form the grooves on the bud as shown.
Step 9
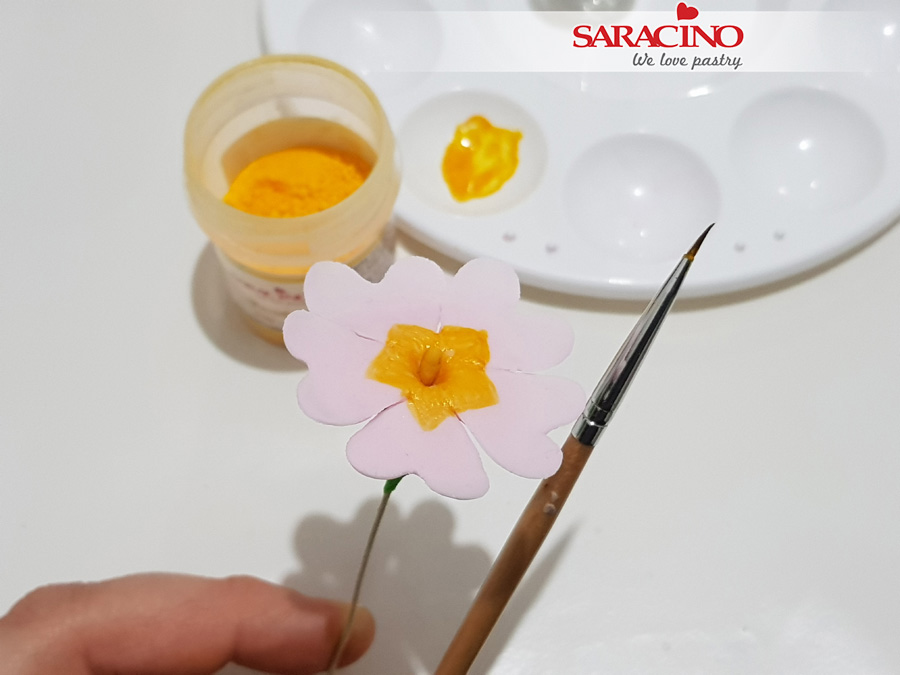
Mix some of your yellow powder colour with clear alcohol. Use a fine brush to paint the yellow centre of the flower.
Step 10
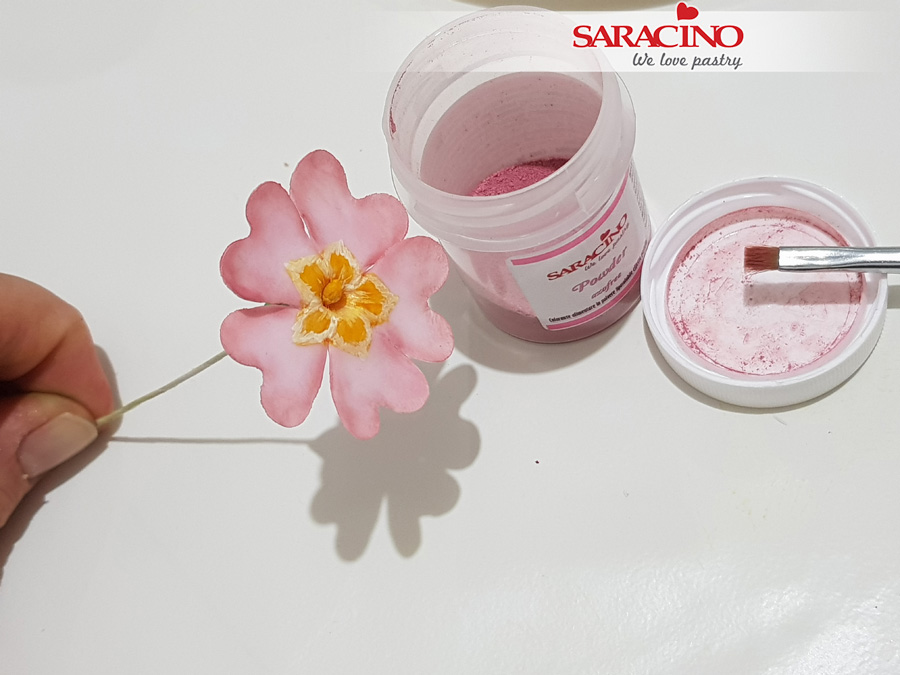
Mix a lighter shade of yellow and outline the centre. Use a fine brush and pink powder colour to dust the petals. Take care not to over dust.
Step 11
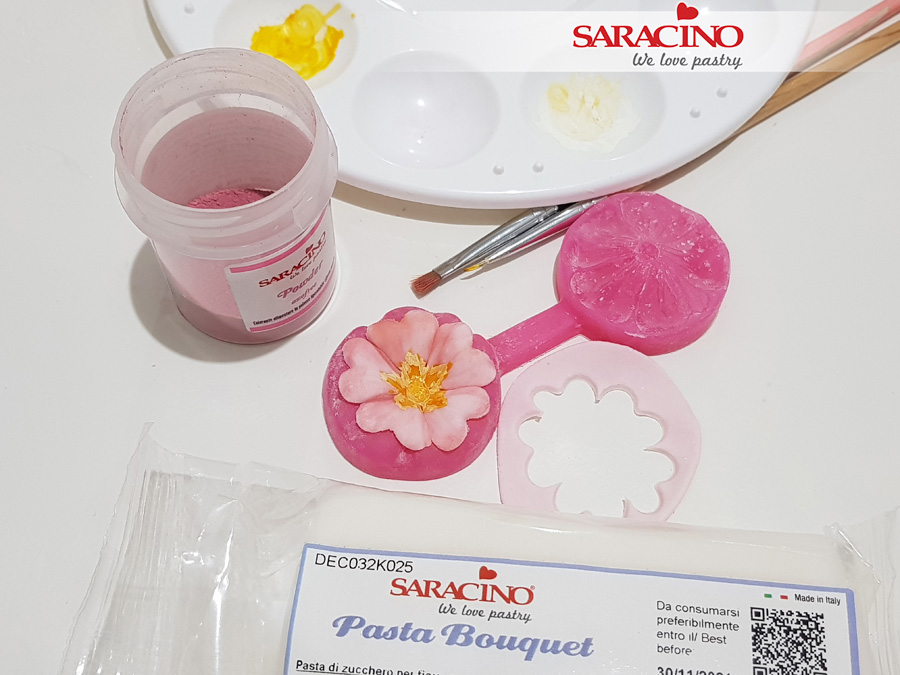
Repeat the above steps for the flower we need on the wreath. Place in the veiner and add texture.
Step 12
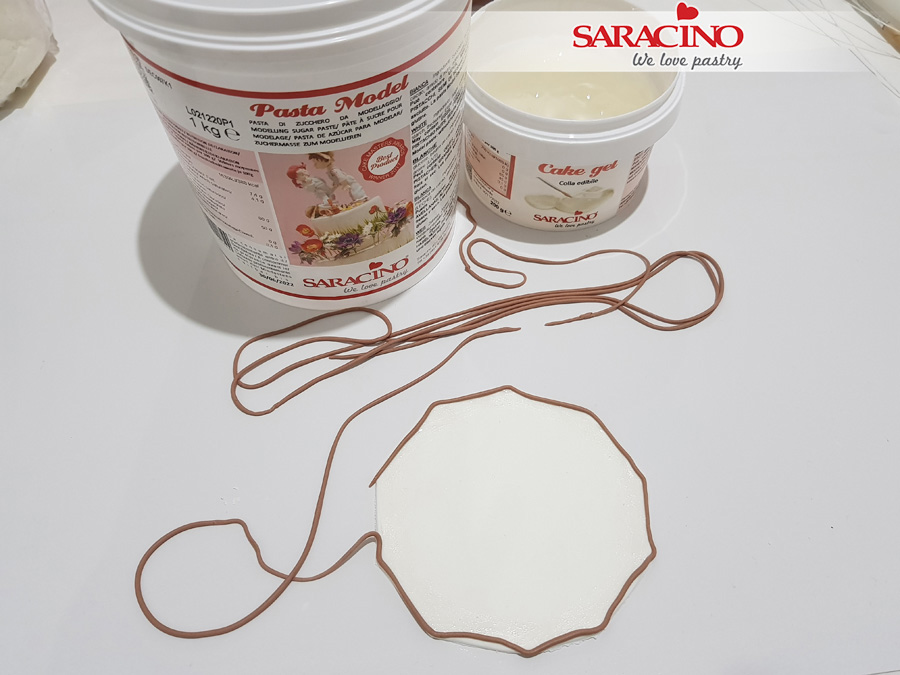
Using Pasta Model roll out a thin piece and cut out the shape you would like for the plaque. Now to give the wreath effect add brown Pasta Model to your extruder and extrude fine strings to place around the outside of the plaque.
Step 13
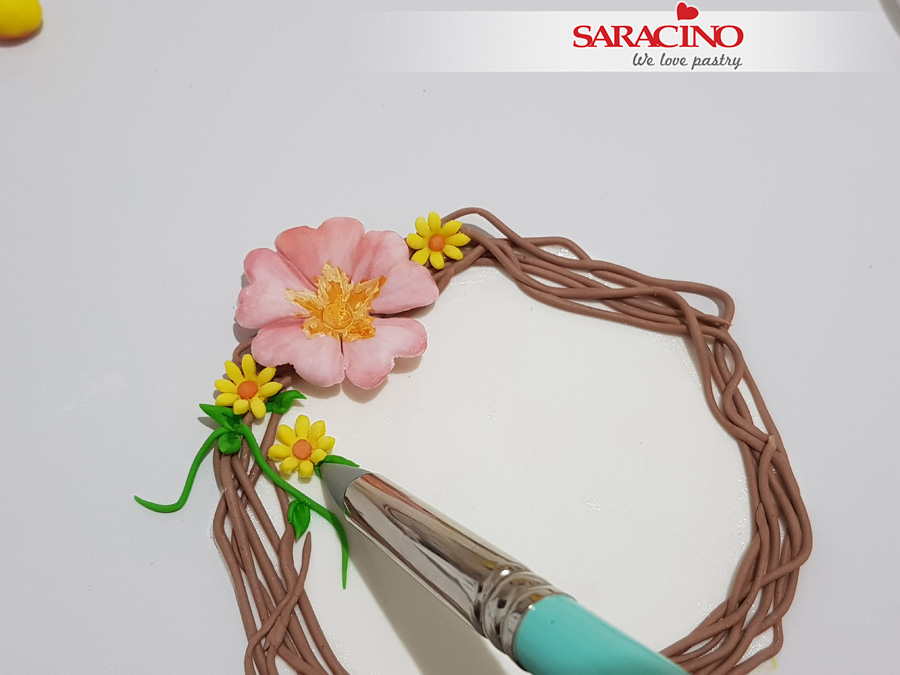
Fix the primrose we made earlier. Add filler flowers and leaves as required.
Step 14
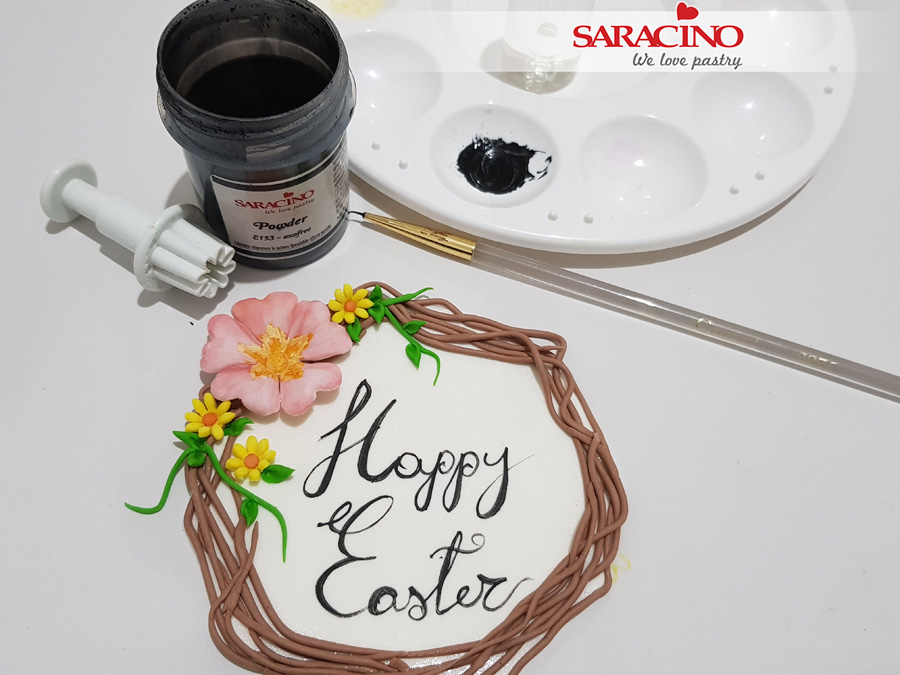
Mix black powder with clear alcohol. Using a fine brush paint your message. Allow to dry.
Step 15
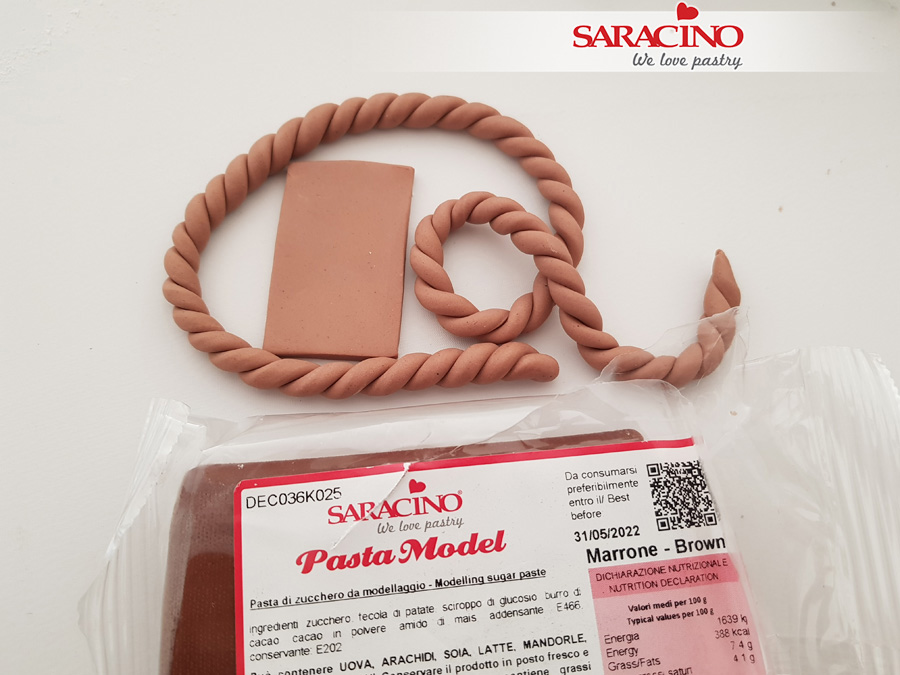
For the egg basket use brown Pasta Model in your extruder to extrude a thick strand of paste. When extruded use your fingers to twist the strand so it forms a rope. Using the same colour paste roll and cut the rectangle shape for the basket base.
Step 16
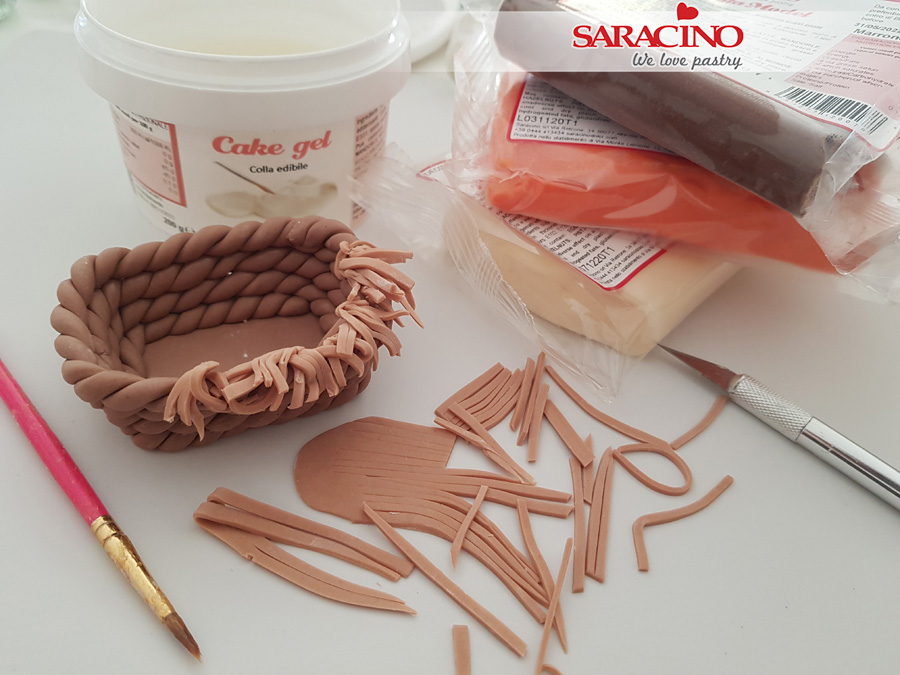
Roll out more of your brown paste. Use a sharp knife to cut strands. Fix to the outside of the top of the basket using a little cake gel if required.
Step 17
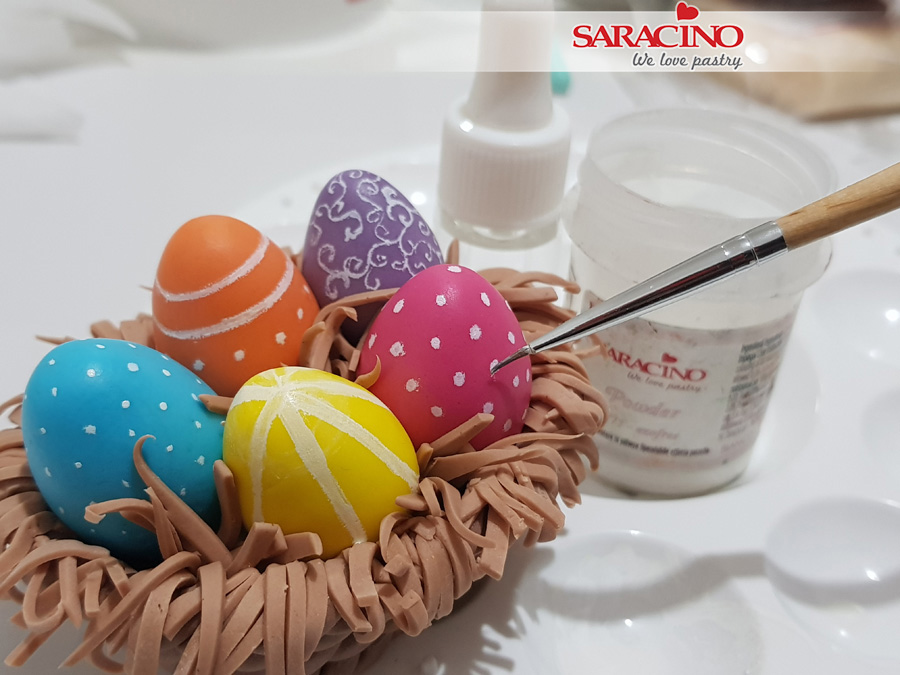
Add some decorated eggs into the basket.
Step 18
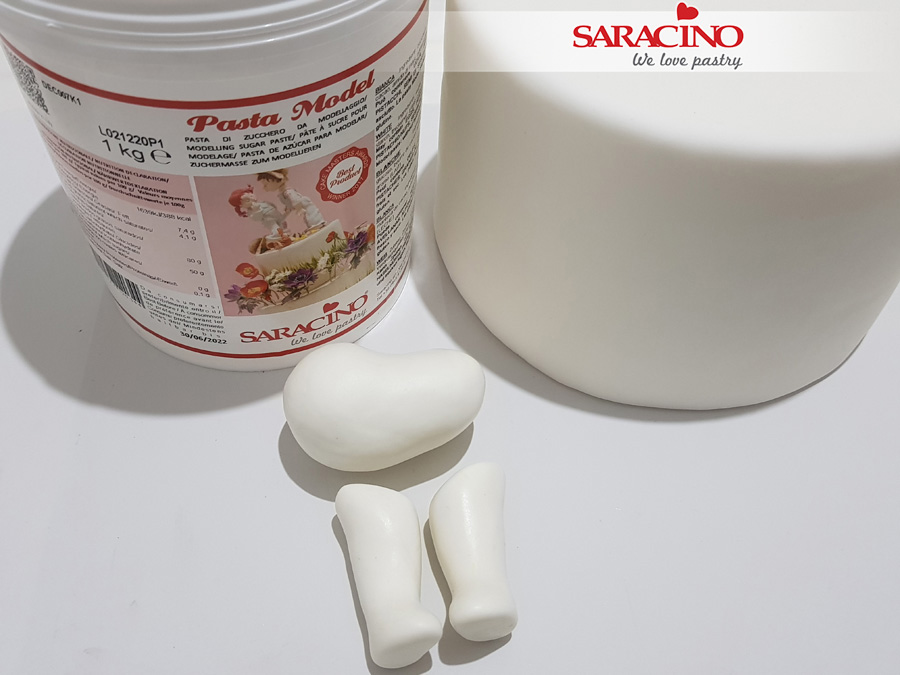
For the torso and the legs use some of your white modelling paste. The Body is to be a pear shape flattened at the chest area. Roll each leg to a sausage shape and then trim the top and form the feet.
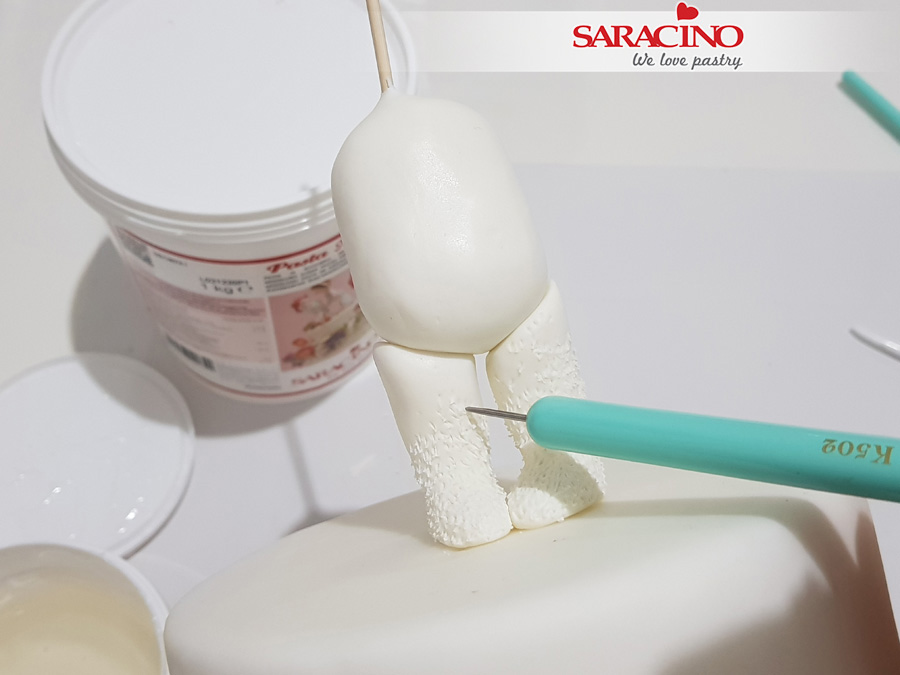
Step 19
Insert a cocktail stick into the body ready for the head fixing. Use a sharp tool to add a fur texture to the legs.
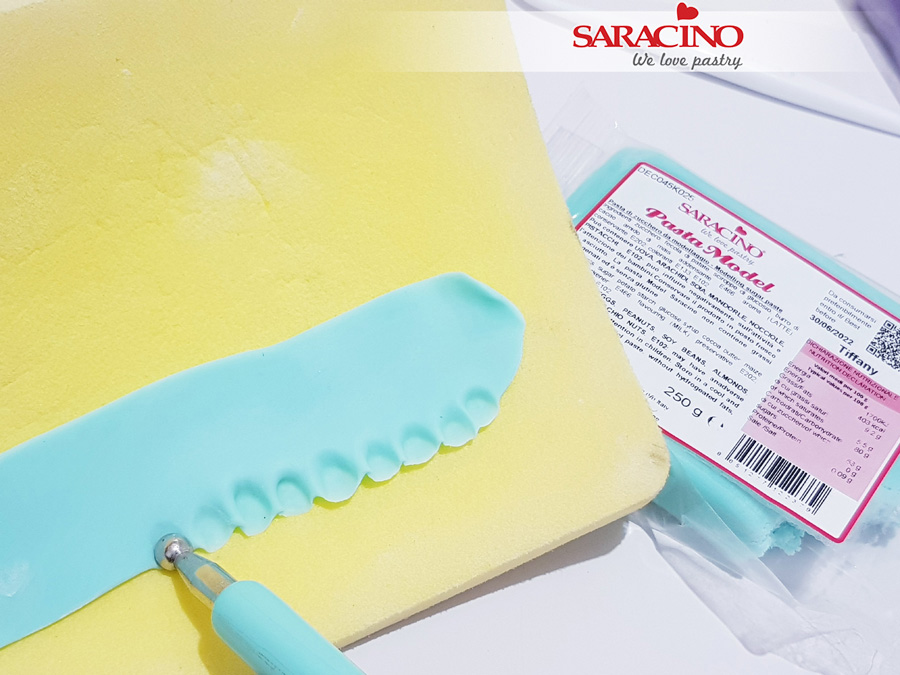
Step 20
Roll some of your Tiffany Pasta Model thinly and cut out the skirt. Use a ball tool to add the hem detail.
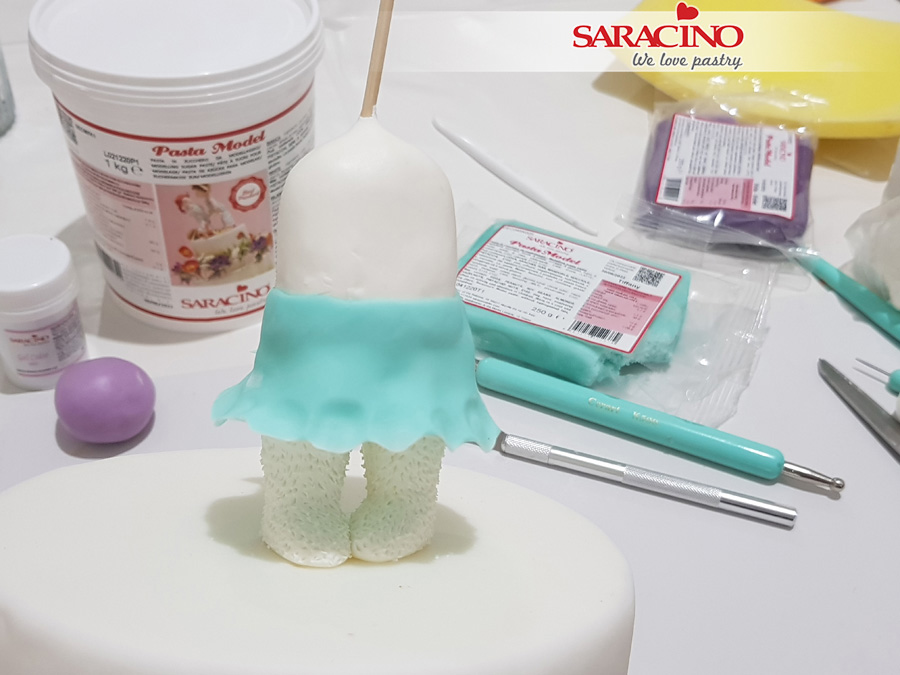
Step 21
Fix around the body.
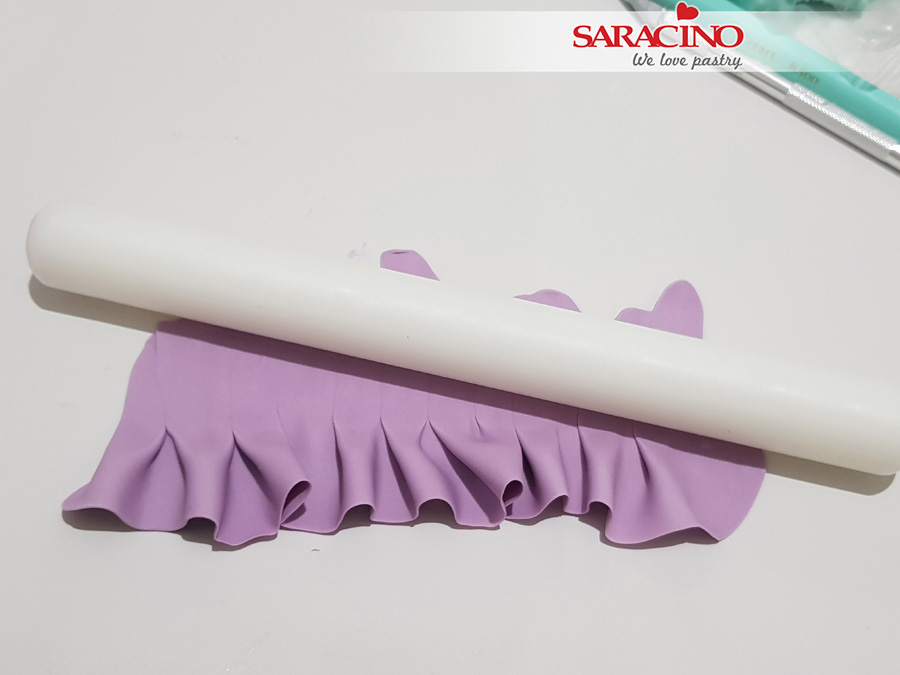
Step 22
Roll the violet Pasta Model for the dress. Pinch the hem to form pleats and then re-roll to create the smooth top.
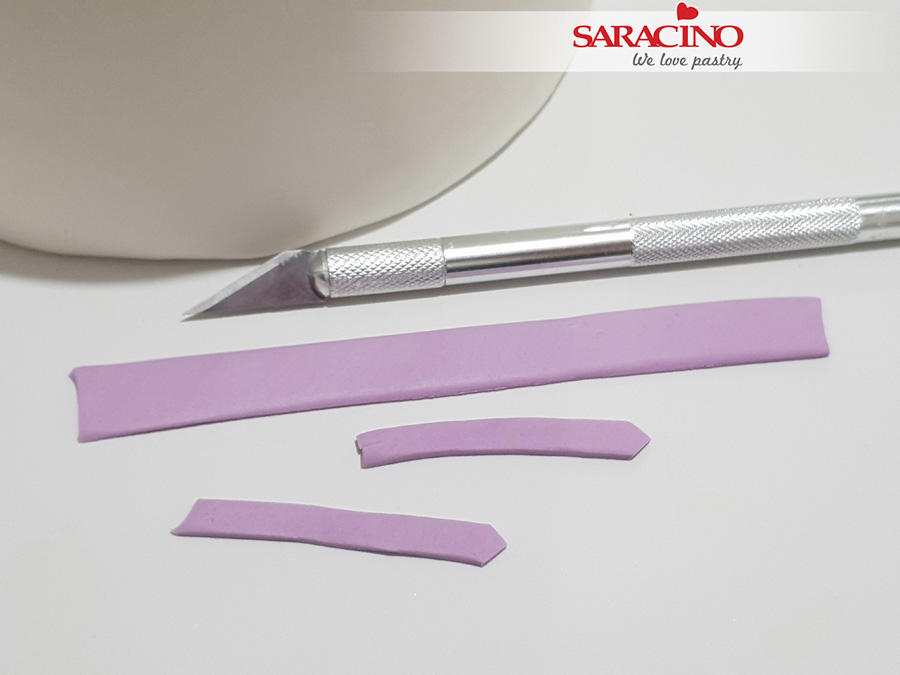
Step 23
Use the same colour to shape the belt and straps. Use a sharp knife to cut out the shapes.
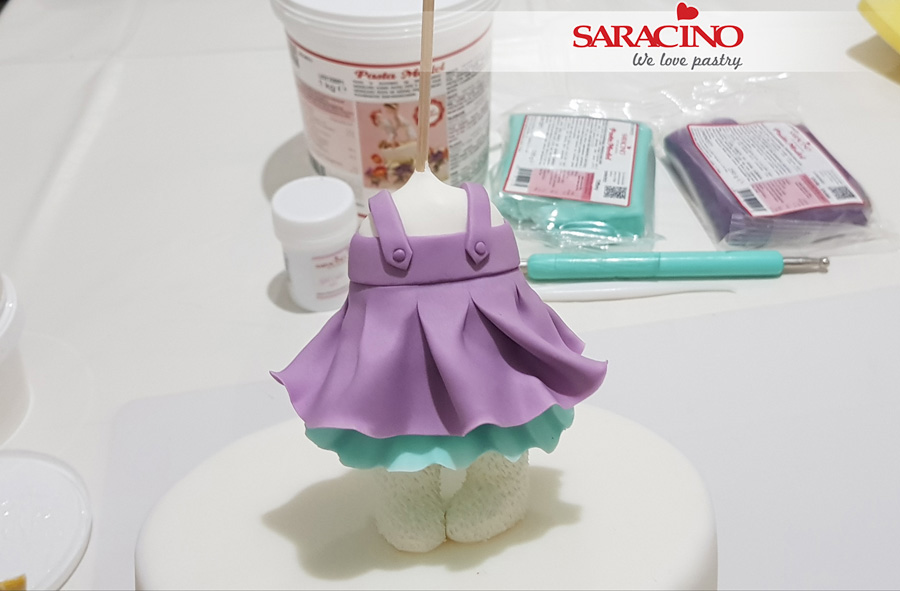
Step 24
Fix to the body as shown. Add two small balls of paste for the buttons.
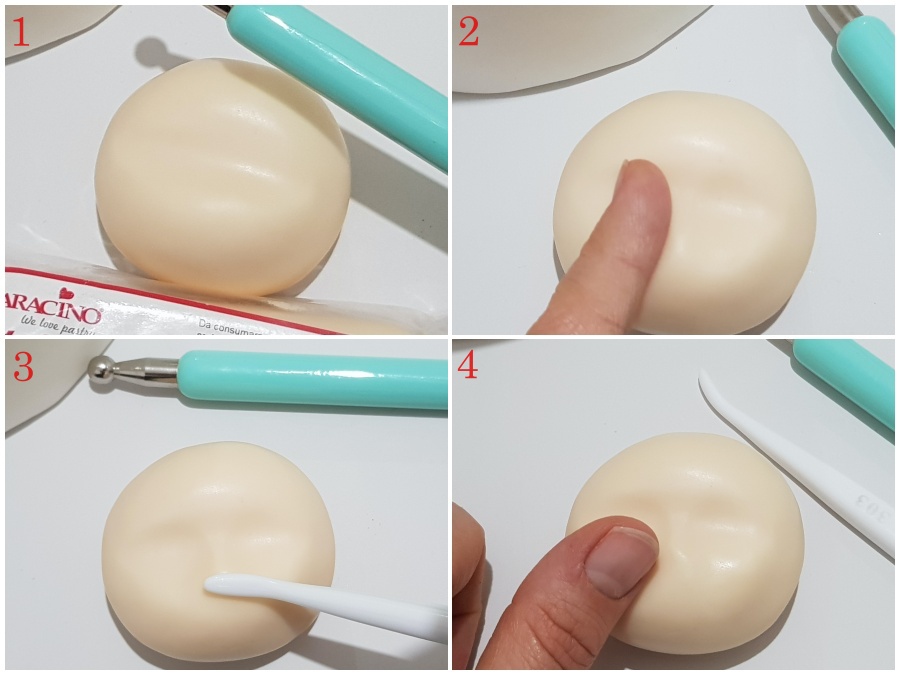
Step 25
- Using skin colour Pasta Model roll a ball. Use the handle of a ball tool make a groove across the centre.
- With a finger, apply light pressure to form the nose shape.
- Use a Dresden tool to shape the nose
- With your thumb or fingers gently push the cheeks outwards.
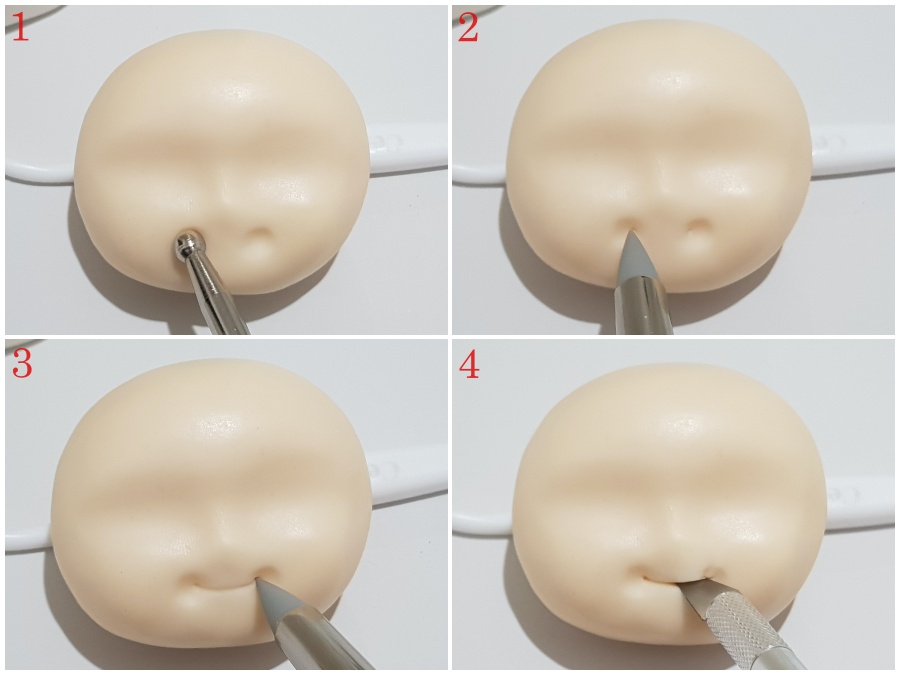
Step 26
- Use a small ball tool to form the dimple either side of the mouth.
- Mark the start of the smile with a sharp modelling tool.
- Use a sharp tool to mark the smile.
- Use a sharp knife to form the mouth.
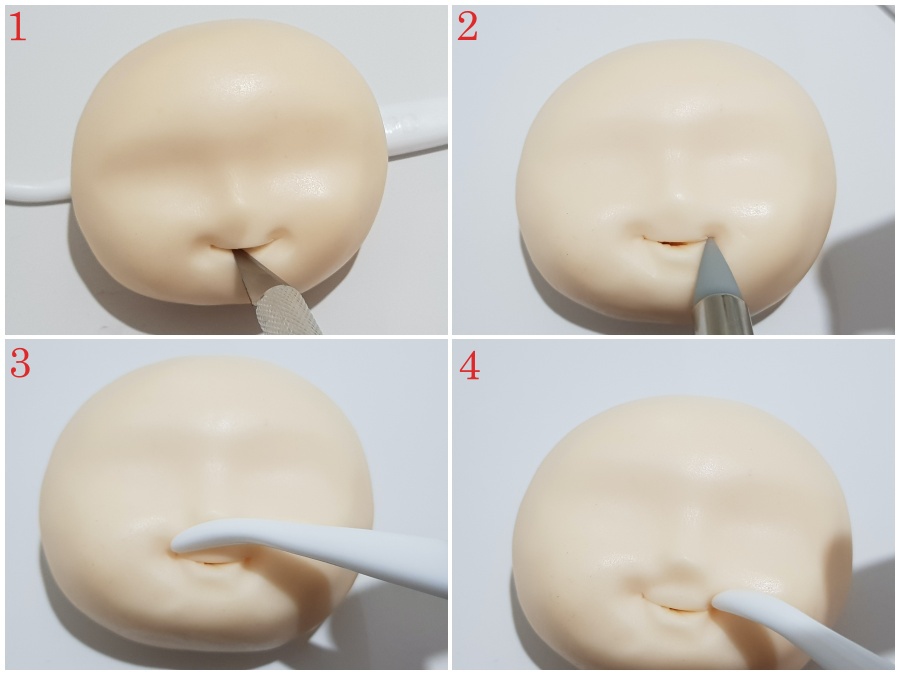
Step 27
- When forming the mouth lift the upper lip to open the mouth slightly.
- Use your silicone tool to form the bottom lip.
- Use your Dresden tool to form and shape the upper lip. You will need to do this as the previous steps may have pushed the mouth out of line.
- Finish off the mouth area modelling with the blunt end of your Dresden tool.
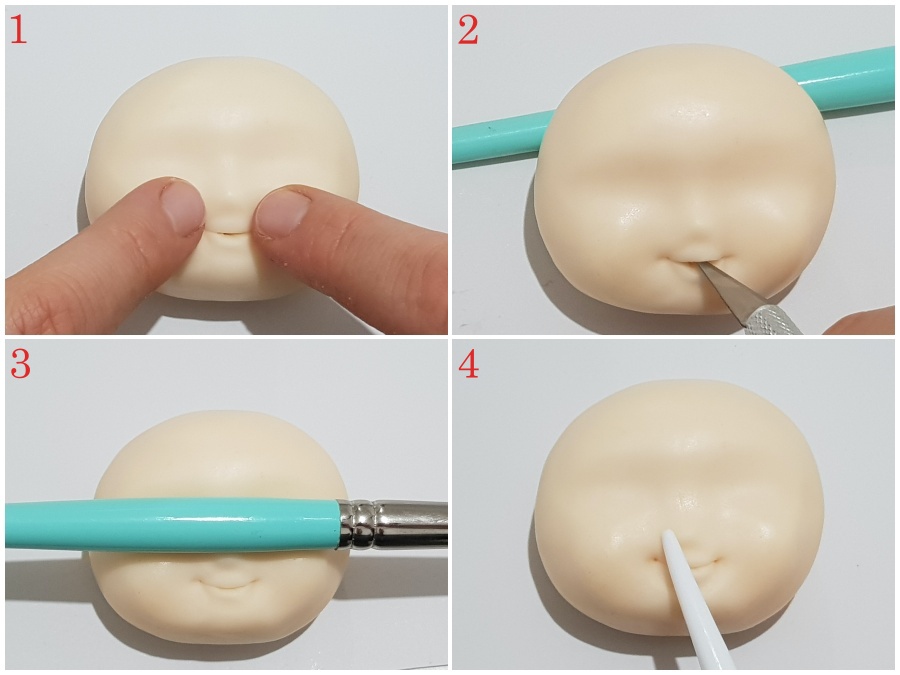
Step 28
- Use your fingers to re-shape the cheeks
- Open the mouth with the scalpel and slightly pull out the upper lip that may have been pushed down with the previous pressure.
- With the handle of the brush press over the top of the nose.
- Use the sharp end of the Dresden tool to re-shape the nose if required.
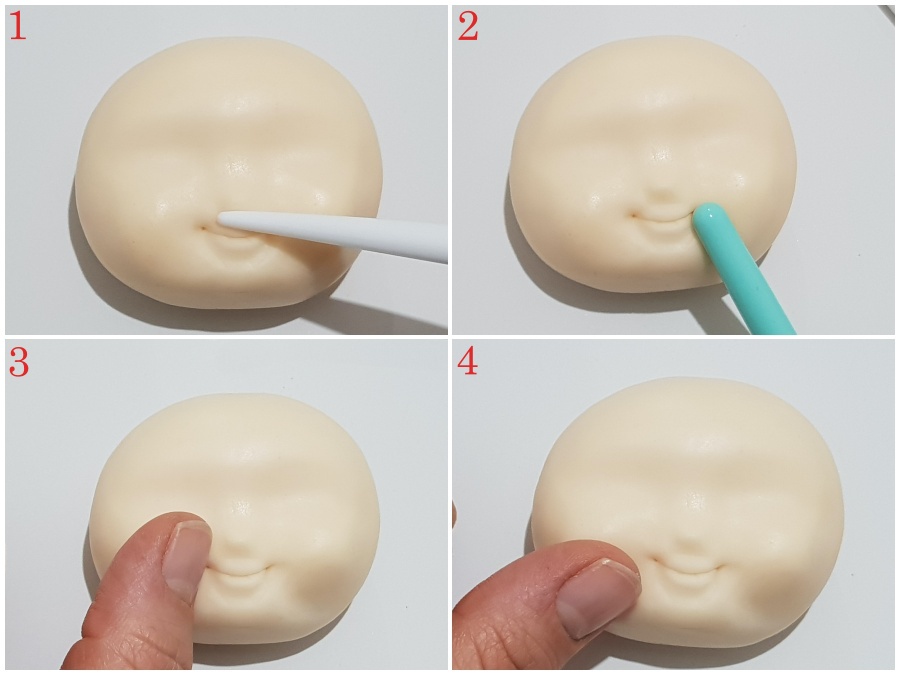
Step 29
- With the same tool push up to form the nose tip.
- Use the end of a brush to press and start forming the chin shape.
- Push the cheeks outwards with your finger or thumb.
- Repeat to give a lift to the cheeks.
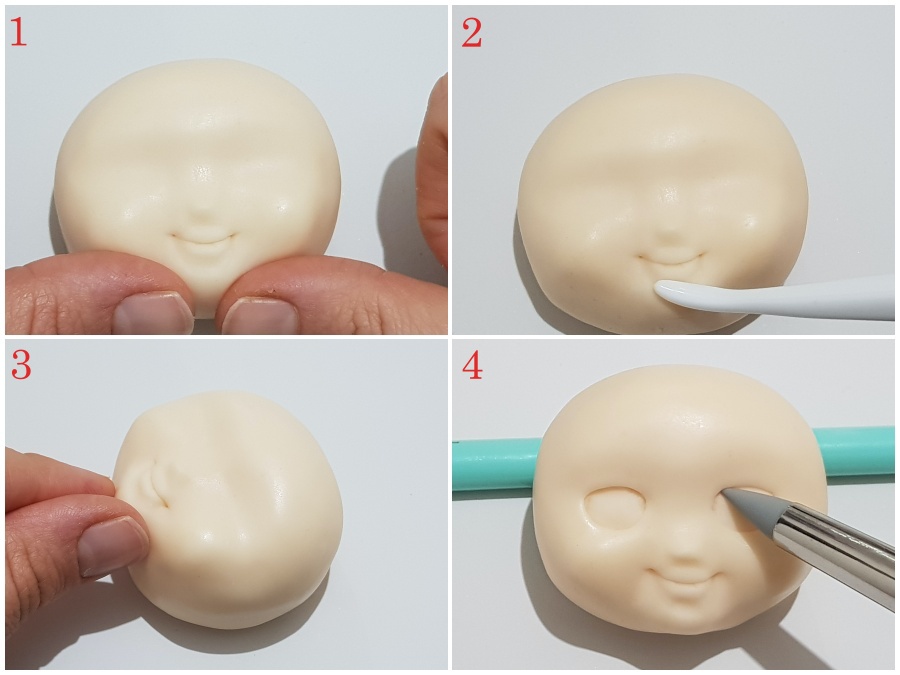
Step 30
- Pinch the chin together using thumbs or fingers.
- Use your Dresden tool under the lower lip to create the chin dimple.
- Reshape the chin with your fingers by gently pinching.
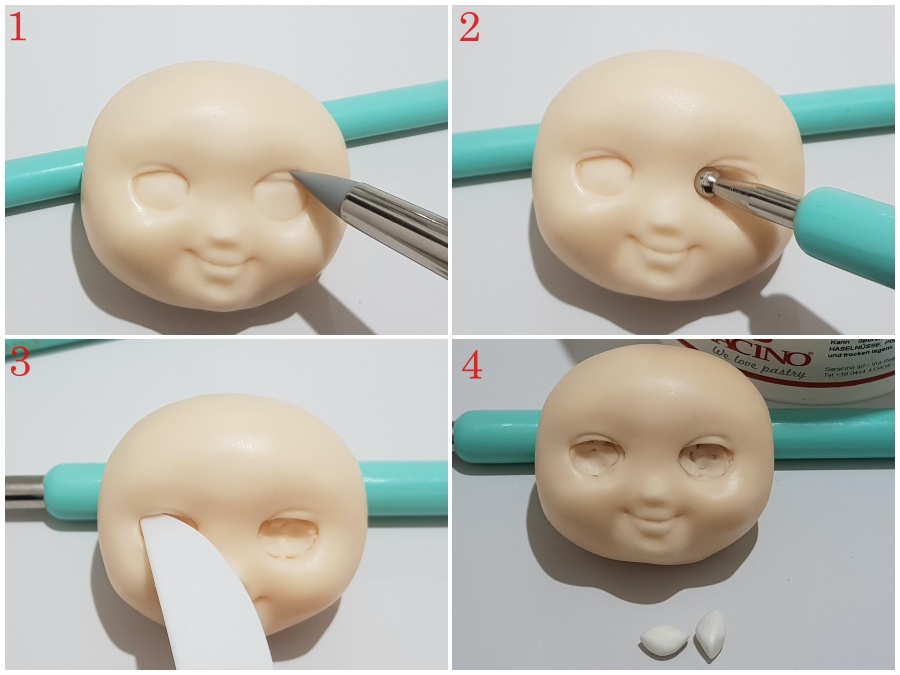
- Use the silicone tool to outline the eyes.
Step 31
- Using the same tool, shape the eyelids.
- Use a small ball tool to push in the eye sockets.
- Remove any excess paste with a knife.
- Roll two balls to form the eye balls.
Step 32
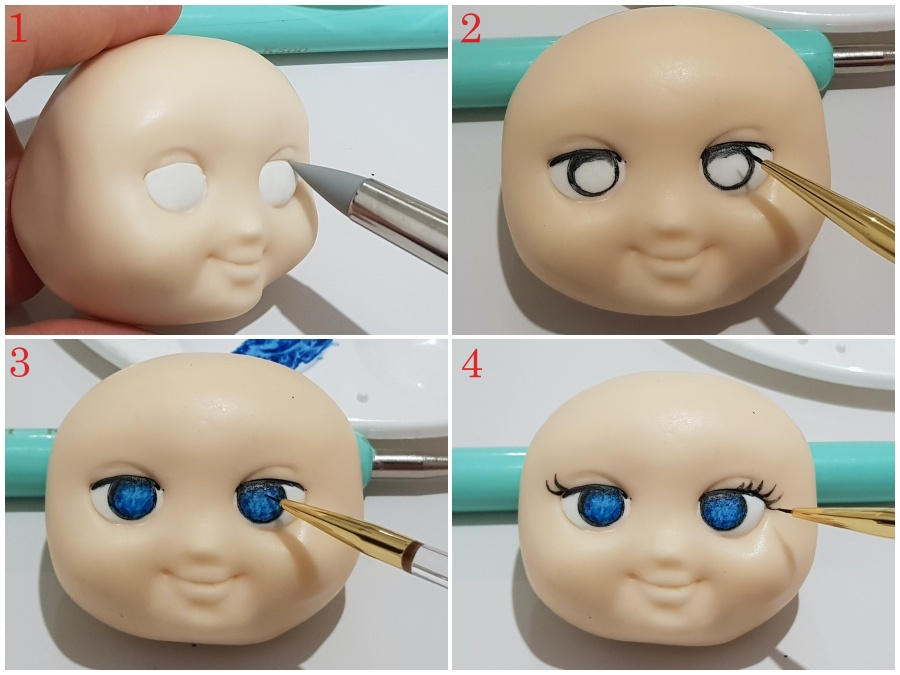
- Insert the white eye balls into the eye sockets. Blend around the outside using the silicone tool.
- Mix black powder colour with clear alcohol. Use a fine brush to paint lines beneath the eyelids. Form the pupil outline. Add a little shade to the top of the eyeball.
- Mix your blue powder colour with clear alcohol. Paint the inside of the pupil blue, taking care to give a lighter shade towards the centre.
- With the black, paint the eyelashes on the outer sides of the eyes with a fine and tapered line.
Step 33
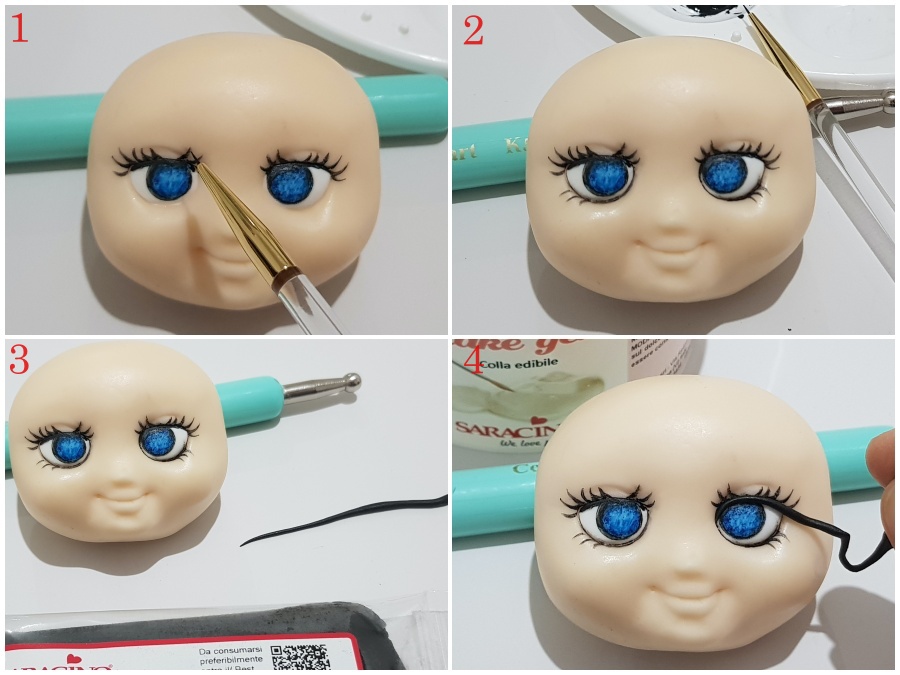
- Repeat on the other side of each eye.
- Complete with the lower lashes and with an ultra-thin line paint the perimeter of the eye.
- Create a thin tapered strip with the black Pasta Model.
- Position each lash over the eye. Cut the excess with a scalpel with an oblique cut upwards.
Step 34
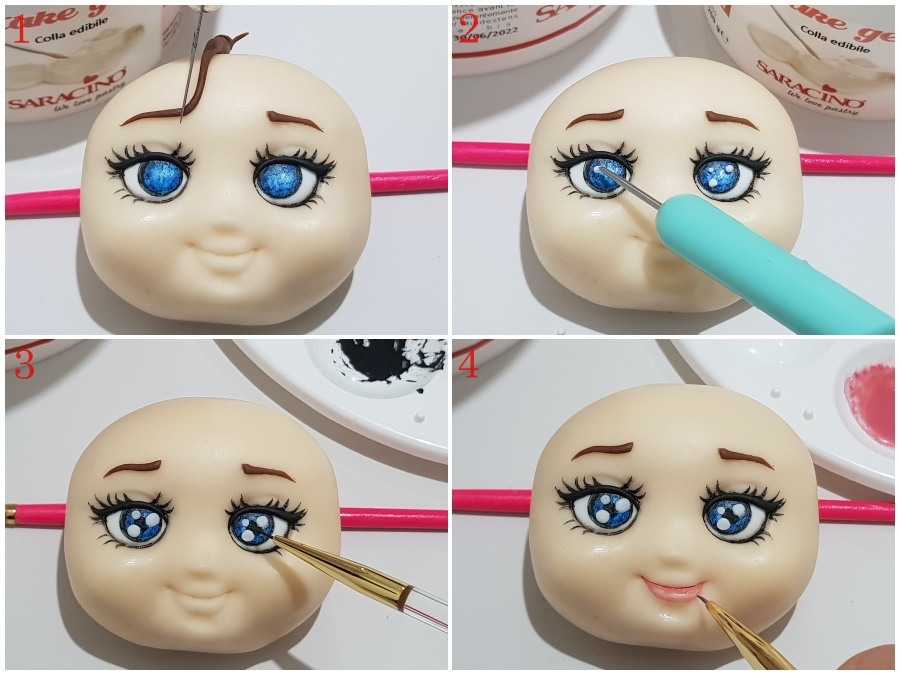
- Using the same technique, create the eyebrows with brown Pasta Model.
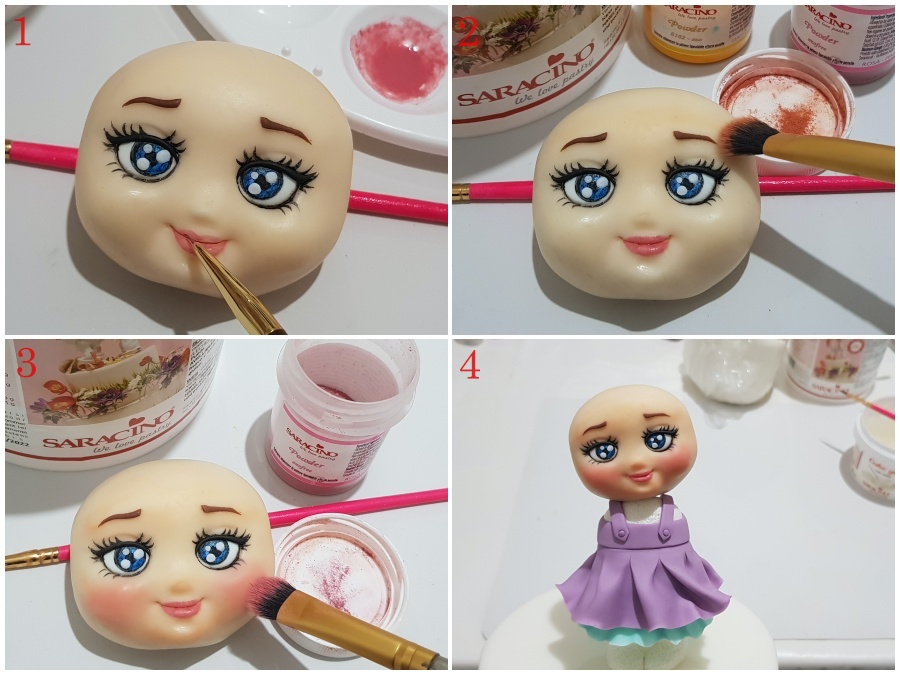
- Roll six tiny dots of white paste. Apply to the eyes as shown using a small amount of cake gel if required.
- With the black dye, paint centre of the pupil.
- Mix pink powder colour with clear alcohol. Use a fine brush to paint the lower lip.
Step 35
- Use the same technique to finish the upper lip.
- Mix pink and yellow powder colours. Use a soft brush to dust the forehead, chin, nose and eyelids.
- For the cheeks use pink only.
- Place the head onto the cocktail stick.
Step 36
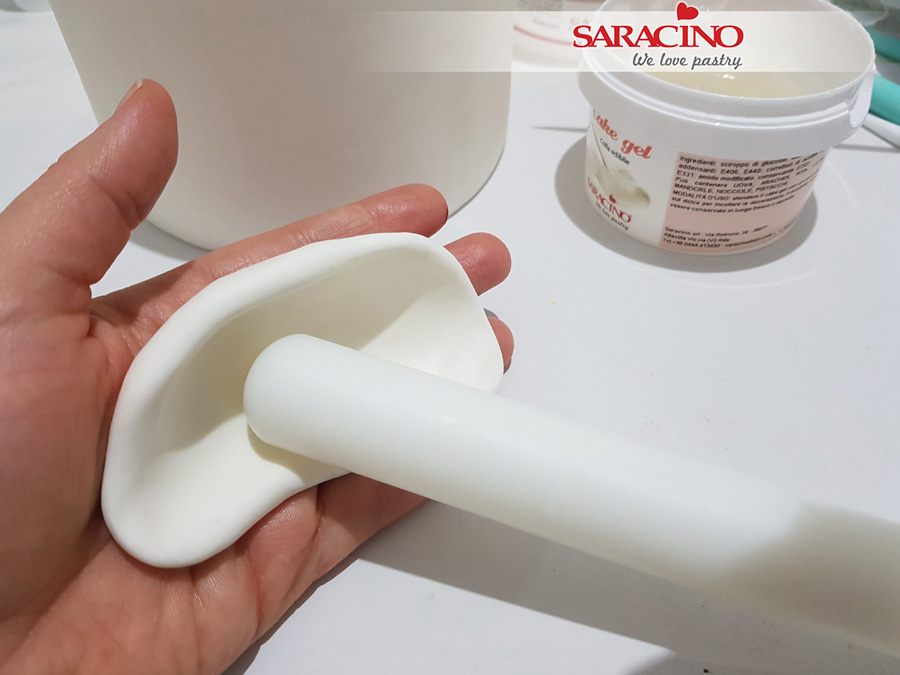
Using white modelling paste shape the bonnet with the end of your rolling pin.
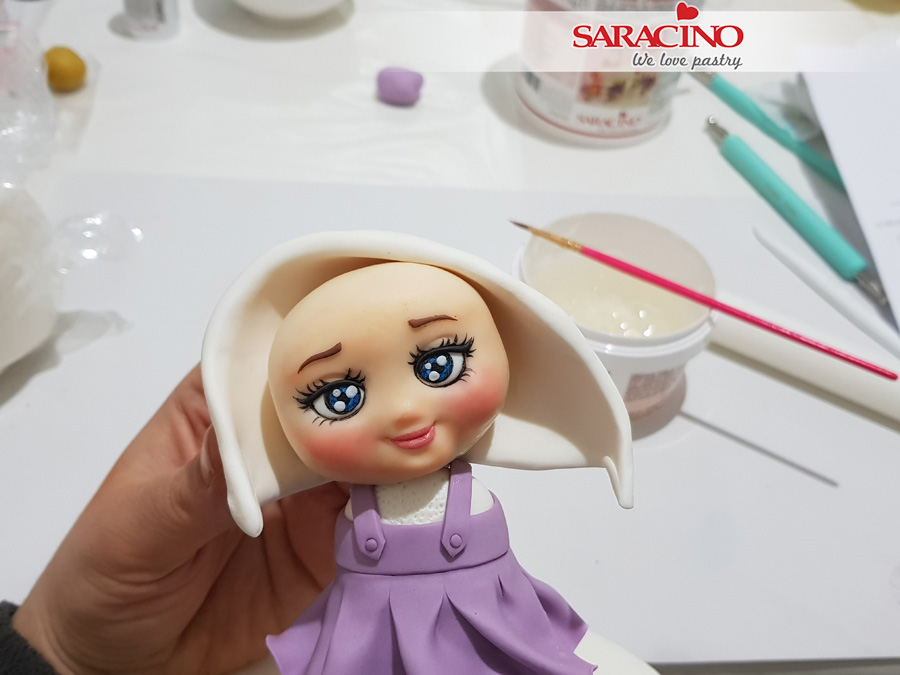
Step 37
Pinch each end of the bonnet. Place over the head to check for size.
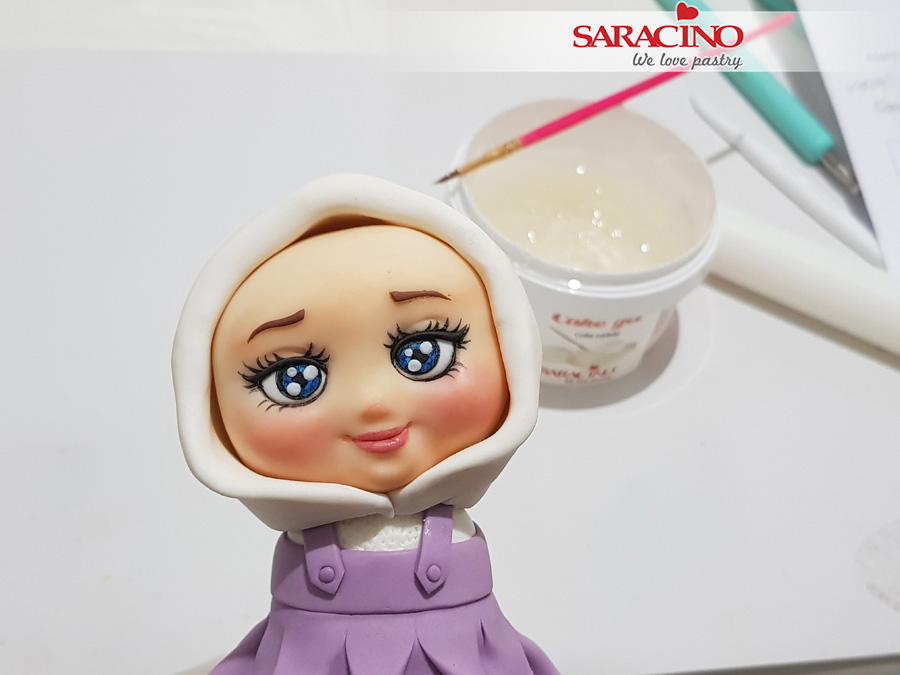
Step 38
Apply a little cake gel to fix the bonnet and the straps under the chin.
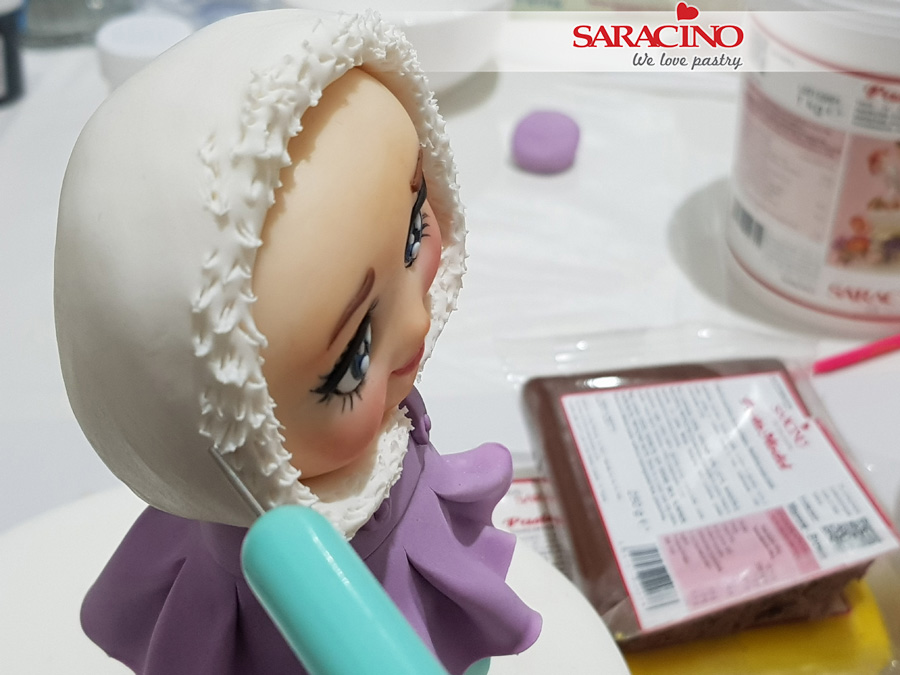
Step 39
Using a sharp modelling tool add texture to give the fur effect around the hood.
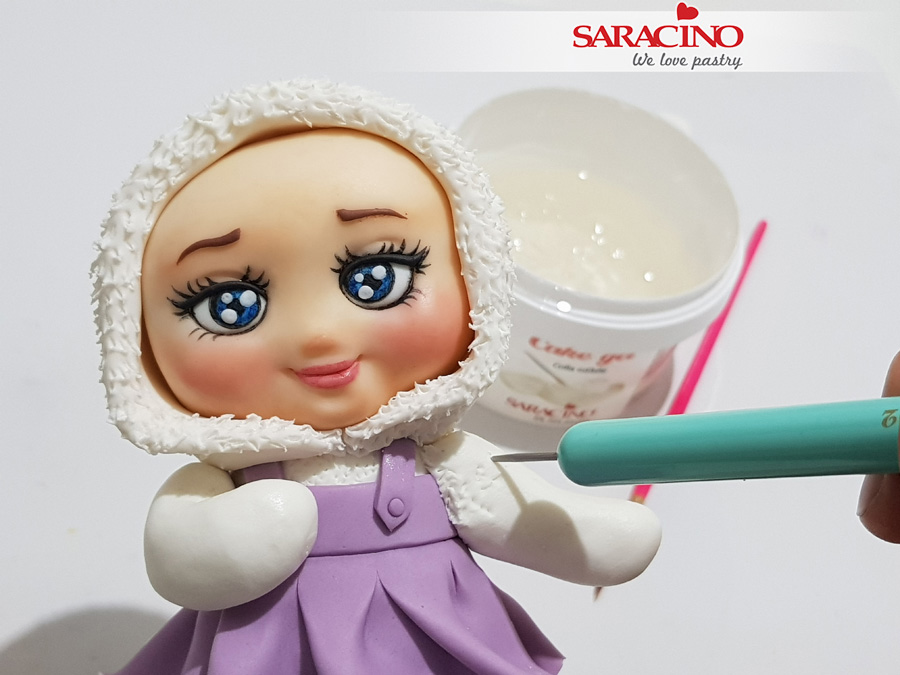
Step 40
Using white Pasta Model roll two equal length sausage shapes for the arms. Attach to the shoulders. Use a sharp modelling to add texture.
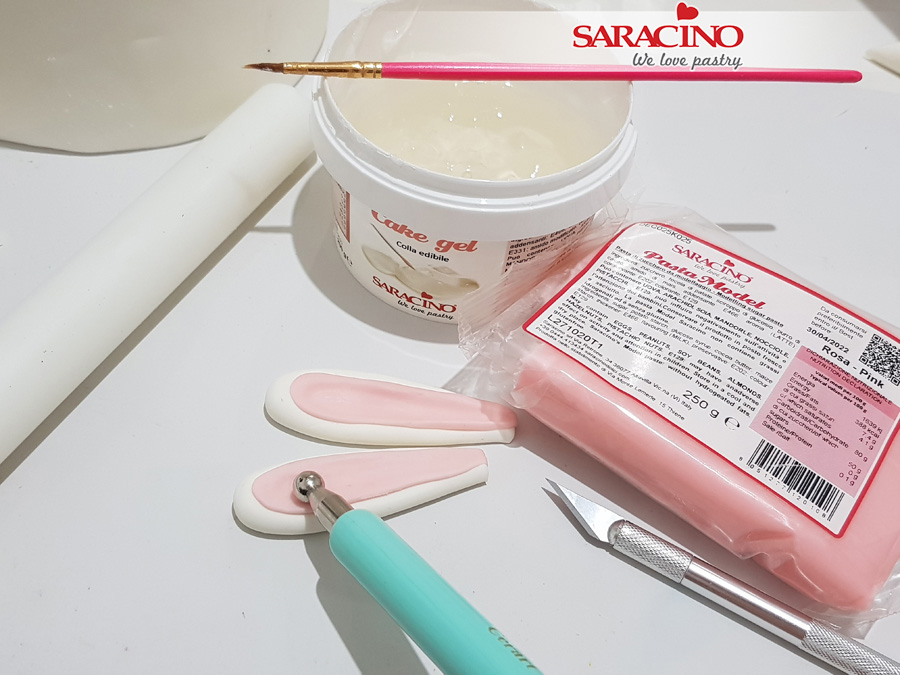
Step 41
For the ears roll white modelling paste and elongate. Fill the inside with pink paste as shown.
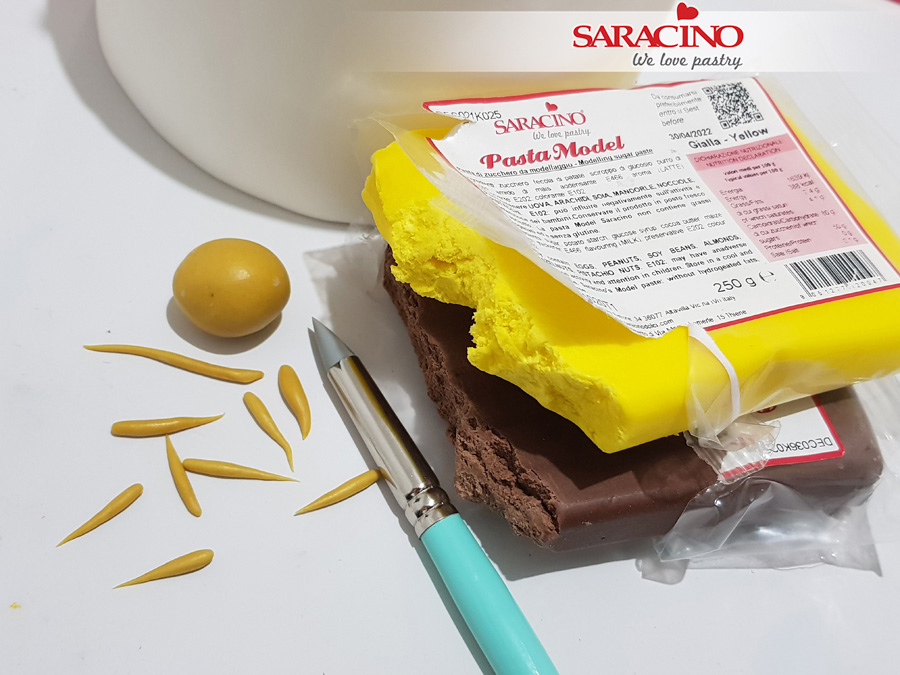
Step 42
Mix yellow and brown modelling paste. Roll into thin tapered shapes.
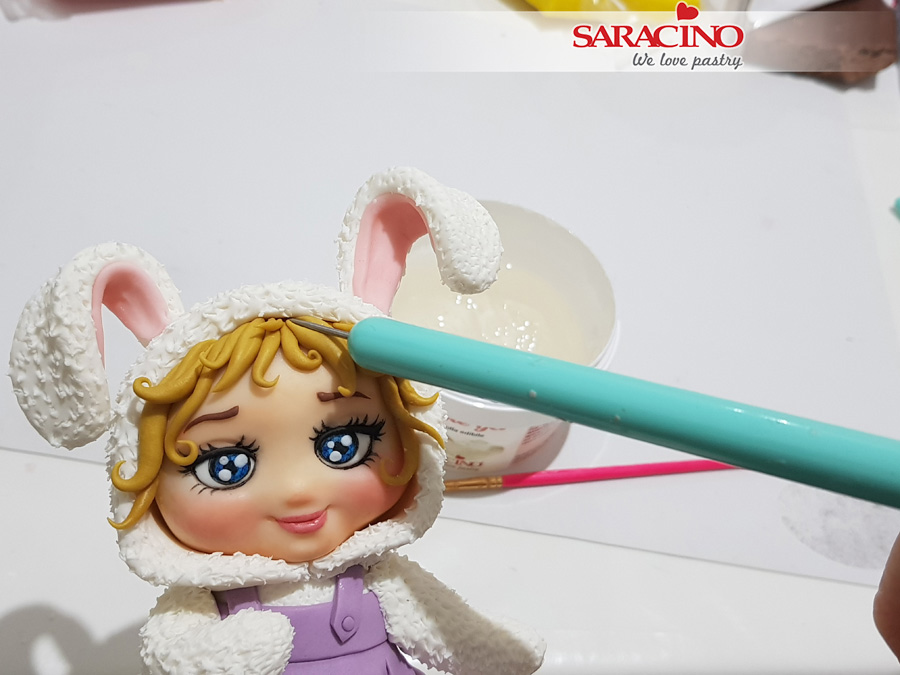
Step 43
Add texture to the ears. Fix and bend into shape to give character. Add the hair strands applying curl to the ends.
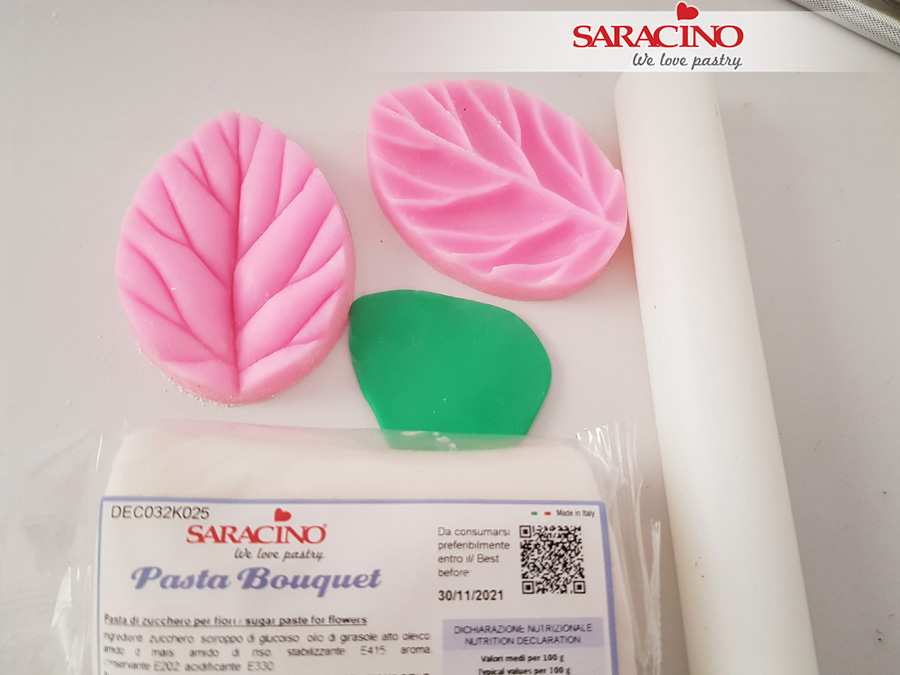
Step 44
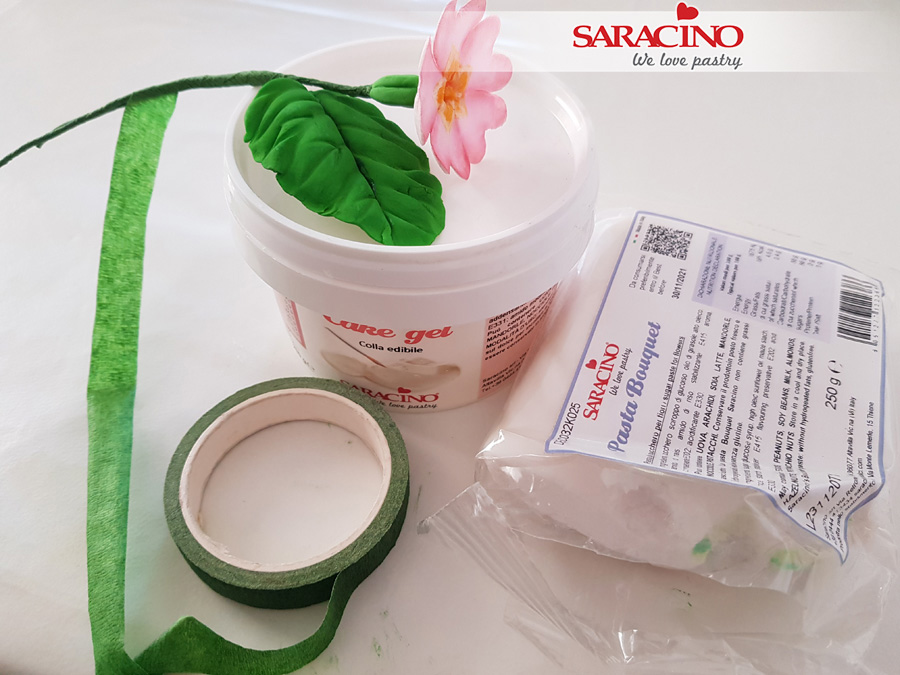
Colour Pasta Bouquet with green. Roll out thinly ready to form our leaf.
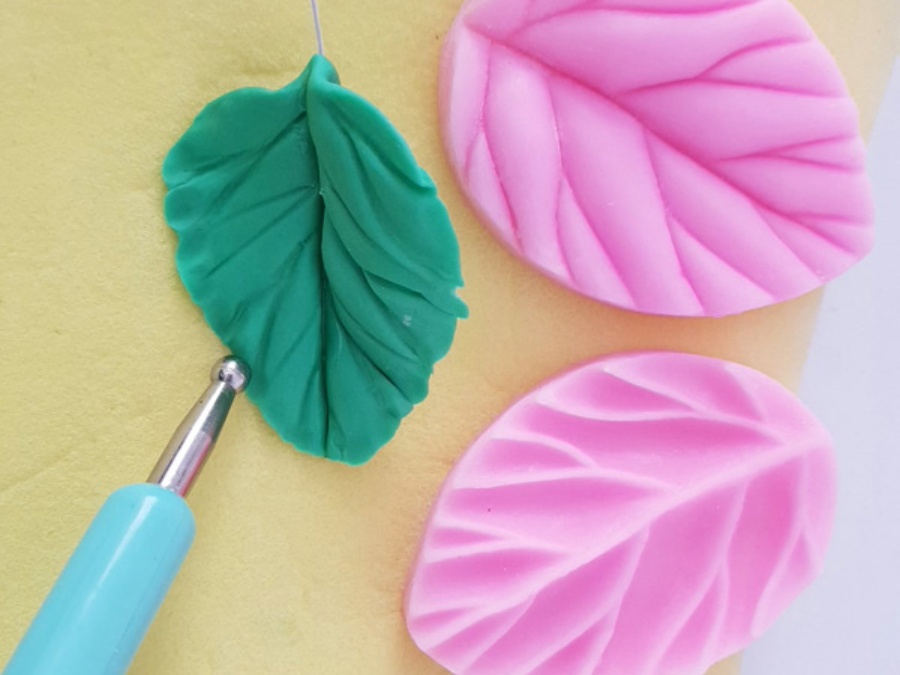
Step 45
Using a flower wire in the centre form the leaf in the mould. Smooth the outside using a ball tool on a foam mat.
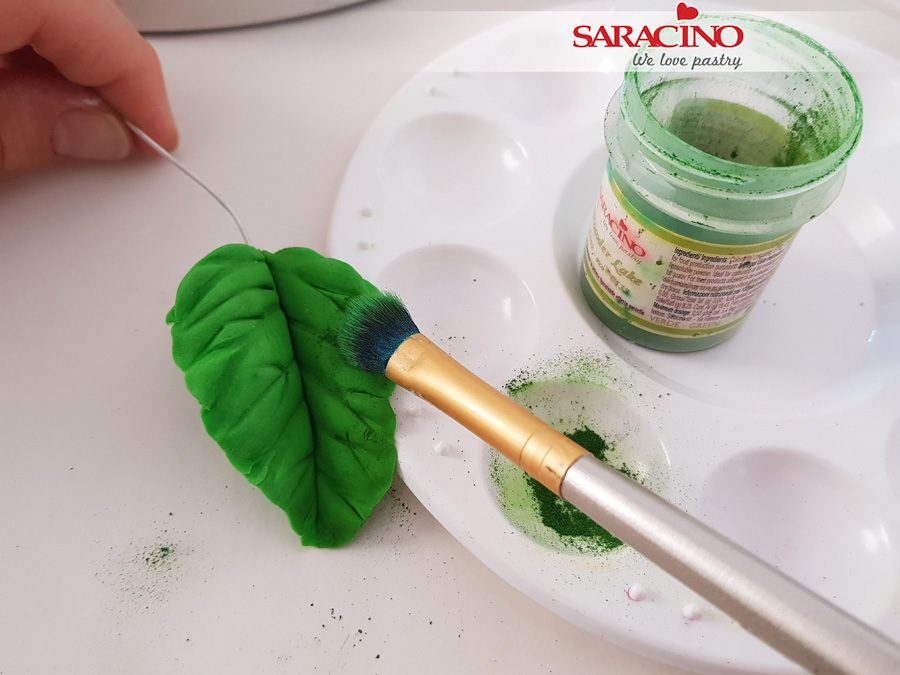
Step 46
Use a soft brush and green powder to dust the leaf.
Step 47
Using green florist tape connect the leaf to the previously prepared flower setm.
Step 48
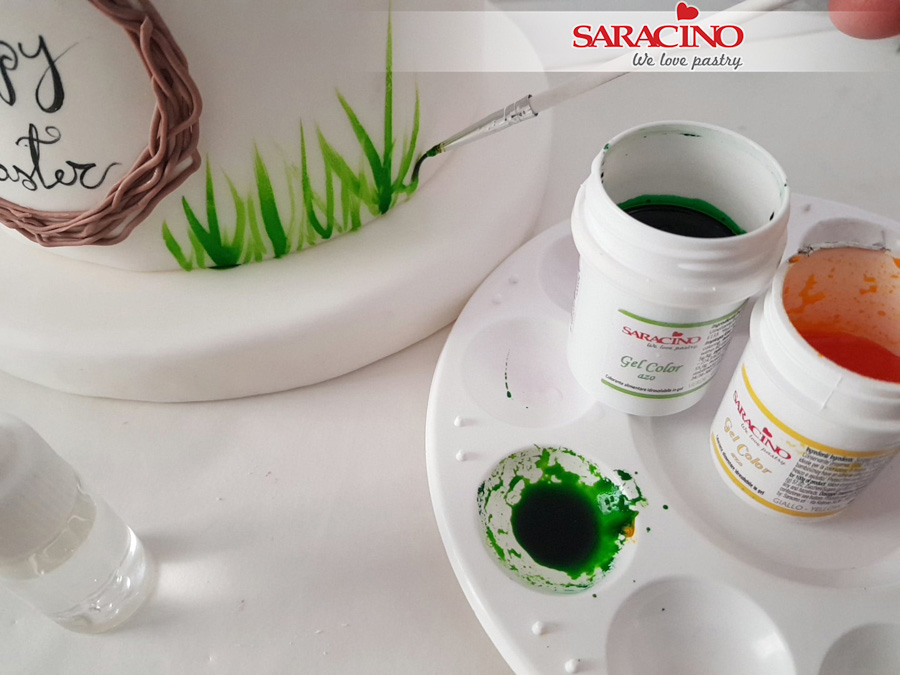
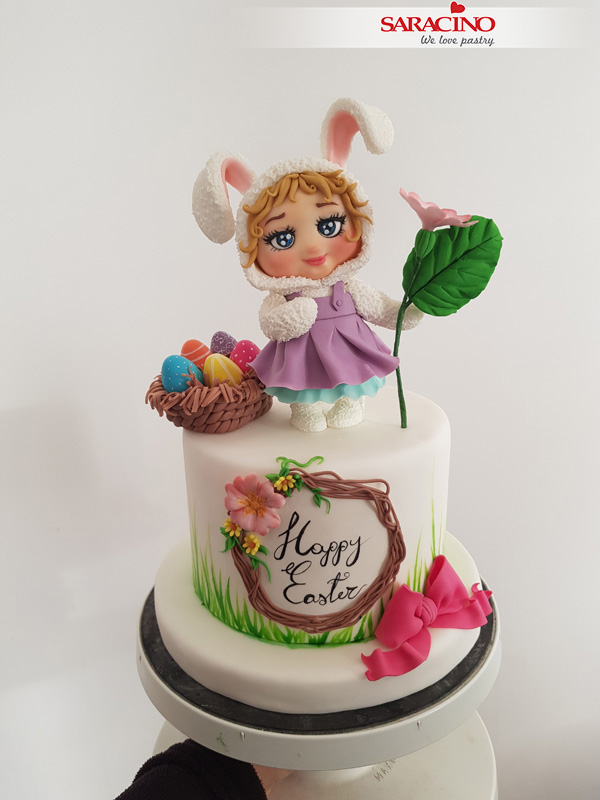
Attach the plaque wreath to the front of the cake. Mix a little green and yellow gel colour with clear alcohol and using a fine brush paint grass to the perimeter of the cake.
Step 49
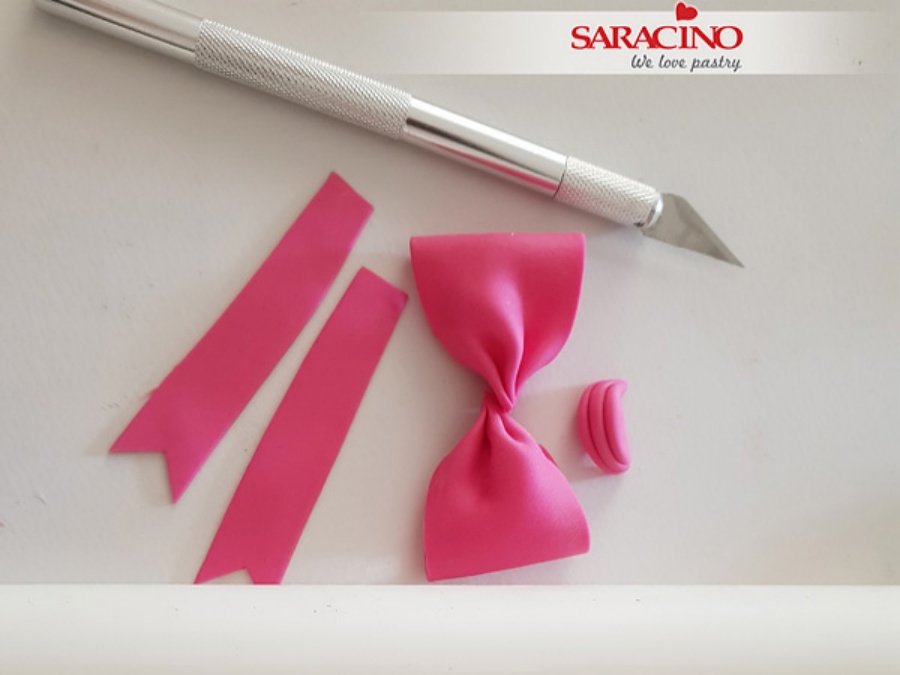
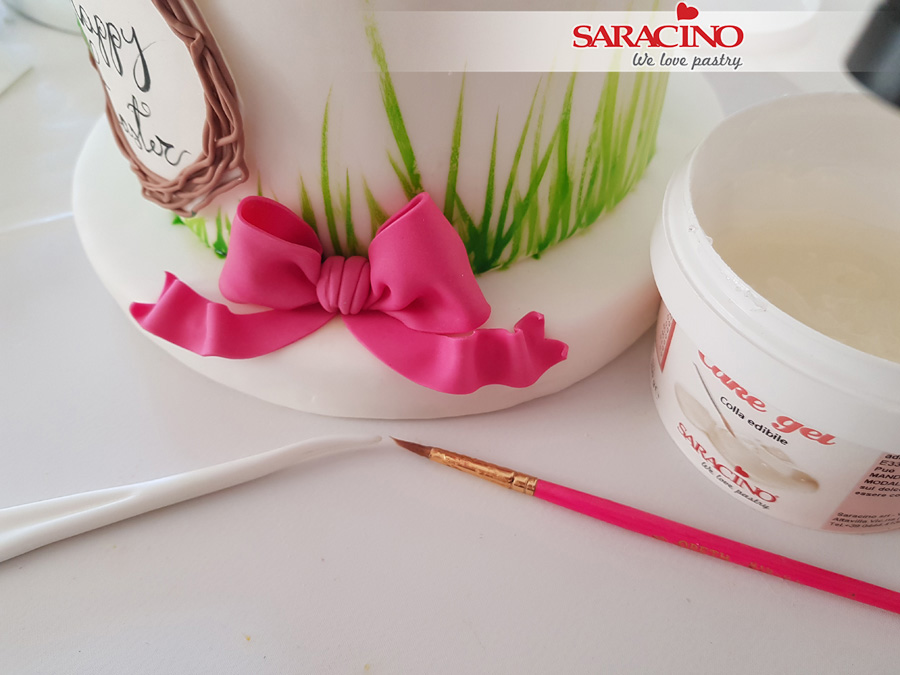
Using Pasta Model coloured pink create a bow.
Step 50
Fix the bow to the side of the cake.
Step 51
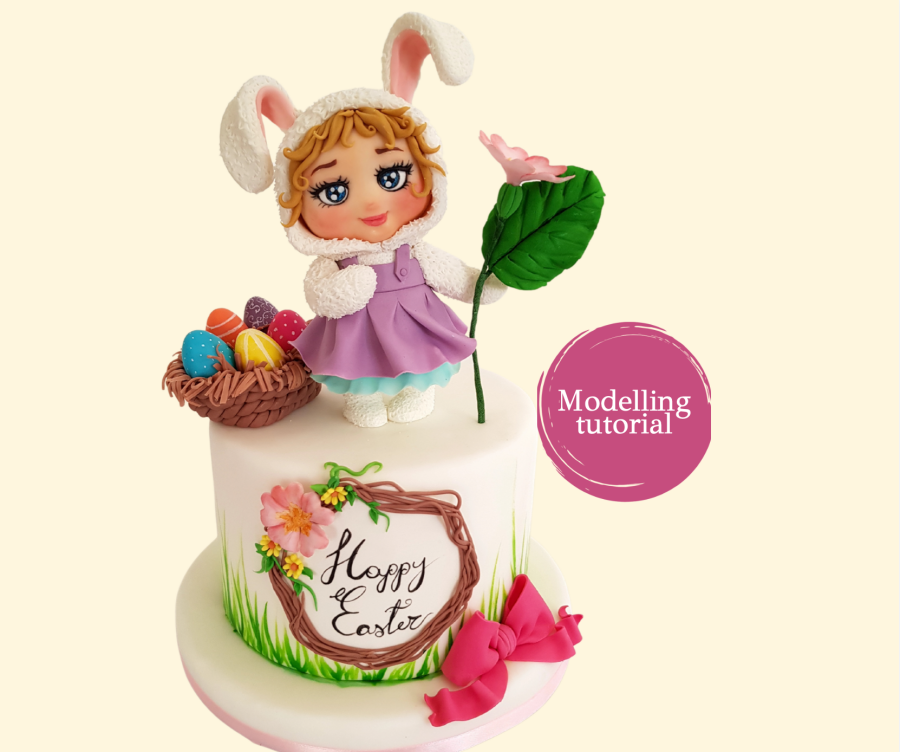
Place the figurine, basket and flower to the top of the cake. Your cute Easter celebration is ready!


