


Author: VICKY TURNER

FB Page : https://www.facebook.com/YellowBeeCakeCompany/
Skill Level:
Beginner
Tips from Vicky:
It’s a good idea to colour Saracino in advance, otherwise it can become very soft when you’re trying to work. If it does become too soft, simply put the model down for a few minutes and work on something else. You really don’t have to rush to create amazing models. Dip your silicone tool in a little water or edible glue and use it to blend the seams when attaching new pieces to your models.

You will need:
- Round, filled sponge cake, 12.5cm (5″) deep: 10cm (4″)
- Round cake drum: 15cm (6″)
- 500g Saracino Pasta Top: White
- 110g Saracino Pasta Model: White
- 1g Saracino Pasta Model: Black
- 1g Saracino Pasta Model: Pink
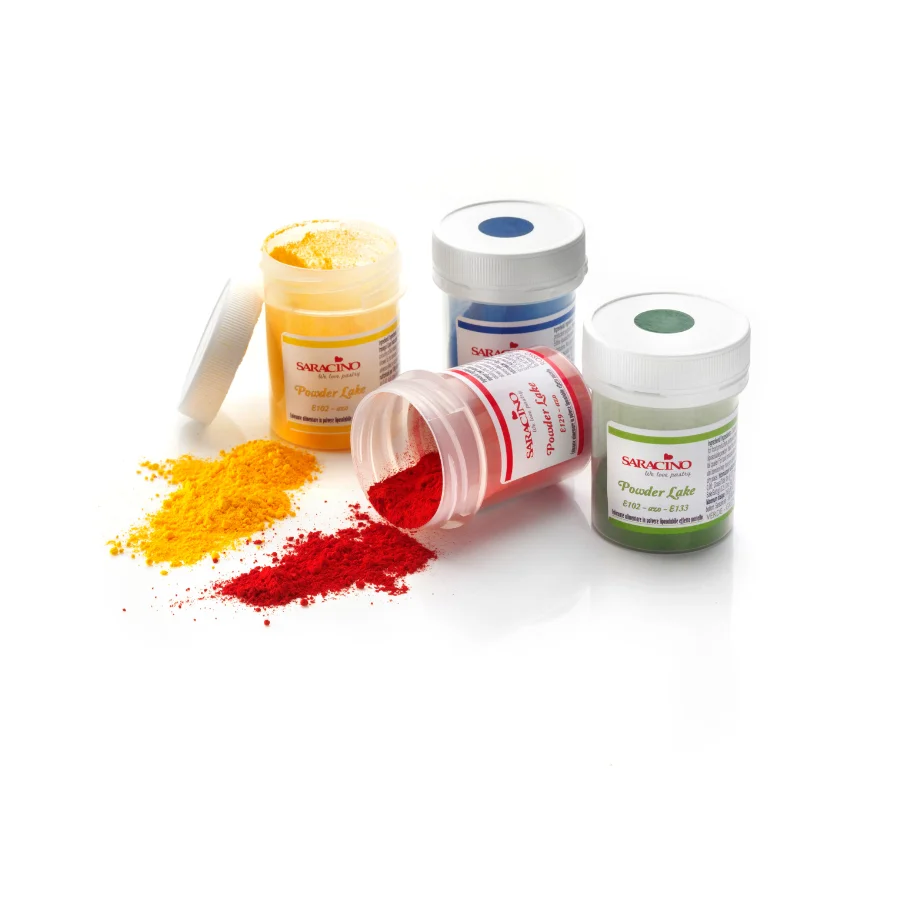
- Saracino Dust Colour: Green, Pink, White, Yellow
- Saracino Gel Colour: Green, Orange, Red, Yellow
- Sugarflair Dust Colour: Dusky Pink, Shadow Grey
- 20-gauge Florist Wire
- Pliers
- Craft Knife
- Cerart Dresden Tool
- Cerat Ball Tools
- Silicone Tool
- PME Bulbous Cone Tool
- Paintbrushes
- Corn Flour
- Edible Glue
Preparation:
Cover your cake and drum in White Pasta Top sugarpaste. Mix Green, White and Yellow dust colours with alcohol to form a bright green paint. Paint grass blade around the bottom edge of the cake and finish with a long sausage of White Pasta Top.
Step 1
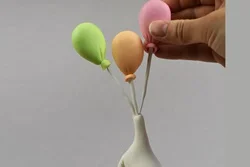
Split 30g of White modelling paste into three even balls, colour each ball with the following colours, Red, Orange and the third ball with a mix of Green and Yellow. Remove a small pea sized ball from each colour and set aside. Roll each large ball into an egg shape, flatten the back of each egg and use your fingers to shape into a balloon. Cut a 20-gauge florist wire into three. Bend the tip of each wire into a hook. Dip the hook into edible glue and then insert into the narrow end of the balloon. Set the balloons aside to dry overnight. Once the balloons are firm, take the remaining coloured paste and shape each into a cone. Push the bulbous tool into the wide end of the cone and then use your fingers to shape the paste around the cone. Thread the shape, narrow end first, up the wire and glue in place at the base of the balloon. Cover each wire with White modelling paste, leaving the end of the wire exposed.
Step 2
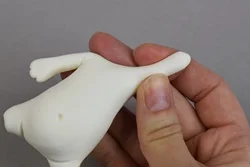
For the body, take 45g of White modelling paste and shape into a long cone. From the wider end gently pinch and roll the paste to form two legs.
Step 3
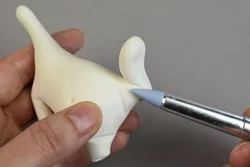
Repeat at the narrow end to form two arms. Bend the left arm down towards the side of the body and the right upwards. Lightly pinch the end of the left arm to create the paw. Use a craft knife to cut the paste to reveal the toes. Use the dresden tool to mark in the creases between the legs and arm pit. Press a small ball tool into the centre of the stomach to form the belly button.
Step 4
For the feet, take two 3g balls of White modelling paste and shape into elongated cones. Lightly flatten between your fingers and then use the craft knife to mark the toes.
Step 5
Glue a foot to the right leg and use the silicone tool to smooth away the seams.
Step 6
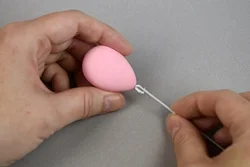
Push a kebab skewer into the other leg, and thread up through the body until it reached the bottom of the right arm. Glue the other foot in place and use the silicone tool to blend the seams. Trim the skewer to the height of the cake, and then push down into the cake, securing the foot to the icing with a little edible glue.
Step 7
Use a small ball tool to indent the surface of a marble sized ball of White modelling paste. Flatten the back edge and then glue in place onto the bottom of the body.
Step 8
Push the three balloon wires into the right arm.
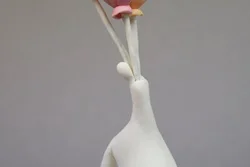
Step 9
Roll a small pea sized ball of White modelling paste into a long cone. Glue the cone to the top of the arm, as shown in the photo. Use the silicone tool to blend the seam.
Step 10
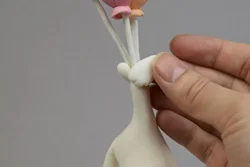
Create another paw using a large pea sized ball of White modelling paste.
Step 11
Attach to the model as shown in the photo, use the silicone tool to blend the seams.
Step 12
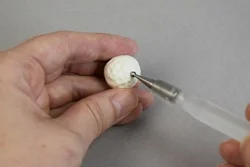
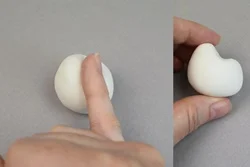
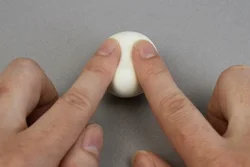
For the head take a 20g ball of White modelling paste and roll into an egg. Place the egg on its wide end and then place the side of your finger half way up one side of the egg, lightly press to indent the paste.
Step 13
With the pointed end of the egg facing upwards, place your fingers on either side of the point and lightly press down onto the groove to create the eye sockets.
Step 14
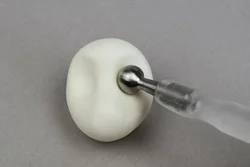
Press a large ball tool into the eye sockets to further enhance the indent. Use your fingers to smooth away any harsh lines.
Step 15
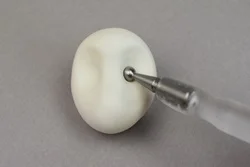
Push a smaller ball tool into the inner edge of the eye sockets.

Step 16
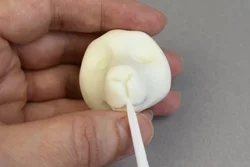
Use your fingers to gently flatten the top of the muzzle, shape the cheeks by stroking the paste away from the muzzle and shape the mouth area by gently pulling the paste away from the face.
Step 17
Mark in the mouth with the dresden tool and flatten the area where the nose will sit.

Step 18
Push the ball tool into the top of the head.
Step 19
Add a small triangle of pink modelling paste to the muzzle to form the nose.
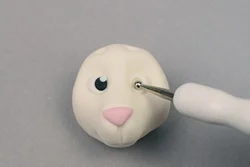
Step 20
Fill the eye holes with two small balls of White modelling paste. Push the ball tool into the inner corner of the eyes to form a well. Fill the well with Black modelling paste and then add a very small ball of White modelling paste as a highlight to each eye.
Step 21
Roll a small piece of Black modelling paste into a tapered sausage, glue the strip to the top of each eye, using the dresden tool to fit the paste around the eyeball.
Step 22
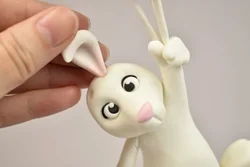
For the ears, take two 2g balls of White modelling paste and shape into elongated cones. Push the modelling tool into each ear to form the inner ear.
Step 23
Shape the rounded end of the ear into a point and then bend over the rest of the ear.
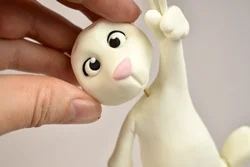
Step 24
Push a cocktail stick into the neck of the body and glue the head in place.
Step 25
Lightly dust the base of the ear with the Dusky Pink food colour and insert the ear into the holes on the top of the head.
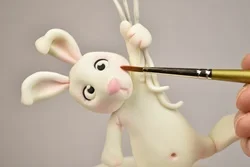
Step 26
Dust the model with the Dusky Pink dust colour over the cheeks, around the eyes, bellybutton, toes and between the legs. Dust the balloon strings with Shadow Grey dust colour.
